


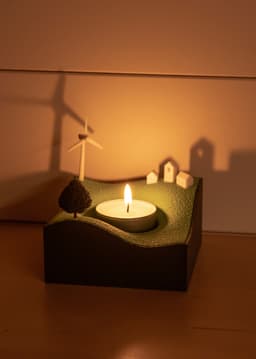
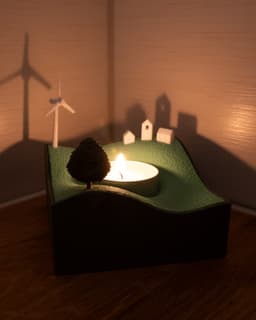


Candlelight Valley // Miniature Landscape Tealight Candle Holder
A soft warm light washes over village homes as their occupants gaze upon the great alder across the meadow. The flame provides warmth, and the wind lends its power. All is well in Candlelight Valley.
TAKE CARE! Different candles and different filaments may affect safety. Ensure that your candles will not soften the holder and increase fire risk. Do not leave unattended.
This miniature scene adds coziness to any space. The base is a functional container as well! This model is assembled from several tiny prints for a colorful and detailed result!
Printing Guidelines
* you can reference my short video to see the assembly steps
-
The Valley part is designed to be printed in Spiral Vase mode along with Fuzzy Skin settings. 4 versions are included: 38mm and 40mm (candle diameter) versions with and without (plain) indentations for the tree, turbine, and houses. For extra strength you can increase extrusion width to 0.6mm. For the Fuzzy Skin, I suggest 0.25mm point distance and 0.5mm skin thickness, and 0.24mm layer height. Vase mode isn't necessary, it just prints quickly and cleanly. There is a steep overhang for the candle indentation, which is likely to cause a hole... but that's okay, we all have holes, and the candle itself will hide that!
-
The Base can be printed using default print settings. Three base sizes are included with varying heights and space inside the container. The standard Base.stl has a minimum clearance of 18mm. The Deep version has a 28mm clearance, and the Shallow version has virtually no clearance (but you could still sneak a card in there!).
-
The Tree is designed for printing in Fuzzy Skin mode. 1 perimeter, 0% infill. Fuzzy Skin is optional and different settings can produce different nice results, but I generally used 0.5mm point distance, and 1mm skin thickness.
-
The TreeTrunk.stl is tiny and can be printed solid. It can be press fit into the tree, or glued if necessary.
-
There are 3 houses that can be printed using default settings. There are arrows imprinted on the bottoms to indicate which direction is facing the candle.
-
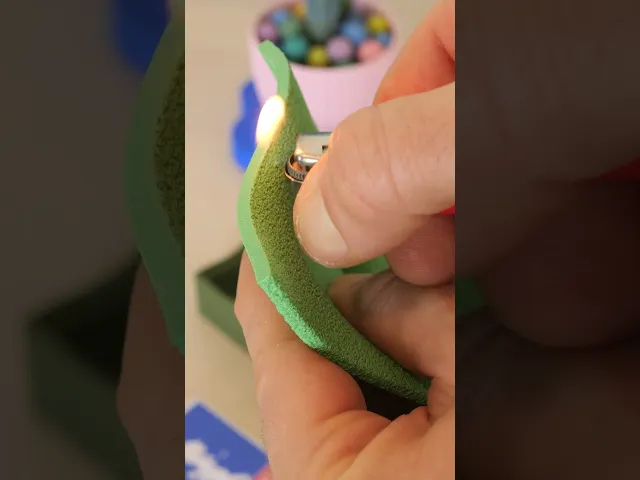
The Turbine is the trickiest part to assemble, consisting of 4 tiny parts and some raw 1.75mm filament. Print all solid. You may want to print with an outer brim for the TurbineBody for bed adhesion. Glue a short segment of filament into the TurbineCap. Once that is dry, trim the filament sticking out to approximately 4mm using flush cutters. Add the turbine blade (top of the print facing forward for best spinning). Glue the TurbinePole to the TurbineBody. The small end of the TurbinePole has a flat notch that should be facing the front of the Turbine. Stick the TurbineCap and TurbineBlade to the TurbineBody by sticking the filament into the hole at the front of the TurbineBody. Ideally, you want just enough clearance for the turbine blade so spin freely with a gently breeze, but that might take more than one attempt to get perfect.
-
Glue the tree, turbine, and houses onto the valley using Superglue for speed, or E6000 if you're patient and want more control.
Photographed model was printed using eSun ePLA Matte Matcha Green and Panchroma Army Green PLA (Amazon)*
These affiliate links give me a commission on sales at no additional cost to you. Thanks for supporting Make Anything!.
Candlelight Valley // Miniature Landscape Tealight Candle Holder

30mm to 40mm Pendant Light Adaptor

30-60-90 Drafting Triangle // 6 inch + 150mm Version

Drafting Triangle Collection

JUMBO Stacking Sieves // Supersized Stackable Sift Collection

Gutter Guard // Rain Gutter Debris Filter

EZPZ Screwdriver Bit Clip

IKEA FLISAT Bench TPU Feet // Floor Protector + Grip
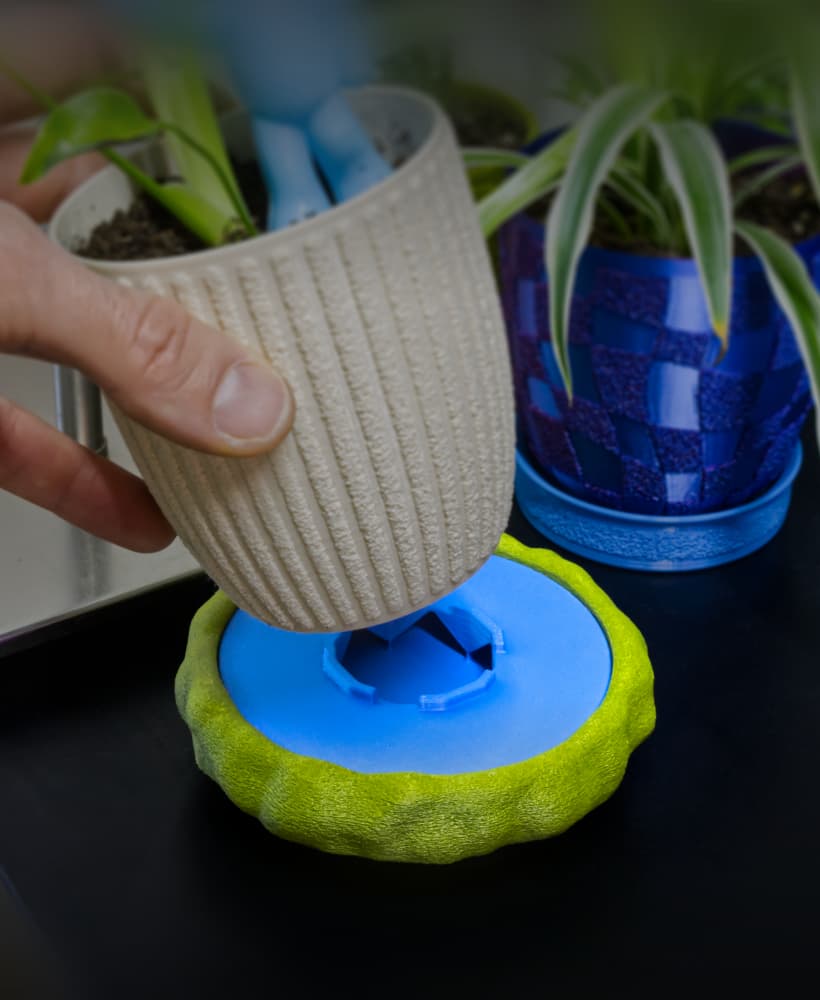
EZPZ Pot Spacers // Airflow and Drainage for Plants

EZPZ TPU Cable Clip Collection // Quick, Flexible, Cable Clips

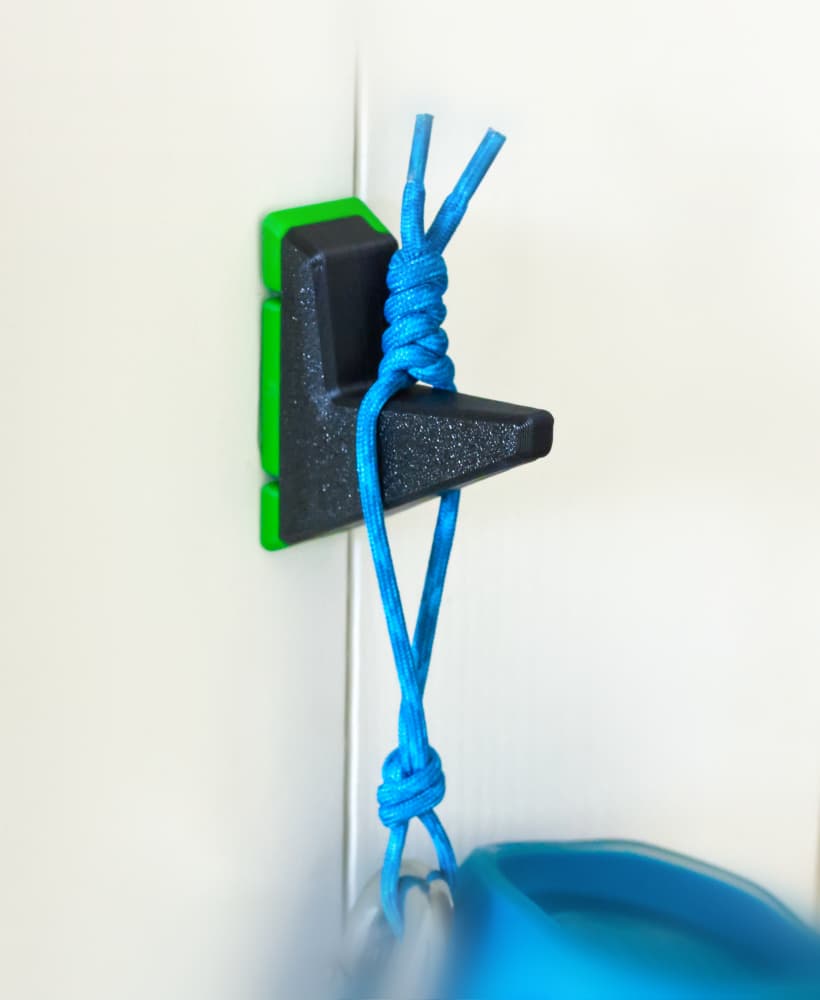
EZPZ Dummy Nail // Damage Free Wall Hanger Collection

EZPZ Wall Hooks Collection // 17 Variations (and counting!)

EZPZ Shelf Hook Collection // Type 1

EZPZ TPU Cable Clip (4mm)

Caliper Undercut Gauge Adaptors
EZPZ Wall Hook // Type A 36mm
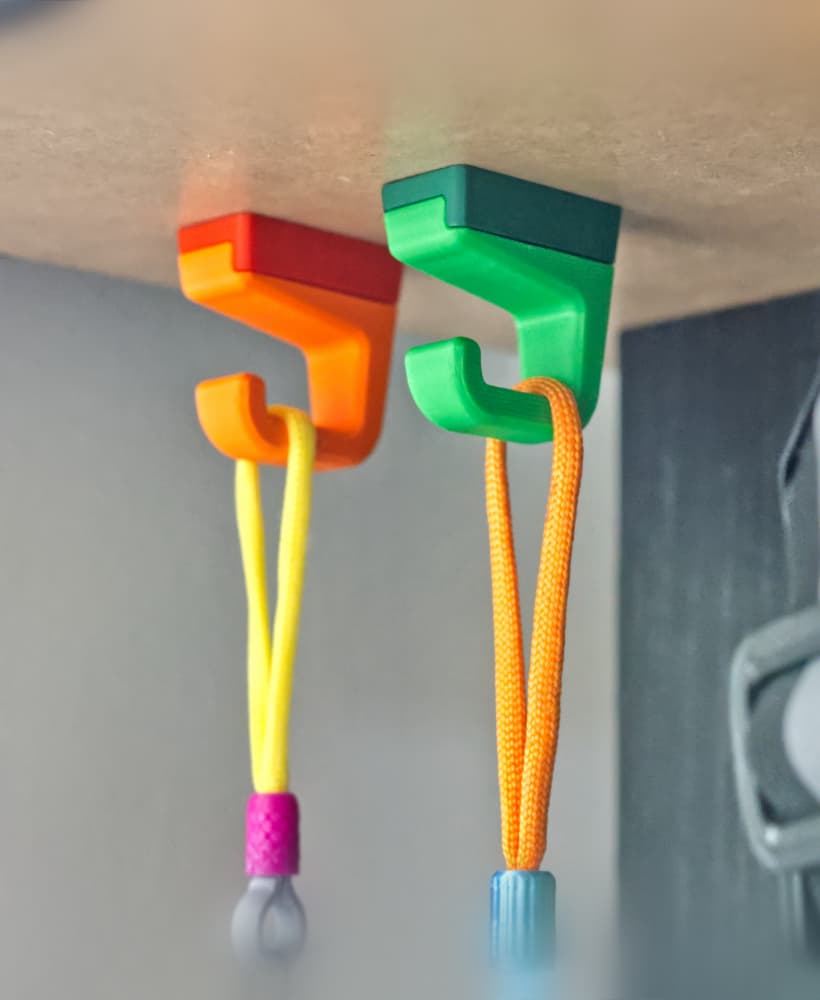
EZPZ Small Shelf Hook // Type1

EZPZ Tube to Wall Mount
Moss Dish/Frame for 100mm Chunky Puck Drip Tray
IKEA Bekväm TPU Feet // Floor Protector + Grip