

.gif&w=256&q=75)
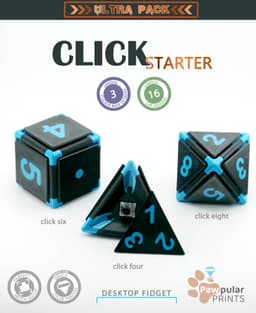


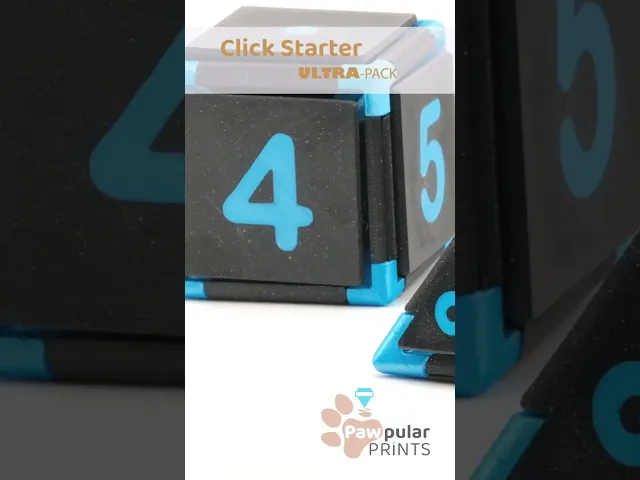
Click Starter Ultra-Pack
PRIVATE USE ONLY⚠️
Hi I'm Kelly! 👋 I'm a dog mom and aspiring 3D designer! These files are my intellectual property and the files CANNOT be shared, remixed or sold in any way. A Commercial License is Required to legally sell physical prints of my designs. 👉HERE is a link to my commercial license options!
DESIGN DESCRIPTION You’ve probably seen this one coming if you follow us on Instagram — it just took a bit to finish things up. My mission was to get you a complete dice set with plenty of time to print before Christmas… and it’s finally here! This pack includes a D4, D6, and D8 to go with your D10, D12, and D20, which means your clicky dice set is officially complete! I had a ton of fun designing these, and we even printed a full Pawpular set just to test them out! I hope you have fun completing your dice set!
⚠️NOTE: The D4 base and D4 raised/indented caps will need supports when printing. The D4 was a bit of a tricky one — I couldn’t find another way to make it work while keeping it nice and proportional with the rest of the set. Please make sure you enable supports when printing these files. I tried to paint supports on the files and made 3mfs for both Prusa and Bambu slicer. There are also alignment dots printed into the bases. These dots need to line up correctly to ensure all 3 numbers on the caps line up in the same corner.
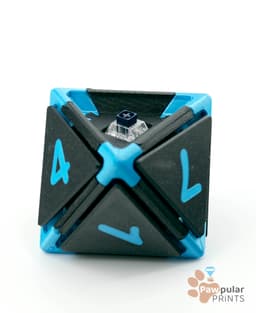
This pack contains 3 unique base designs and 16 total cap designs. The D6 and D8 are included as ZIPS! There is no keychain option for this design. The D8 requires 8 bases, 6 hubs, 8 clickers and 8 caps to complete the design. The D6 requires 6 bases, 8 hubs, 6 clickers and 6 caps to complete the design. The D4 requires 4 bases, 4 hubs, 4 clickers and 4 caps to complete the design. There are also two types of bases to account for printer tolerances. If your printer is good at handling tight tolerances, use the Tight base. If your printer cannot handle tight tolerances, the standard version is for you. During assembly, be sure to line up the dots on the bases so your caps all align properly when fully assembled! ⚠️Note that some filaments may over/under extrude which could impact assembly.
CLICKER INFORMATIONℹ️
Like most of my designs, this is a clicky design that requires a mechanical keyboard switch to make the clicky part. These models feature a universal base design which has been tested with many keyboard switches and 99% of them work! I have an up to date list of verified clickers with links you can find HERE. This design should be compatible with most MX style keyboard switches, however, the two metal contacts on the bottom of the switch must be clipped off flush (or folded over) to ensure the switch seats properly in the base (this is a destructive process).
LICENSING⚠️
This is a PRIVATE USE ONLY license.
Commercial License options available 👉HERE
Sharing, sub-licensing, selling, renting, hosting, transferring, distributing, modifying, or remixing of any of the digital files contained in this design is NOT ALLOWED.
PHOTO COLORS🎨
- Amoybaby Sky Blue Silk PLA
- Prusa Galaxy Black
- TTYT3D Silk PLA Shine Chocolate Gold
- Amoybaby Silk White PLA
3D PRINT SETTINGS⚙️
Layer Height: 0.2mm (recommended) External Perimeter: 0.33mm (recommended) Scale: 100% (Everything is modeled with tight tolerances and should not need to be resized) Orientation: Print the caps face down so you have a smooth surface for clicking! (recommended for flat)
⚠️Supports: REQUIRED FOR D4 Base and RAISED/INDENTED CAPS! Default (normal) support type works great. Only need to support the two sides of the base and the middle peg of the caps if printing face up.
NOTE: I've found the best way to get the most crisp details on these clickers is to start with the smallest details first and work up from there. Here is the order I recommend after LOTS of trial and error:
- Small Detail (Numbers)
- Everything Else (Base Colors)
⚠️WARNING⚠️ - This pack requires very good bed adhesion to ensure the best possible results for your finished clicker. It is recommended to clean your bed with soap and water before printing or whatever your specific printer manufacturer recommends for a deep bed clean!
Stay Pawsitive! 🐾
For model help or other questions, please contact us at support@pawpularprints.com
Click Starter Ultra-Pack

Chapter and Verse

Prickly Pots

Rocket Pawps

Omni Cups Multi-Pack

Pan-Dumplings Multi-Pack

Jazzy 2.0 Heroes and Hoards

Directors Cut Multi-Pack

Jazzy Clicker 2.0 3-Motion Edition

Dual Tides

Alumni 2026 Multi-Pack

Summer 'Sicles Multi-Pack

Mallow Drama

Bouncy Blast Multi-Pack

Foul Firepower

Telly Tappers

Community Mod: Love Turtles by Buckle N' Shackle

Pasta Party Multi-Pack

Trunk Tappers Multi-Pack

Jazzy Clicker 2.0: Heart-to-Heat Multi-Pack
