
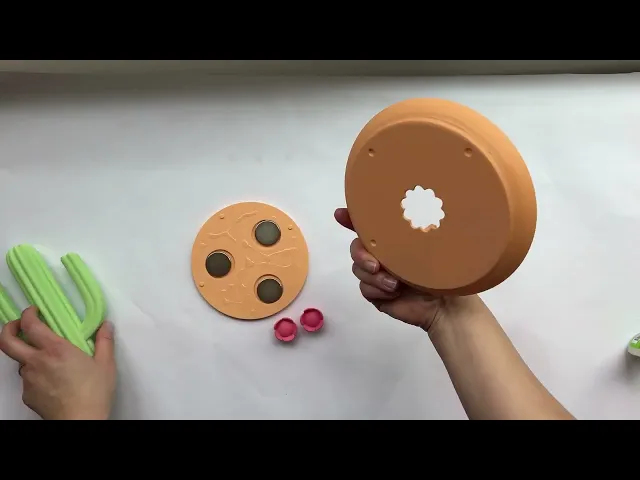


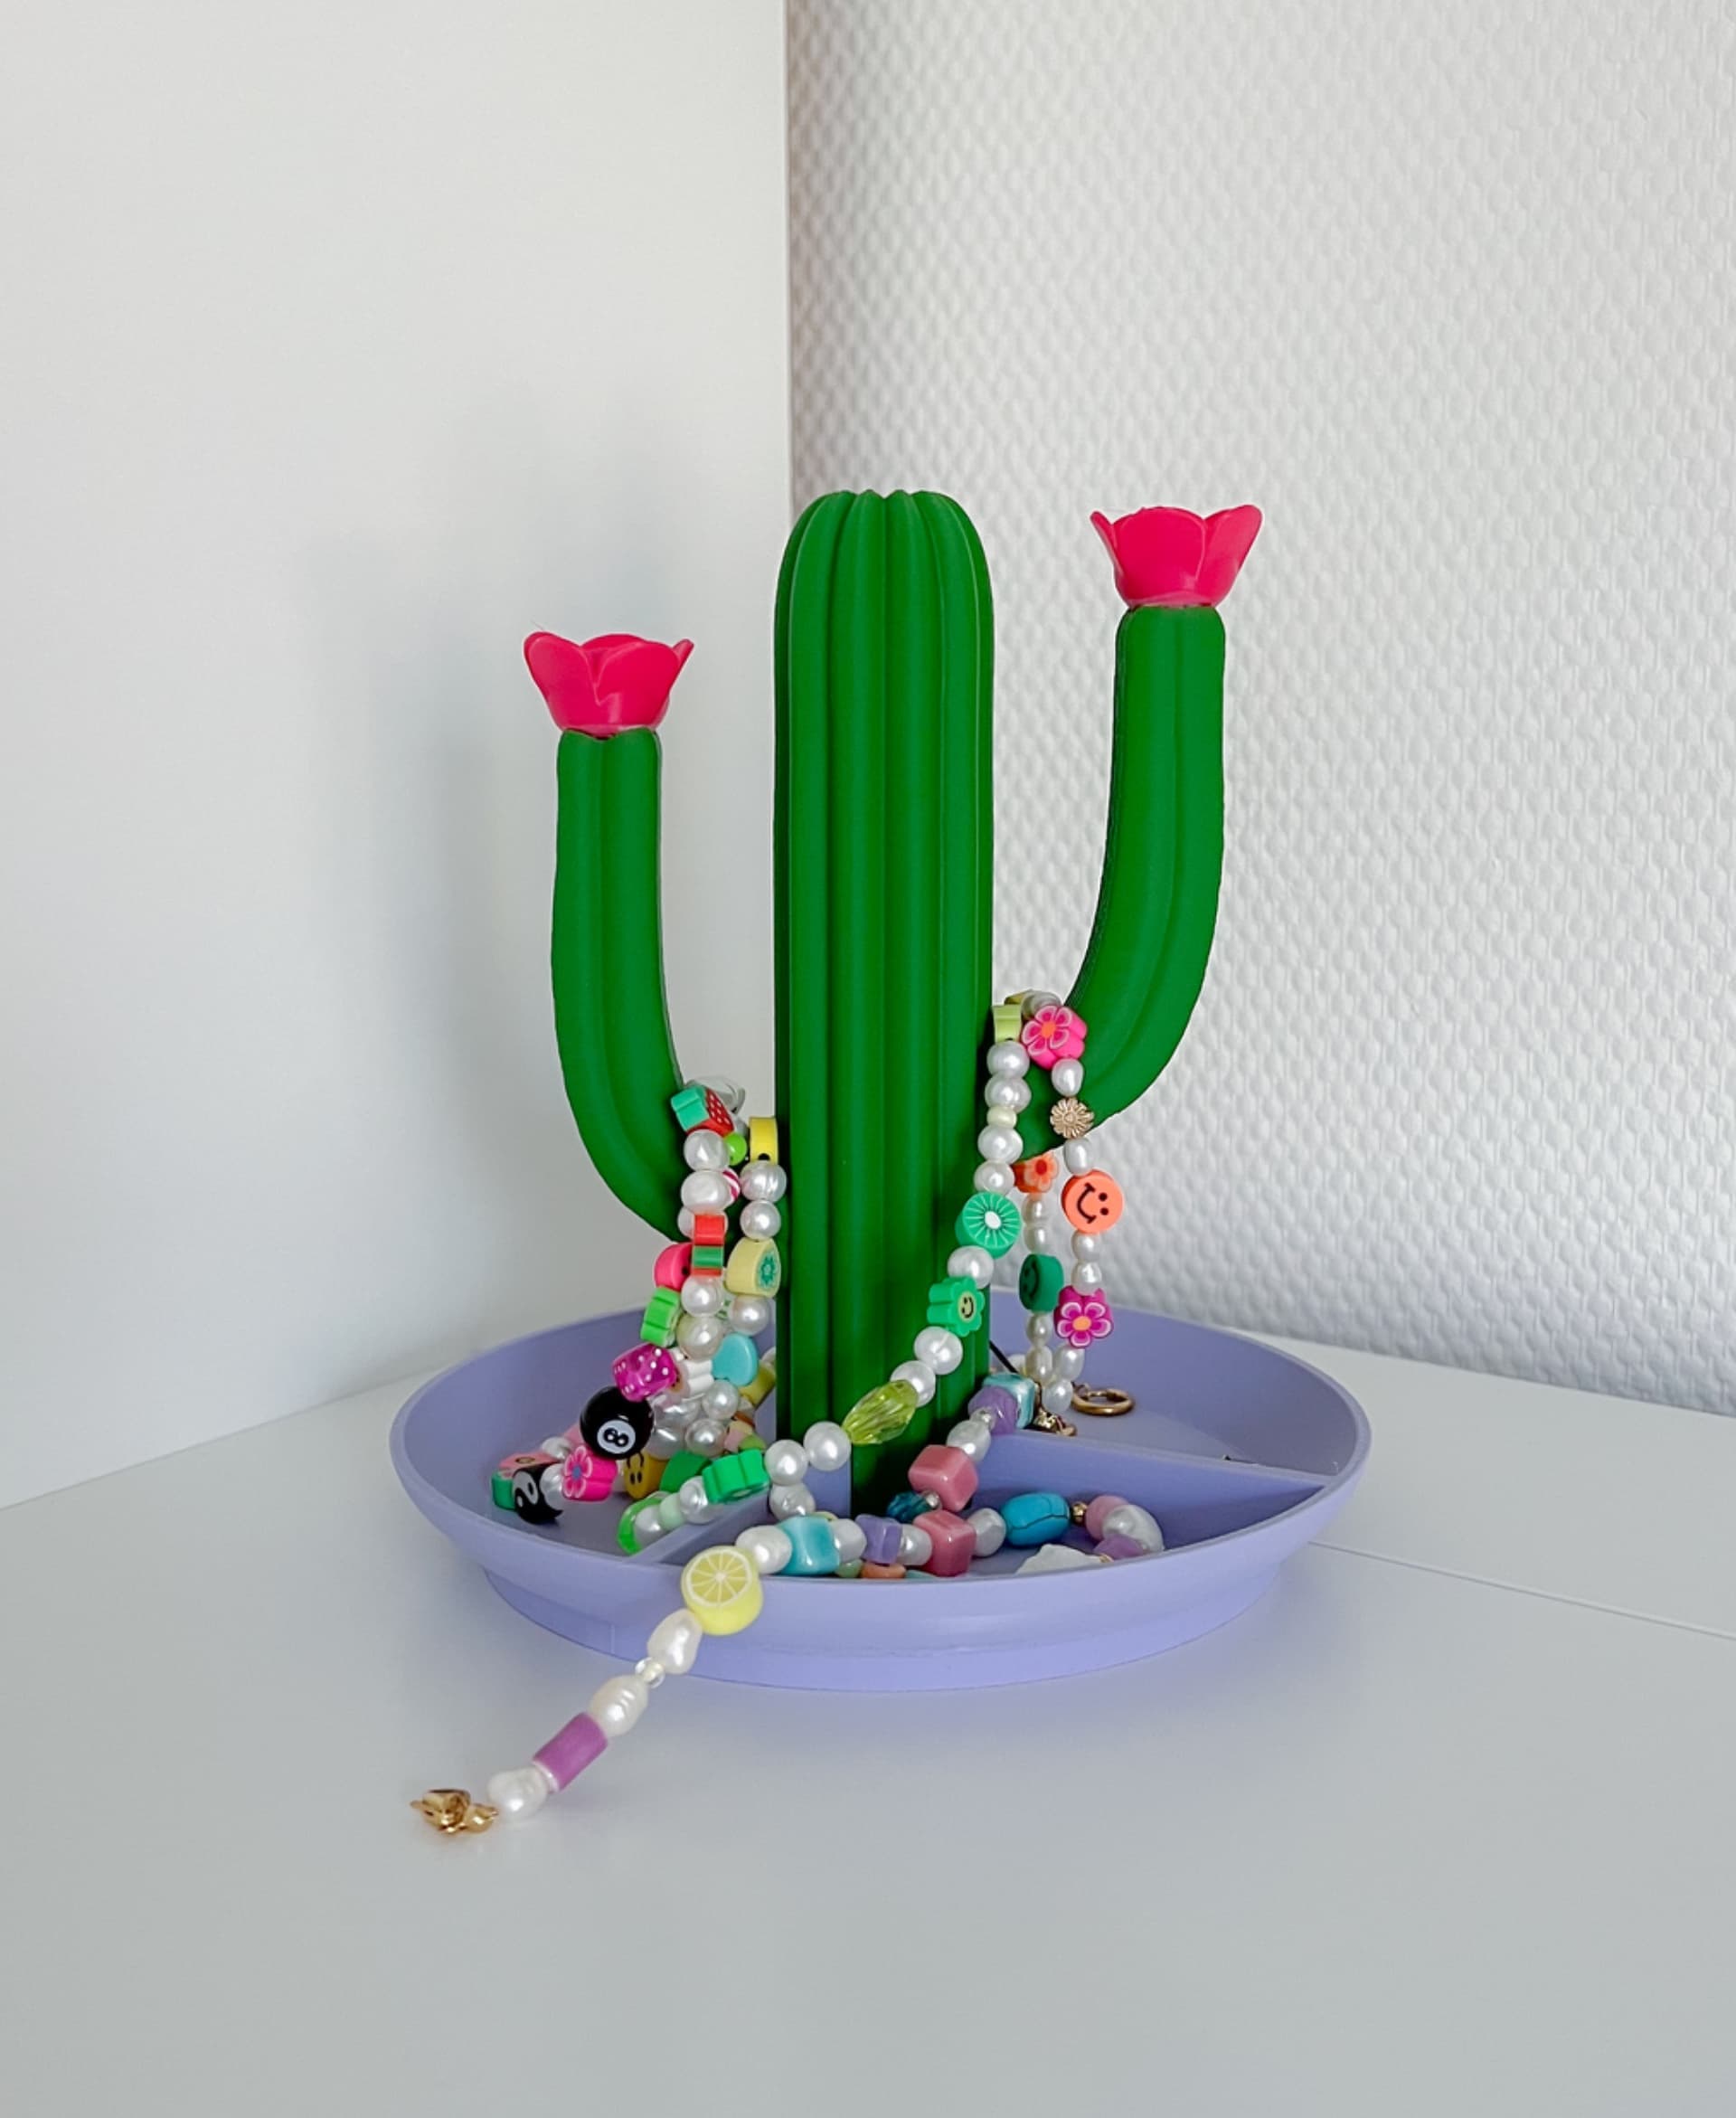
Cactus Magnetic Organizer - For Hair Accessories and Crafts
This 3D design is for personal use only if purchased individually. To obtain the rights for commercial sale, you must join the Commercial Maker Thangs Membership.
This Cactus Magnetic Keeper marries quirky charm with functional design and is ideal for storing crafting supplies or hair accessories. Inspired by the classic cactus shape, it features a sleek, modern base and a stylish floral accent. This piece not only captures the elegant vibe of nostalgic decor but also offers a clever solution for storing jewelry, hair accessories or small items.
Ideal for any personal space, like your bedroom, bathroom, or vanity area, this magnetic organizer brings a touch of vintage style and practicality to your décor. It's the perfect gift for those who love retro designs or need a stylish storage option for their little treasures.
Materials Used: You can find the specific items I used for this project listed below: Neodymium Disc Magnet, 1.26 inch x ⅛ inch: https://amzn.to/3Q9cdT1 INLAND PLA in Peach: https://amzn.to/3JsXP49 INLAND PLA in Peak Green: https://amzn.to/3W91yLP Polymaker PLA in Gradient Pink to Peach: https://amzn.to/3QeT1TP Zap-A-Gap Super Glue: https://amzn.to/3W9CSCX
Print Settings: -No brim required. -Supports needed for the cactus; no supports needed for the rest of the model. -10% infill -2 walls. -0.4mm nozzle. -0.12mm to 0.2mm layer height.
Assembly: I used different colors of PLA for each part. Watch the assembly video here: https://youtu.be/cAuxFc7LbDY


Cactus Magnetic Organizer - For Hair Accessories and Crafts
Apple Tic-Tac-Toe Carton with Hidden Storage - Game, Cute Kawaii Retro Fruit Crate, Maker
-2%2520(3).png&w=3840&q=75)
Oyster Bookmarks with Sliding Tin - Cute Retro Bookish Gift, Reader Stocking Stuffer, Book Lover
-1.png&w=3840&q=75)
Nostalgic Cafeteria School Lunch Tray Storage Box - Retro Organizer, 90s, Compartment Trinket, Cute

Cottagecore Earring Holder - Organizer with Mini Hangers, Cute Jewelry Stand, Organization

Pixel Milk Juice Carton Clicker Keychains - Print in Place, Fidget, No Support, Retro, Kawaii, Game

Lace Heart Wall Shelf - Kitsch Retro Whimsical Coquette Cottagecore Doily Display Shelf Vintage
-2%2520(2).png&w=3840&q=75)
Retro Tiki Bar Parrot Lip Balm Holder Keychain - Kitschy Tropical Bird Bag Charm Accessory Whimsical
-2%2520(1).png&w=3840&q=75)
Retro Kitsch Sweet Dessert Charms - For USB-C, Kindle, Phone, Dust Plug, Keychain, Accessory, Keys
Retro Kitsch Sheet Cake Business Card Holder - Kitschy Vintage Cake Accessory Cute Whimsical
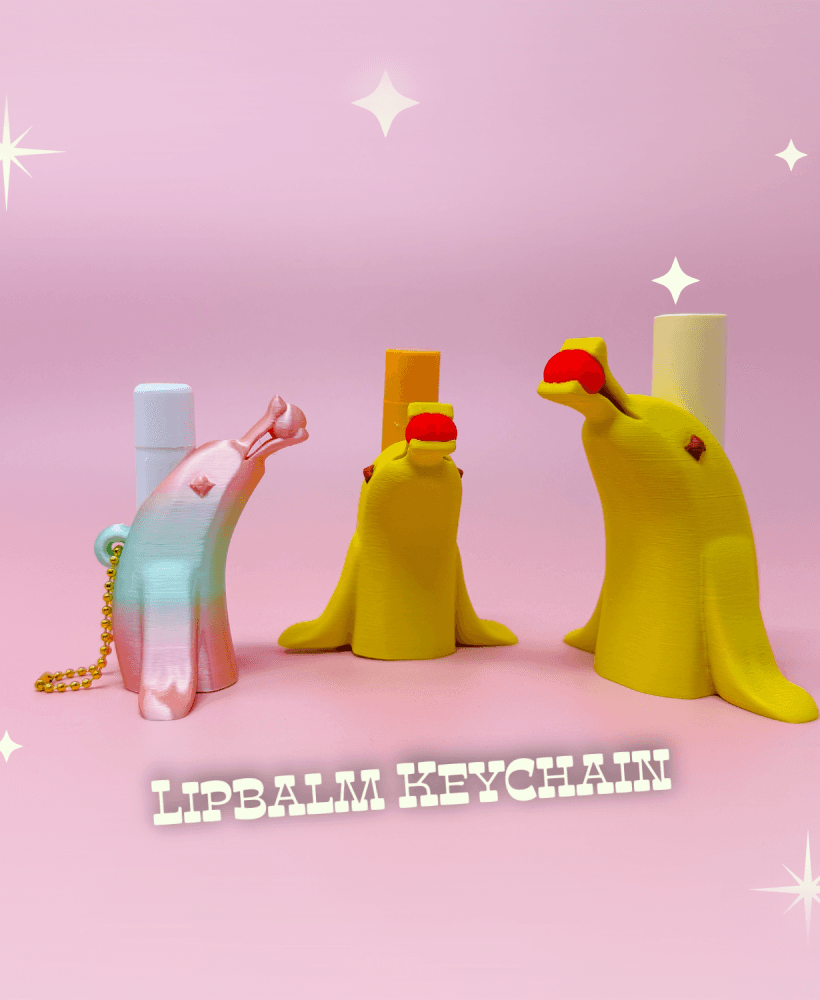
Retro Tiki Bar Banana Dolphin Lip Balm Holder Keychain - Kitschy Tropical Bag Charm Quirky Whimsical
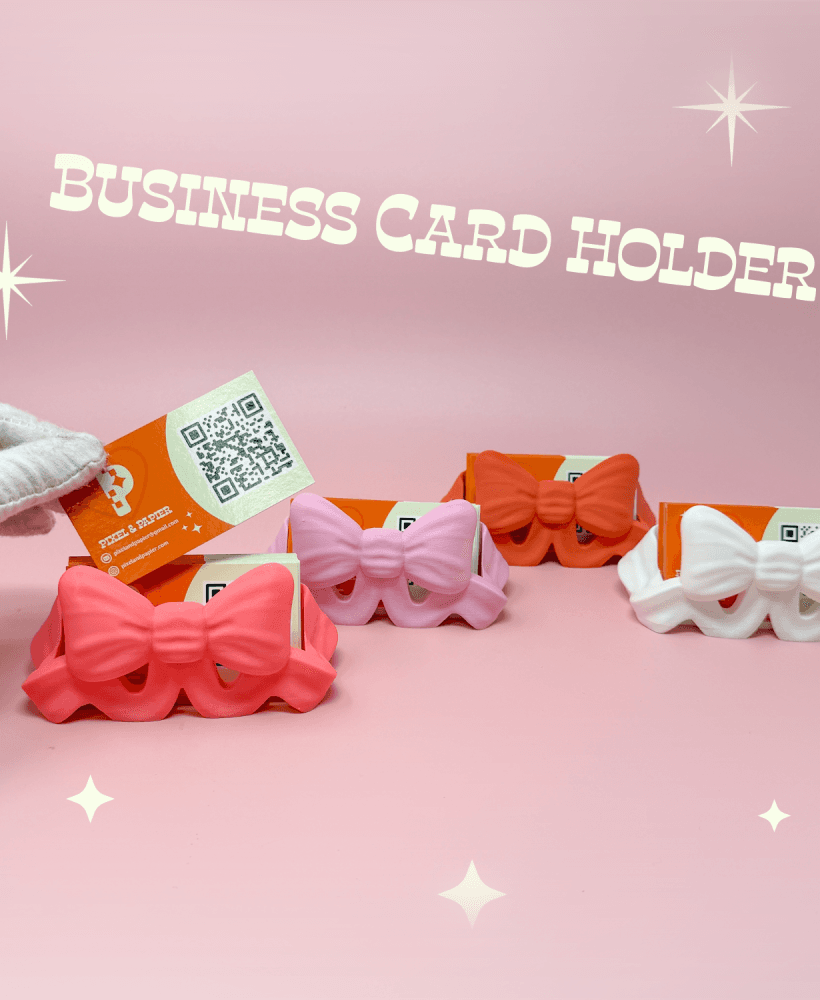
Retro Bow Business Card Holder - Kitsch Cute Chunky Desk Office Decor Coquette Whimsical Girly
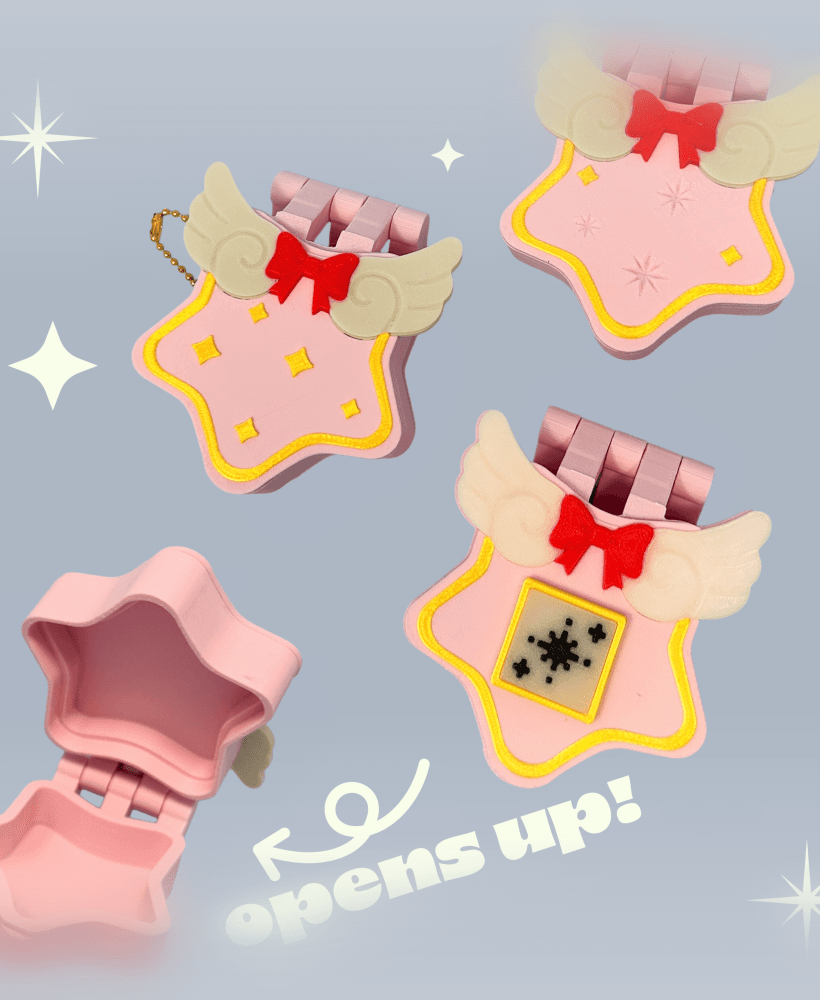
90s Kawaii Star Compact Keychain - Anime Bow Cute Whimsical Girly Coquette Cottagecore Accessories
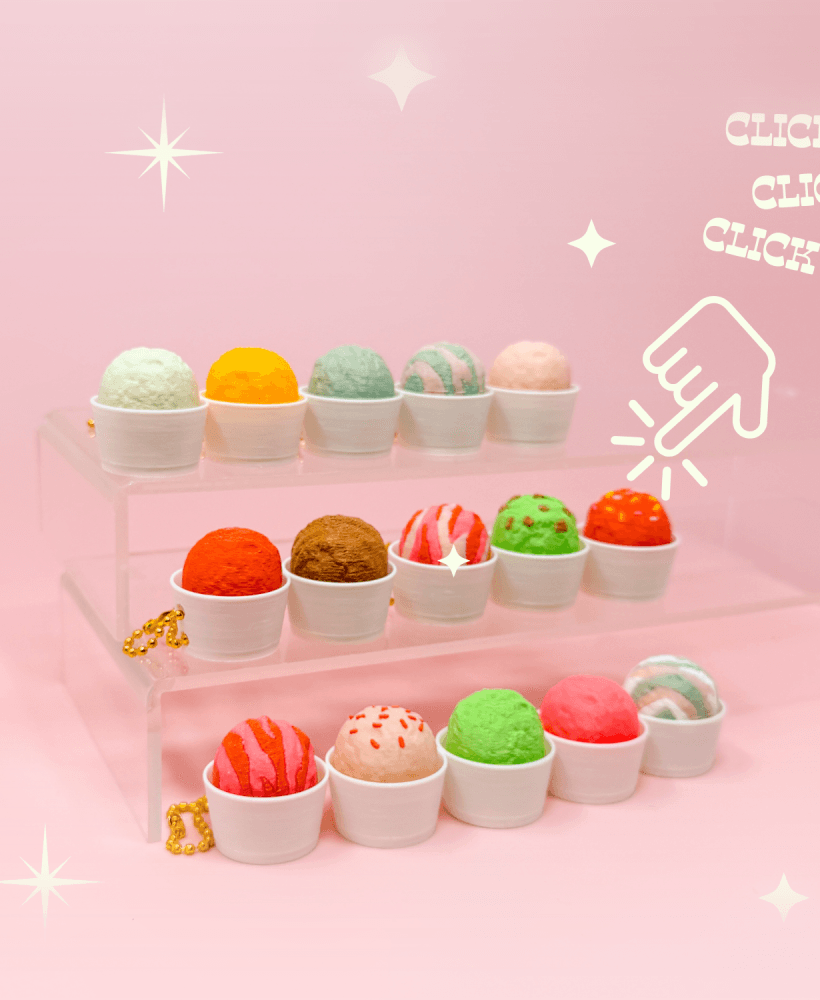
Retro Ice Cream Scoop Fidget Clicker Keychain - Kitschy Charm Nostalgic Gift Kawaii Accessory
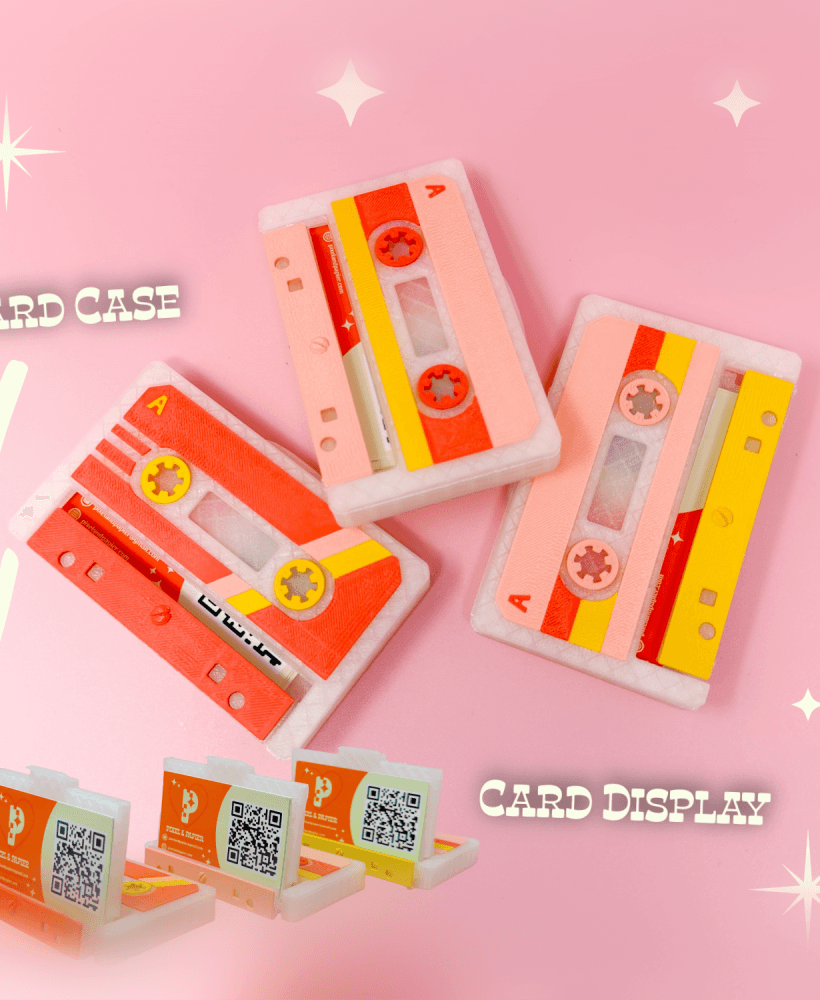
Retro Cassette Tape Business Card Holder - Kitschy Vaporwave 80s 90s Accessory Cute Nostalgic Stand
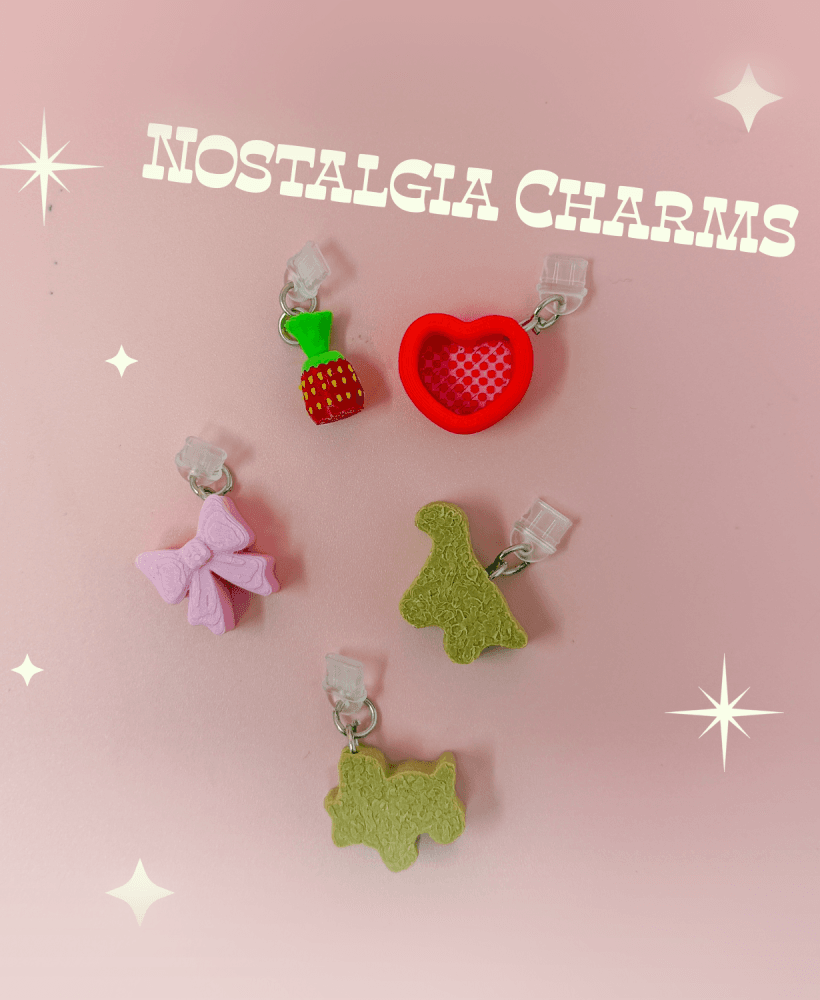
Nostalgia Charm - Dust Plug USB-C for Kindle, Phone, Keychain - Retro Kitschy Cottagecore Whimsical
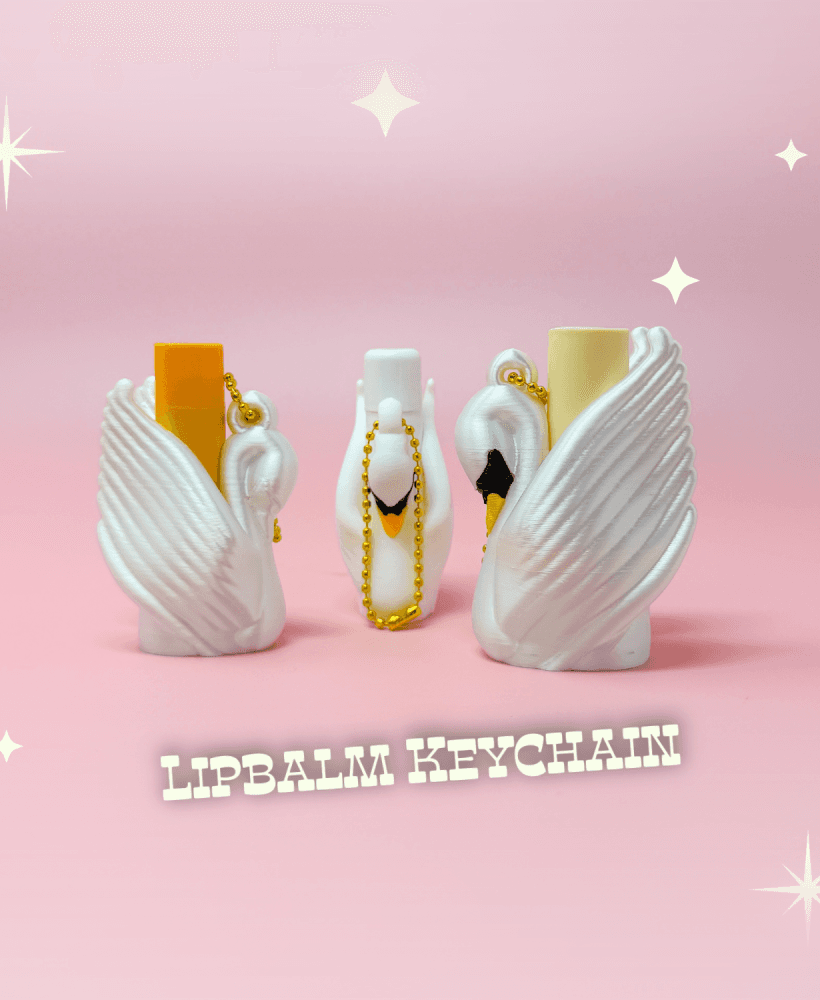
Art Deco Swan Lip Balm Holder Keychain - Kitschy Vintage Elegant Romantic Cygnet Whimsical
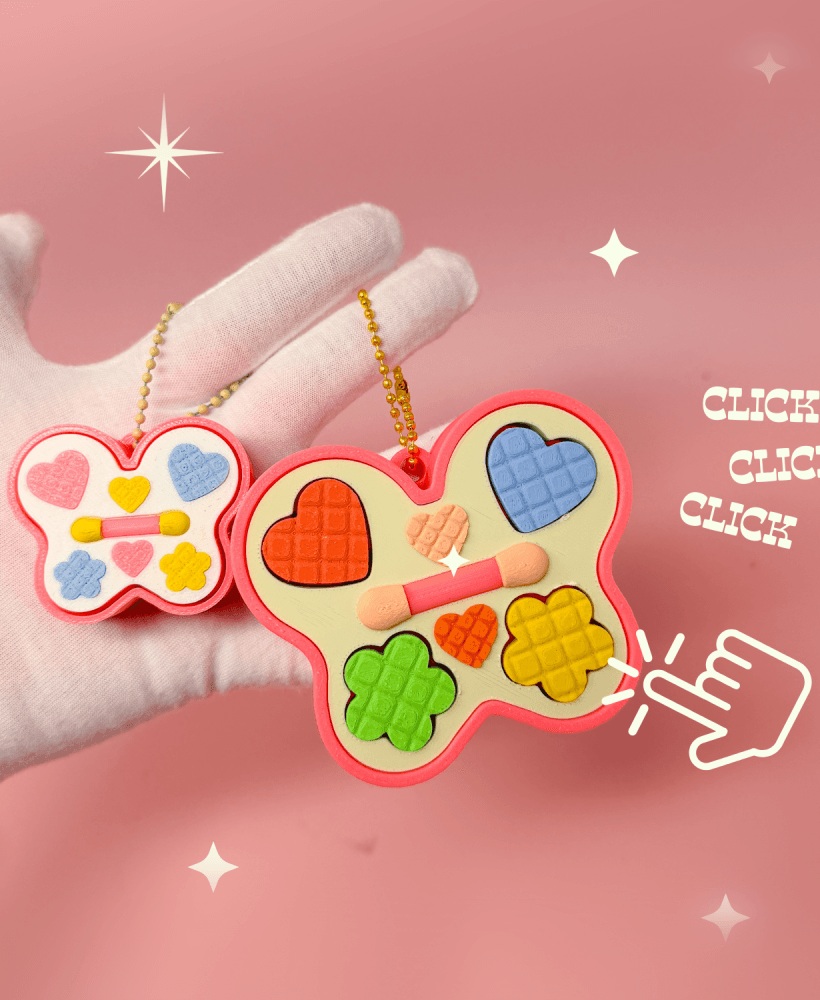
Retro 90s Butterfly Eyeshadow Palette Fidget Clicker Keychain - Colorful Heart Flower Makeup Compact
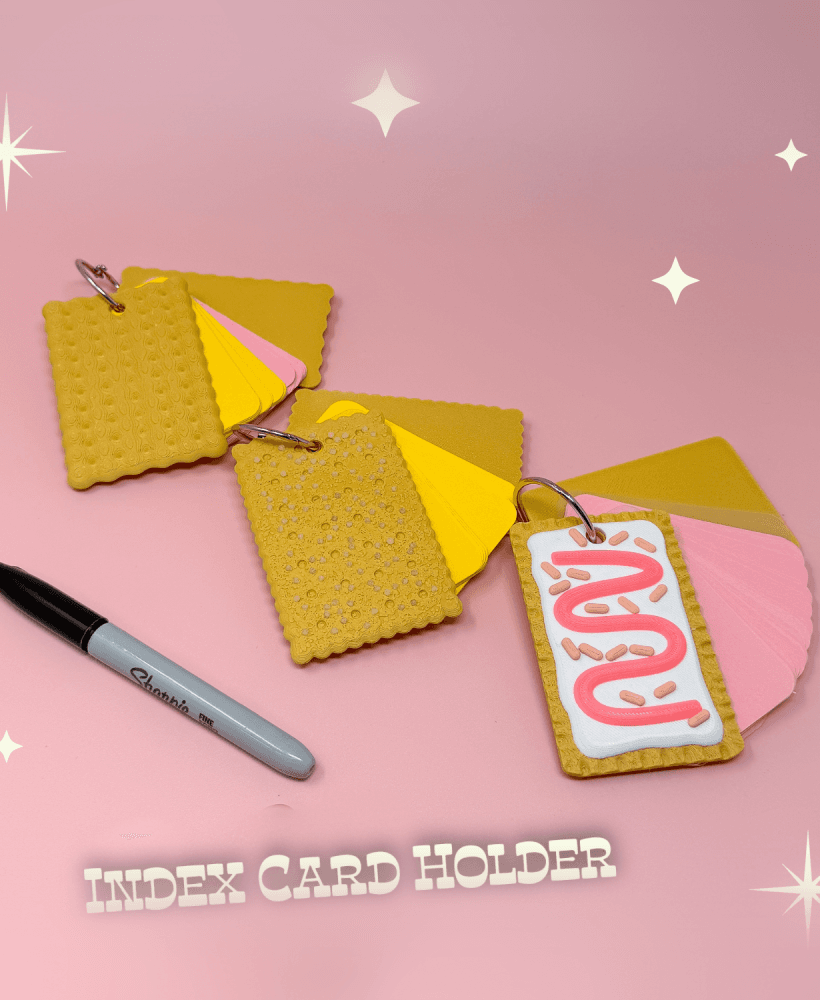
Retro Snack Cracker Notecard Index Card Holder - Fake Food Nostalgia Flash Card Ring Desk Stationery
-1.png&w=3840&q=75)
Magical Compact Clicker - 90s Nostalgia Magical Girl, Star Fidget, Pastel Compact, Cute Keychain

Loving it! :)
Love it!
Hi :) I’ve been a member with you for a little over a month now and I really enjoy your designs :) can I ask you something? I saw your cactus jewelry dish on Facebook just now and it actually wasn’t yours, it is Polly Rocket.. can you tell me the difference between yours and there’s? I love your designs and you’re actually the only person I have a paid subscription with❣️ thanks🥰
Thank you! Polly Rocket is actually one of my subscribers :) she printed this cactus.
love this design! what you could have done to save on filament is is to merge both bottom trays that way it already has the countersunk hole. Or have the top tray not have a hole that completely goes through and only have a countersunk hole. it would save on glue and material.
i hope this made sense lol
Hi, thanks for the input! The components are currently separated so that magnets can be placed into the circular slots on the bottom plate, making the bottom tray magnetic.
you can achieve the same result on a single piece (and avoid using glue) by having the magnet slots embedded within the part and adding a filament pause/change in the slicer right before the first layer that closes the magnet slots. This way you will have a single, sturdier and easier to print piece that gets printed up until the slot for the magnet is ready, then the printer stops, you put the magnets in and resume, and the printer will cover the magnets embedding them within the print.
Something like this
Thank you for your input and suggestion! While I did consider this approach, I ultimately had to make a design choice. I believe most users would prefer not to pause their prints. Additionally, inserting large, strong magnets, even with glue, could cause them to accidentally dislodge and hit the nozzle, introducing another variable that might cause issues for users. Considering the potential for damage, I felt this design choice would be safer.