

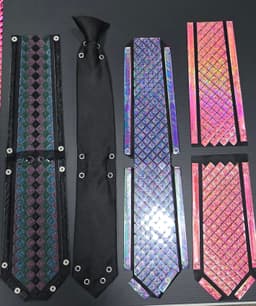

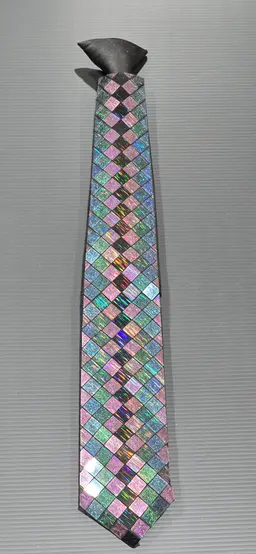

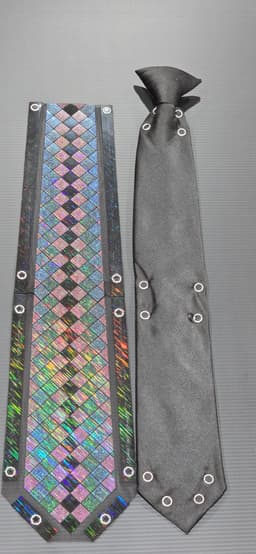
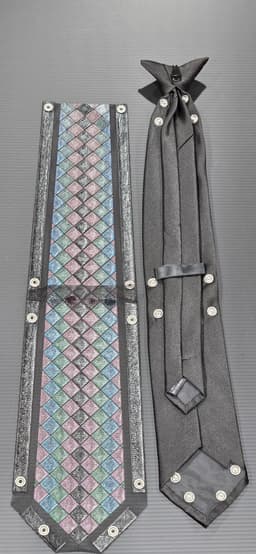

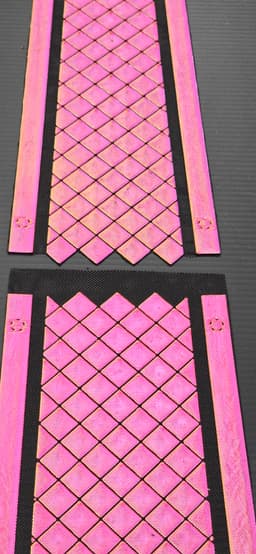


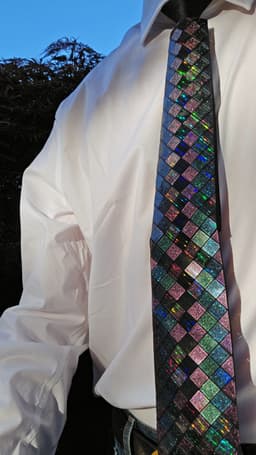

Diamond pattern tie cover with snap fasteners
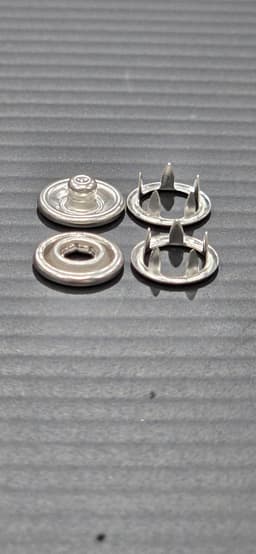
This model is a two part print. It requires 3/8" snap fasteners (size 15) - https://a.co/d/9FlIdOR
I also use a UV curable resin, a UV light, and 2 12" x 8" pieces of mesh fabric.
The ties that I use come in a variety of colors to suit your fabric color used - https://a.co/d/7HtPNCF
I achieve the multi color finish by using an AMS unit with the Bambulabs P1P
I use a magnetic PFLAT sheet available for sale on my website - https://kaizen3dprints.com/collections/p-flat-plates
The tie used is 3.1" at the bottom, and 19.5" from the bottom of the knot to the bottom of the tie. You may be able to able to resize the proportions of this match an existing tie you may have. If you use a normal tie, you'll have to apply the tie cover, after you've tied the tie (this method is more difficult).
Insert a pause command before layer 2 starts, place your mesh fabric down along with magnets to hold it tensioned, and resume the print. The print is .84mm tall, 3 layers at .28mm layer height. Once both prints are completed (minimum of 256x256mm build size required) trim away fabric as shown. Attach the two panels together with the UV curable resin where the fabric overlaps (see included PDF guide for tips). Install the snap fasteners, the male snap goes onto the tie, and the female snap goes onto the printed tie cover. The snap fasteners will line up with the holes. You will need a total of 10 pair of fasteners, per tie.

Diamond pattern tie cover with snap fasteners

Abstract art #2

Hand sewn vertical wallet

256x256 PFLAT sheet holder

Massage Roller

Spinning gear fidget ring
Flat band fidget ring

Large TPU foldover bag

Adjustable Strap (48"/122cm max length)

Small Foldover Bag
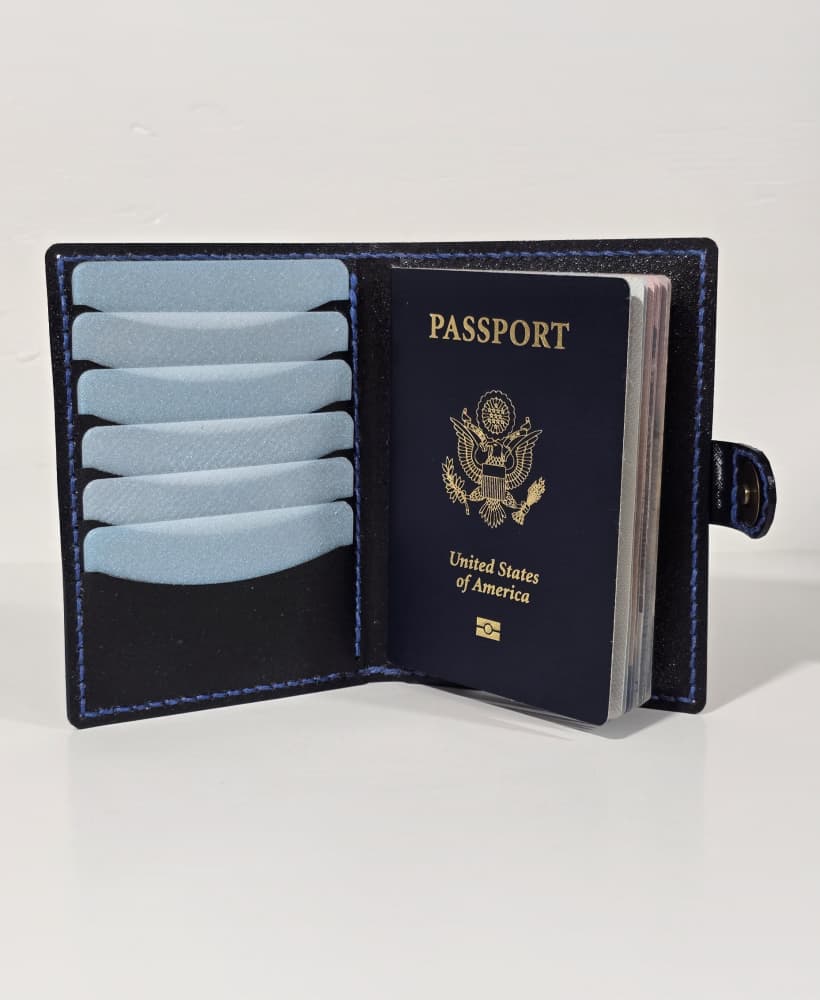
Customizable Passport Wallet

Tall TPU Bifold Wallet for sewing

Vertical Wallet for Chicago Screws

Square Grid Negative Modifier

Hex Grid Fabric Modifier

Heart Pixel Pattern Textile and Modifiers

Vertical TPU wallet with rivets and grommets

Flippy heart textile and modifiers

Foldable TPU bag sized for Snapmaker U1

Crossed Basket Weave Textile / Modifier

Nice work. Would you mind sharing your tie knot cover? Are you satisfied with the final version after assembling everything?
omg YES!!!