


Modular CNC Vacuum Workholding Table
Modular Vacuum Work Holding
This is a followup to my original Vacuum Workholding Pad.
The goal here is to produce something similar to the Air Weights Holding System but producable on a standard sized 3D printer. If you want an off the shelf system that works great, I would suggest buying the Air Weights system that fits your needs. However if you want to do some expirementing with vacuum work holding and like me were a bit nervous about crashing a bit into an expensive Air Weights table, this is a good option to start trying things out.
Materials Needed Vacuum Pump - This is the exact pump I am currently using. Something 5CFM or stronger would probably be better, but this has worked for me so far with smaller setups.
1/4" NPT quick connect fittings - These will be used to connect the hose between the vacuum pump and the vacuum pad.
1/4" OD hose - Used to connect the vacuum pump to the vacuum pad.
1/4" x 1/8" Closed Cell Foam Weather Stripping - Used as gasket material for the table. Air Weights conviently sells both adhesive backed and non adhesive backed versions of this as well.
3mm Steel Dowel - Optional, for use with aligning fixture plates.
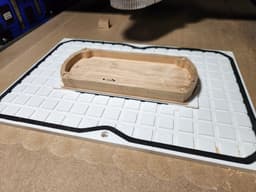
Building a Table
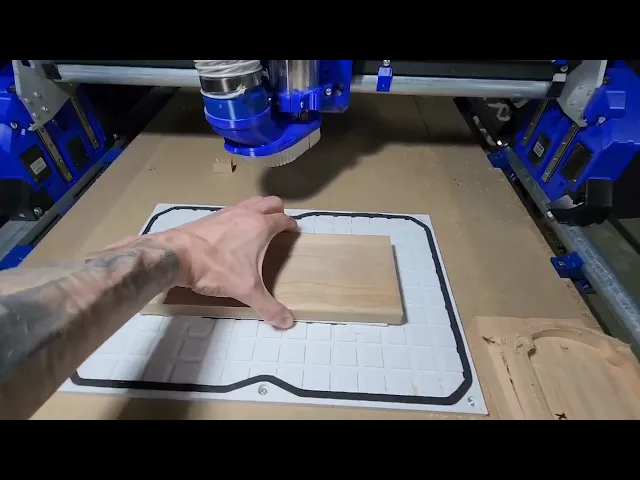
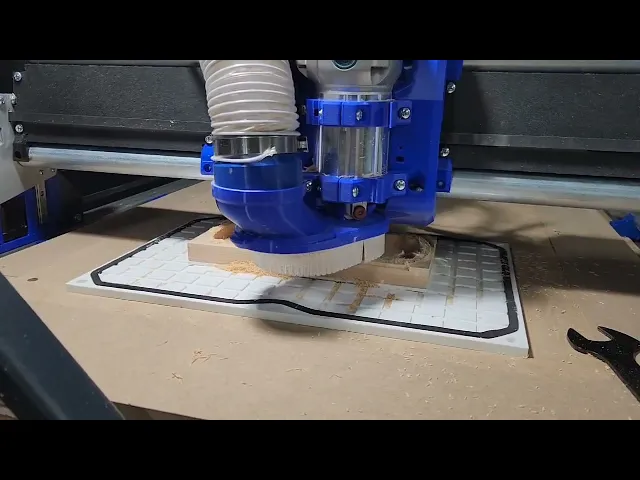
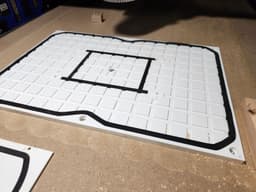
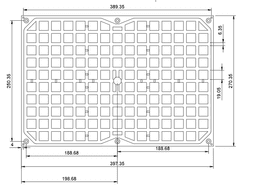
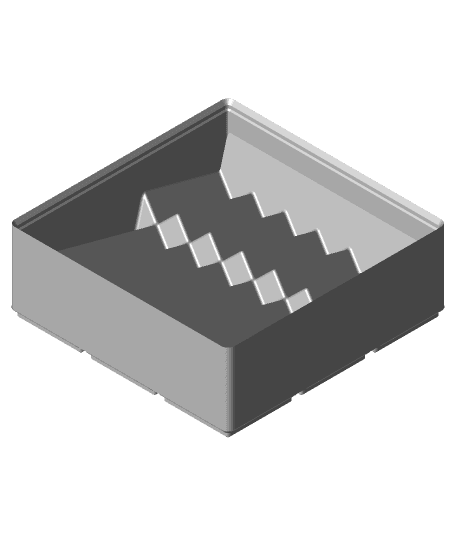
There are a series of tiles provided which can be joined to create a vacuum holding table of any size (within reason of course). Each tile has slots for alignment pegs which can be used to help with alignment and holding parts during assembly. A completed table should cosist of at least one port tile, and have edge tiles all along its perimeter.
To join two tiles together you will want to be working on a flat surface. First drop some CA glue into the alignment peg slots of one tile. Then fully seat the alignment pegs into the holes. Once those are set, you can run a bead of glue across the tile with the alignment pegs in it, being sure to cover both the tile and the protruding pegs. I used a thick CA glue for this and was generous in my application. The glue is also going to act as a sealer to prevent air from entering through gaps in your tiles. Once you have applied the glue, you can press the two tiles together by aligning the pegs in one tile with the slots in the other. Press firmly and be cautios to avoid squeeze out glueing the tiles to your table. I like to slide my joined pieces around a bit while pressing the flat to the table just to keep them from setting on the table.
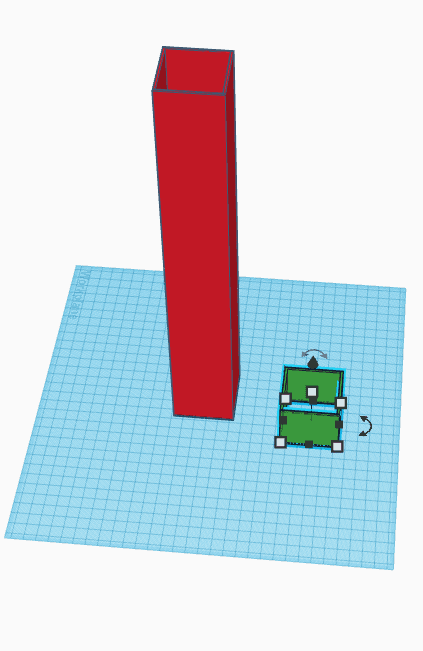
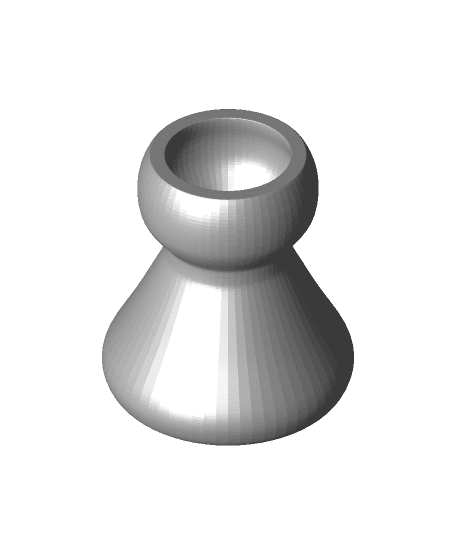
To create a vacuum, you will need to glue the Air Adapter to your port tile. Use a generous amount here as well, I tend to aim for noticable squeeze out. Th Airi Adapter is threaded to fit a 1/4" NPT Quick Connect Fitting. You will run the hose from this fitting to your vacuum pump. As of now the air is designed to come straight from under the table. This was done to minimize the height required for the vacuum table itself.
Finally once the table is assembled to your desired demensions you can run your permanent gasket along the edge tiles forming a permiter gasket around your table. Because this outer gasket is permanent, I reccoment using adhesive backed gasket here.
Temporary Zones
The grid of the vacuum table is designed to fit the 1/4" wide gasket material. This allows you to create smaller temporary zones on the table without having to always use the entire surface area of the table. To do this simply press fit non adhesive backed gasket into grid to form the size of vacuum area you need.
Working With Fixture Plates
The vacuum table was designed with fixture plates in mind. All corner tiles have a hole for a 3mm dowel pin which can be used for aligning fixture plates that span the entire surface area of your table. Alternatively, you can print the optional Fix Plate Pins which slot into the grid and raise a 4mm pin you can align to.
Installing To Your CNC Table
The vacuum table can be mounted to your CNC via the screw holes provided on all of the edge parts. I used M4 threaded inserts in my spoilboard to make the table easily removable and remountable. As an added bonus, if you have your CNC cut the holes for the inserts as well as the hole for the air adapter you can always reference this when setting up jobs on the CNC. For example my port is in the middle of my vacuum table, so based on the coordinates I chose to cut the mounting holes, if I run all jobs on the table with the origin being the center of my stock, I always know the exact starting position for my tool.

CNC Vacuum Work Holding Pad

Modular Table Lamp
CERCA | Modular Screen Table Lamp E14, E26, E27
modular table or enclosure.stl

Modular Table Corner Tool Shelf
Extra long IKEA LACK table modular leg extensions 194mm (removable)
CNC Table Clamp
6040 CNC vacuum holder

Table Saw Vacuum Adapter

Fruit Bowl Modular Centerpiece Table Organizer

Modular Stationary or Table Set of 3
Bedside Lamp With Modular Illuminated Storage - Table Lamp

3018 CNC adapter for scheppach vacuum
Flexible Vacuum Attachment for Table Saw
vacuum hose adaptor for table saw
Cover round table ikea 49 cm diameter (scalable, modular)
(3).png&w=3840&q=75)
TSX 07: segmented coffee table
Gridfinity CNC Tool Holders
Gridfinity Collet Holder Collet-ction