


.png&w=256&q=75)
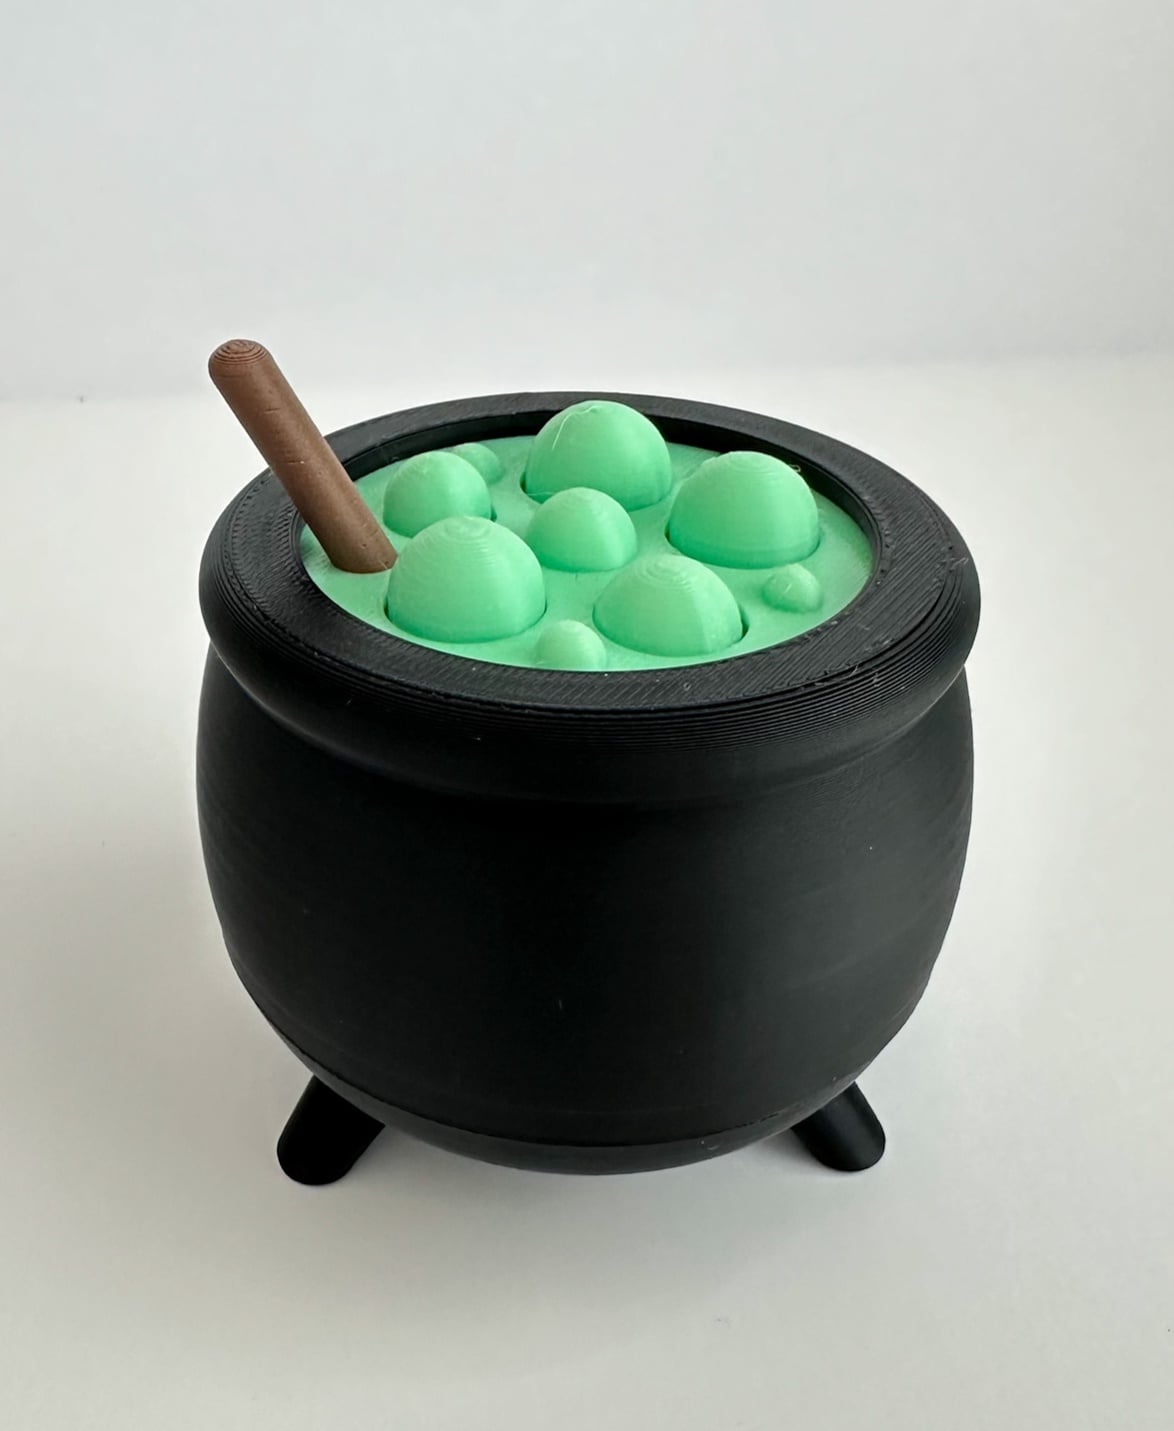
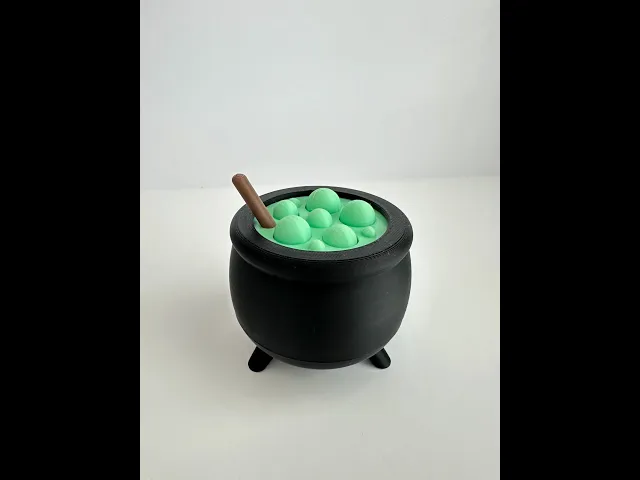
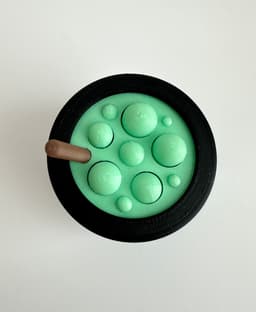
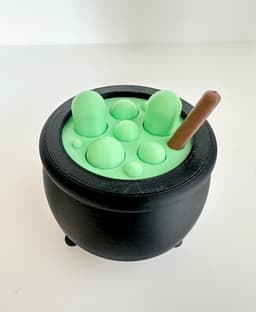
Boiling Cauldron Fidget
This Boiling Cauldron Fidget is sure to brew up a lot of fun this Halloween season 👻 Print in place magnets cause the brew to boil when rotated. You can also stir it with the stick for the same effect.
Please note: You will need (10) 6mm x 3mm neodymium magnets for each fidget Here is an Amazon link to the magnets and filament I used: https://amzn.to/3ZkJ7Fy
Update 10/25/2025: I redesigned the 'boiling brew, 'cauldron (bottom)" and 'cauldron (peg)' parts to help them stay together more securely. The new STL/3mf files are as follows: (1) Updated Cauldron (boiling brew).stl (2) Updated Cauldron (bottom).stl (3) Updated Cauldron (top).stl (4) Updated Cauldron (peg).stl (5) Updated Cauldron (stirring stick).stl (6) Updated Boiling Cauldron Fidget 3mf
In a nutshell, I changed the peg to be two parts instead of one: one half prints in place at the center of the boiling brew. It can not come out but it can rotate. The second part of the peg inserts into the bottom of the pot and connects the bottom of the pot to the boiling brew (see photos)
- No supports are needed to print any of these parts
- I recommend printing the stirring stir laying flat. I have found printing it upright makes it more prone to breaking along the layer lines (I have orientated it this way in my 3mf file). Also it will print with no brim (just make sure your print plate is clean:)
- Magnets need to be inserted the same way as the original model (the pause print is still at layer 27 for the parts that need magnets)
- Super glue can be added in the holes where the peg inserts and the stirring stick if needed
3D Print Settings: PLA works great 0.2mm Layer Height 15% Infill (except for ‘Stirring Stick’ which is 75% infill) Outer Wall Speed 100mm/s (this is to help blend the layer lines) No supports needed Outer brim on ‘peg’ piece (Glow-in-the-dark PLA makes them extra fun:)
I have also included a 3MF file with the following print profiles: Print plate #1: one color; pause added at layer 27 (layer height 4.20mm) to insert magnets (make sure to orientate the magnets correctly - see photo/video), outer brim on peg piece
Print plate #2: one color; pause added at layer 27 (layer height 4.20mm) to insert magnets (make sure to orientate the magnets correctly - see photo/video)
Print Plate #3: one color, outer brim, 75% infill
To assemble: insert the boiling brew piece into the cauldron body, insert peg into cauldron bottom, then slide those two parts together. Add a drop of super glue onto the end of the ‘stirring stick’ and insert it into the small hole in ‘boiling brew’ (let dry before stirring:)
Have fun printing!
Boiling Cauldron Fidget

Twisty Fidget Tree (2 Styles)

Alphabet Layered Fidgets

Big Beads: Sports Themed

Cupcake & LED Candle Set (with Cupcake Stand and Magnetic Match)
Spill the Tea Fidget

Football Layered Fidget

Potted Flowers and Watering Can

Flower Stand for Potted Flowers with Watering Can

Pixel Flower Fidget (2 sizes) with Stems, & Vases (3 styles)
.JPG&w=3840&q=75)
Fidget Fabric Fried Egg Set (play or coaster set)

Twisty Pint Fidget (2 Styles)

Clicky Phone Fidget (2-in-1 Fidget)

Fry Pan, Spatula and Fork

Green Eggs (requires mesh fabric), Slinky Ham and Plate

Number & Symbol Big Beads (for Horizontal and Vertical Stringing)

Big Letter Beads
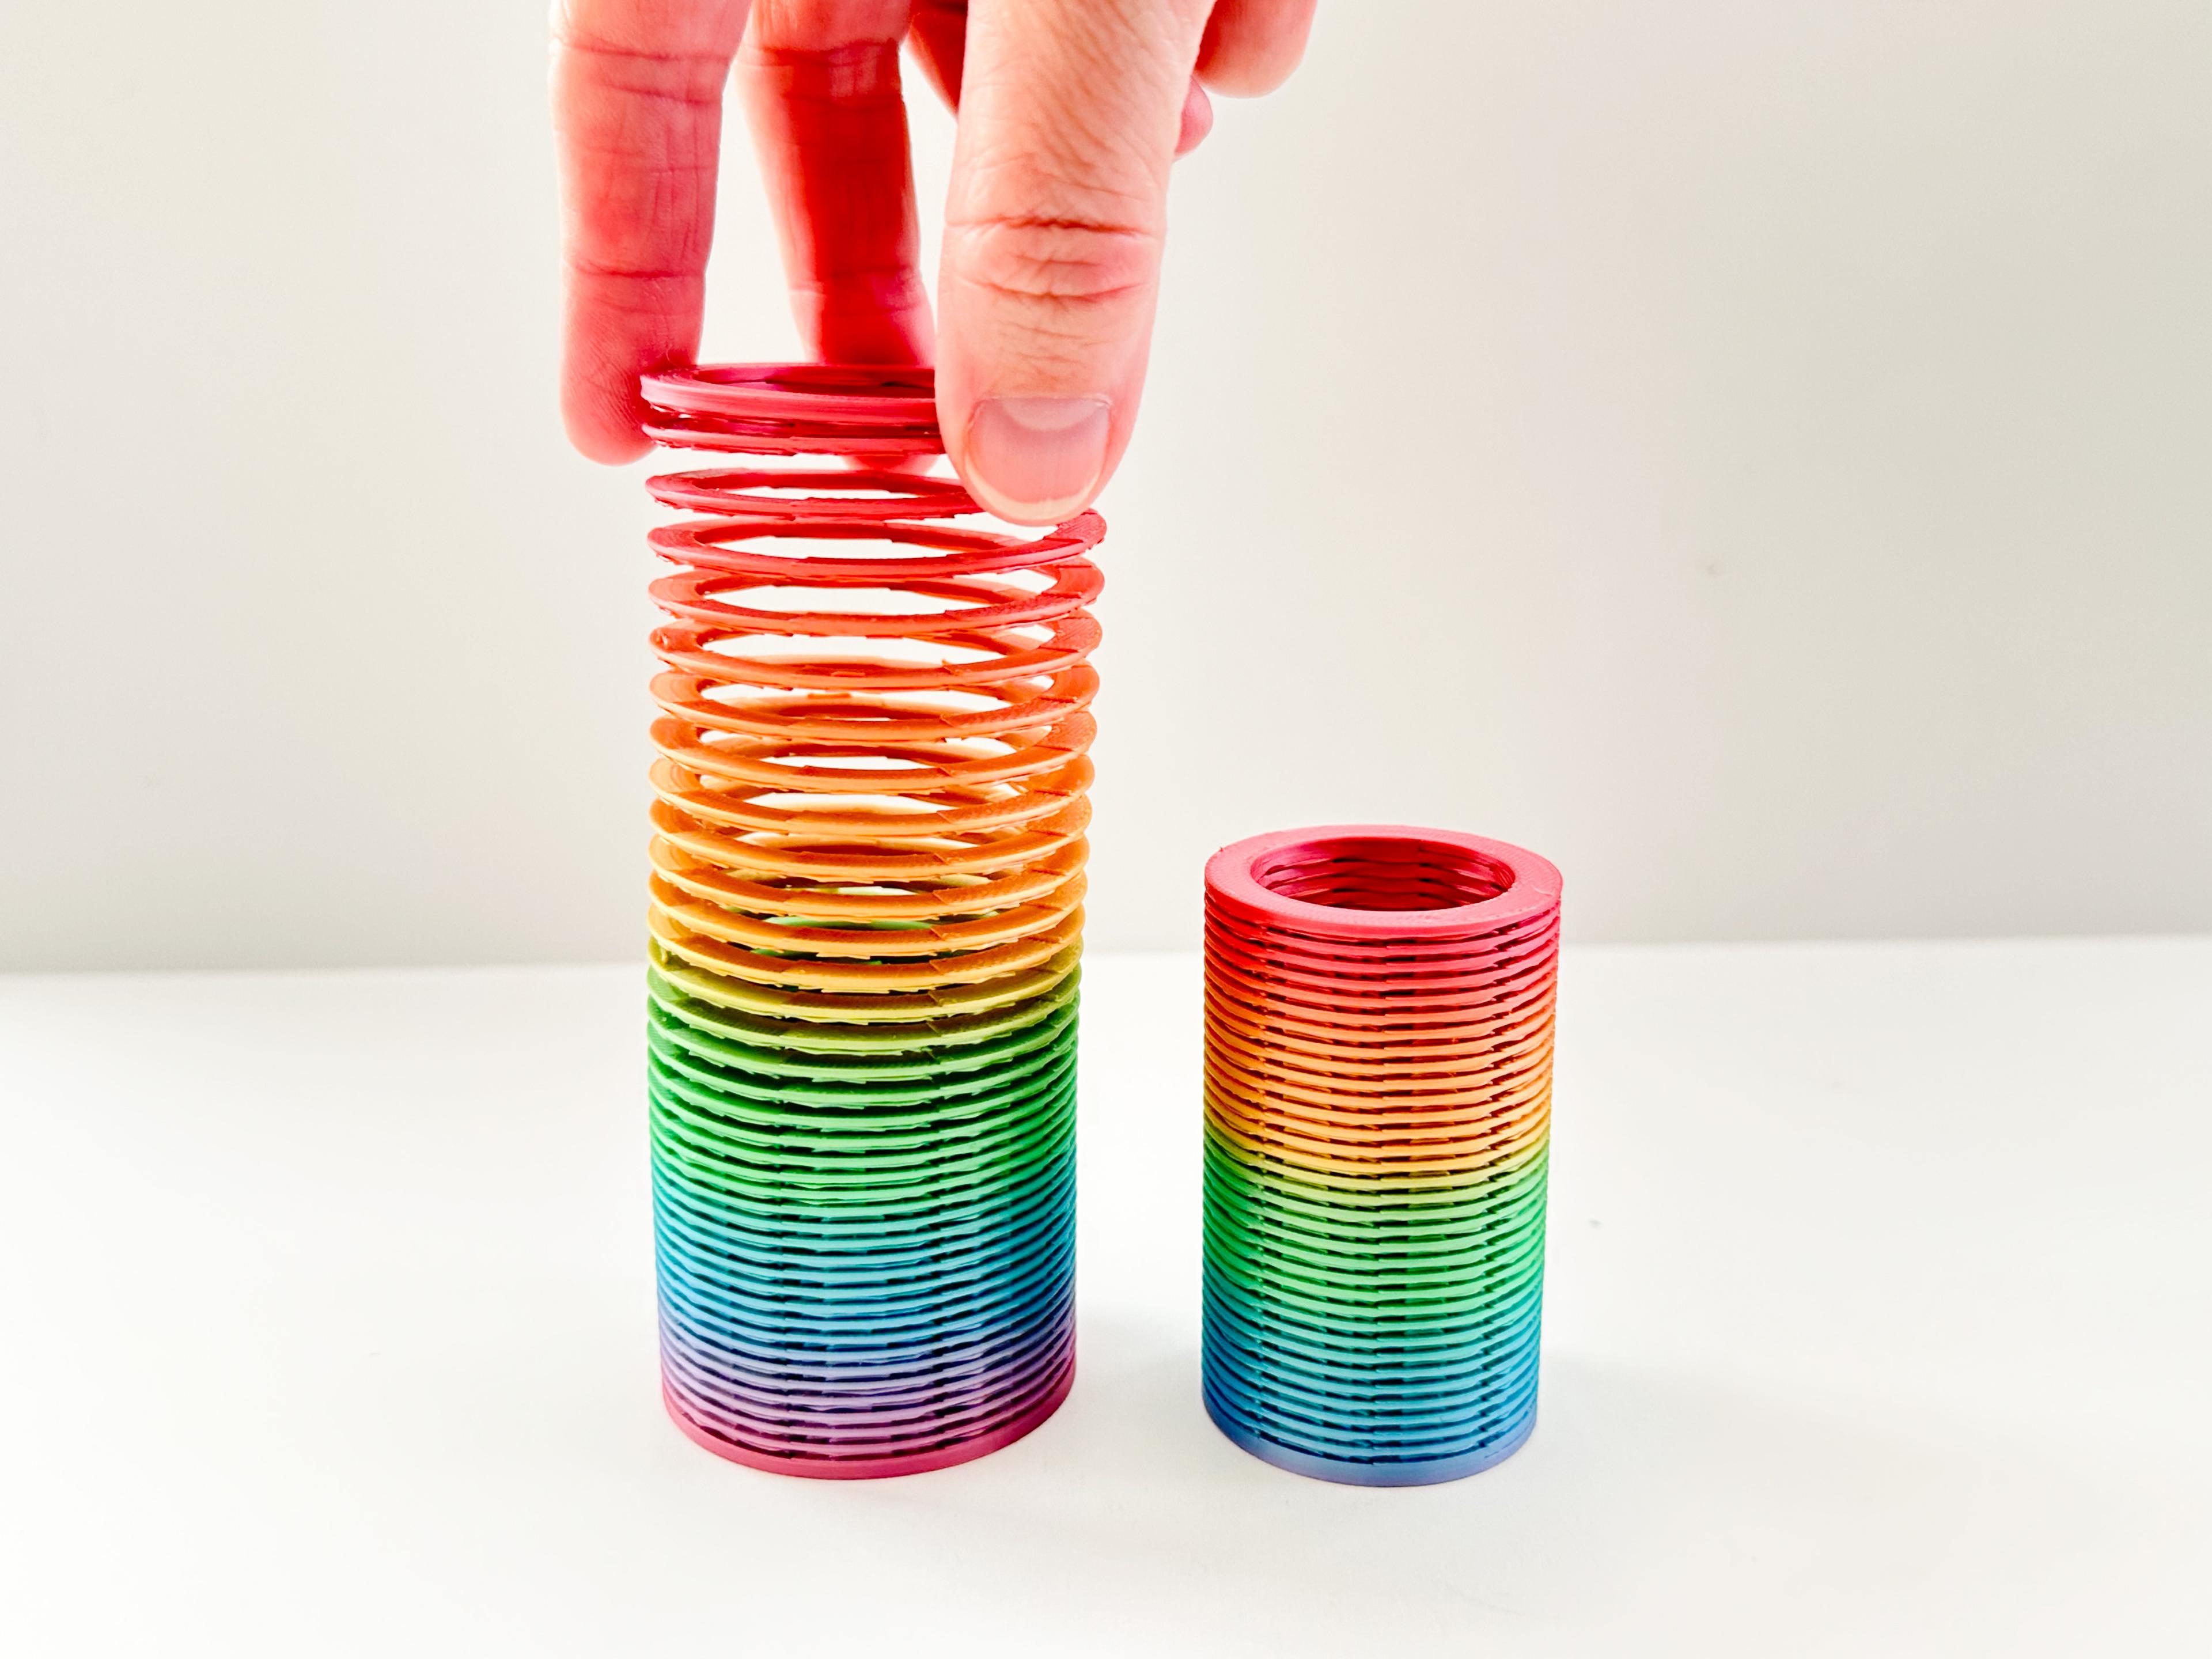
Slinky (2 sizes)

Pear Spinner Fidget
.JPG&w=3840&q=75)
Carrot Garden (2 sizes)
.JPG&w=3840&q=75)
This printed beautifully
🙌🏼 Thanks for sharing:)