


GAMES BOOK V2 | SWITCH, DS, 3DS, SD CARD & MICRO SD
UPDATE v4 - April 13
- Added pages for Nintendo DS, Nintendo 3DS and SD memory cards
- Updated the Nintendo Switch page; you can now combine pages (e.g., 3DS + Switch + SD in a single Games Book)
- Added instructions for printing holographic images
UPDATE v3 - March 22
- Improved COVER - BACK & COVER - BACK - BLANK: Improved sliding mechanism
- 3D images added: added lots of images ready for 3D printing!
UPDATE v2 - March 19
- Improved COVER - BACK: Improved the MicroSD slots for a smoother, easier fit.
- Added COVER - BACK - BLANK: A clean version without the SD card slots for those who prefer a minimalist look.
The GAMES BOOK is a functional tribute to the iconic Game Boy Color, reimagined as a high-capacity "book-style" library for your Nintendo Switch media.
Why you’ll love it:
-
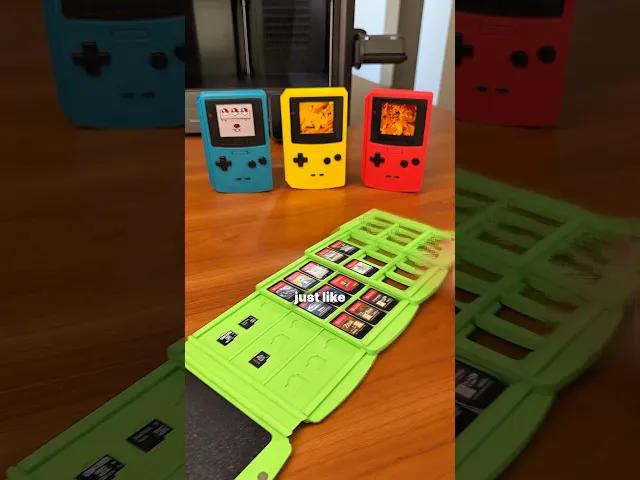
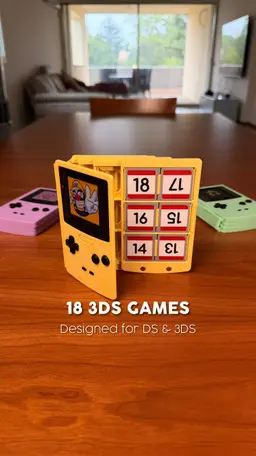
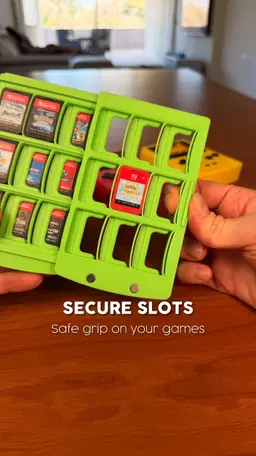
Massive Capacity: Flip through pages to find your next adventure! It holds up to 27 Switch cartridges.
-
Spring-Loaded Security: Each slot features a precision-engineered integrated spring, ensuring your games stay snug and won't fall out.
-
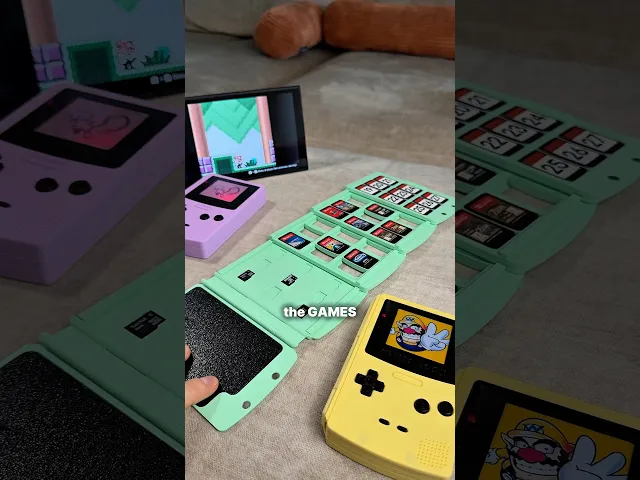
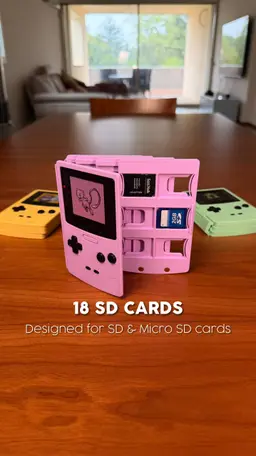
The "Secret" Page: The final page includes dedicated slots for 9 Micro SD cards—perfect for your digital library.
-
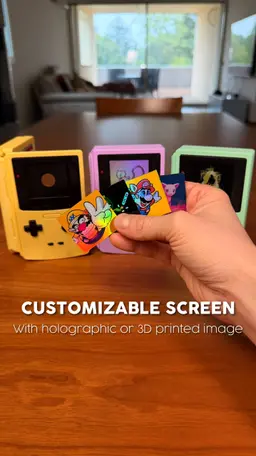
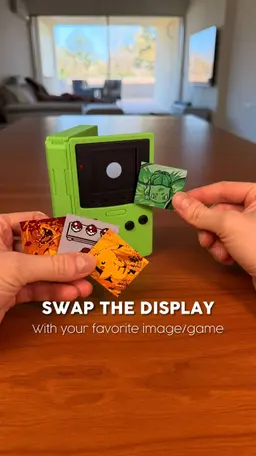
Fully Customizable "Screen": Make it yours! The front screen is a swappable plate. I’ve included a Chroma Canvas / HueForge tutorial and settings file so you can print your favorite game scenes with stunning color depth.
-
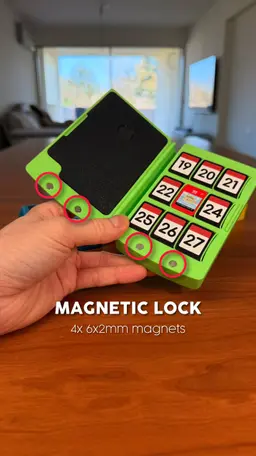
Magnetic Snap: Uses two magnets (D=6mm - TH=2mm) for a satisfying, secure tactile closure.
💡 PRO TIP: Smooth Scrolling! If the pages aren't sliding as smoothly as you’d like, don't worry—there’s a classic "old school" fix!
Take a candle (unlit!) and gently rub the wax along the sliding rails. You only need a tiny amount. The wax acts as a dry lubricant, and your pages will slide like butter!
ASSEMBLY GUIDE Follow these steps to put your GAMES BOOK together in just a few minutes:
-
Cover Assembly: Connect the main shell components (COVER - FRONT, BACK, and SPINE) by simply snapping them together. You should hear a clear "CLICK" confirming they are securely locked.
-
Control Panel: Glue the BUTTONS section onto the front cover.
-
LED Detail: Glue the RED LED piece into its designated slot on the BUTTONS panel.
-
Stacking the Pages: Stack the pages onto the back cover. Start with the 2x PAGE and finish with the PAGE - FRONT. Pro Tip: Position each page halfway over the previous one and press down firmly to snap them into place!
-
Magnetic Closure: Glue the 4 magnets into their respective housings. Make sure to double-check the polarity before the glue sets to ensure a perfect snap!
-
Customization: Simply snap your favorite printed image (using the included Chroma Canvas profile) into the screen slot.
OTHER VIDEO & PHOTO If you want to see more videos or photos of this design follow me on my Instagram or TikTok!
COMMERCIAL LICENSE Purchasing or downloading this file does not give you the right to sell physical prints of this design. You can obtain a commercial license for all my designs by signing up to my Thangs.

GAMES BOOK V2 | SWITCH, DS, 3DS, SD CARD & MICRO SD

ENERGY DRINK | 33CL / 12 FL OZ CAN COOLER

WATER GAMES | BOWLING, TIC-TAC-TOE & FINGER SURF

MAG DRIVE | BUILD ANY VEHICLE, MAGNETICALLY
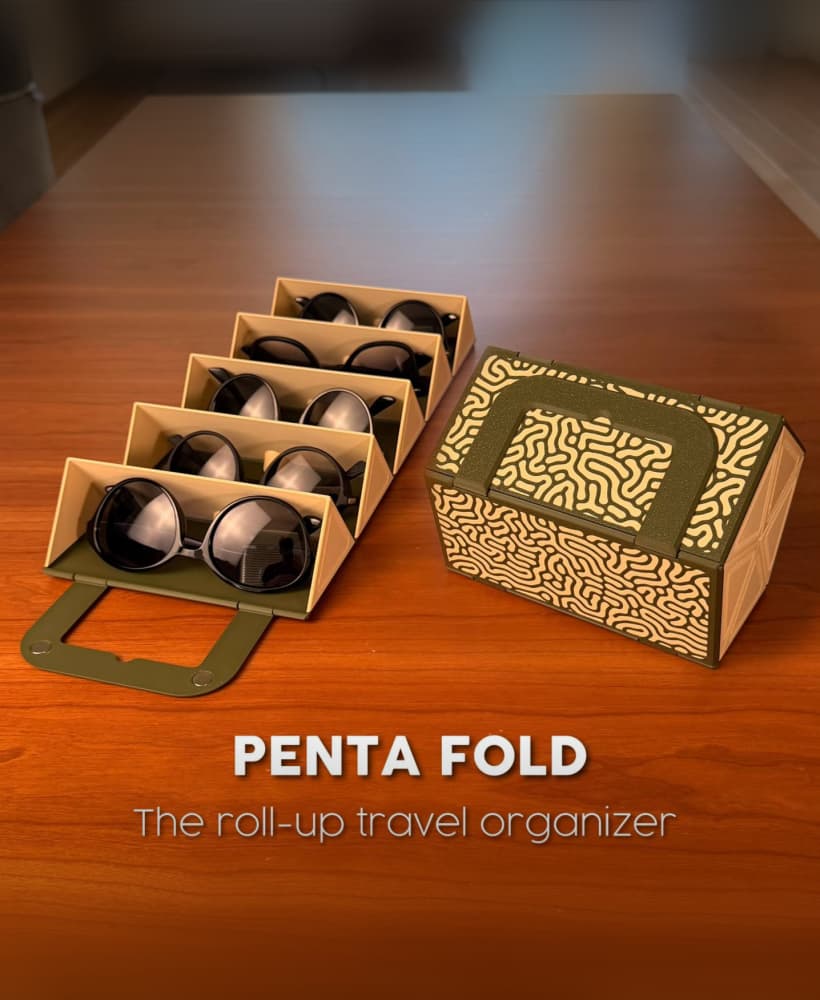
PENTA FOLD | THE ROLL-UP TRAVEL ORGANIZER
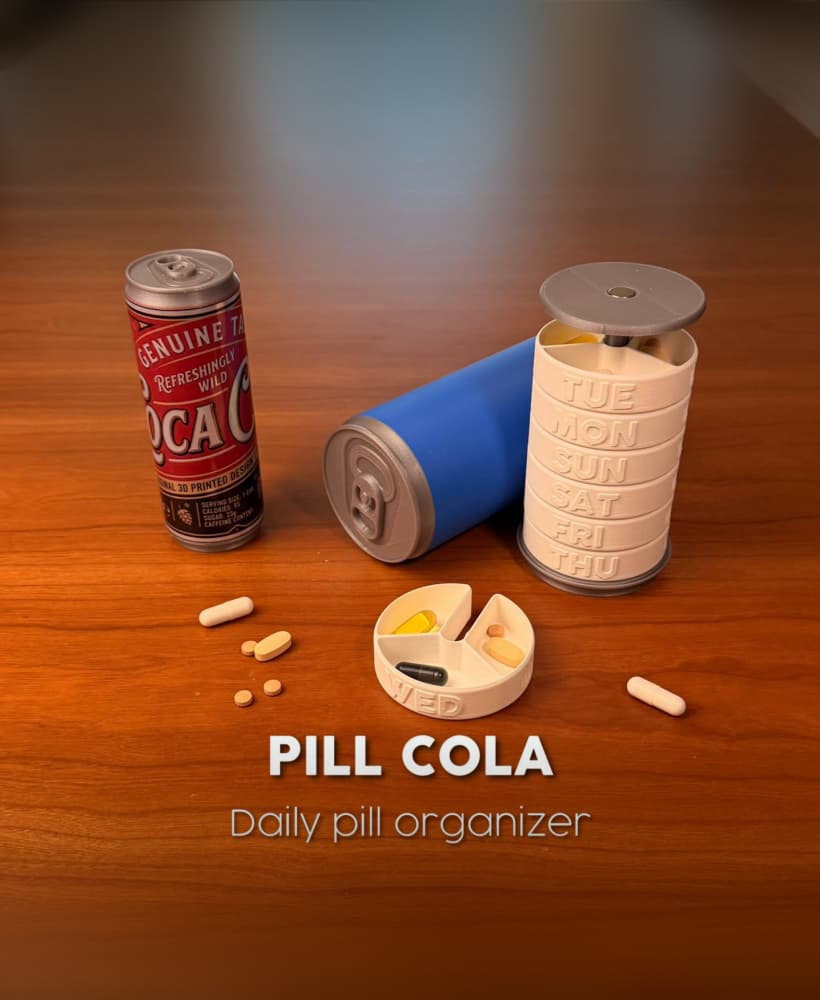
PILL COLA | DAILY PILL ORGANIZER

SWITCHNOTE | CONSOLE STICKY NOTE HOLDER

CABLE SAFE | FALL PROTECTION SYSTEM
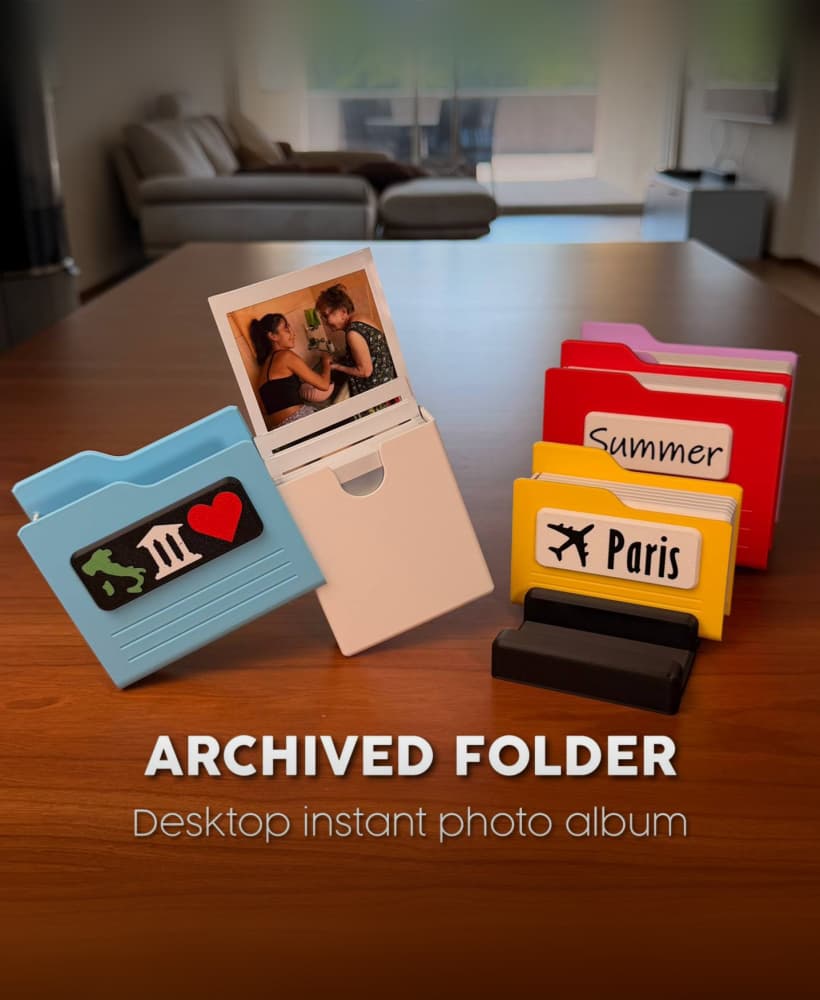
ARCHIVED FOLDERS | DESKTOP INSTANT PHOTO ALBUM

POWER PUMP | MINI DESKTOP CHARGING STATION

PEEK IN | OPEN YOUR MEMORIES
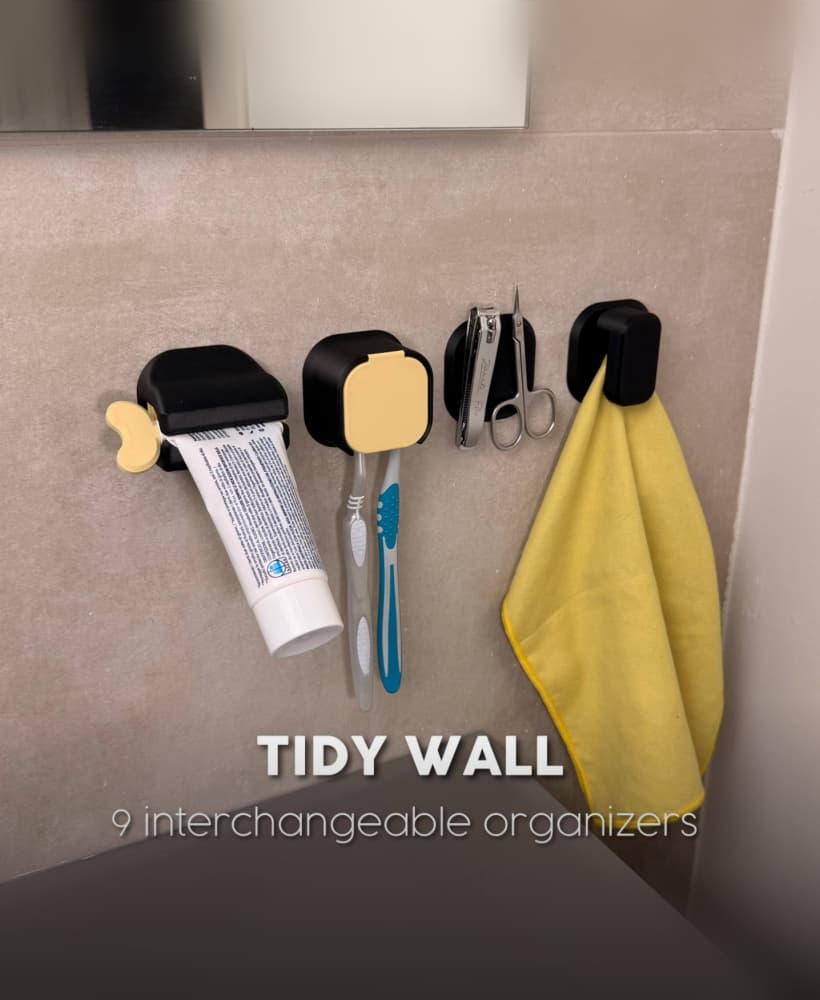
TIDY WALL | 9 INTERCHANGEABLE ORGANIZERS

CARD BOOK | TRADING CARD BINDER

3COSYSTEM | A 3-TIER TERRARIUM

PIVOT ORGANIZER | THE SATISFYING PEN HOLDER

FLOPPY CLICK | THE RETRO-TECH COASTER HOLDER
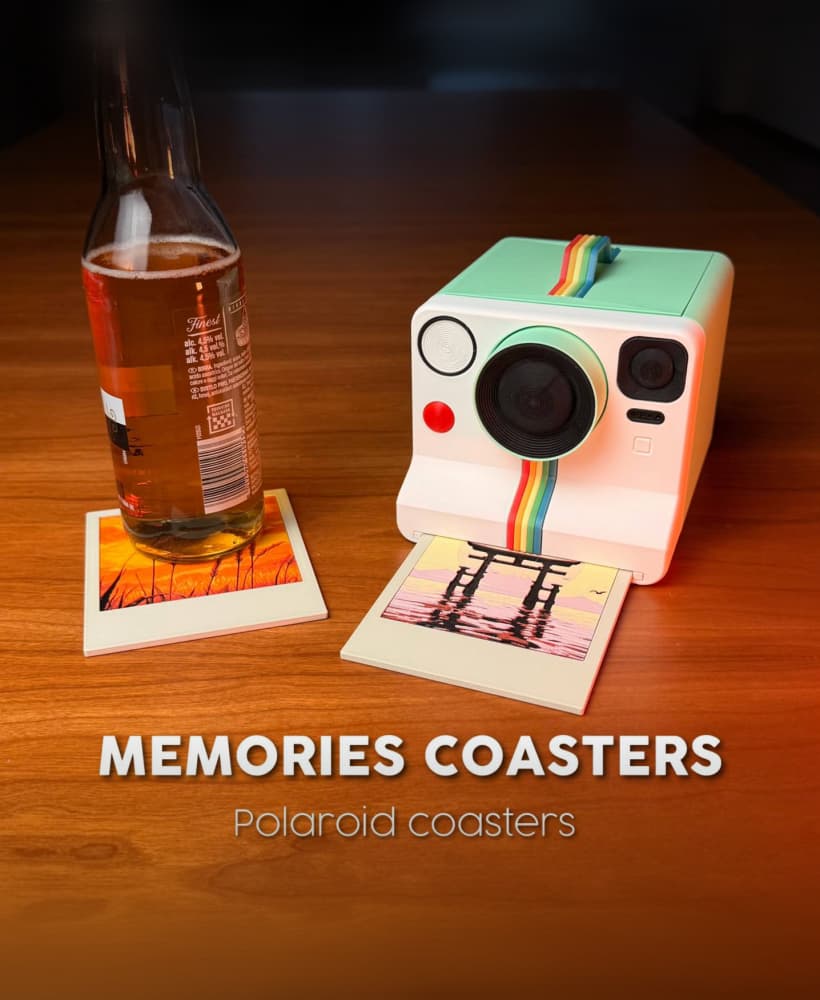
MEMORIES COASTERS | POLAROID COASTERS

COASTER DISPENSER | For TULLE COASTERS

PIC ARCHIVE | ICONIC MOVING BOX PHOTO STORAGE

CACTICHARM | CACTUS JEWELRY HOLDER & LAMP

hi! I just purchased this, but I was wondering if I could get a blank template for the window? (I would like to add a sticker instead of a printed image)
Hello! All right, I'll be posting an update soon with the following new parts:
Thanks, ALFI
When you update the models, can you post an announcement on your media pages and such?
I made that file if you need it
I love it, but I have a question: what size are the circular magnets?
6x2mm
Your discord message for this has the link to the print files not the picutures
Thank you so much! I re send the message with photos :)
Thank you very much! Great work
What filament did you use for the body colors?
PLA and matte PLA by eSun
Is it possible to get the printed pictures for the cases with more pokemon designs? maybe gengar and snorlax,
I tried using the .Docx file you put in with the digital files, and it jus5t bring everything up in a different language so i am unable to make them myself
I'm having trouble with the quality of the top layer of the BUTTONS. I'm testing with a 0.25 nozzle, but the quality is still very poor. Any tips?
Is it possible to put the magnets "hidden"? like make a pause and then print a thin layer on top it printed great but I made a mess with the glue and the magnets
are there 3mfs of the other jpgs?
Hello there!
Is there an easy way to make/have more hueforge for the screen display?
Thanks :)
Hello! I left the guide inside the file on how to create them! Thank you!