
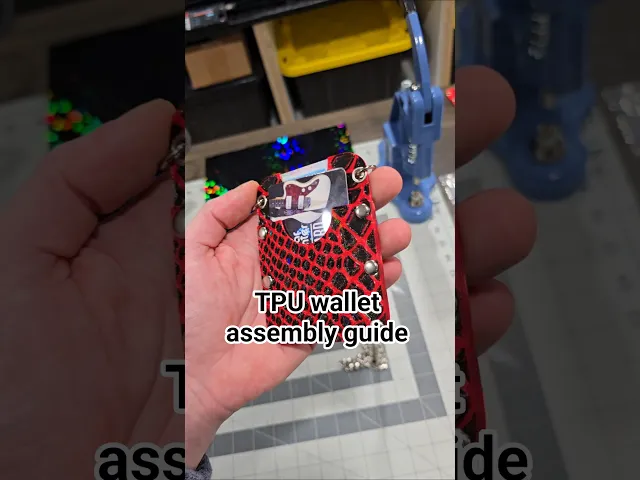

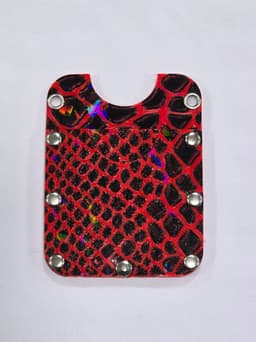


Vertical TPU wallet with rivets and grommets
I really wanted a multicolor TPU wallet that I could customize with different pockets. Here it is! There is an orca slicer 3mf with some modifiers included (Dragon Con textile), or you can pick the particular STL files that you want to use in the slicer of your choice.
This wallet requires the following
-7 rivets - I use 8mm double cap rivets with an 8mm and 12mm shank, but you can use a range between 6mm and 10mm caps for this project. Here is an example - https://a.co/d/05kkWgbg -2 grommets - I used 3/16" eyelets found here - https://a.co/d/0ifc5cGE -TPU - I've used both 90a and 95a TPU -A 3D Printer - I have been using the Snapmaker U1 or the Prusa XL as they excel in multi color TPU printing. These can be printed on any 3D printer that can print TPU. They can be printed in PLA but are obviously, much less flexible. -A way to attach the rivets and grommets. A press will work, or the associated hand tools (hammer, punch, base)
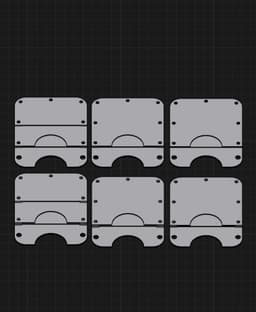
You can customize your own wallet using any combination of pieces. The only two vital pieces are the "back back" and "back front". There are three other styles, a tall panel, a tall panel with a cutout, and a short flat panel. Each of these have different variations if you want a little more space in each of those pockets (to put two cards instead of one, for example). If you would like a multicolor design on a wallet, you'll need a printer that can use more than one color of TPU at a time. You can read more information about using STL and SVG modifiers in the included generic PDF guides.
I like the textured effect that the PEI build plate offers, but it can be made holographic by using a PFLAT sheet. If you are using a PFLAT sheet, it's best to use isopropyl alcohol to aid in the removal of the printed pieces.
Stack up the pieces that you'd like to use, then choose a rivet that extends between 1-3 mm past the top of the material. If the post is too long, it will jut off to the side when the cap is applied. Too short, and the cap doesn't have enough material to balloon inside of it. I have a small rivet press, but you can use the hammer method as well (they usually come in the rivet kits) I also use a grommet press to secure the 3/16" grommets into the two top holes. You can attach a cord or chain to these grommets to attach to a belt loop or around your neck, for example.
I've made a short instructional video that will help along the process.
If you have any questions, please reach reach me at kaizen3dprints@gmail.com
License Summary: Personal use only unless you hold a Commercial License. No resale or sharing of files. Selling printed models allowed only with an active Commercial License.
Vertical TPU wallet with rivets and grommets

Abstract art #2

Hand sewn vertical wallet

256x256 PFLAT sheet holder

Massage Roller

Spinning gear fidget ring
Flat band fidget ring

Large TPU foldover bag

Adjustable Strap (48"/122cm max length)

Small Foldover Bag
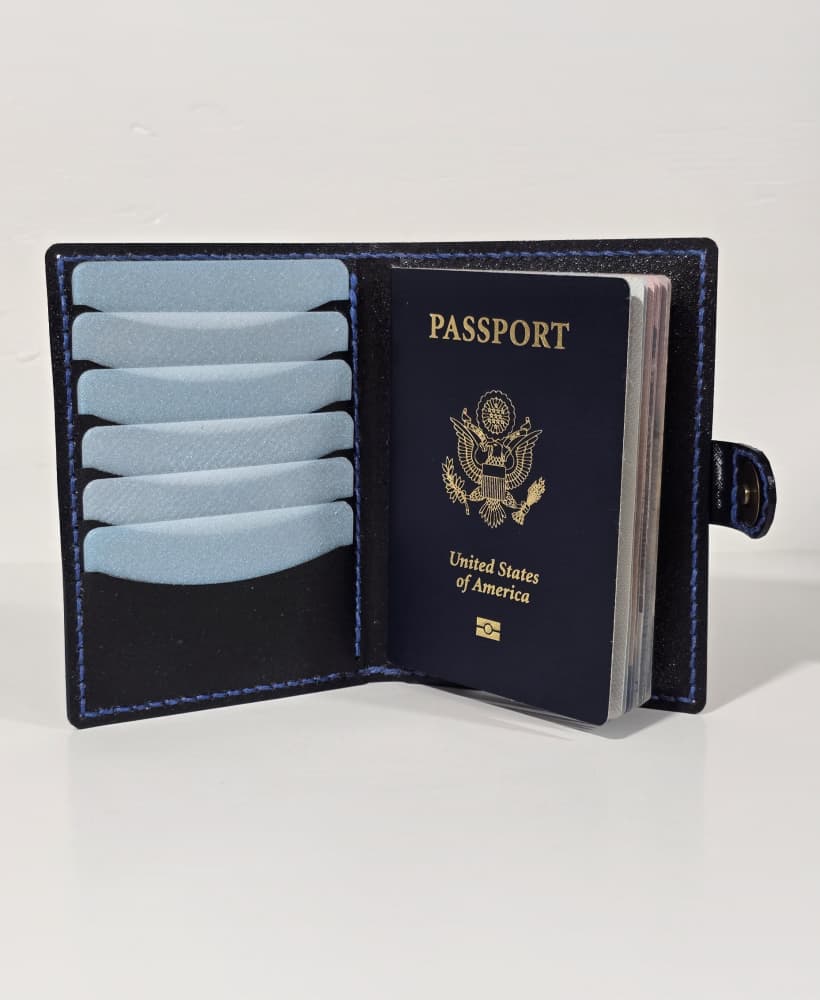
Customizable Passport Wallet

Tall TPU Bifold Wallet for sewing

Vertical Wallet for Chicago Screws

Square Grid Negative Modifier

Hex Grid Fabric Modifier

Heart Pixel Pattern Textile and Modifiers

Flippy heart textile and modifiers

Foldable TPU bag sized for Snapmaker U1

Crossed Basket Weave Textile / Modifier

Thin Beaded Textile / Modifier
