


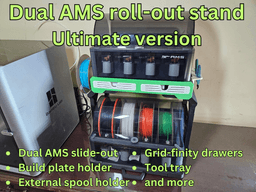


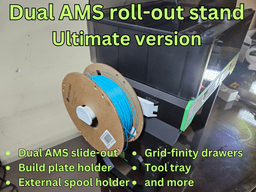
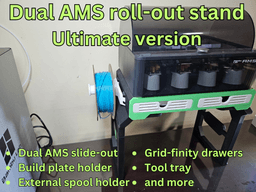


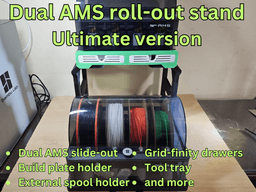


DUAL AMS 1 AND/OR AMS 2 PRO SIDEKICK STAND
The Sidekick works with the AMS 1 and AMS 2 PRO. The base of the AMS 1 is slightly larger and wider than the AMS 2 PRO so there will be a small gap of a few mm if using the AMS 2 PRO but this will not affect the functionality of the Sidekick.
NEW: The model offers two types of drawer front, vertical and slanted. The main print profile has the slanted drawers as I felt it would add a little something to the design. If you want vertical drawers please use the print profile "BL non-slanted drawers.3mf"
NEW: Added the side without logo. For opposite side you will need to mirror this part. File name is "Side - no logo"
This model is for a stand for a Bambu Lab AMS 1 and/or AMS 2 PRO with a roll-out carriage for a 2nd AMS below (V1 or V2). You can also use the bottom portion for a filament rack.
The Dual AMS stand offers you the ideal solution and features:
Stack two AMS units (AMS 1 OR AMS 2 PRO) - the model features a screw-on slide-out tray to enable the bottom AMS to be rolled out for easy maintenance and filament change;
Two large drawers with GRID-FINITY style compartments (the compartments can be downloaded for free on MakerWorld;
Filament storage rack;
Build plate holder for two or more build plates;
Side mounted tool tray (can be can be downloaded for free on Maker World);
Side mounted External spool holder (can be downloaded for free on Maker World);
TECHNICAL SPECS AND INFO
The build requires about 1.75 spools of filament. PLA and PETG are fine. The design is very rugged so no need to use ABS or ASA. The assembled height is a little under 600 mm (24 inches) with closed lid If you wish to use the pull-out drawer you will need 4x no. 6 wood screw 5/8" long (metric: 3.5mm dia x 16mm long)
INSTRUCTIONS
IMPORTANT: I have included a print profile (3mf file) for the base unit with all the required parts. I strongly recommend you use this as the parts are correctly oriented and optimized for printing. I have painted support and it is designed to use TREE MANUAL settings.
I have also uploaded individual STL files for the parts.
ASSEMBLY
A Gif assembly video with the model description photos shows how to assemble the Ace-overhead. I also uploaded a zip with the assembly photos.
LINKS FOR ADD-ONS
All add-ons are uploaded to Maker World and available for free download.
External spool: https://makerworld.com/en/models/1260510-external-spool-holder-for-dual-ams-sidekick-stand#profileId-1284878
Tool tray: https://makerworld.com/en/models/1260525-tooltray-for-dual-ams-sidekick-stand#profileId-1284902
Modular tool tray: https://makerworld.com/en/models/1260537-modular-tooltray-for-dual-ams-sidekick-stand#profileId-1284919
Add-on tray: https://makerworld.com/en/models/1260532-side-tray-for-dual-ams-sidekick-stand#profileId-1284912
Drawer compartments: https://makerworld.com/en/models/1260535-drawer-inserts-for-dual-ams-sidekick-stand#profileId-1284915
DUAL AMS 1 AND/OR AMS 2 PRO SIDEKICK STAND

D3P RISER FOR QIDI MAX 4

Creality SparkX i7 D3P bottom riser

Creality SparkX i7 D3P overhead mount
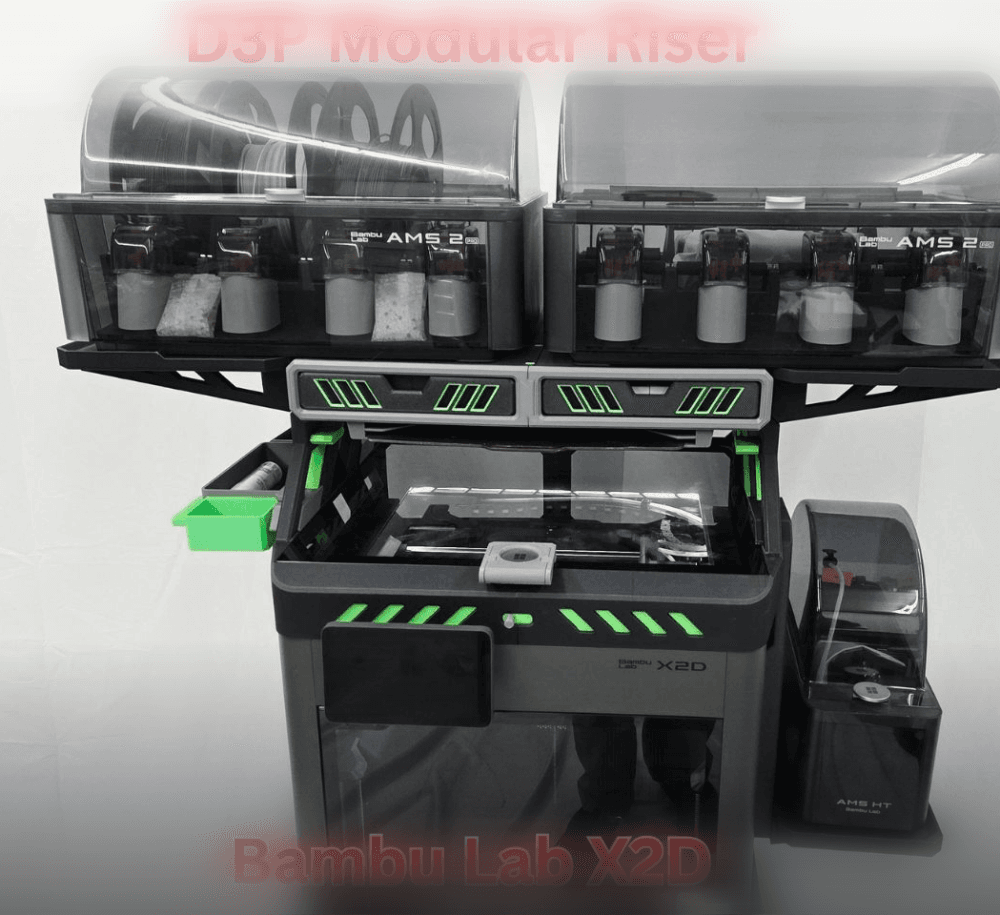
D3P riser for Bambu Lab X2D
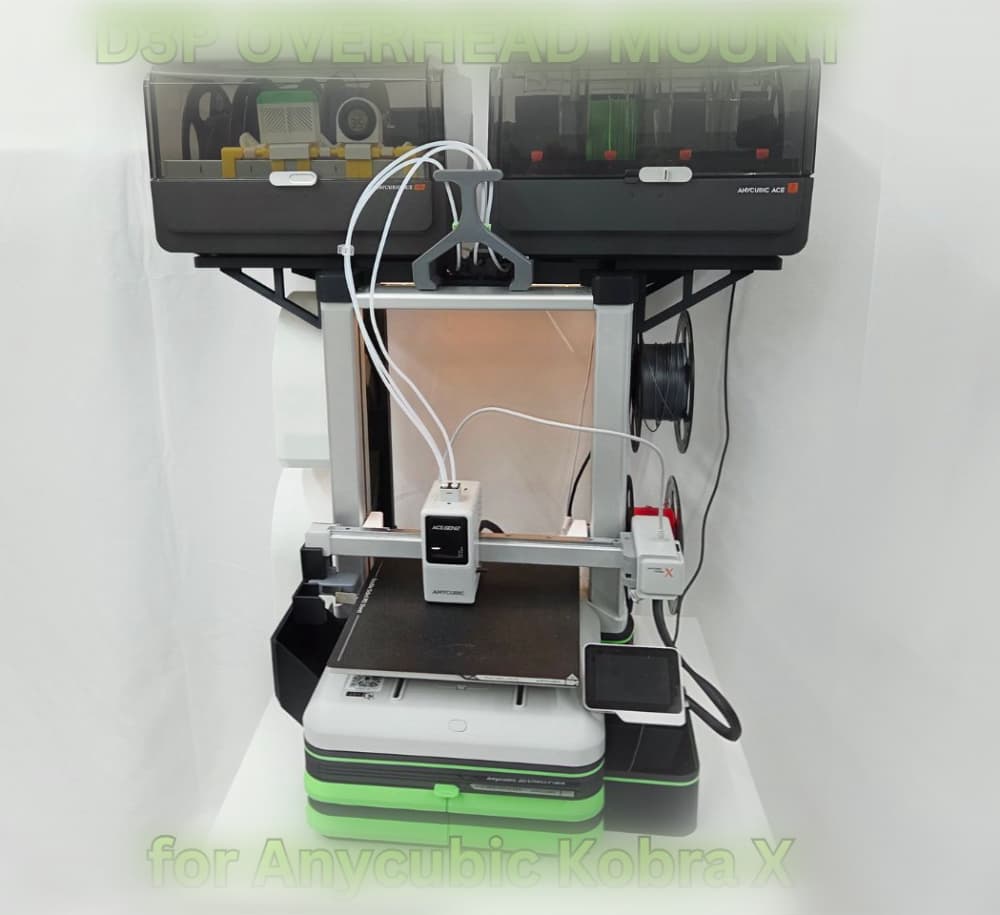
D3P Overhead mount for Anycubic Kobra X and Kobra 4
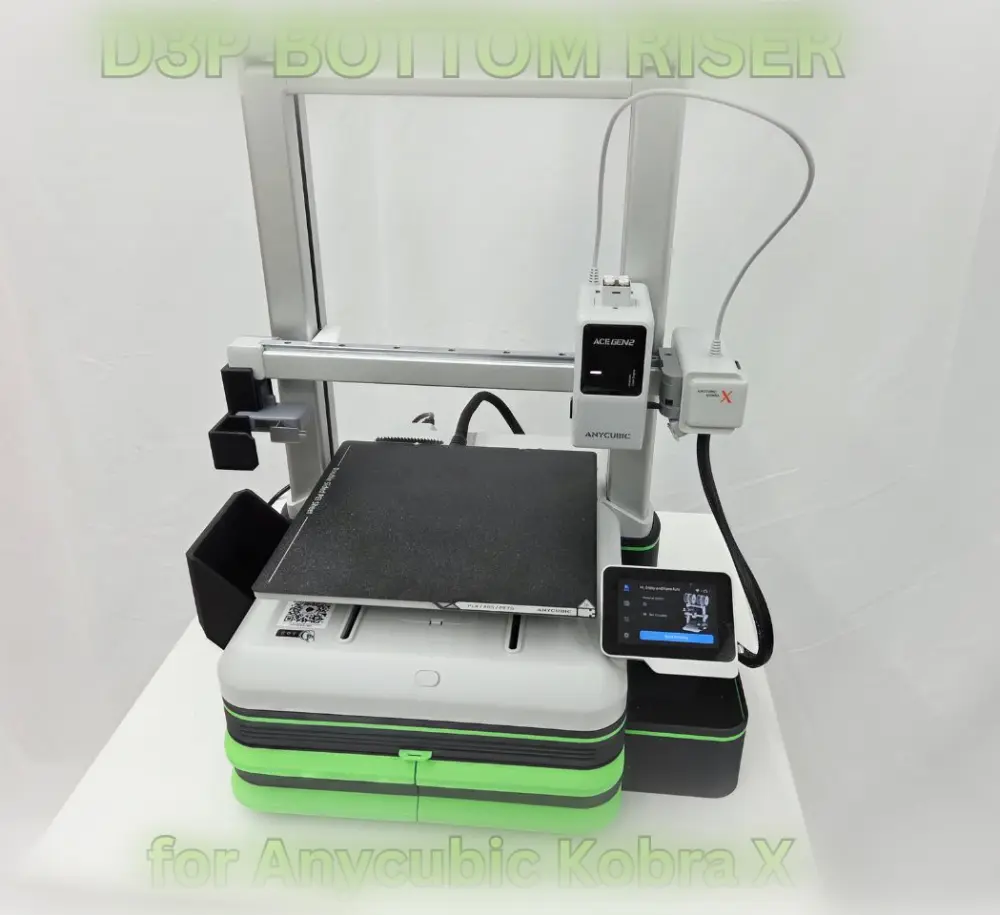
D3P Bottom riser for Anycubic Kobra X and Kobra 4

D3P riser for the Anycubic Kobra S1 Max

D3P riser for K2 SE
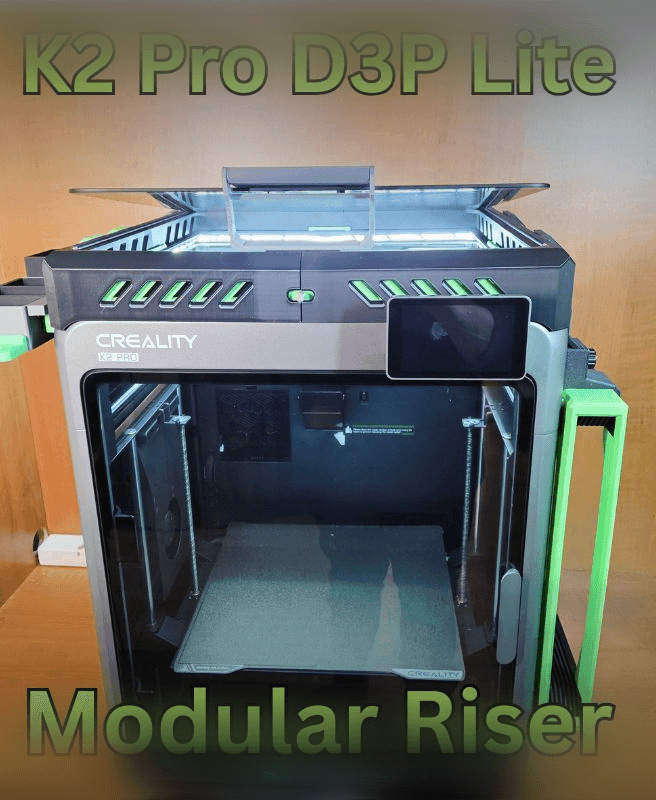
K2 PRO D3P RISER LITE
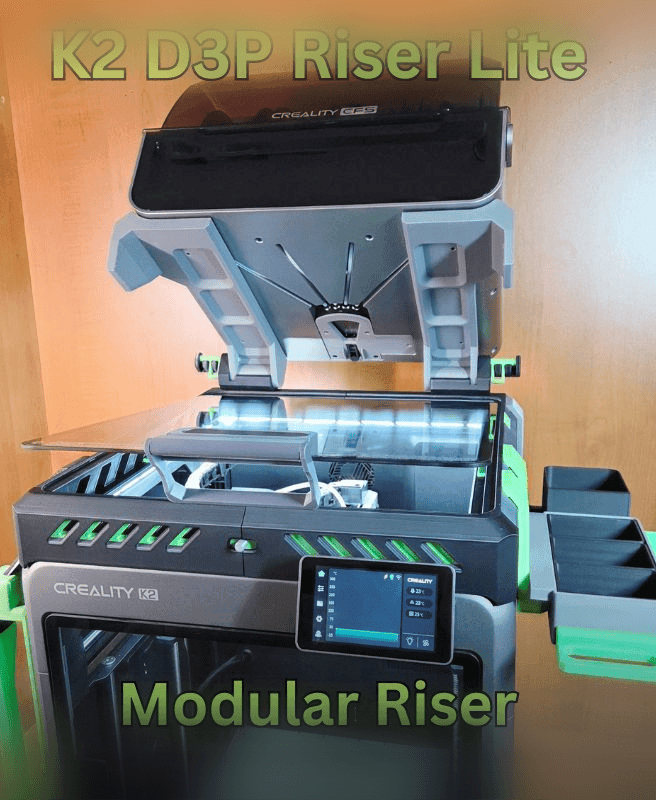
D3P K2 LITE RISER
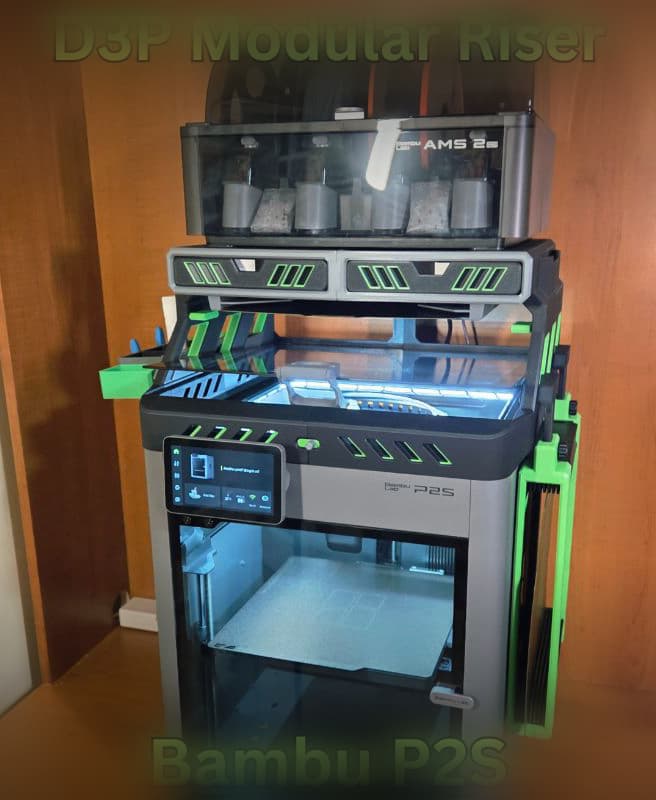
D3P riser for Bambu Lab P2S
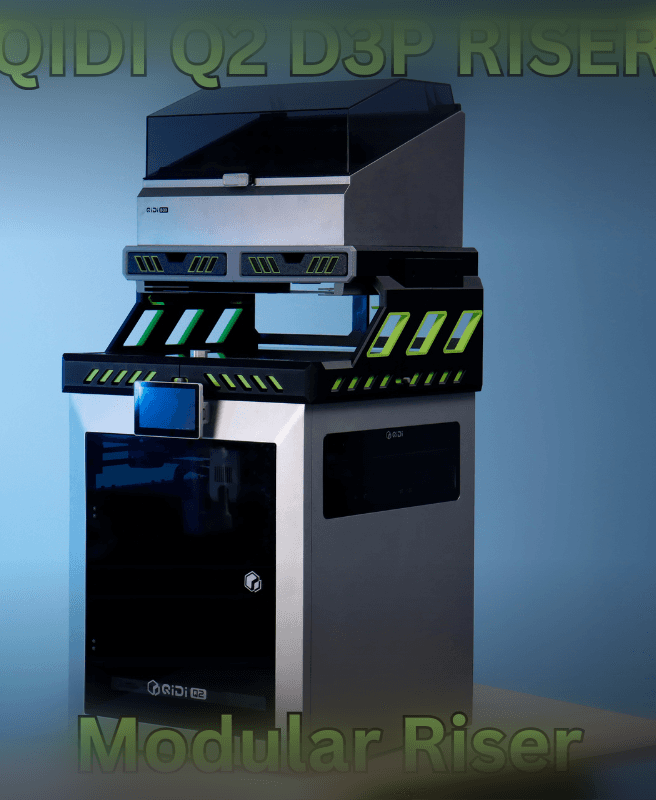
Qidi Q2 D3P Riser
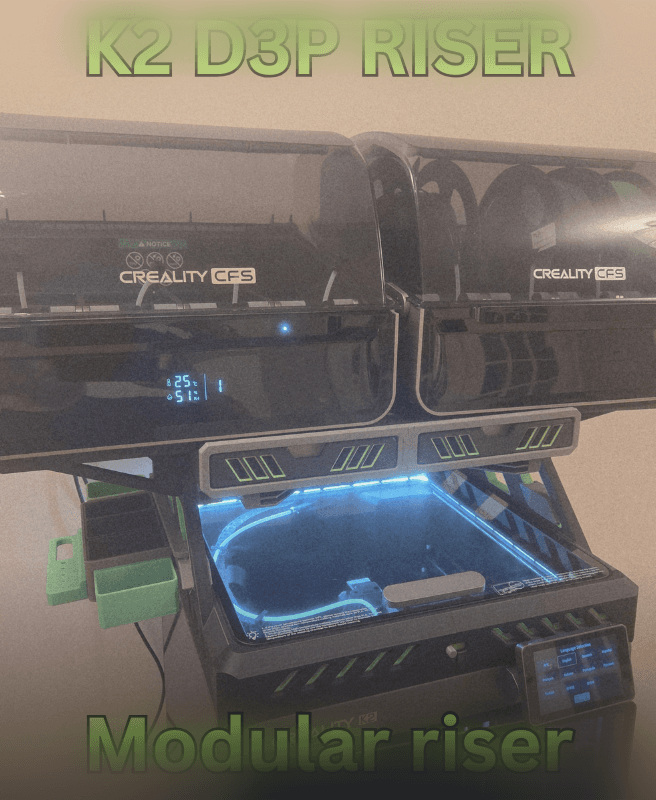
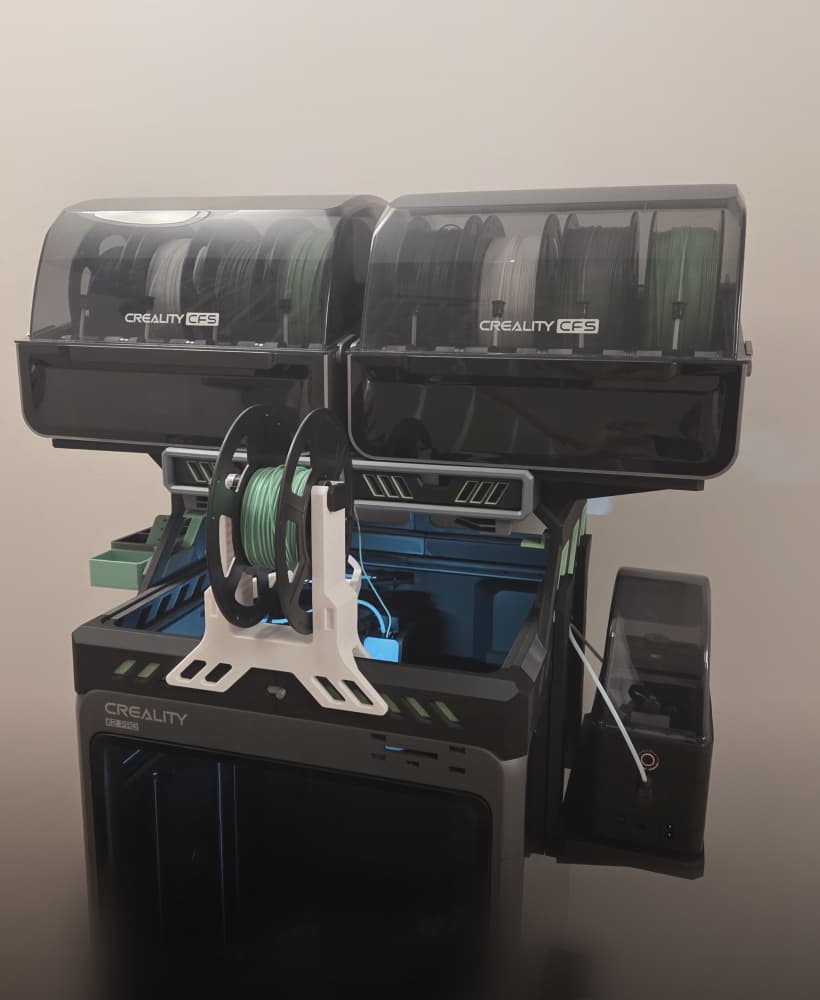
Creality K2 - D3P riser
CREALITY K2 PRO D3P RISER
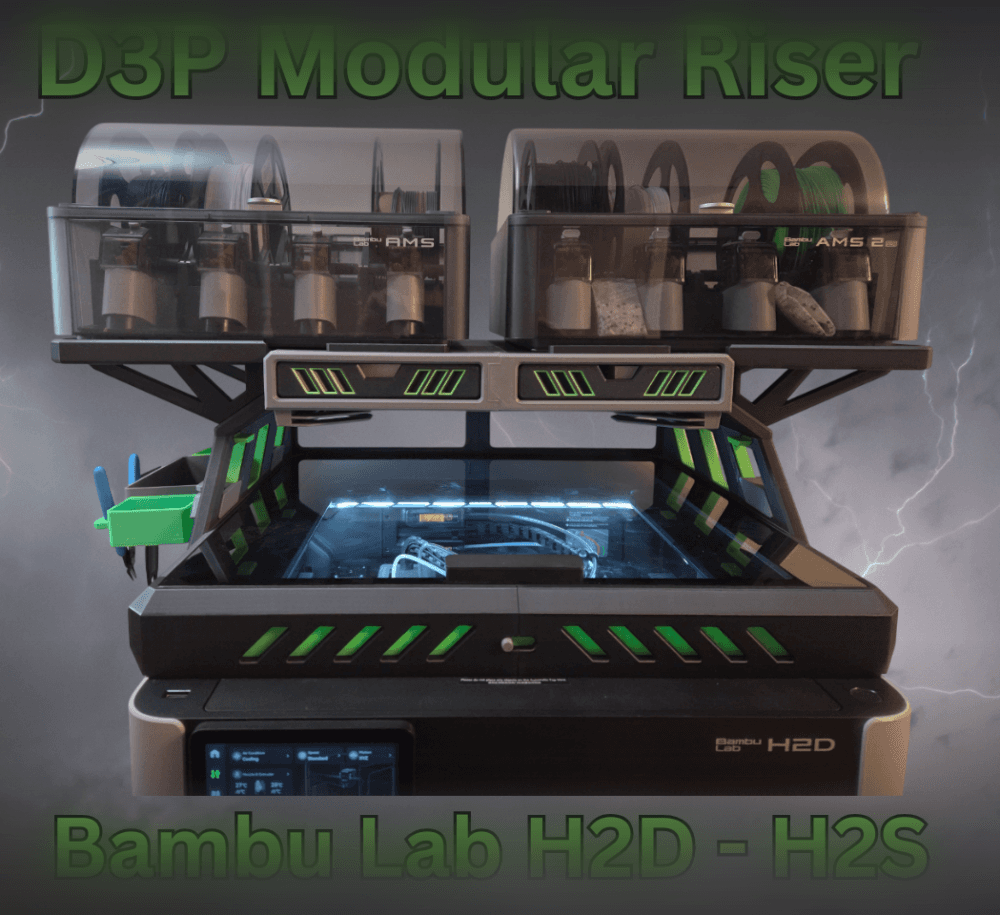
Bambu H2D H2S H2C D3P Riser

D3P riser for K1 K1C K1E
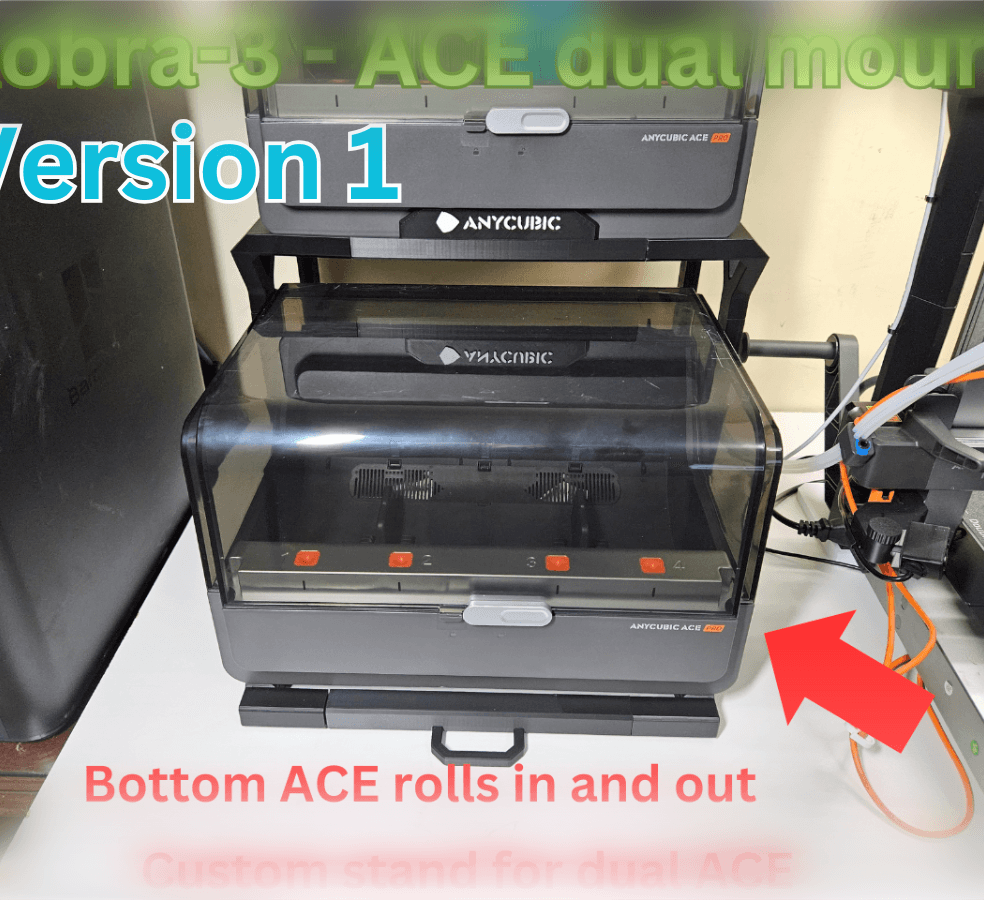
KOBRA-3 DUAL ACE-PRO STAND
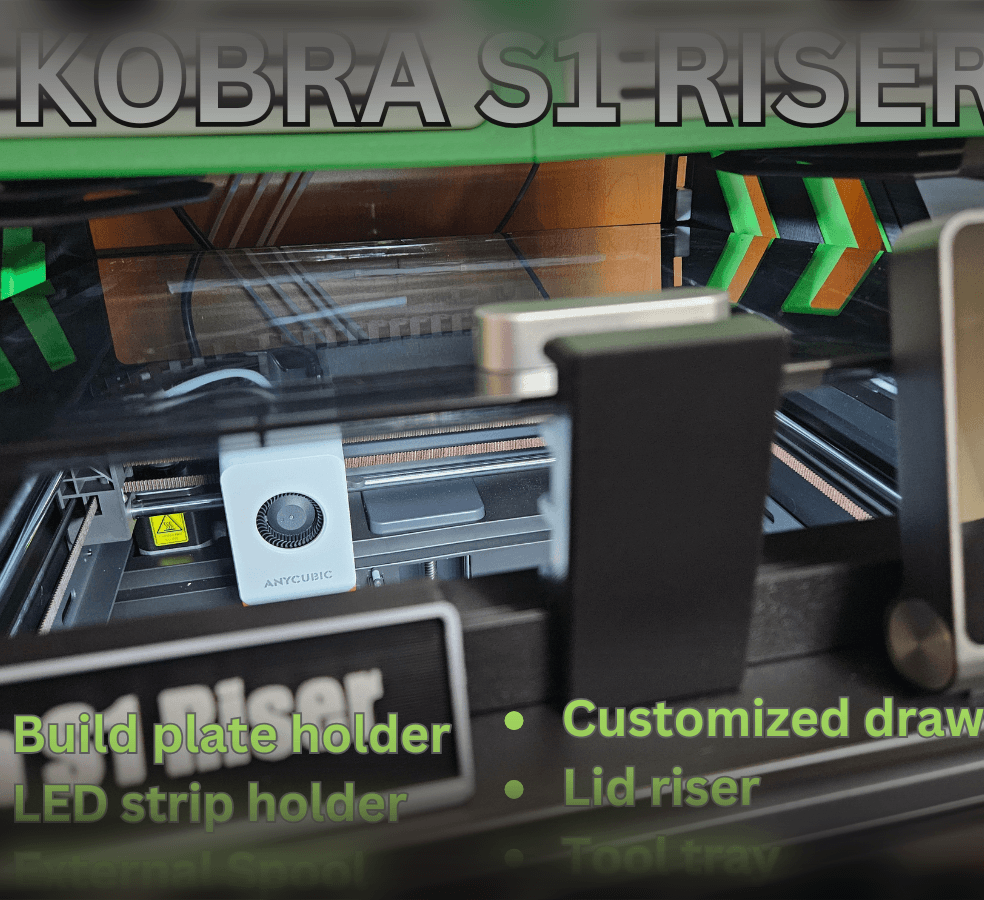
Anycubic KOBRA S1 RISER

Anycubic Kobra S1 Riser LITE

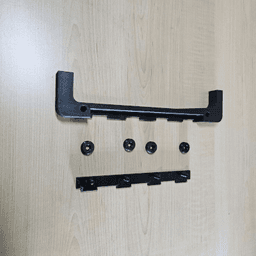
What I forgot: what are plates 9 & 10 ? They are not mentioned in the instructions. And the pins from plate 1 are shown, but not there they are used.
The pins from plate 1 are used to secure the two cabinet (where the drawers are) together as illustrated in photos 19 and 20. Thank you
Plates 9 and 10 are for a spool rack. If fits under the stand should you only wish to use it with an AMS on top.
I bought this a week ago and now noticed that on plate 14 one of the pins is 1 mm larger than on the other side and does not fit. Otherwise the fit is very good to ok on my H2D printer.
The pins are all the same size and should fit. This model has been out for some time and printed many times and this issue has never came up. Maybe verify your settings. Also could it be you are looking at the holes where to attach the screws for the AMS.