


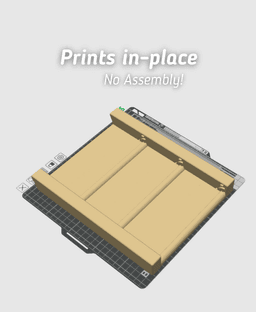


Display Stand - Small Display Shelf with 3 Tiers - Print in Place with no Supports
Best 3D Printed Display Stand?
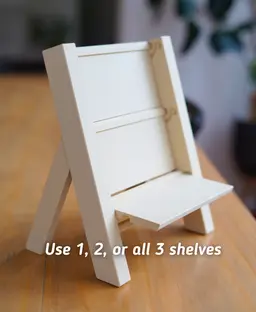
This display stand is fully print-in-place with no supports, stores flat, and locks into place. Great for displaying mini prints at home, or at craft fairs. It has 3 tiers that you can fold up or down depending on your needs.
This was designed specifically to show of Ludo models! You'll find that you can fit any Ludo model neatly on this shelf. This design was meant to help 3D print sellers display their prints at craft events, BUT its turned into a great display shelf in general!
Print in Place The entire stand can be printed on a 250 mm (or larger) print bed with no supports. It comes off the build plate fully functional, with no cleanup required! Just fold the legs and shelf out and you're good to go.
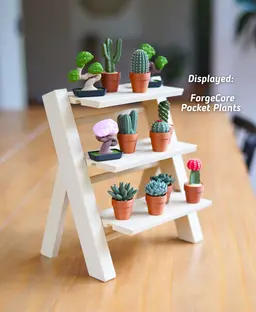
What are those Plants?!? The plants shown in the image are from the ForgeCore Pocket Plants collection. A collection of mini plants that are clickers, spinners, and fidgets.
Filaments I Used: Bambu Wood White Oak


Display Stand - Small Display Shelf with 3 Tiers - Print in Place with no Supports

Wobbly Walrus - Articulated Fidget Walrus

Corn dog Spinner

Munching Manatee - Articulated fidget Manatee

Cinnamon Roll clicker

Furry Ferret - Articulated Fidget Ferret

Mint Chocolate Chip Clicker

Huge Humpback - Articulated Fidget Whale
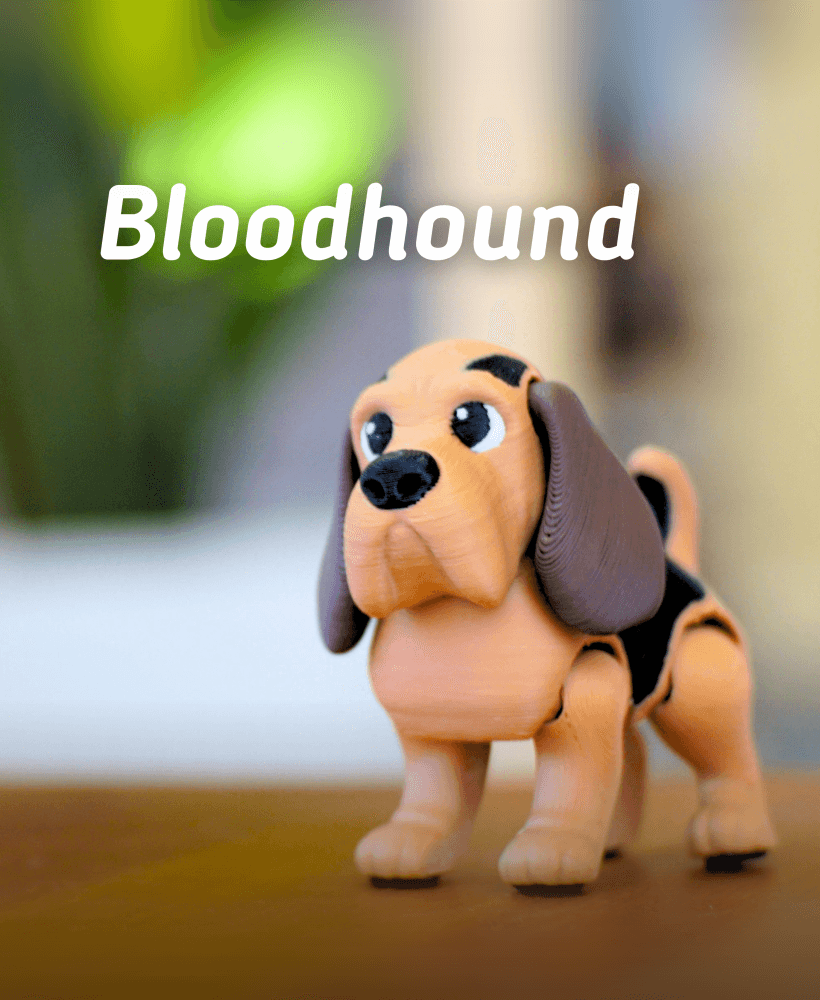
Bloodhound - Articulated fidget Dog

Basset Hound - Articulated Fidget Dog
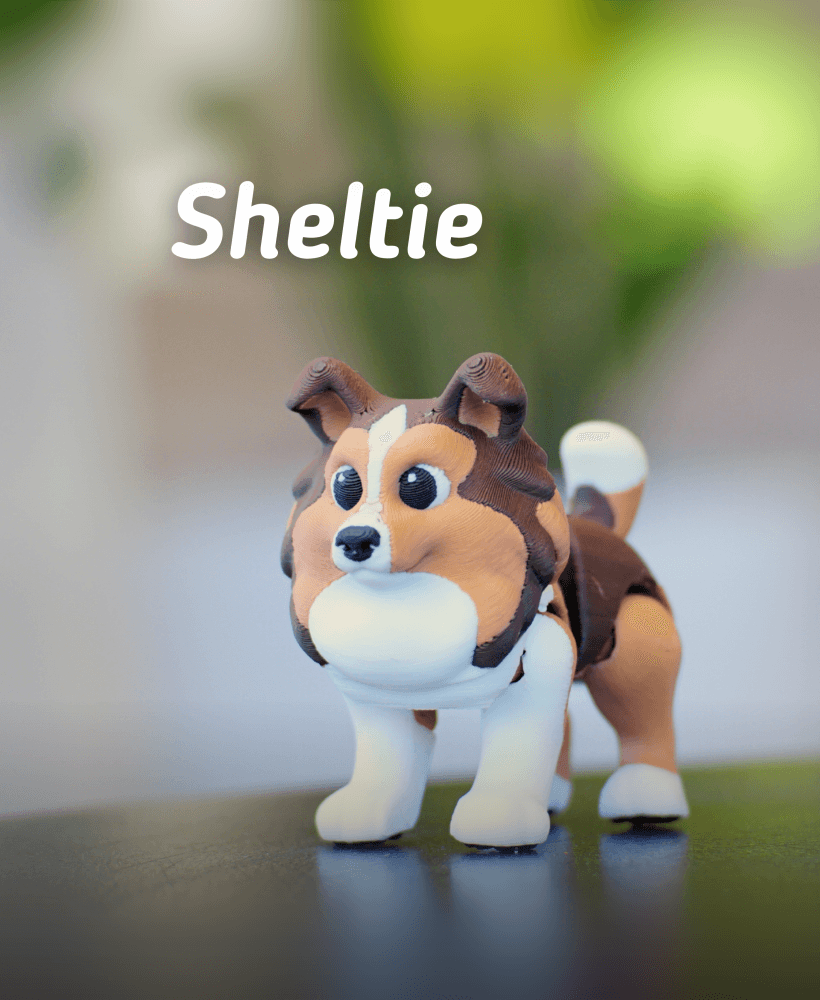
Ludo Sheltie - Articulated Fidget dog

Jumping jackalope - Articulated Fidget Jackalope
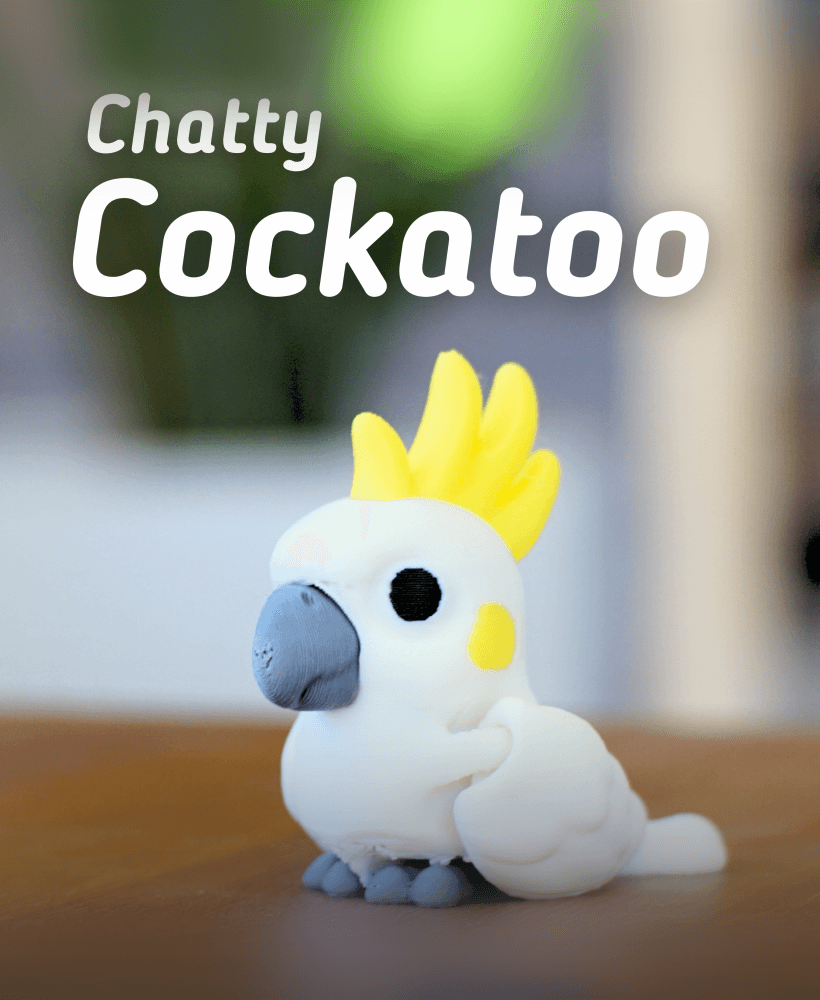
Chatty Cockatoo - Articulated fidget Cockatoo
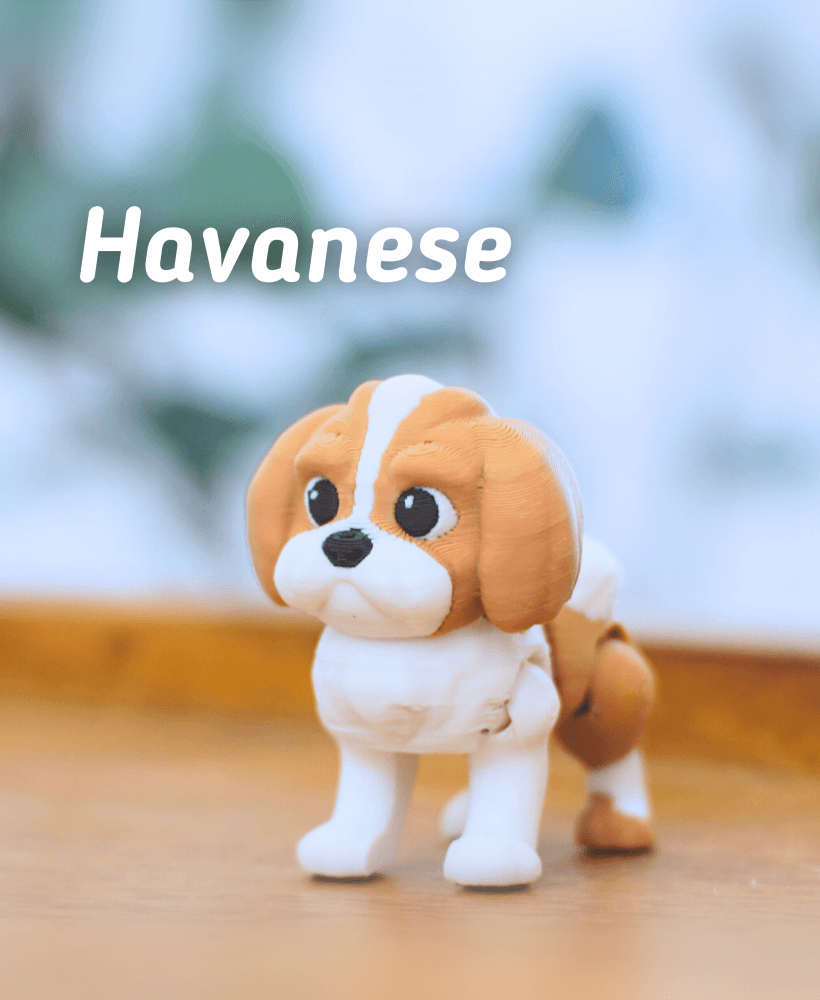
Ludo Havanese -Articulated Fidget Dog

Labradoodle - Articulated Fidget Dog

Ludo Pug - Articulated fidget dog

Popsicle Clicker

Buck-Tooth Beaver - Articulated fidget beaver

Ludo Boarder Collie - Articulated Fidget Dog

Ludo Springer Spaniel - Articulated Fidget Dog

I had to scale to 99.63% to fit onto my Prusa Mk4
Any chance this will mess it up?
There is a chance that the tolerances can be messed up by scaling down but I have had others say that downsizing worked just fine for them. I just can't guarantee anything other than the file, as it is uploaded.
Unfortunately the legs are just a tad too tight to pull out with the current tolerances, I have my printer tuned to .1 so it shouldnt be a problem but scaling even that very small bit puts it out of alignment.
Is it possible to get the step files to adjust it?
Hi, there is a lot of bridging for this shelf. Is it possible that the bridging fused the legs to the steps? The stl files can be found in the 3mf file, you should be able to export them from there if you wish to do so.
The legs are fusing to the side of the walls not the top. The tolerance is too tight.
Converting this stl to a step leads to more problems so it's really difficult to modify.
Can this be scaled down without issues to fit a smaller build plate (220x220x220)?
I know this is late but I just finished printing this at 85.68% scale on my AD5M with a .4 nozzle and .2 layer lines and 60% infill. It came out perfectly, just be careful when initially separating the pieces(that's why i chose 60% infill for the added toughness just in case). Some areas did cut it very close in terms of tolerance.
I would not recommend scaling this down as it may mess with the strength and tolerances of the shelf. That being said, you could give it a try if you really want to.
Do you have any additional suggestions for improving print quality? Having layer lines along the legs and a rough top surface of the shelves. Using Bambu P1P/AMS with Bambu Matte Desert tan filament. Using 0.20mm standard print settings.
Hi. I only realise the size after printing. Any chance you can make a much bigger one? 😭😭😭
This is as large as it can be made but also print in place. so this is the largest we can make it for a normal size printer
Well that was a waste of a third of a spool of filament. Printed the 3mf file on my Bambu with no modifications. The gaps between parts of the model are way too tight and it came out a solid brick.
What printer and filament are you using? This design has 0.2 mm clearances for horizontal gaps, and 0.3 mm for vertical gaps. Which is the standard sized gaps most designs use
I recommend checking your tolerances using a model like this
If you arent able to get 0.2 mm working its likely your flow rate is set too high. Make sure you do a print before hand and calibrate your flow rate for the filament you're using