

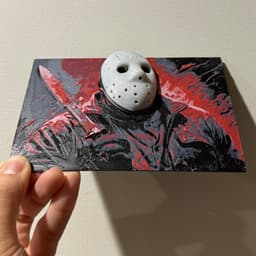


Friday the 13th Jason with Pop-Out Mask - Hueforge Print
236 downloads · 3 years ago · **Sleep, if you dare!**
This is a combined print that utilises filament painting as well as classic
Sleep, if you dare!
This is a combined print that utilises filament painting as well as classic 3D printing methods. The included 3MF has all the settings already applied if you are using the profile attached, but if you are downloading the raw files, please follow the instructions below.
Print Instructions
- The print swaps filaments 4 times, with the final time being the colour of the mask that ‘pops out’ from the print. In my print, I used a 5th colour (marble), but you can use what ever colour you want, or even reuse the white.
- I printed with supports for the mask, but depending on your printer, you may get away with not having supports. I also altered the mask to be printed with 5% infill.
- The mask will have a small gap at the top to remove the supports. Print layer swaps below:
Filament Swaps
Print at 100% infill with a layer height of 0.08mm with a base layer of 0.2mm.
Filaments Used:
- PLA Kingroon Black Transmission Distance: 0.4
- PLA+ eSun Grey Transmission Distance: 1.4
- PLA META Sunlu Red Transmission Distance: 4
- PLA Kingroon White Transmission Distance: 8
- PLA CC3D Marble Distance: 5.4 (this is the mask!)
Swap Instructions:
- Start with Black
- At layer #12 (1.08mm) swap to Grey
- At layer #15 (1.32mm) swap to Red
- At layer #19 (1.64mm) swap to White for the rest.
- At layer #25 (2.04mm) swap to Marble (this is the mask!)
Friday the 13th Jason with Pop-Out Mask - Hueforge Print
236 downloads · 3 years ago in

Shelf Studs - Cause you can nail 'em!

Barty the Gargoyle

Apple Pencil 2 Jig for Eufymake
.JPG&w=3840&q=75)
Navessa Allen's Into Darkness Trilogy Inspired Book Nook

Game On Inspired Pen Holder

Gothic Window with Ledge

Oversized Mewtwo Pokemon Card - Hueforge Hybrid

Vi (Arcane) Back Tattoo - HueForge Print

Fortnight - TTPD Christmas Ornament

Caught Up Inspired Helmet/Pen Holder

Reading Challenge Book Trophy

WoodForge - Aztec Style Star Wars Print

Taylor Swift - Life of a Showgirl Flatforge

A Lil Reading Ghost

Terrasen, Velaris and Lunathion Shelf Signs

Babel Tower and HueForge Map inspired by Babel by RF Kuang

Lights Out Inspired Skull / Pen Holder
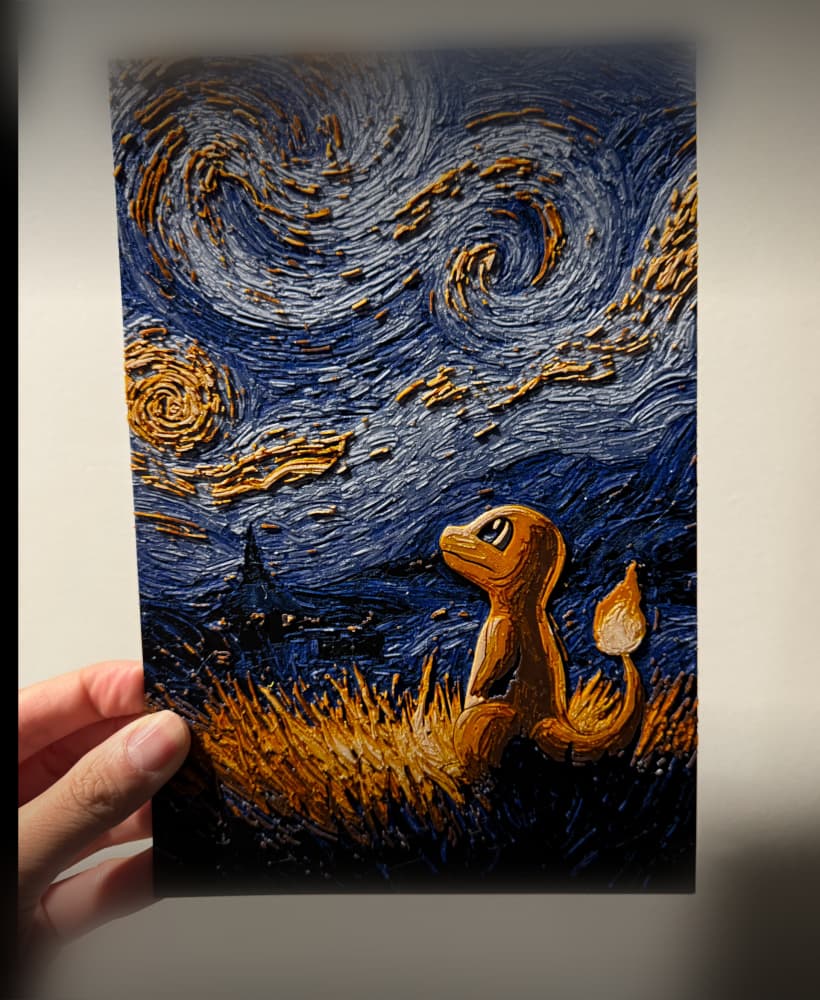
Starry Night Charmander

Starry Night Gengar

Waiting for an 200x200 version :)