

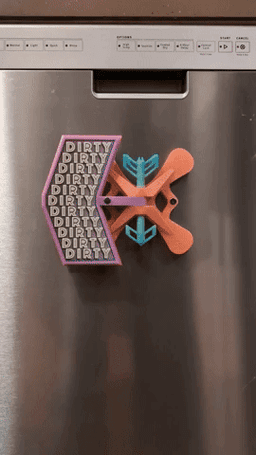


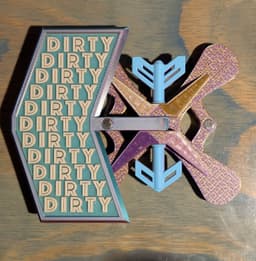


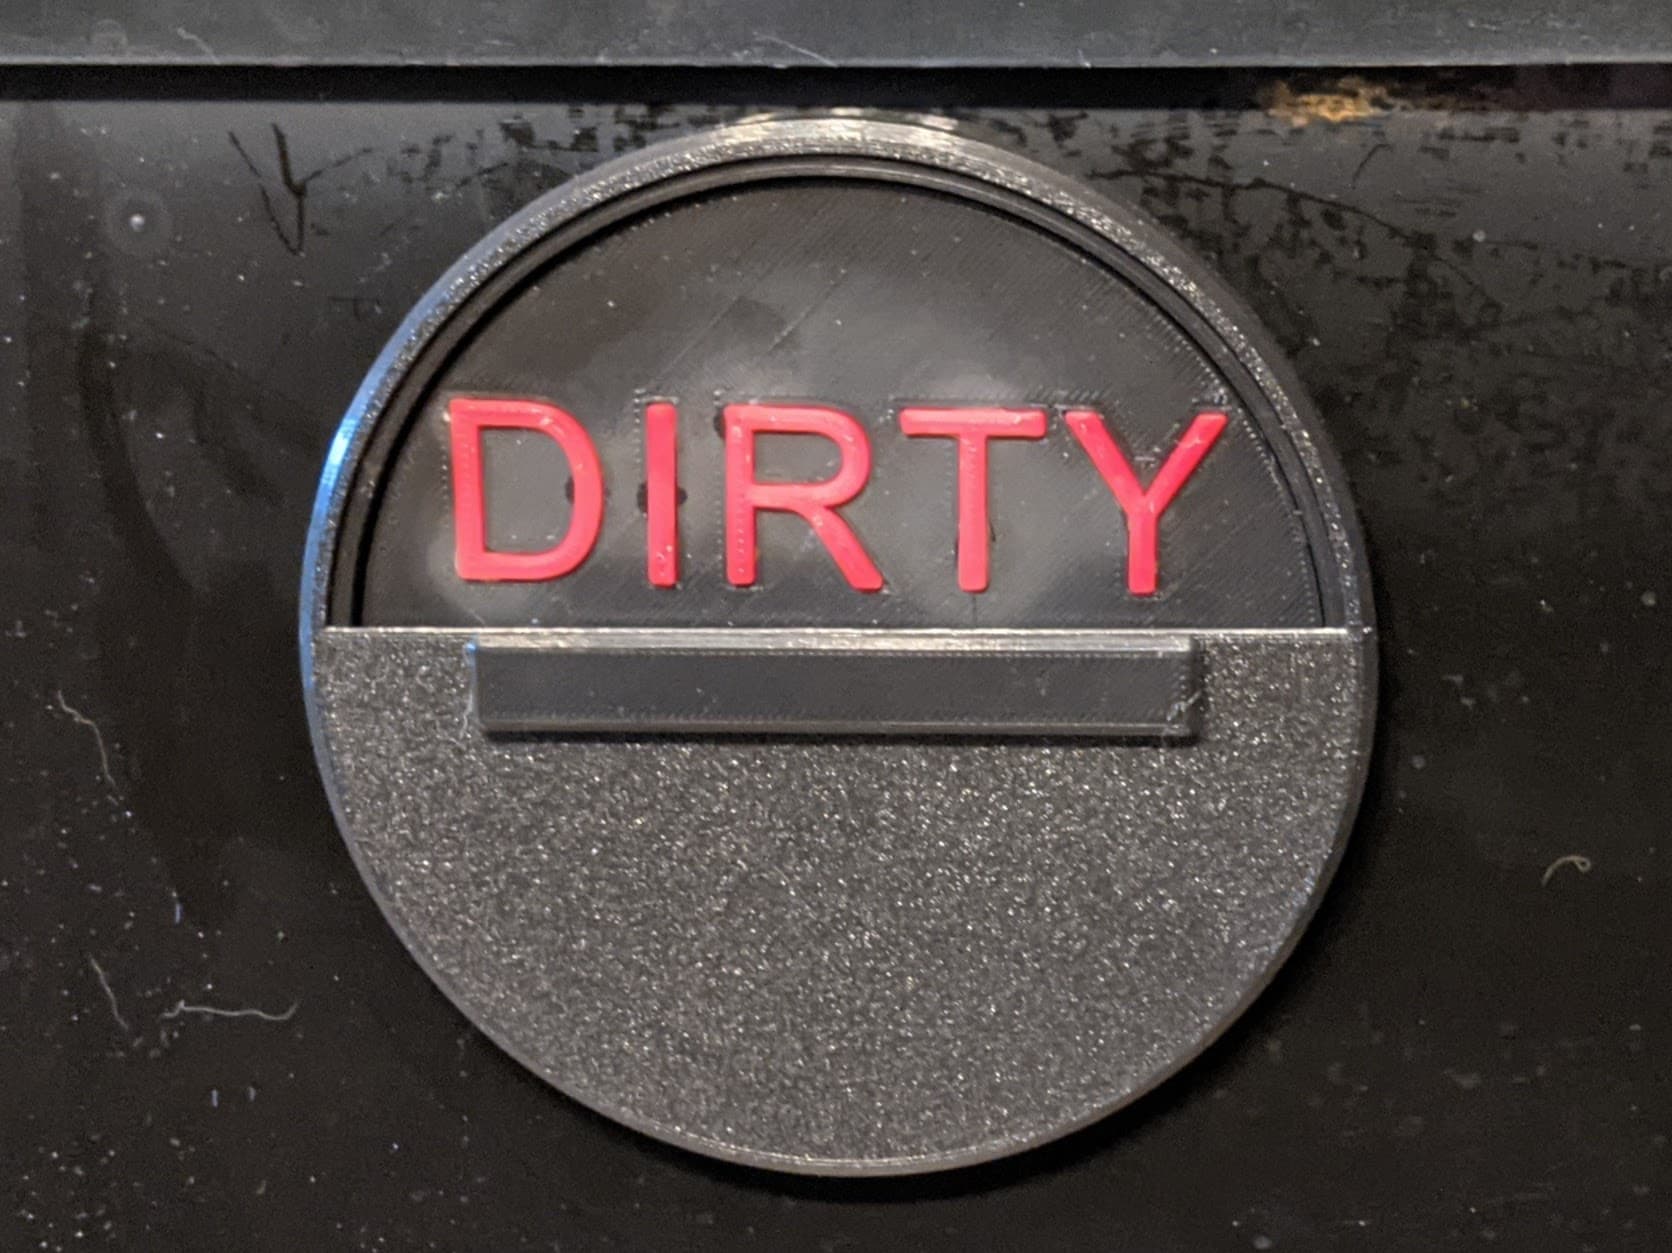
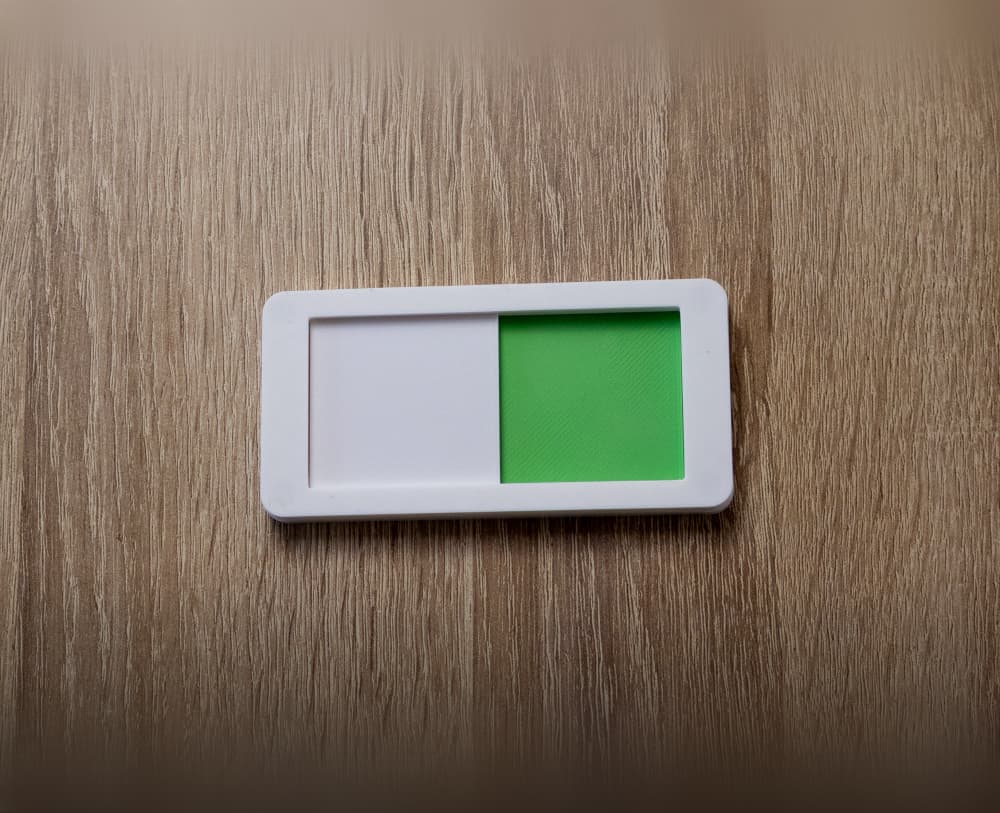
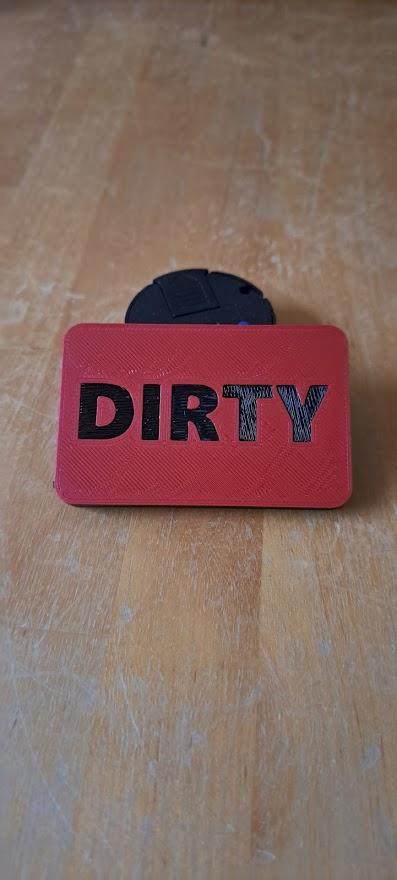
Dishwasher Status Indicator ||CLEAN // DIRTY||
This dishwasher status indicator was a fun first-project I started to teach myself CAD and familiarize myself with 3d printing. Hope y'all like it. Feel free to message me if you have any questions or ideas for improvement. I will most likely be making a version 2 at some point, so it'll be nice to get some feedback.
Features: Positive Clicking Action: A tactile, over-center mechanism guided by magnets.
Large & Easy to Read: Clear, legible text lets you know the status from across the room.
Highly Customizable: The multi-part design allows for endless color combinations.
Strong Magnetic Mount: Uses eight powerful N52 magnets for a secure hold and snappy action.
Required Hardware: Magnets: 8x N52 Neodymium Magnets, size 3/8" diameter by 1/4" thick
The specific magnets I used can be found here.
Glue: A small tube of Cyanoacrylate (Super Glue).
Printing Instructions: The included .3mf file has all parts already oriented for optimal printing.
Material: PLA was used for the original, but any rigid filament like PETG should work.
Print Settings: The project file is set to a 0.16 mm layer height, but thicker layers have given me good results as well.
Walls/Perimeters: 3
Infill: 15
I used Ironing on the "CLEAN" and "DIRTY" label inserts to make the text pop a little better.
Supports:
Arrow Pieces (Fletching & Arrowhead): Auto-brim and auto-tree/organic supports are recommended.
Arm: This part has a small, custom-designed support on the center brace that should snap off easily. Do not add auto-supports to the Arm.
Magnetic Base, Label Inserts: No supports are needed.
Assembly Instructions (Read Carefully & See Photos)
Follow this sequence for a smooth assembly.
-
Start by removing the small, custom support piece from the center brace of the Arm.
-
Orient the Magnetic Base so the diamond-shaped opening of the clevis is facing you. Place the Arm into the center of the clevis, aligning the holes.
-
Take the Fletching piece and insert it from the top, passing through the Magnetic Base and the Arm. Apply firm pressure until it clicks into place and its flange is seated flush against the top of the clevis.
-
Insert the Arrowhead piece into the bottom of the clevis until it clicks into place. This piece is decorative plugs the hole at the bottom of the clevis.
-
If there is too much wobble or slop in either of the hinge pin pieces (fletching and arrowhead), you can add a small drop of super glue to the flanges and align them while it dries. Just don't get any super glue on the part of the shaft where the arm rotates.
⚠️ CRITICAL STEP: Pay close attention to magnet polarity! The attraction between the Arm and Base magnets creates the clicking action. If the polarity is wrong, they will repel each other, and the mechanism will not work.
-
Install the Arm Magnets: Start by gluing the first two magnets into the pockets on the marquis (the head) of the Arm.
-
Take a third, loose magnet and let it snap onto one of the magnets you just installed in the Arm. This loose magnet is now your guide for the correct polarity.
-
Swing the Arm over to one side. Guide the Arm and the attached loose magnet toward the corresponding open magnet pocket in the Magnetic Base.
-
Carefully pull the Arm back, leaving the loose magnet behind in the pocket. Remove the magnet without changing its orientation.
-
Apply a small drop of super glue into the pocket and permanently insert the magnet.
-
Repeat this entire process for the other side. When finished, the Arm should now be attracted to the Base on both sides.
-
Install the Mounting Magnets: Glue the final four magnets into the recesses on the back of the Magnetic Base. The polarity of these magnets does not matter.
-
The "CLEAN" and "DIRTY" Label Inserts should press-fit firmly into their openings on either side of the Arm's marquis.
One Last Thing: This was a fun project for me, and I'd love to hear people's ideas for improvements and It'll make me really happy to see this project come to life in someone else's hands.
Also, if people show enough interest, I'll release the Fusion files for the label inserts, so people can make their own.
"Ether Item Works, 2025. This work is licensed under a Creative Commons Attribution-NonCommercial 4.0 International License."
Dishwasher Status Indicator ||CLEAN // DIRTY||

Dishwasher Status Indicator
Emotional Dishwasher Status Indicator
Dishwasher Indicator
Dishwasher status slider, magnetic

Clean Dirty Dishwasher Magnet

Reversible Do Not Disturb Desk Sign – 3-Sided Work Status Indicator

Magnetic Dishwasher Sign - CLEAN | DIRTY
.gif&w=3840&q=75)
Dishwasher Dial (Clean/Dirty) Magnetic

Big Snappy Indicator Switch

LGP Self-Watering Tray — Modular Bottom Watering Reservoir for the Logical Grow Platform
.gif&w=3840&q=75)
Diswasher Sign Clean - Dirty / Easy Print

dishwasher sign

Practical Condition Markers for DnD Figures
Dish Washing Sign
Ender 3 Cover and LED Indicator
Clean/dirty dishwasher sign

Restroom In Use/Open Sign – Magnetic Slide Mechanism

Electric Eel Wheel 6 Battery & Tripod Base STL File

Thermal Detonator • Star Wars Cosplay Prop
