Art Deco Fan Desk Organzier - Noir Edition
Some desk pieces just sit there. This one watches.
Shaped in the bold stepped‑fan silhouette of late‑1930s Deco, this organizer rises like a shadowed skyline under a lone streetlamp. Its lines are sharp and deliberate, the kind you’d expect to find in the office of a private investigator who keeps his blinds half‑closed and his coffee strong.
The front panels carry a leather‑textured finish, the kind you’d see on a well‑traveled valise or a case file that’s been opened one too many times. It adds warmth, grit, and just enough class to make you wonder who sat at this desk before you — and what they were working on when the trail went cold.
Designed for pens, pencils, scissors, and the tools of anyone who works late into the night, this organizer brings the mood of a noir bureau, a radio station after hours, or a detective’s cluttered desk where the truth is always one drawer away.
Whether you’re a maker, a writer, or someone who appreciates a little mystery with their organization, this piece delivers the right mix of Deco elegance and noir atmosphere.
What You Get:
-
STL files for the full organizer.
-
Leather‑textured front panels for authentic 1930s character.
-
Clean geometry optimized for easy printing.
-
No supports required on most FDM setups.
Printing Notes:
-
Recommended layer height: 0.16–0.20 mm.
-
Print the body in a bold or Bakelite‑inspired color for period accuracy.
-
Print the leather panels in brown, oxblood, or dark tan for maximum noir mood.
-
Panels press‑fit or glue depending on your tolerances.
Who It’s For:
Anyone who wants their desk to look like it belongs in a 1937 detective’s office, a late‑night broadcast booth, or a smoke‑filled newsroom where the work is serious and the hours are long.
3D printing settings:
Resolution: 0.16mm - 0.24mm Infill: 15% - Grid First layer speed: 25mm/s First layers: 2 Brim/Skirt: Brim recommended for leather panels. Support: Optional, tree/organic
Materials:
Red Copper Silk PLA or Bronze Silk PLA Chocolate Matte Brown PLA
Instructions:
- Print Parts (X2 denotes printing two)
- The leather side panels need to be glued on.
- The other leather panels can be pressed into place by placing the top in first and then pivoting and pressing the part in place.
Note: Pay attention to orientation and be sure that the leather textured side of panels face outward. They will be in the same order on both sides.
Art Deco Fan Desk Organzier - Noir Edition

Fallout Dice Tower Can Holder

Towelie Diorama - South Park

Abstract Atomic Era Starburst Wall Decor
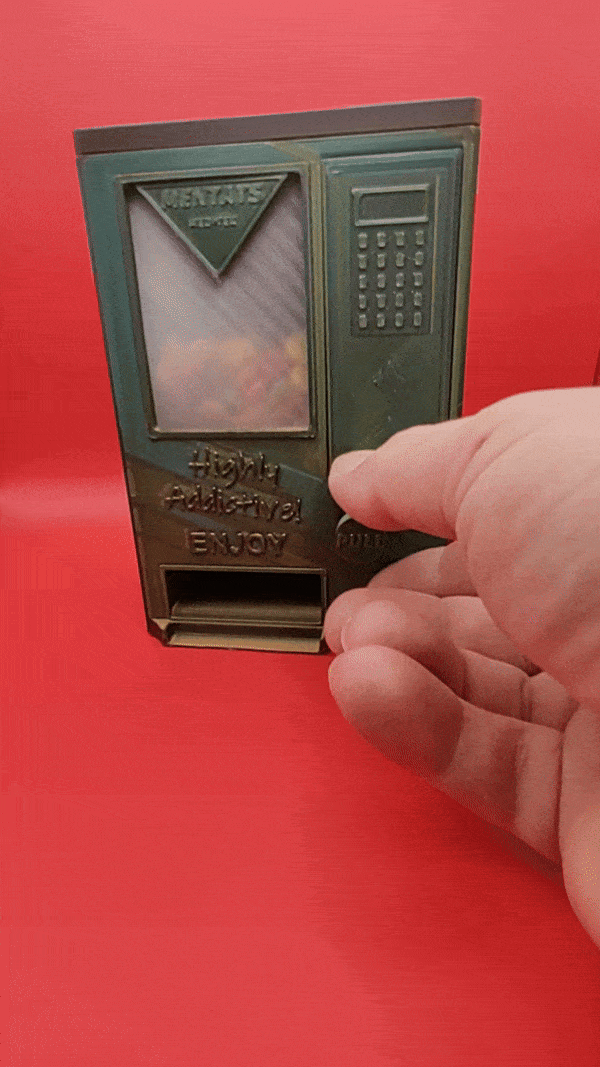
Fallout Mentats Vending Machine Candy Dispenser

Aviator Effects Box – 3D Printable Storage Case

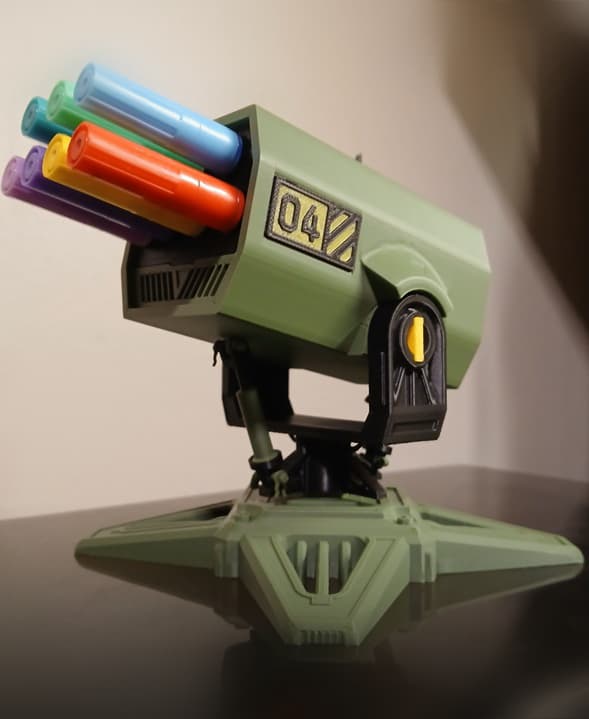
Missile Platform 24 Pen Holder

Fallout Securitron MkIII
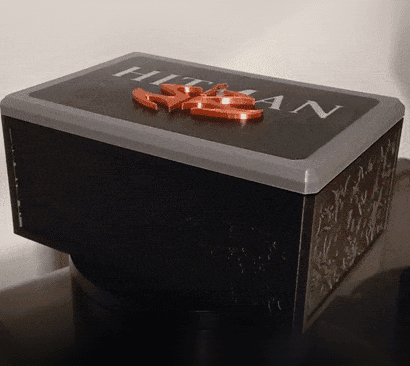
Hitman Skull Box

The Tommy Rose - Thompson Submachine Gun Prop - LIFE SIZE

Fallout Nuka Cola Quantum Cooler Stash Box

Grape Faygo Bucket – TPU Handle

Eskimo Grand Piano Box

Fallout Changeable Billboard - Modular Kit

Arcadia Model 30 - Bluetooth Speaker Stereo
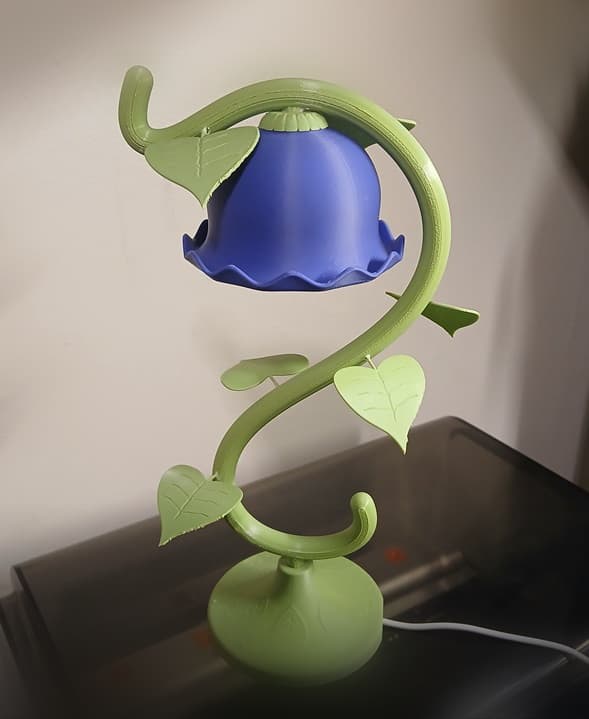
Lumen Lilly Lamp
Articulated Missile Battery Pen Holder

ModuStack Drawer System

Everything is FINE Incense Cone Burner

Sunset Sarsaparilla Sheriff Can Holder