Lumen Lilly Lamp
This lamp blends organic curves with a soft, whimsical glow, designed to resemble a living vine curling upward into bloom. The stem rises in a gentle spiral, accented with sculpted green leaves that give it a natural, hand‑crafted feel. At the top, the light is housed inside a Very Peri flower‑shaped shade—a blue‑violet tone that adds a calm, magical presence when illuminated.
The base continues the botanical motif with leaf‑pattern detailing and a stable footprint. A standard power cord exits cleanly from the rear. Compact and eye‑catching, it works beautifully on desks, shelves, or bedside tables, bringing a touch of fantasy and nature‑inspired charm to any space.
3D printing settings:
Resolution: 0.2mm Infill: 15% - Gyroid Supports: Yes, organic/tree - Block support at leaf holes and inside the leaf hole so it doesn't put supports inside the Vine part. Outer Wall Speed: 130mm/s Inner Wall Speed: 230mm/s Brim: Optional Skirt: Yes, 5 loops
For Leafs:
Outer Wall Speed: 45mm/s Support: Yes, Organic/Tree Brim: Yes, 5mm
Note: Let them fully cool before you take them off the bed. Be careful while removing supports.
Materials:
Anycubic Spring Leaf PLA Creality Very Peri PLA
Bambu Lab Lamp LED Kit 001 or compatible kit.
Instructions:
-
Print Parts.
-
Cut LED light cord after the controller about 25.4mm or 1 inch after the controller. (Between controller on the cable and the actual LED puck and NOT the USB end.)
-
Using a hot nail or small drill bit that is the diameter of the leaf stems and clean out the leaf holes in the Vine part. (There are six holes with three on either side of vine.)
-
Put adhesive pad or glue puck to Light Mount part with the chamfered edge up (slant edge going up with LED puck on widest side) with the cord going through the slot.
-
Feed cable end through the inside Shade hole. Glue the Mount around the chamfered edge and insert into the shade and hold (be careful not to get glue on sides). Feed the cable through the Shade Cap and glue the cap part to top of the Flower Shade part. You should now have the flower shade, cap, and light assembled.
-
Feed cable through opening at the top of Vine part that is slotted. (Note: You may need to use a small screwdriver between the cable of the LED and the Vine body to gain leverage to push the cable through. This is why it is slotted.)
-
Use something to get the end of the LED cable to come out of the slot in the bottom of the vine to pull it the rest of the way through while feeding it from the top.
-
Put the pulled cable end at the bottom of the vine through the loop in the very end of the vine bottom to go into the Base part.
-
Put cable through Base part top hole out through the bottom and push the lamp vine into the hole in the top of the base.
-
Feed cable through hole in side of the Base part.
-
Put small amount of glue on leaf stem, one at a time, and insert each leaf into a hole and hold for a few seconds so the glue can set and hold the leafs in place.
-
Strip the cable ends and wire ends (There should be three wires in the cable: Positive (red), Negative (black), and DIN (white ~ Data). Insert the longer cable side through a white heat shrink tube or black, if cable is black, that fits around main cable diameter and then smaller ones that go around each inner wire and cut the shrink tubes to size. Make sure the outer heat shrink tube has some extra room to fit the smaller tubes inside to fully insulate them, so you'll want to use one a little bigger than the outer cable diameter. Carefully soldier the cables back together in the correct order. Shrink the heat shrink tubes around the inner exposed wires and then the larger outer shrink tube around those and it should be fully sealed.
-
Power lamp on and enjoy!
It should be pretty common sensy and it sounds far more intimidating than it is. If you have troubles... message me.
I appreciate your patronage and support!
Lumen Lilly Lamp
.jpg&w=3840&q=75)
Acme Cartoon Storage Crate

Fallout Dice Tower Can Holder

Towelie Diorama - South Park

Abstract Atomic Era Starburst Wall Decor
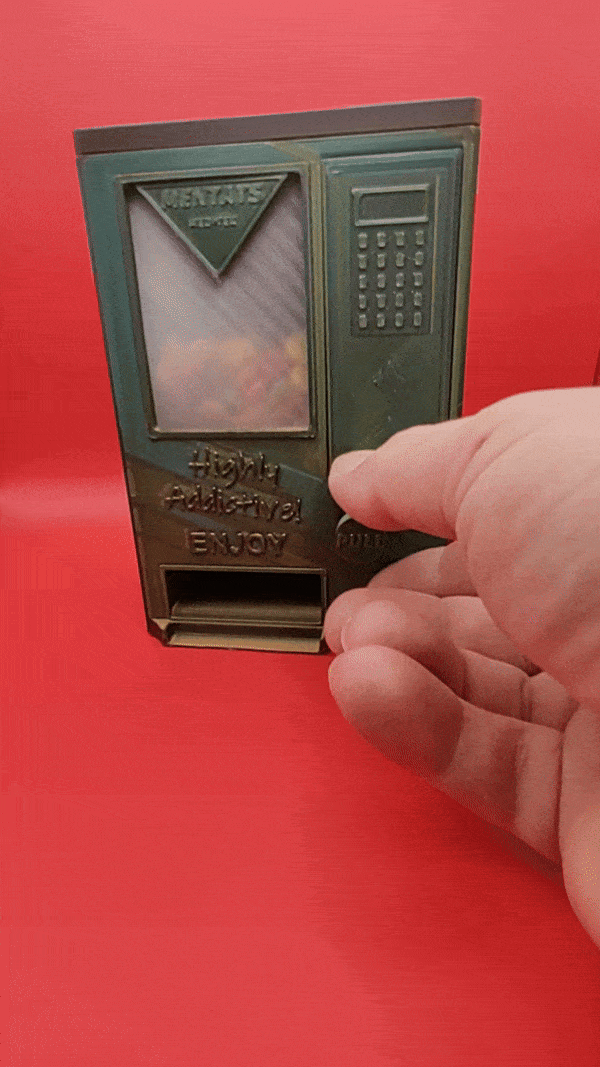
Fallout Mentats Vending Machine Candy Dispenser

Aviator Effects Box – 3D Printable Storage Case

Missile Platform 24 Pen Holder

Fallout Securitron MkIII
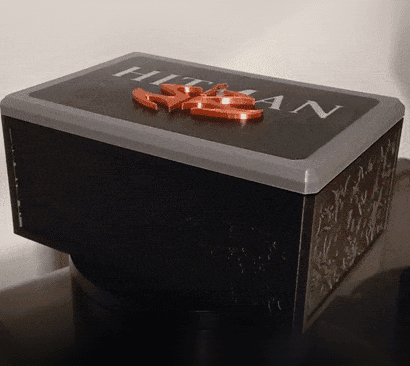
Hitman Skull Box

The Tommy Rose - Thompson Submachine Gun Prop - LIFE SIZE

Fallout Nuka Cola Quantum Cooler Stash Box

Grape Faygo Bucket – TPU Handle

Eskimo Grand Piano Box

Fallout Changeable Billboard - Modular Kit

Arcadia Model 30 - Bluetooth Speaker Stereo

Articulated Missile Battery Pen Holder

ModuStack Drawer System

Everything is FINE Incense Cone Burner

Sunset Sarsaparilla Sheriff Can Holder