


Zorbles - Ultimate Squishy Clicker Fidget with Carrying Case
ZORBLES
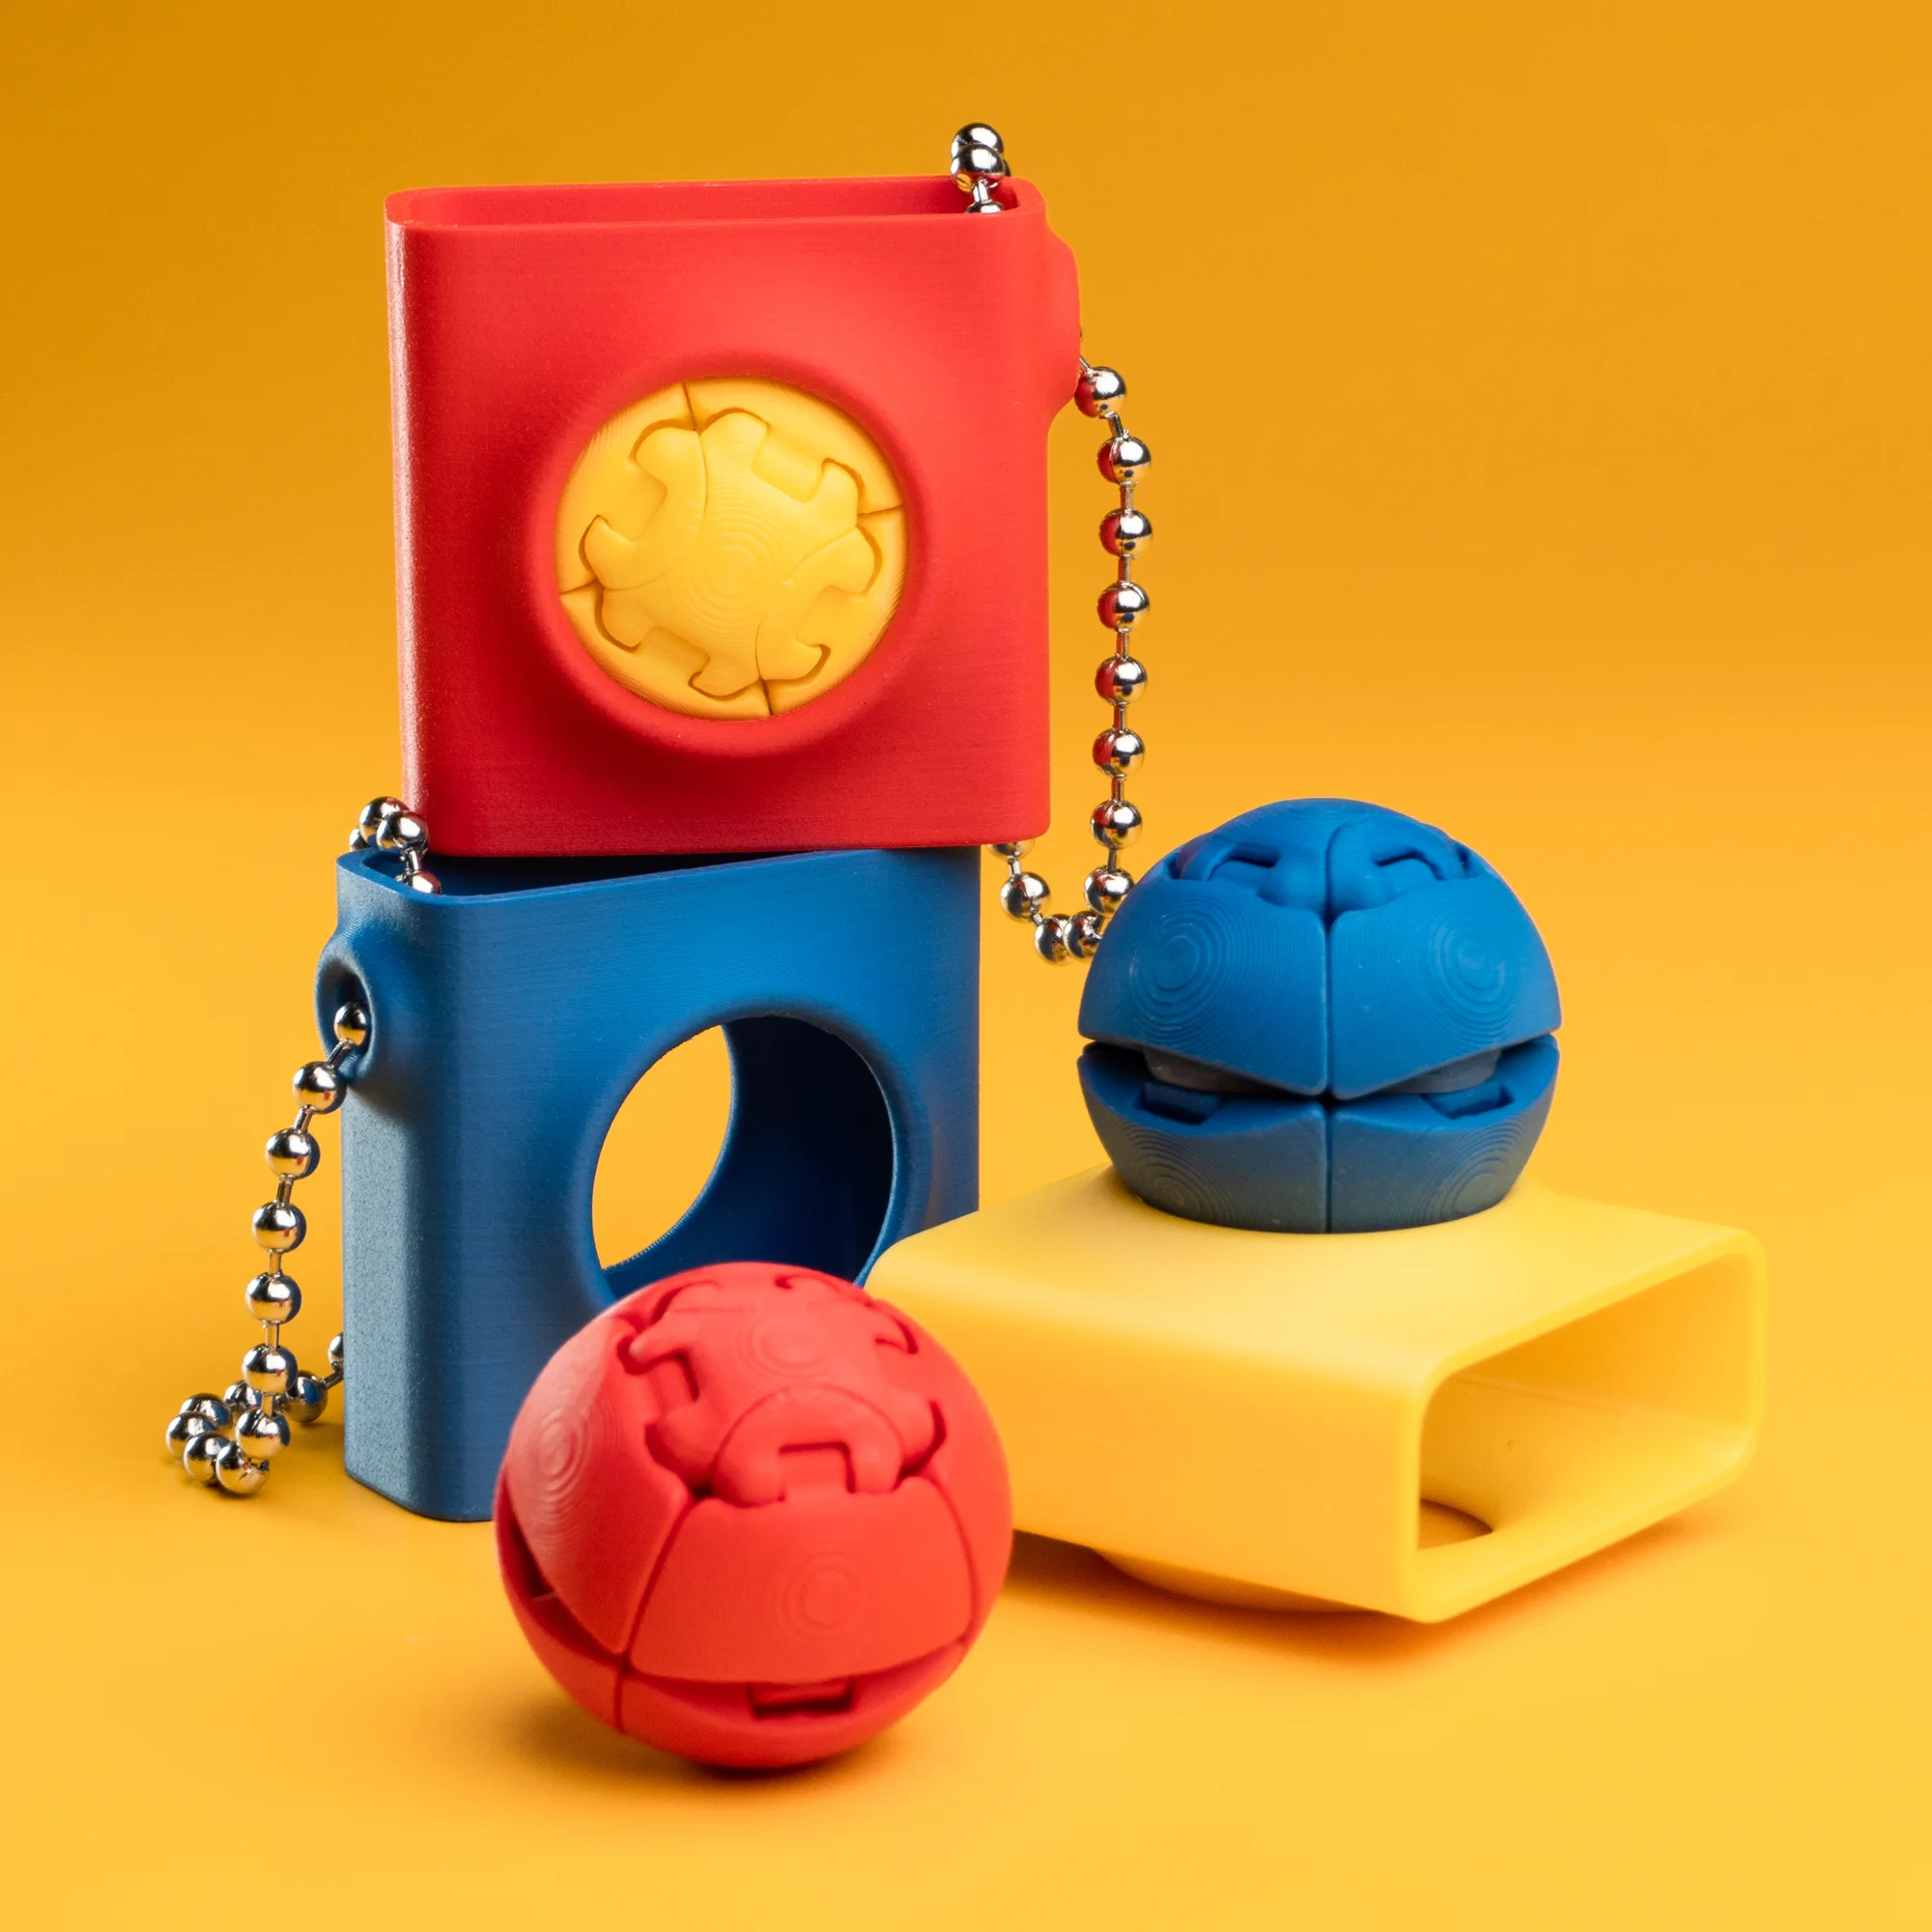
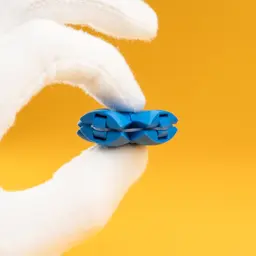
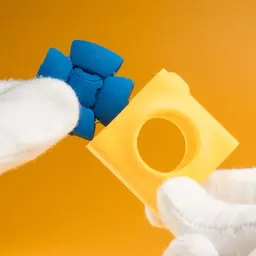
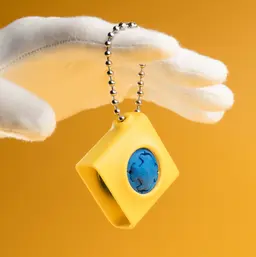
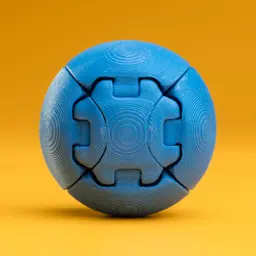
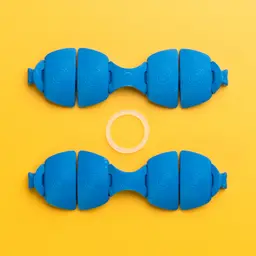
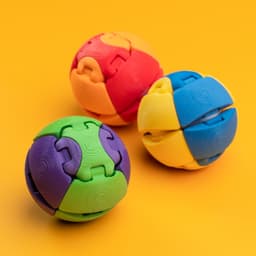
Introducing Zorbles, the ultimate fidget toy - a perfect orb that you can squish, squeeze, roll, and customize to no end. Each Zorble consists of two identical halves that snap together with a rubber band wrapped around the center to create their satisfying squish. Inspired by the collectability of classic marbles, you can make endless color combinations. Swap different halves for a dual color Zorble or change color halfway through a print to make a spotted Zorble. Make mini ones for quiet clicking or big ones for super squishing. Take your Zorble on the go with the carrying case that adds to the fidgeting fun. Pop one in and spin it around like the ball on those old school computer mice. The case even doubles as a display so you can show off your entire Zorble collection on your desk.
PERSONAL USE ONLY
Purchasing or downloading this file does not give you the right to sell physical prints of this design. Commercial license is available for this design by subscribing to patreon.com/bloblab
COPYRIGHT PROTECTED FILES
All Blob Lab designs are protected under copyright law. Your purchase does not give you the right to sell or distribute the digital files in any way.
FILAMENTS
If you'd like to purchase the same filaments used in this design, please check out the Blob Lab Amazon Storefront affiliate link amazon.com/shop/bloblab3d
INSTRUCTIONS
Check out this tutorial video!
- .12mm layer height recommended for high quality
- print Zorbles without supports, add brim if needed
- concentric top surface pattern recommended for smoother Zorbles
- brim and supports are highly recommended for printing the Zorble Case
- add a 3.5mm ball chain with the length of 125mm to the case
- if you scale Zorbles you may need to adjust x-y compensation
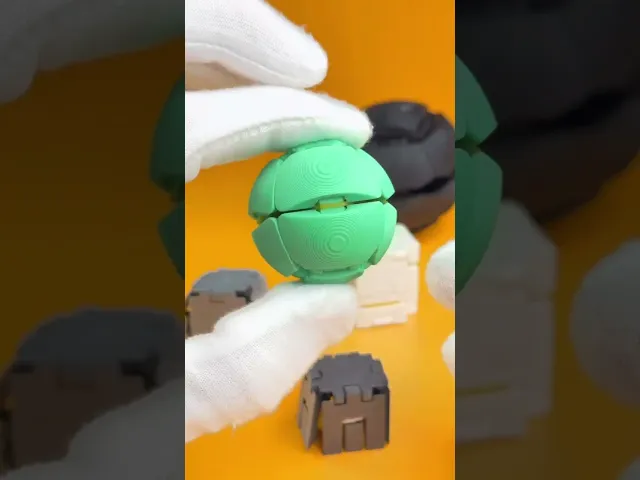
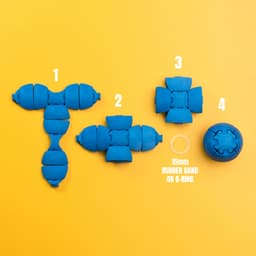
Assembling the Zorble Parts
- Each Zorble has two identical halves. After printing make sure the joints are moving freely.
- Lay one half flat and press the center onto the end connector of the other one. They should press fit together and be snug.
- Do the same with the remaining 3 connectors.
- Once all four ends are connected you can press down in the center to make sure all the connections are flush and smooth. Use a dowel or screwdriver for easier pressing.
- If joints are too loose, you can add positive x-y contour compensation (approx. 0.03mm).
- Alternatively you can add a drop of superglue if the connections are too loose.
- If joints are too tight, add negative x-y contour compensation (approx. -0.03mm).
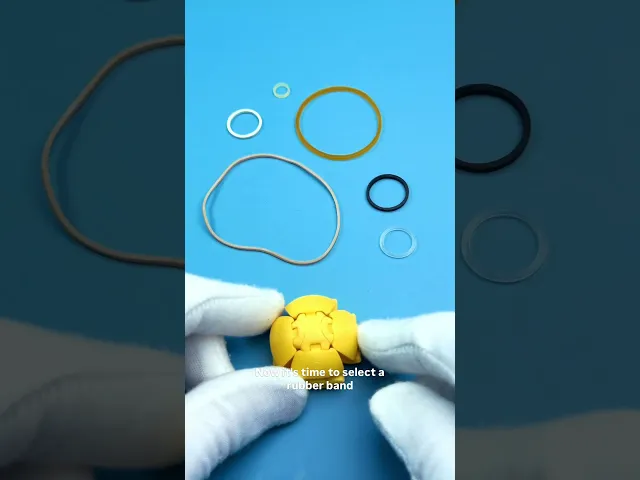
Adding the Rubber Band
- Add a rubber band or o-ring around the center of the Zorble. Any band that is around 10-20mm in diameter and 1-2mm thick should work. Squeeze it and make sure the band slides into all four sides.
15mm silicone o-ring(currently out of stock) is ideal for the longest lasting Zorble- clear elastic hair ties also work great and are less expensive
- 15mm rubber bands also work but may wear down quicker
- Experiment with smaller/larger or thick/thin rubber bands to change the feel and snap
- Larger common household rubber bands can also be used if wrapped around 2 or 3 times.
Need help? Check out the FAQ or join the Discord.
Some of the above links are affiliate links. We appreciate the support if you choose to use them.
Zorbles - Ultimate Squishy Clicker Fidget with Carrying Case

Blob Sloth - Flexi Articulated Art Toy with Tree Display

Space Blob Moxi - Mini Playset Art Toy with Modular Box

Space Blob Noz - Mini Playset Art Toy with Modular Box

Space Blob Zeek - Mini Playset Art Toy with Modular Box

Blob Butterflies - Magnetic Modular Art Toy with Log Container

Blob Octopus - Flexi Articulated Art Toy with Magnetic Ink Display and Crab

Blob Beetles - Mini Modular Art Toy with Log Container

Blob Plants - Desert Series - Mini Plant Collectible Art Toy with Skull Container

Blob Monkey - Flexi Articulated Art Toy with Magnetic Branch

Gingerbread Blobs - Mini Modular Articulated Art Toy

Snowblobs - Mini Modular Articulated Snowman Art Toy

Blob Snowflakes - Ornament Art Toy

Blob Plants - Mini Plant Collectible Art Toy with Pot Container

Blob Flowers - Mini Plant Collectible Art Toy with Watering Can

Blob Skeletons - Mini Modular Articulated Art Toy

Blob Rocks - Prehistoric Series - Mini Rock Blind Box Collectible Art Toy

Blob Mushrooms - Mini Mushroom Collectible Art Toy with Stump Holder

Pocket Blob Mushroom Forest - Mini Playset Art Toy with Latching Case
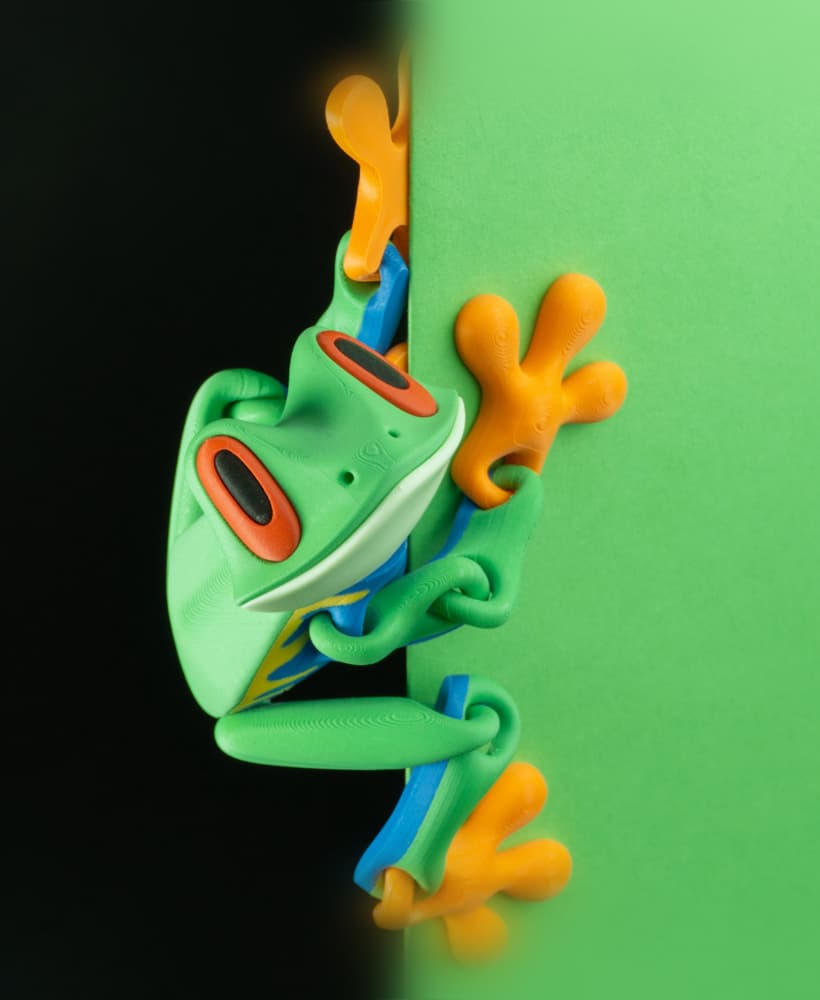
Blob Frog - Flexi Magnetic Fidget Art Toy

Hola, acabo de comprar tu diseño de Zorble y el archivo viene vacío. Cual es el problema?
try downloading again or use the STLs