


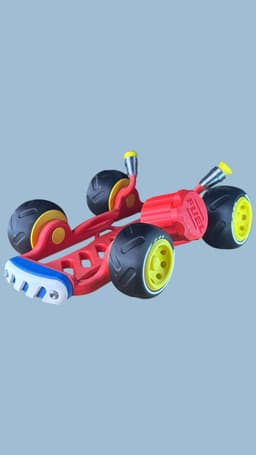
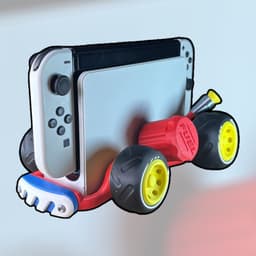

Mario Kart Switch Stand - For Classic, OLED & Switch2
819 downloads · 1 year ago · Hi guys, here comes my brand new Switch Docking Station Stand for Switch Classic, OLED & ofc the SWI
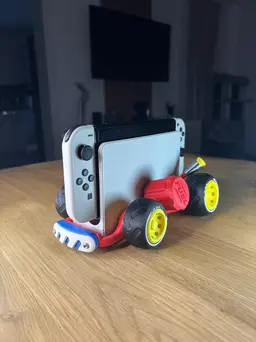
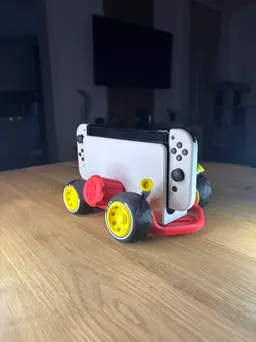
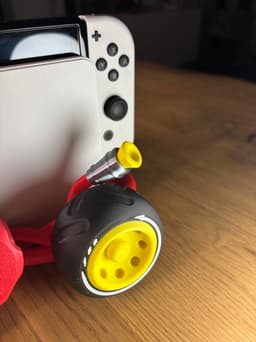
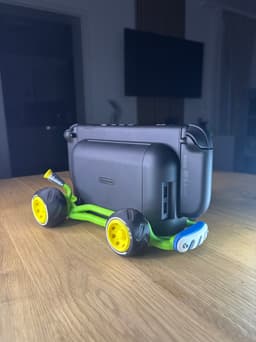
Hi guys, here comes my brand new Switch Docking Station Stand for Switch Classic, OLED & ofc the SWITCH2 - Inspired by Mario Kart from Nintendo! Allert! Retro vibes are coming if you download this awesome file! Check out the feelings of a racer on the Mario Kart world. Get your gaming setup on the next level!
PRINT SETTINGS:
- printer: BambuLab A1 series
- NO supports!
- 2 Wall Lines
- Nozzle: 0,4 mm
- Infill: 10% - 15%
- Infill Pattern: I always recommend Gyorid (as an Engineer I know that the Gyroid Pattern is always the best choice because of its efficiency)
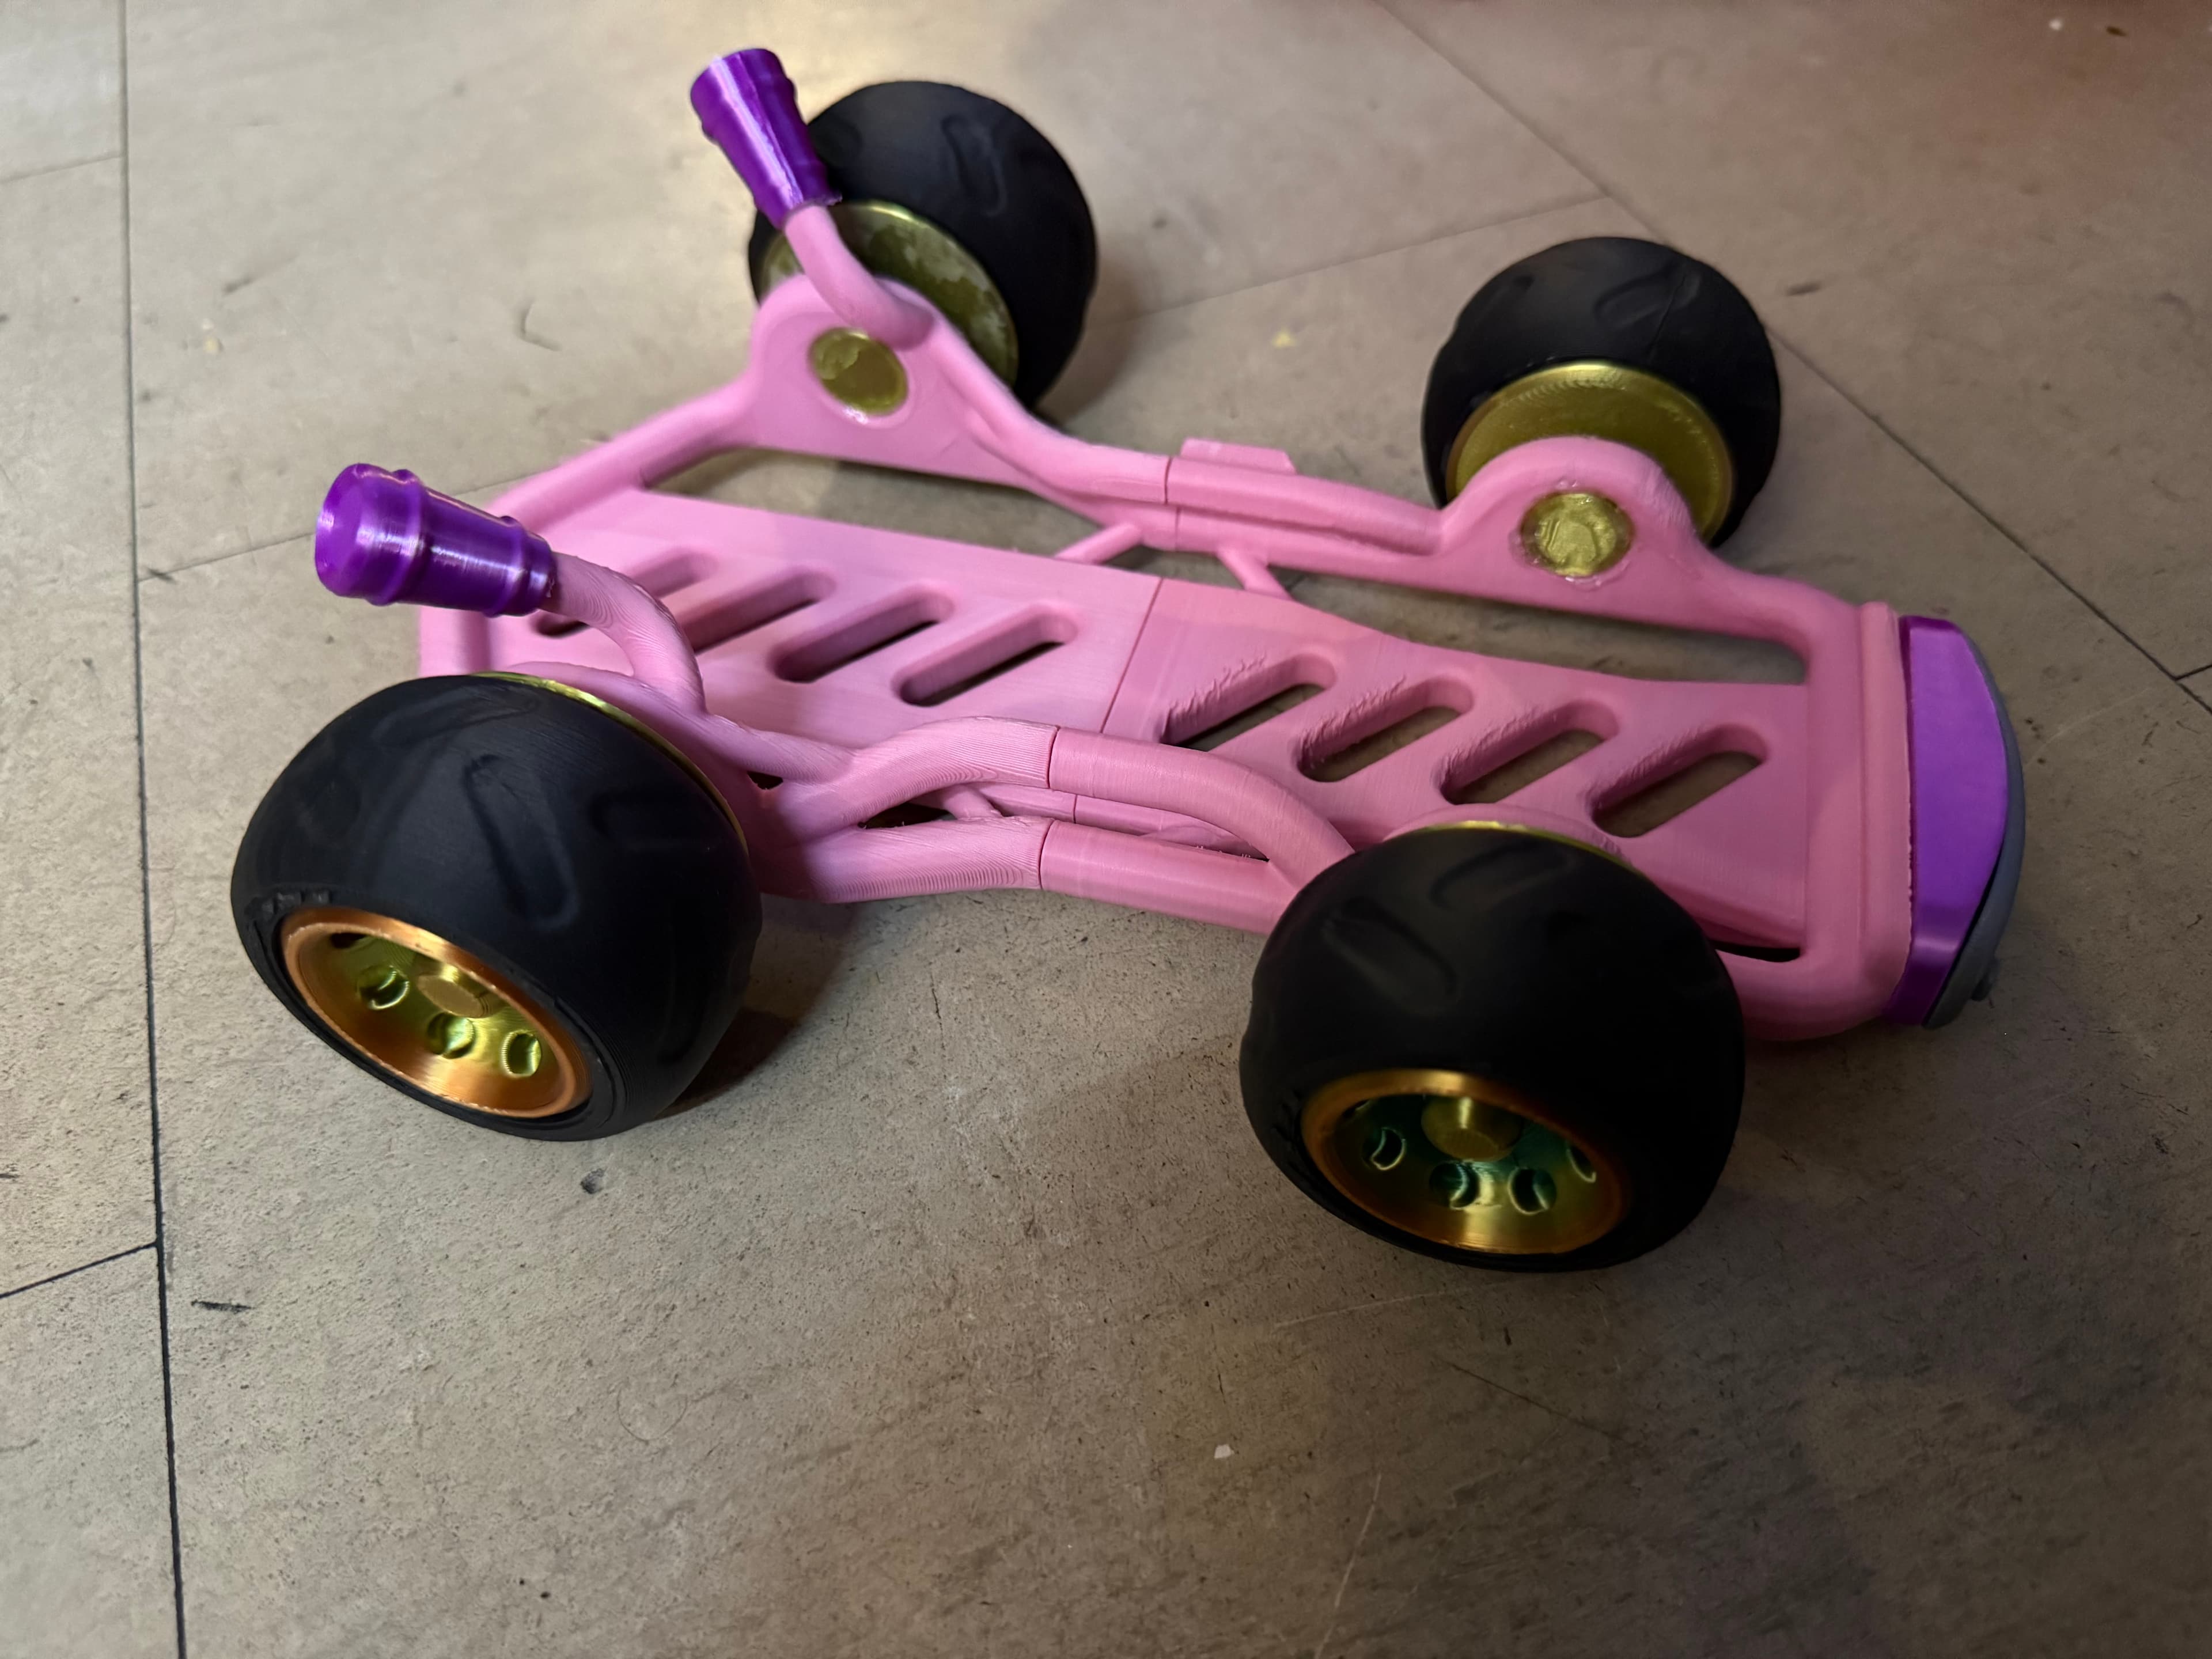
- material: OVERTURE Red Matte PLA (Amazon), OVERTURE Green Matte PLA (Amazon), eSUN Metallic PLA (Amazon), OVERTURE Matte Yellow PLA (Amazon), OVERTURE Matte Black PLA (Amazon), OVERTURE Blue Matte PLA (Amazon), eSUN Matte White PLA (Amazon) :)
- If you have any questions about printing, feel free to contact me on Discord or just on Thangs.
- I recommend to put some glue on the print bed to get an 100% print after all!
IMPORTANT
-
This model can be used for private use and for a commercial use. If you want more, feel free to purchase my EPIC plan. Start with the Starter Plan and get one model for free!
-
This is a hand made project - and not an official Nintendo product!


Mario Kart Switch Stand - For Classic, OLED & Switch2
819 downloads · 1 year ago in and

Universal Controller Stand - Inspired by Wolverine

Universal Controller Stand - Inspired by Ryu from Street Fighter

Predator Universal Controller Stand

Protection Glasses Case - Inspired by Milwaukee
DIY Universal Gaming Controller Stand - Inspired by Prince Broly (Old Version)
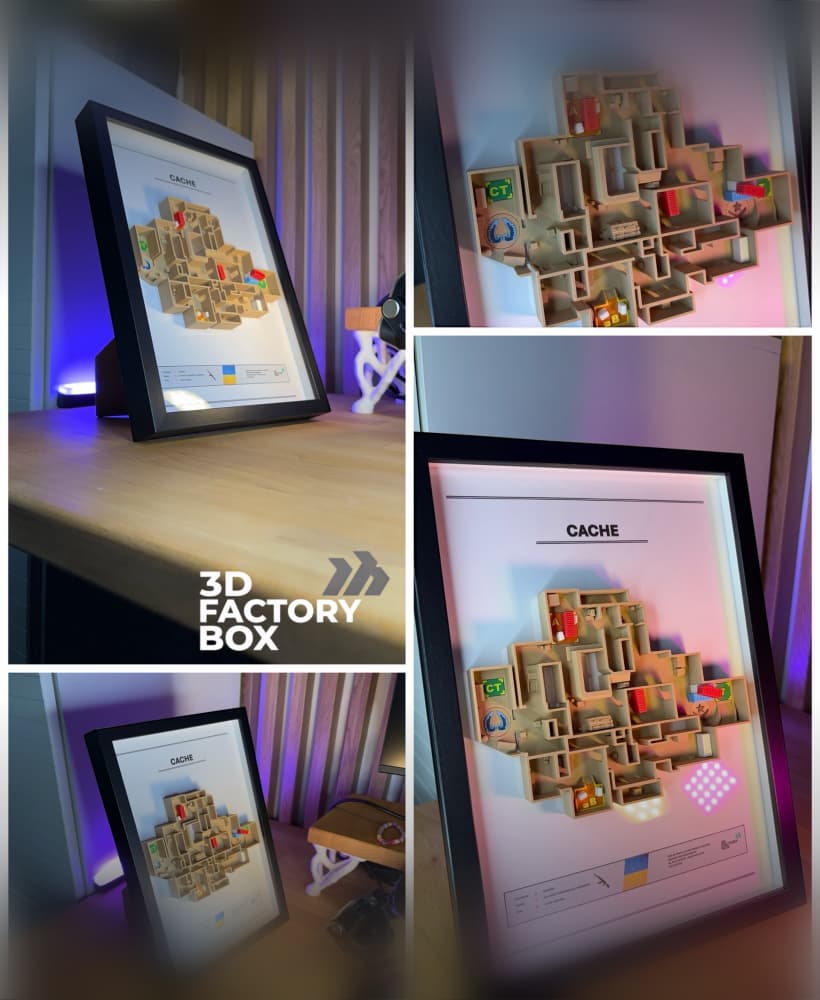
3D Printed Gaming Map - Inspired by "Cache" Fan Art
Mechanical Gaming Desktop Stand
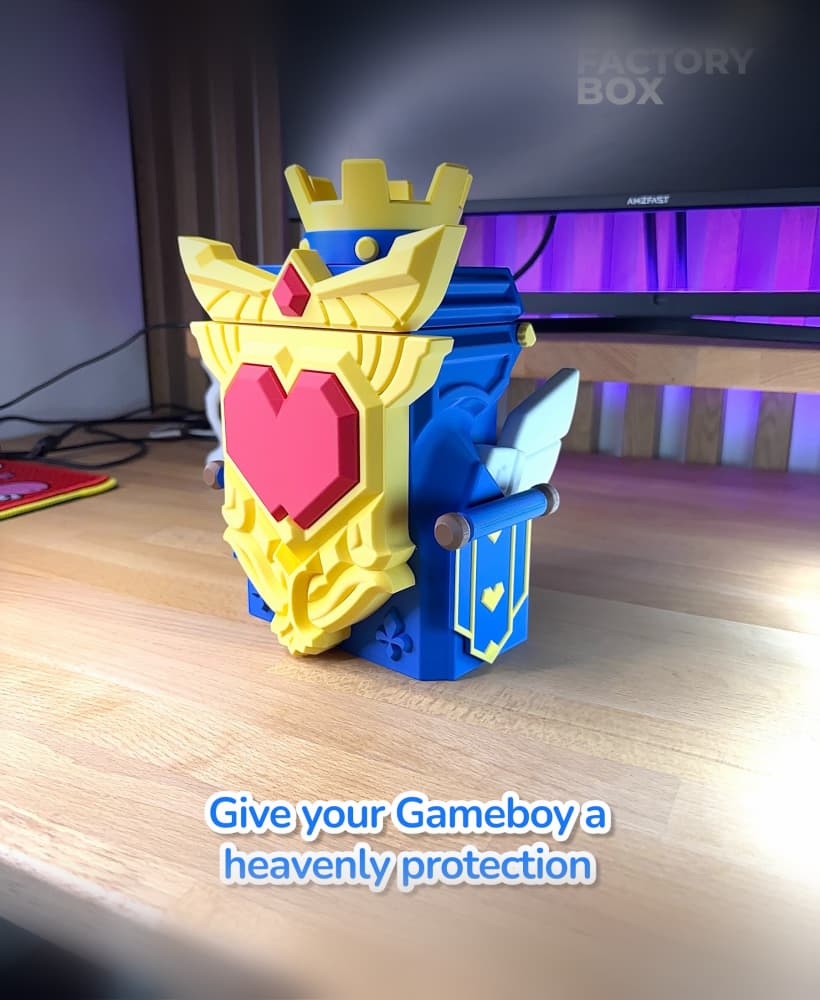
Gameboy Box - Inspired by Medieval Tower Games

Graded Card Case - 3 in 1 Slab Case

Diorama Switch2 Stand - Inspired by furniture like Kallax from IKEA

DIY Universal Gaming Controller Stand - Inspired by Broly

Modern Desk Organizer - for Pencils and More
Gaming Combi Stand - Generic Version (minimalistic deco)

Anime Based Phone Snail - Universal Controller Stand
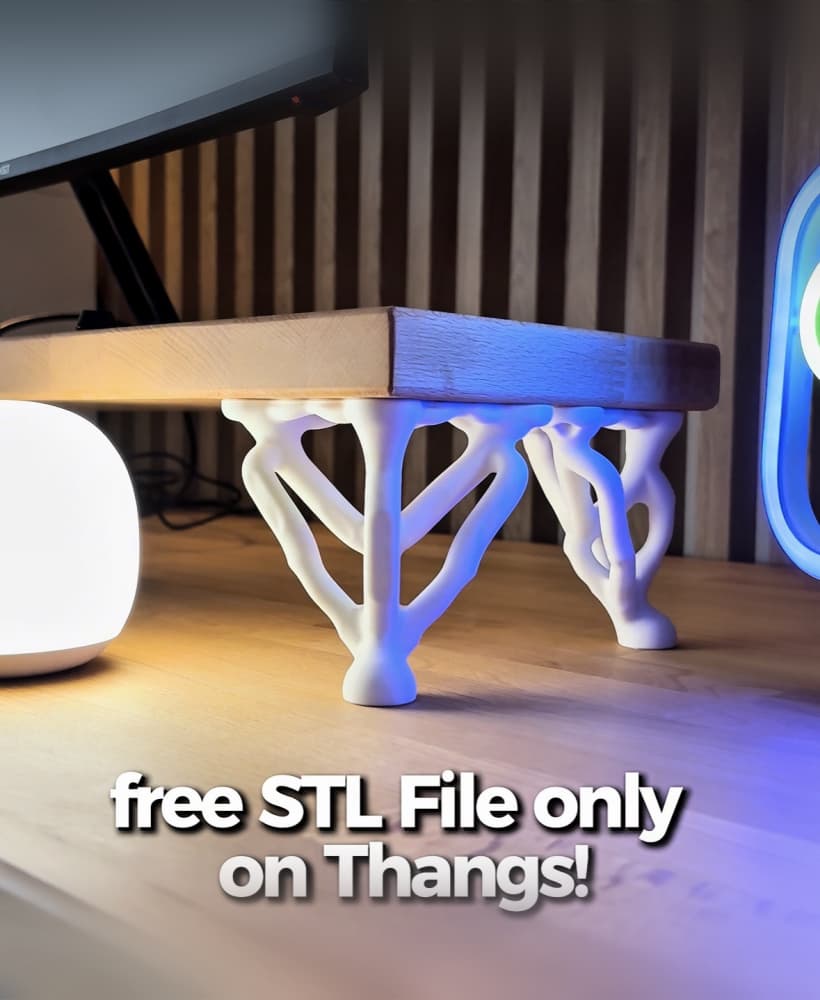
Generative Table Legs

Santas House Diorama - Christmas Home Decoration

DIY Universal Controller Stand - Bartholomew Bear Inspired by One Piece
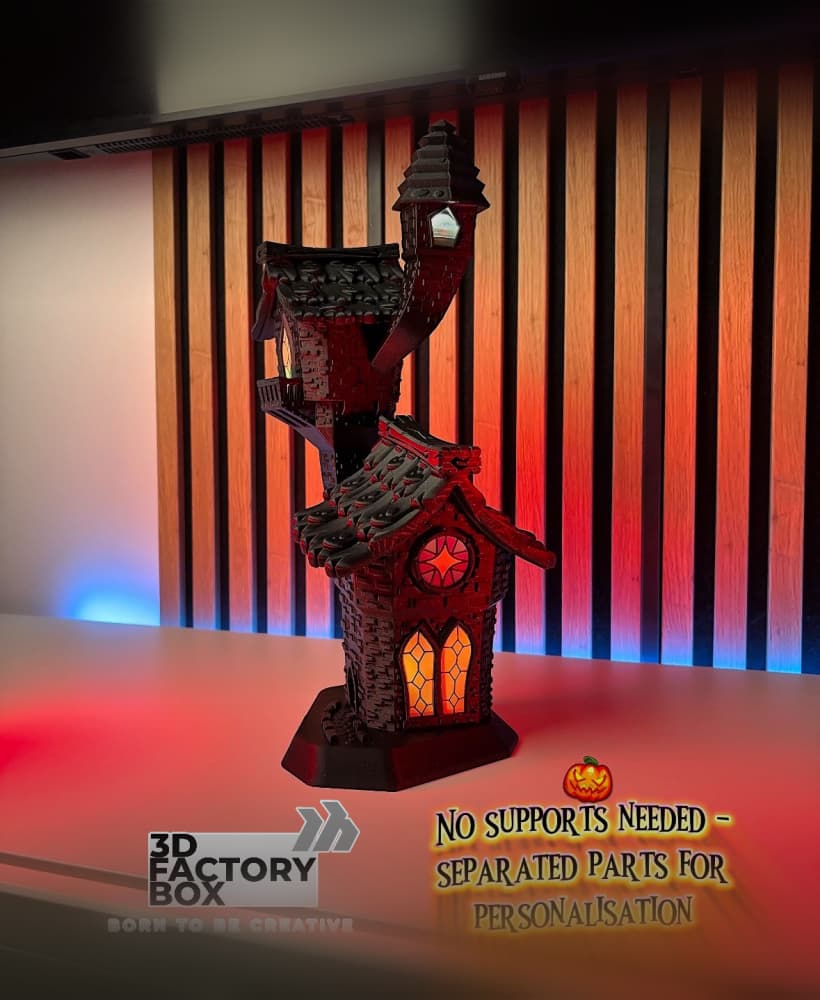
Spooky Church - Halloween Special - No supports
Duo Gaming Controller Stand - Inspired by Kaijo No 8
All in all it is a such nice print! :) Good idea with the Peach version! :)
Hello,
are the individual STL files also available?
I can currently only find the exported 3MF files, except for one STL (Red_Chassis1.stl). Thanks in advance.
See you then Sven Carstensen
Hi I checked it again - I forget to put the STL files into the zip file - I will upload it immediatly - sorry for that!
Yes ofc - research on the zip file - you will find everything you need :)
My zip file doesn’t have the classic model. Am I doing something wrong?
Hi buddy, The Switch Classic should actually fit in the OLED version as well.
Could you please upload a image to how you print the kart base? I am not sure if I am putting in the correct position
same as the g_code file is including :)
Just I wan't to say thank you for your amazing job! You have a great talent and you inspire to people who start designing as a hobby. :3
Thank you buddy - Love your words! :)
Excellent design!! I'd like to know if you used glue to join the pieces or if they fit together perfectly. In my case, the pieces don't fit together. I don't know if it's because of my printer. When will you be able to upload the .stl files?
Thank you so much for your work.
The STL files are available ... You have to glue the pieces fot a better stability :)
Sorry!!! I saw it!! Thanks so much again!!
You re welcome buddy! :)
I just downloaded the file and only the gcodes appear.
I just downloaded the file and only the gcodes appear.
you know i'm gonna go crazy and print a bunch of them in every kart thats relevant. Bowser is a MUST do as well if you can!~
Hi buddy, thank you very much! Bowser and more will come also in different designs :)
Ok so I’m printing the second part. But for me I have to use supports for the base. I don’t know how it’s how to print without them. I have a k1 speedy. So maybe it’s different?
You just need to put the flat side of the model straight on the print bad in your slicer... thats all...
no the issue I was coming across is that by default it puts it on its side when i load it in. So sideways it has to have supports, I didnt see until i printed the first part out and rotated the second half, where the flat part was. So i'm standing it upright to print now, and it should work no problem. It's almost done, i printed 2 different halves by mistake, so i'm fixing it now. I'll be uploading the pic tonight of it finished.
but also how the HELL is the base no supports? what kind of voodoo magic printer do you have?
Hi I checked it again - I forget to put the STL files into the zip file - I will upload it immediatly - sorry for that!