

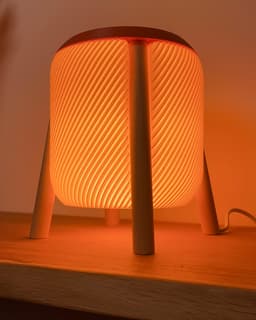
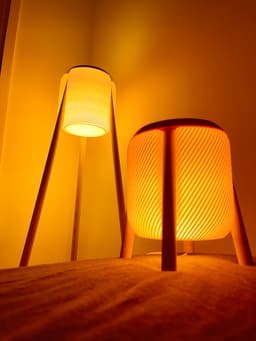


Umea mini - a table lamp in boho style
The famous Umea lamp now as a table top version.
Size & Scaling: Fits a Bambulab A1 mini (so kind of every printer out there) Scaling is not recommended
Print settings: Shade: does not work with Cura... use orca slicer, prusa slicer or bambu studio... vase mode/spiralize outer contour layer height 0.2mm print it upside down and set bottom layers to 4 (see last picture) variate line width for less/more diffusion (0.4-1.0mm) Top: prints upside down 0.16mm layer height 3 walls minimum review position of z-seam Cap: 0.2mm layer height 2 walls 2 bottom layer 0 top layer 30% gyroid Clip: use a brim Retainer, Adapter: 0.16mm layer height 3 walls 30% gyroid
Filament: For the shade use some whiteish filament. I used Spectrum PLA Ivory Beige.
Additional hardware: 4x wood rods diameter=20mm L=205mm 8x wood screw 3x20mm 1x E14 light cord For drilling the leg you need a long enough 8mm drill For drilling the adapter holes use a 2mm drill
Assembly: Cut the wood rods to length (205mm) Use drill guide 2 to drill a through-hole in one rod Create some cutouts on the ends for the cable to enter/exit Use drill guide 1 to drill pilot holes in one side of every rod Screw the adapters into the rods using the pilot holes Optional: Use saw guide 9.5/holder to cut the lower end of the rods to create a level stand of the lamp Route the wire through the drilled rod Click the rods into the top part Insert the shade and tighten it with the retainer Add the body from the lamp socket and the light bulb Secure the cable onto the retainer with the clip Close the bottom of the shade with the cap

Umea mini - a table lamp in boho style

Orsa - a floor lamp in scandi style

Habo floor lamp

Swing retro pendant

The Honey shelf system

Ikea Fado rumbler (25cm version)
Venio - a futuristic table lamp

Borno vase

Cibol - a table lamp

Rocket side table
Umea industrial - a floor lamp with steel/copper/aluminum pipes

Funnel vase two parts

Hobbs - a levitating desk lamp

Dego - a modern cup shelf

Needle vase - minimalistic & elegant
Needle bowl - an elegant & minimalistic bowl

Coneo - a space age housing for Ikea Fado (17cm)

Cup shelf wave

The Y Stand for IKEA Fado (17cm)

Kami - a floor lamp in boho/scandi style

Worked really well. We just had issues in the end with screwing in the retainer. We did not manage to rotate to a perfect fit. A 180° rotation is missing. Any clues what we can do different when slicing?
You can try to play a bit with the horizontal expansion/x-y expansion values. An offset of -0.05 can help already.
Do you have the chance to share a profile for this product with the settings made as you clicked?
Why are both sides of the main body of this product closed? How do we install the lamp inside?
When you enable the "vase mode" in the slicer, it will open one side.
Hi can you guide me a little bit. I use Bambu Studio and can’t find not all setting you mention. For the shade you recommend 4 bottom layers. Is that to use the cap? And does the shade has two openings? So you can click the cap? And how to get the pattern inside the shade?
No one?
You'll want to enable 'Spiral vase' mode, under the 'Others' setting.
Hey bro, I am going to try and do your routing trick on this one as well.
Hello. I recommend print cap in 102% scale for best, tight fit in shade. Default scale (100%) print for cap results it little smaller, than shade place for fit and cap don't fit tight in shade.
How do you keep the shade up. Mine keeps dropping down and I have no idea what the CAP is for!!
There is a part called retainer. Screw that one in the top part with the shade in between. The cap is for closing the bottom of the shade
how do you connect the top to the shade? on the big version there are screws but how do you do it on the small one?
The instructions above don't mention all the files to print. Print four "Umea mini adapter.3mf" and one "drill guide 1.3mf". Use the guide to drill pilot holes in the top of your poles then attach the adapters with the screws.
This attaches the legs to the top, any idea what attaches the actual shade?