
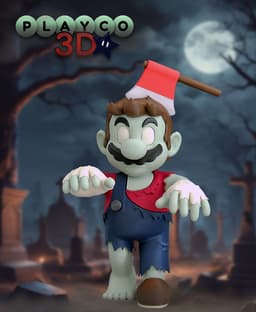


Zombie Mario
26 downloads · 1 year ago · Introducing Zombie Mario: Rising from the Dead!
Zombie Mario has risen from the grave after a deadl
This model is restricted by licensing terms.
View license.
Introducing Zombie Mario: Rising from the Dead!
Zombie Mario has risen from the grave after a deadly blow from an axe. While it's still unclear who delivered the fatal chop, some suspect it was little Toad, who may have lost his temper while trying to chop firewood—and let’s just say, his aim wasn’t exactly spot on!
This model is a perfect addition for Halloween, standing at about 6.75 inches (171 mm). It can be scaled up or down, but keep in mind that scaling down may make the fingers a bit tight to fit.
Colors Used:
- Geeetech: Silver
- Bambu Basic: Black
- Bambu Matte: Dark Red (Axe), Dark Blue
- Hatchbox Matte: Cherry Red (Shirt)
- Hatchbox PLA Max: Sage Green
- Sunlu: Burlywood
- CC3D: Bone White
- Sunlu Highspeed: Grey
- Overture PLA PRO: Chocolate
Printing Tips:
- Supports: Refer to the print settings image for guidance.
- Small Parts: An extra plate is included for small parts that could affect the printing of other components.
- Alternative Head Pins: I’ve provided two different head pins—one slightly larger for a tighter fit and another solid one for gluing.
- Alternative Head: A separate plate for the head includes stronger supports under the ears, though extra cleanup may be required.
- Printing the Fingers: Align the fingers (1, 2, 3...) in order with a raft as shown in the print profile. This helps avoid confusion during assembly.
Assembly Tips:
- When attaching the legs, ensure Mario is level before gluing to prevent any misalignment. He should stand perfectly balanced.
- A small arrow is marked on the bottom arm spot, pointing toward the hand. It may be hard to see.
- Mario's hair does not need to be glued; it snaps into place. Just align it at the right angle and pop it in.
- An arrow on the left leg indicates the forward direction.
- The eyes are labeled "L" and "R," with the flat angle facing down.
- Be extra careful when removing supports around the sideburns as they could snap
Assembly Steps:
- Build the Hands: Assemble the left and right hands in order, with 1 as the thumb and 5 as the pinky.
- Glue the Sole to the Boot.
- Attach the Red Shirt to the Blue Pants.
- Glue on the Green Neck.
- Attach the Grey Button: Note that it’s not a perfect circle; it's slightly elongated sideways.
- Attach Small Spots to the Right Arm and Pants: There are 4 spots in total (3 green, 1 red).
- Glue on the Left Arm.
- Attach the Right Arm: This will be tight, so find the right angle to fit it in securely.
- Glue the Hands to the Arms Using the Pins.
- Attach the Left and Right Legs: Ensure they align so Mario stands flat and balanced.
- Build the Face: Glue on the mustache, eyebrows, and eyes, then snap the face into the hair.
- Attach Handle Pieces to the Red Axe, the longer part tapers off away from the axe then glue on the silver part.
- Glue the Axe to Mario's Head.
- Finally, glue the angled part of the head pin to the body and snap on the head, using either the tighter or looser pin.
Congratulations! You now have a Zombie Mario, just in time for Halloween!
Happy printing, and thank you for your support!
Zombie Mario
26 downloads · 1 year ago in and
This model is restricted by licensing terms.
View license.

Stripe (Gremlins)

Rocko (Rocko's Modern Life)

Chris Griffin (Family Guy)

Ice Man (Mega Man)

Inspector Gadget

Cobra Commander (G.I. Joe)

Waylon Smithers (Simpsons)

Lion-O (Thundercats)

Philip Fry (Futurama)

Rosalina and Luma (Mario Bros.)

Lois Griffin (Family Guy)

Sideshow Bob (Simpsons)

Drill Man (Mega Man)

Cut Man (Mega Man)

Gizmo

Chef (South Park)

Peter Griffin

Officer Eric Cartman
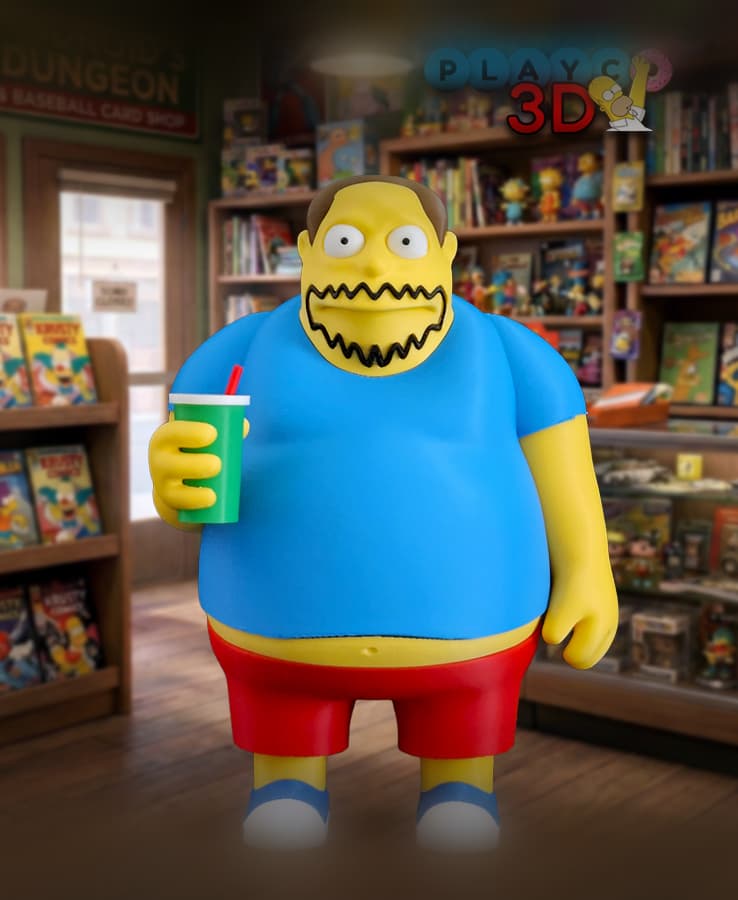
Comic Book Guy
