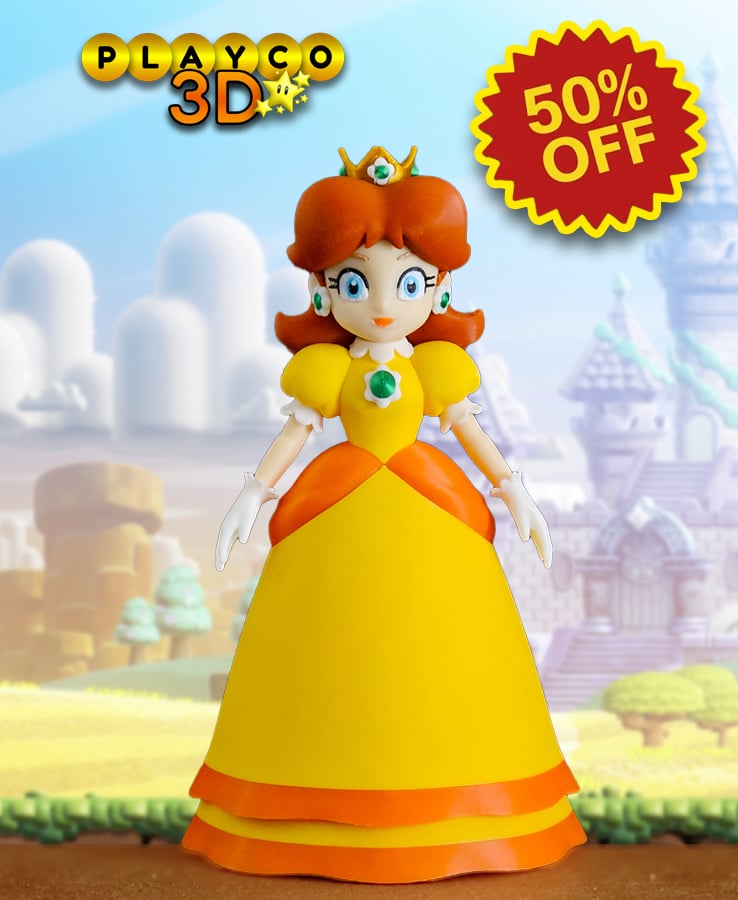


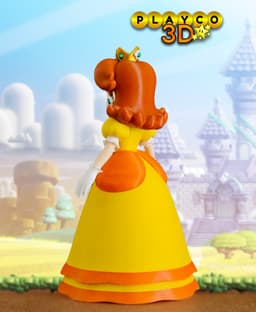
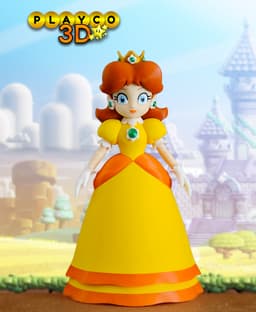

Princess Daisy
Bring some royal flair to your collection with Princess Daisy! This bold and energetic ruler from Sarasaland is ready to shine with vibrant details and a fun, easy-to-print design—perfect for any Mario fan or Nintendo collector.
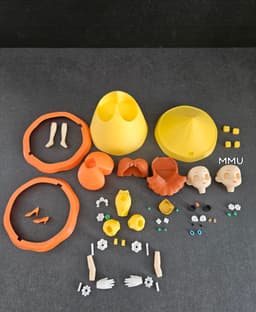
Note: The lips shown in the pictures were printed using the MMU version. A Multi-Part version is also available! MMU Parts include: Face with Lips Face with Lips and Eyebrows Crown with all the Gems Eyes
At 100% scale, this model includes many small parts. Please ensure your printer is well-calibrated (no elephant foot or alignment issues), as inaccuracies can make assembly more difficult.
A separate file is included for the lower part of the dress without pins. This option provides a cleaner look with no visible pins, but it may be more challenging to align and glue properly.
Colors Used: -Elegoo Matte: Yellow -Bambu Basic: White, Black, Orange -Bambu Matte: Sky Blue -Bambu Silk+: Green -Geetech Silk: Gold -Creality Hyper Series: Skin, Brown -Duramic 3D: Light Brow (Eyebrows)
Model Details: Scale: At 100% size, Daisy stands approximately 7.25 inches (184 mm) tall. Scaling up should work fine, but scaling down may cause issues with the eyelashes and part tolerances due to small details.
Daisy Assembly Instructions Build the lower and upper dress using the pins. The large pin goes at the back of the dress. Attach the legs, with the heels glued on. Insert the dress wrap—press firmly. It’s designed to fit snugly, so be aware that once inserted, it may be very difficult to remove. Attach the left and right dress puffs to the chest using the pins. Attach the chest flower with the gem—it fits into place a specific way, so test the orientation before gluing. Then glue on the neck flower piece. Build the left and right arms using the pins. Note: To identify the correct (right) arm and flower shoulder, look for the small notch cut out of the part—it should point toward her head. Once the upper body is fully assembled, attach it to the dress. Insert the eyebrows into the face. Press firmly—using a flat surface like a table can help apply even pressure. Build and insert the eyes with eyelashes into the face. Attach the lips. Attach the upper and back hair pieces to the face. Glue the gems into the earrings, then attach the side hair pieces and earrings to the face. Build the crown and attach it to the hair. Once the head is complete, glue it onto the body.
That’s it—Daisy is complete! You did it, your royal highness of printing! Now take a royal bow and admire your beautifully bold princess in all her flower-powered glory. If you share pics, don’t forget to tag @Playco3D—I’d love to see Daisy ruling your shelf like the true queen she is!
Princess Daisy

Stripe (Gremlins)

Rocko (Rocko's Modern Life)

Chris Griffin (Family Guy)

Ice Man (Mega Man)

Inspector Gadget

Cobra Commander (G.I. Joe)

Waylon Smithers (Simpsons)

Lion-O (Thundercats)

Philip Fry (Futurama)

Rosalina and Luma (Mario Bros.)

Lois Griffin (Family Guy)

Sideshow Bob (Simpsons)

Drill Man (Mega Man)

Cut Man (Mega Man)

Gizmo

Chef (South Park)

Peter Griffin

Officer Eric Cartman
Comic Book Guy
