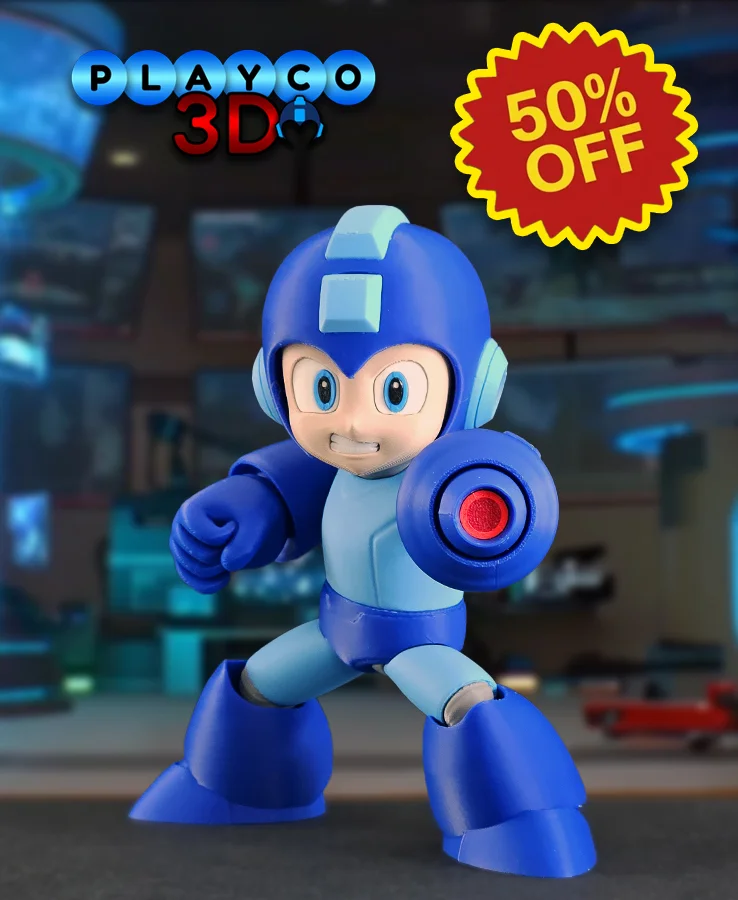


Mega Man
Mega Man: The Ultimate 3D Print with a Magnetic LED Blaster!
This isn't just a figure—it's an interactive display piece that blends retro gaming nostalgia with modern DIY magic. Get ready to print, assemble, and power up your own Mega Man masterpiece! ?
Colors Used:
- Bambu Basic: Blue (Armor), Black, Yellow
- Bambu Matte: White, Scarlet Red (Outer Glow) -Polymaker Matte: Army Beige (Skin) -Esun: Light Blue (Body), Fire engine red (Inner Glow) -Elegoo Matte: Grey
Model Details: Scale: At 100% scale, Mega Man measures approximately 6.25 inches (158mm) tall. At 200% he measures 12.5in (216mm)
I've included two print profiles, 100% and 200%. Scaling larger shouldn't be an issue.
Hardware Details:
For the 100% scale you can purchase the magnetic LEDs from Bambu here. They are very easy to use with tiny batteries and come with a small magnet to trigger the LED. You just need to drop it in his blaster, attach the red cover, then press the magnet into his Energy Tank. Watch as his blaster comes to life!
For the 200% version, you can get the LED from Bambu here. It works exactly the same as the smaller LED.
If you plan to use the LED, It's best not to glue the front blaster in place; it should fit snugly on its own. This way, you can easily remove it when needed. To pop out the LED, simply remove the front blaster and use the hole on the back to push it out with a tool.
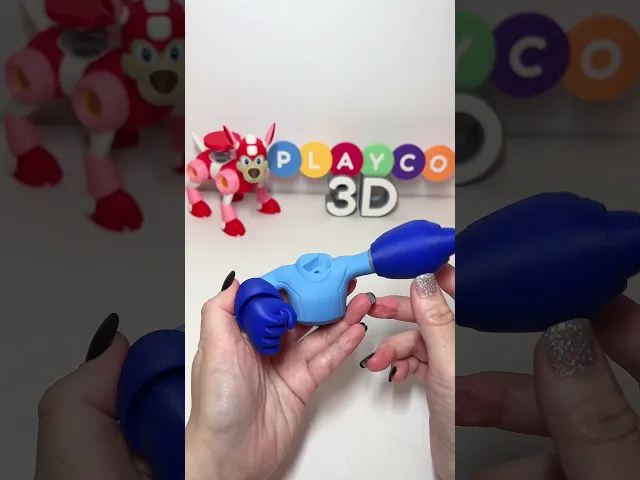
Mega Man Assembly Instructions Legs & Lower Torso Attach the blue legs to the grey hips using the pins. Glue the legs onto the lower torso. Glue the knees to the legs. Attach the legs to the boots, ensuring a snug and level fit. Eyes & Face Clean out raft residue from the black eye cutouts to create a wide opening. Important: The right blue eye fits differently—it has a notch at the top to indicate proper placement. The Right Black Eye is a tad thinner in scale, so pay attention the L and R parts. Firmly press the eyes into the face. Insert the black mouthpiece, ensuring the circle cutout faces inside his mouth Insert the white teeth into the mouthpiece. Helmet & Ears Assemble the helmet by gluing the top piece first, followed by the front piece, pressing it in firmly. Glue the dark red inner ears to the outer red pieces, then attach them to the blue ears. Use the ear pins to align and attach the ears to the helmet. Face & Neck Assembly Glue the face inside the helmet: Insert at an angle, then pull up slightly before firmly pressing it in until it snaps into place. Glue the grey neck in place using the pin. Arms & Hands Glue the elbow to the right arm armor, then attach the hand using the pin. Attach the right arm to the body with the pin. Blaster Assembly Insert the inner red glow into the outer red piece, then press it into the front blaster. Press the front blaster into the main blaster. Insert the yellow blaster charge. Insert the triangle pin into the grey inner blaster, then insert the part into the blaster. Finally, attach the blaster to the left arm. Ensure the triangle hole in the arm is clear of any raft residue for a proper fit. Final Assembly Attach the body to the lower torso using the pin. Attach the head to the body with the pin.
Your Mega Man figure is now fully assembled and ready for display! ⚡?
Thank you for your ongoing support and happy printing!
Mega Man

Stripe (Gremlins)

Rocko (Rocko's Modern Life)

Chris Griffin (Family Guy)

Ice Man (Mega Man)

Inspector Gadget

Cobra Commander (G.I. Joe)

Waylon Smithers (Simpsons)

Lion-O (Thundercats)

Philip Fry (Futurama)

Rosalina and Luma (Mario Bros.)

Lois Griffin (Family Guy)

Sideshow Bob (Simpsons)

Drill Man (Mega Man)

Cut Man (Mega Man)

Gizmo

Chef (South Park)

Peter Griffin

Officer Eric Cartman
Comic Book Guy

He turned out great thankyou.
Thanks so much!
Love this model. It would be awesome to see more Mega Man characters.