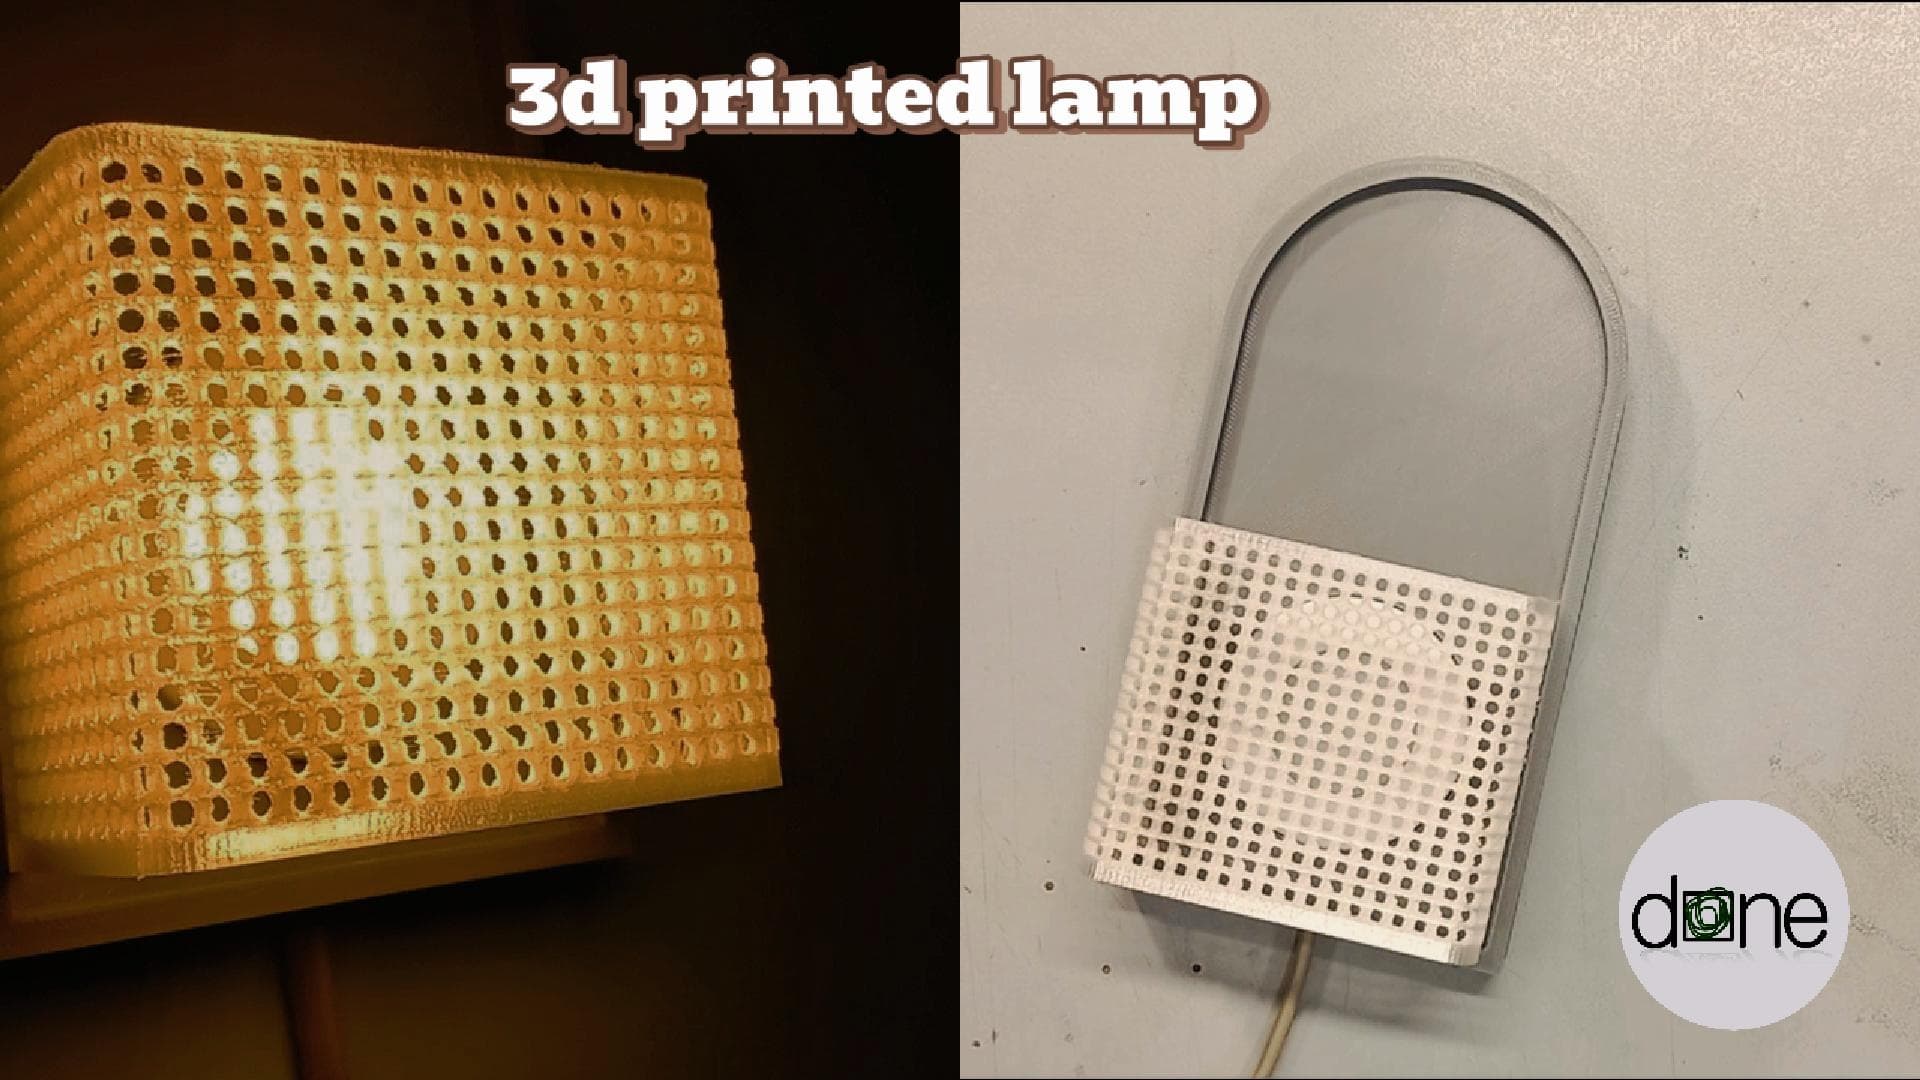
DYO Wall Light Box (Customizable)
Design Your Own(DYO) Wall light box. This model makes it easy to use a LED strip and a SVG file to make a custom wall mounted light box. Included with this model are two example SVGs in the attachments.
Does not need an AMS or MMU, can be made with two filament changes!
- Model is a 3MF that includes the LED strip and wall mount, light box frame, and silhouette background.
- The light box clips together, has a tolerance of 0.2mm, and requires a very clean first layer.
- Supports self adhesive LED strips from 1m-2m(6.5ft), one meter to complete the spiral and a second meter to double back to the beginning. Check included photos to understand. LED strip used for the photos was a 5$ basic LED strip from Walmart.
Print settings:
- 0.2mm layer height
- 3 walls
- 4 top and bottom layers
- 25% infill or more for mount.
- 0.0 Elephant's foot compensation for Wall_light_front model
- Wipe tower optional.
How To: The following works in Bambu Studio, Prusaslicer, and Orcaslicer.
1. Create a SVG, two are included with this model. Easiest way to create a SVG is to take a square photo either JPEG or PNG, change it to black and white, then use a free online SVG converter. Printing the first layer can be difficult for complex images/SVGs, simpler is better. 2. Next import the 3MF into the slicer of your choice, the light box frame should be face down already. 3. Confirm your slicer has 2 filament colors in the project, for Orcaslicer click the "Add one filament" button, for Prusaslicer a second "extruder" must be added. In Prusaslicer navigate to Printers tab -> general -> Capabilities -> Extruders and increase to 2 and DO NOT check mark "Single Extruder Multi Material". 4. Color the parts. The mount should be white, the light box black or the chosen primary color, Silhouette panel white, and the SVG part also the primary color. 5. Add SVG to create a new body/part. For Bambu Studio and Orcaslicer click the bed plate and add primitive-> SVG. For Prusaslicer click the bed and add shape -> SVG. 6. Edit new SVG part. A menu will appear after adding SVG, change thickness to 0.8mm and size of 202mm for SVG with a border or 200mm for SVG without borders. Double check orientation and mirror the SVG if it is backwards. This can be edited later by right clicking on SVG part and select edit. 7. Center everything. Center the Wall_light_front, Silhouette, and SVG model on the bed. There should be no gaps between the box and the silhouette panel. 8. Merge Wall_light_front, Silhouette, and SVG models. In Prusaslicer or Bambu Studio select all three models then right click them and choose "Merge". For Orcaslicer select all three parts and right click them and choose "Assemble". This will fix the first layer primary color, and the print preview will reflect that. 9. Print both halves of the box and test fit. 10. Add LED strip. The bottom left corner is free to mount an LED strip controller if needed, total clearance is 30mm, foam mount tape works. Start from the bottom of the spiral and attached the LED strip along the inside wall until the entire spiral is covered. If you have 2 meters of LED strip, when you make it to the center wrap the strip around the end and continue on the outer wall until you finish the strip at the beginning. 11. DONE!!
Let me know if there are any issues and feel free to post your makes!
DYO Wall Light Box (Customizable)

Mexico Eagle LED Light Box – Tricolor Wall Art

Enchanted Forest Shadow Box Light Box Lamp

Avengers Shadow Box Light Box 3d Lamp
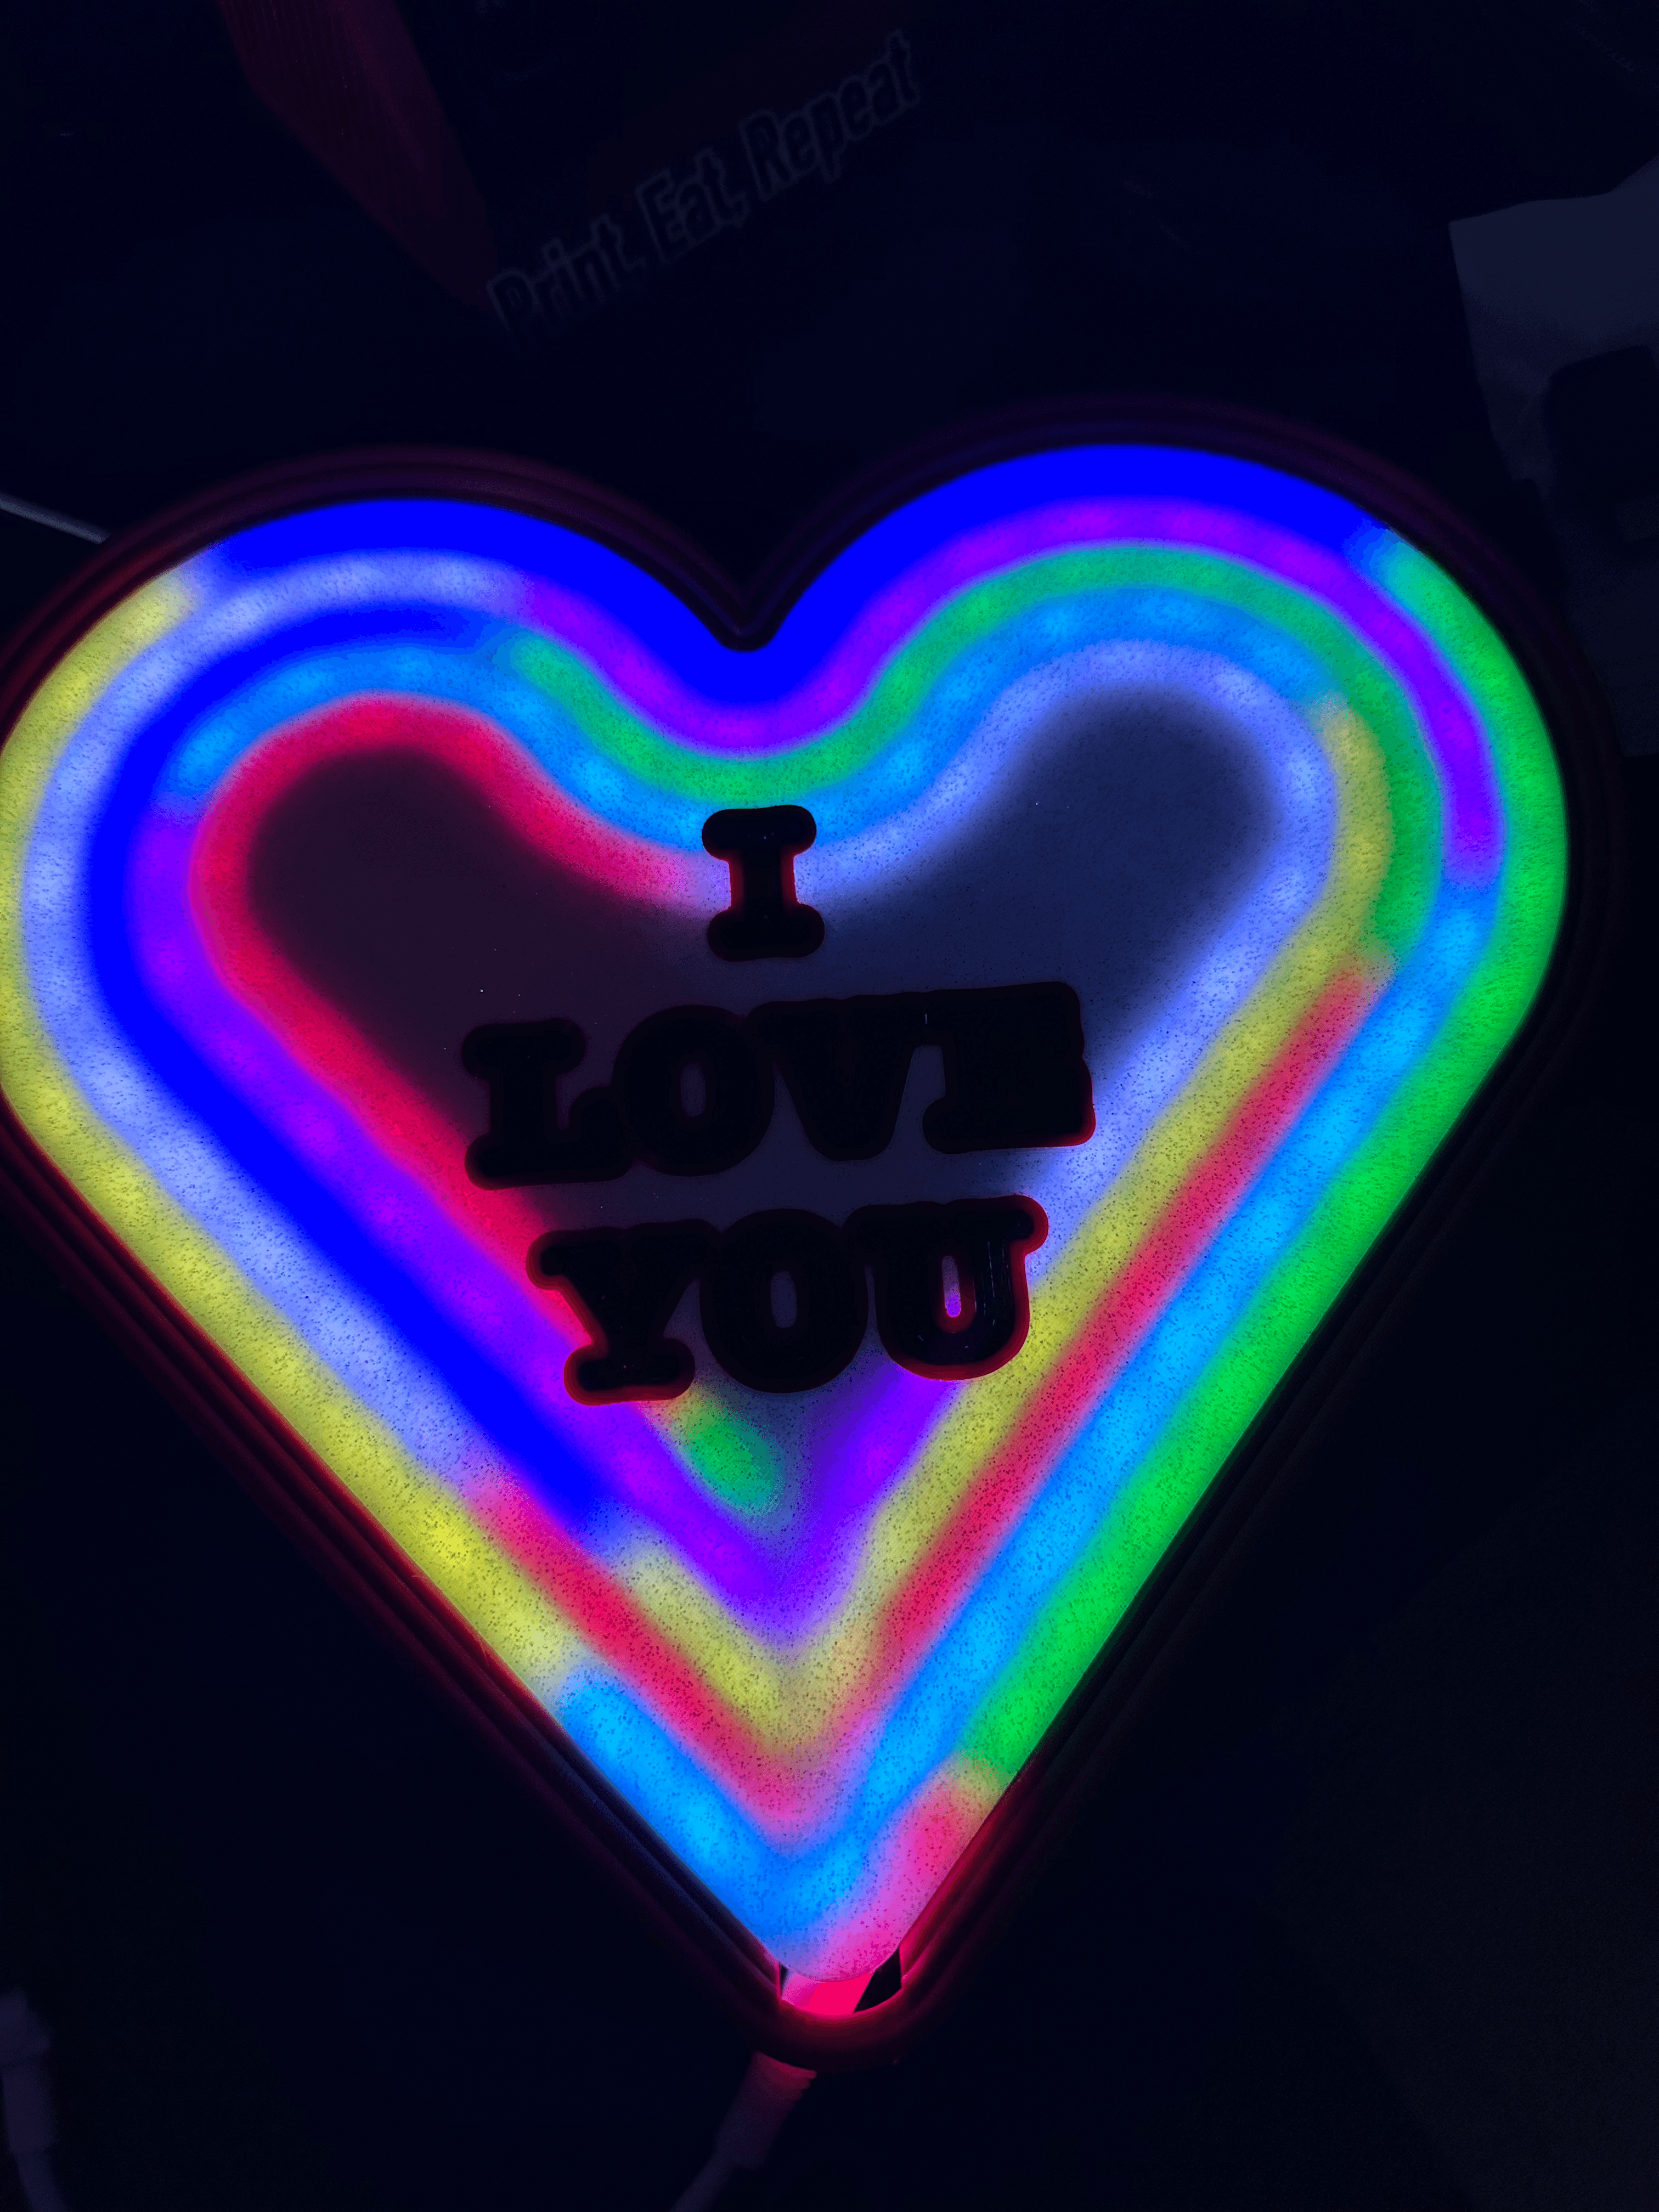
I LOVE YOU NEON HEART LIGHT BOX - SHADOW BOX - LED , RGB, NEOPIXELS

Pikachu Light Box! *FREE* Decorative Light Display

3D Light Box, Romantic Valentine’s Day Gift, Candle Box, Valentine’s Day Box, Couple Magic Box

lighthouse wall art light house wall decor ocean decoration beach house

Lava Cracked Face Wall Sculpture-wall light fixture-3mf

Dragon Rune Light Box
Organizer Box

Deadpool Stained Glass Light Box
ivory box wall art hueforge wall decor optical illusion carving

Wolverine Stained Glass Light Box
polka dot wall light
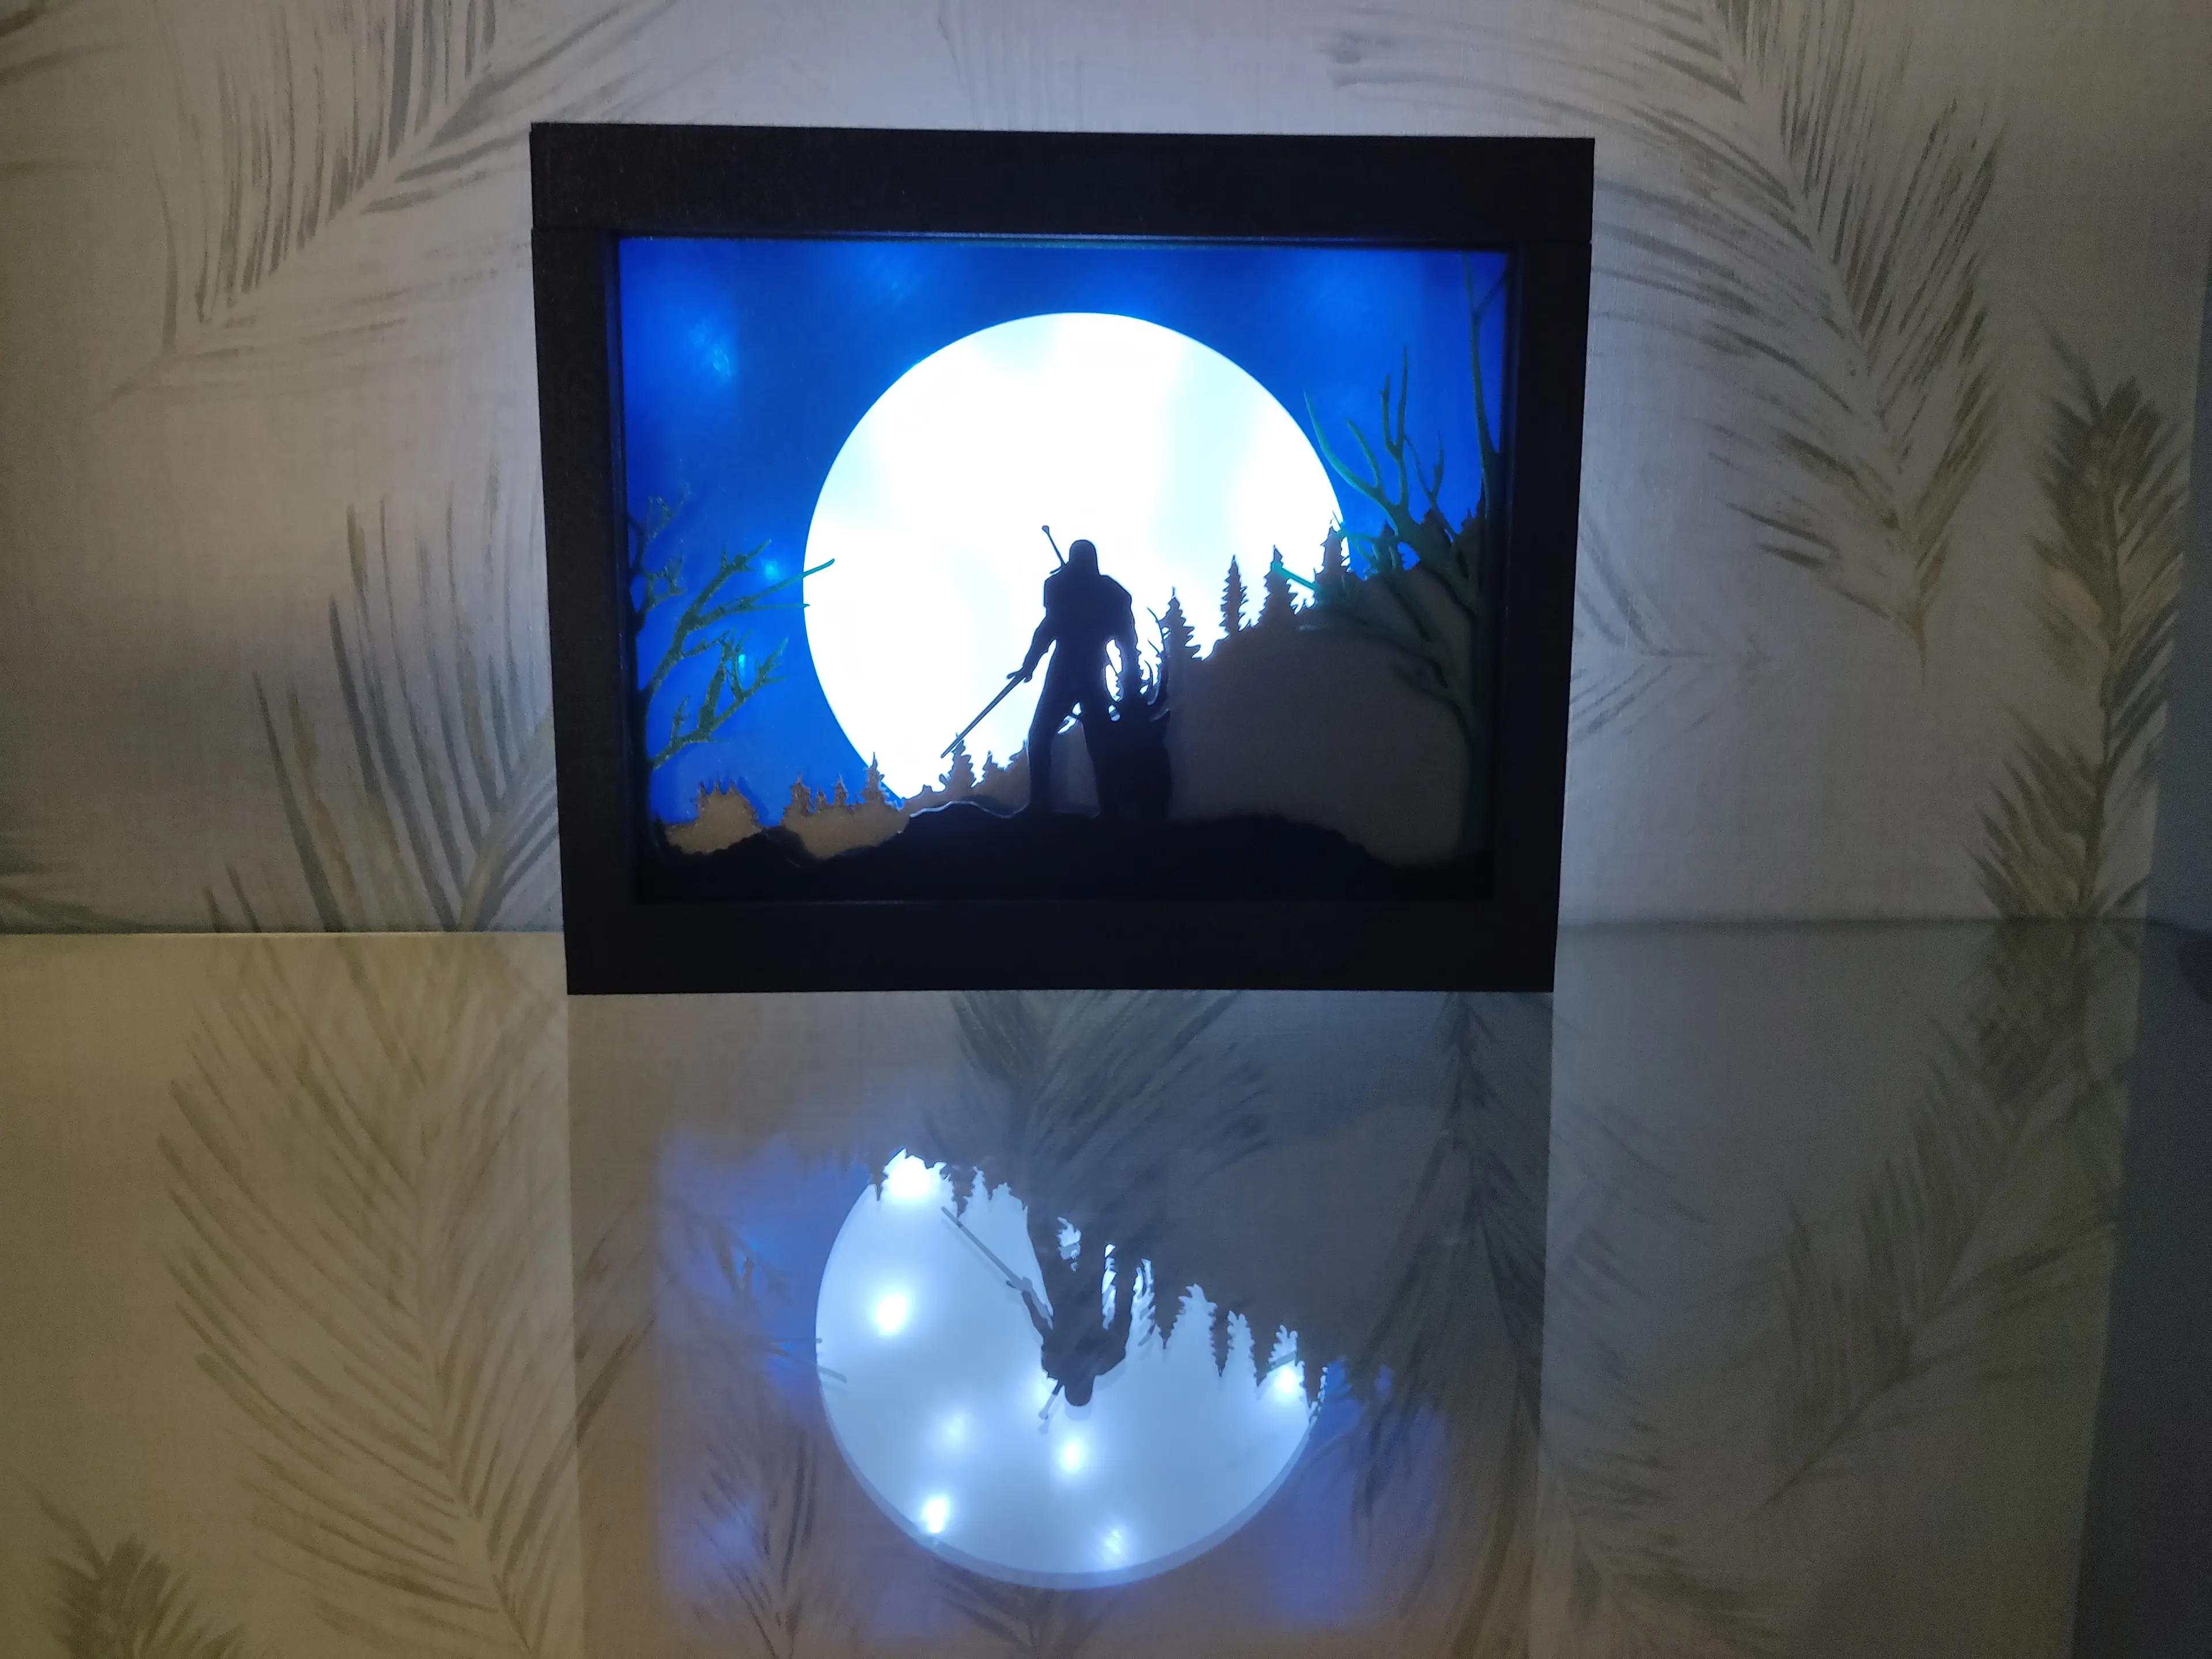
The witcher plates for light and shadow box

N Logo Light Box

Legacy Light Box

Aries Zodiac Constellation Lamp or Wall Art – 3D Printable STL File Wall Light Decor, Snap-Together

Geng Light Box