

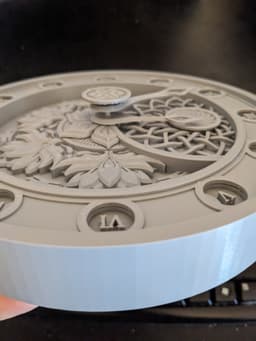


Mandala clock face
A 3d printable clock face designed to work with replacement clock kits.
I made this model based on this piece of art by DanHobb5designs; https://www.instagram.com/p/Cs1WGypM2P-/. This is a functional clock face, clock kit not included. Most of the work was done in FreeCAD, with the more organic aspects being done in Blender. I tried to make this easy to print, easy to assemble and hopefully easy to paint, while staying as true to the original art as possible. Needing minimal support was also a design consideration. I also designed parts to allow for assembly and hanging without the clock kit.
The total outer diameter is 200 mm (7 7/8 inches) and it was designed to be printed at a .2 layer height. The right side decoration and the two hands are the only pieces that might benefit from a lower resolution. The pieces are shaped or keyed to fit in a specific way where necessary. The pieces were designed to fit easily but snug against each other. If they fit too snugly, a light sanding should fix it. If you find the hands don't sit correctly, try reducing or disabling elephant foot compensation. The undercut can be enough to make the pieces not sit correctly.
The clock kit I used is here; https://www.amazon.com/dp/B0742439S3. As long as the kit has a minimum thread length of 12 mm (15/32 inch) and a maximum shaft diameter of 8mm (5/16 inch), this should work fine.
Steps to assemble the clock. You don't need the non-mechanism files if you are using a clock kit.
-
Glue the clock mechanism guide to the back of the clock center. This is optional, but will help ensure the clock mechanism is attached in the correct orientation.
-
Attach the clock mechanism to the clock face using the instructions included in the kit. Use a pair of pliers to tighten the nut securely.
-
Once the clock mechanism is secured in place, place the right side decoration on the post. Glue the right side decoration center to the top of the post. The right side decoration can also be glued down, but it is not necessary.
-
Attach but do not glue the central flower decoration to cover the nut and washer from the kit. This piece should fit securely and is meant to be easily removable if needed.
-
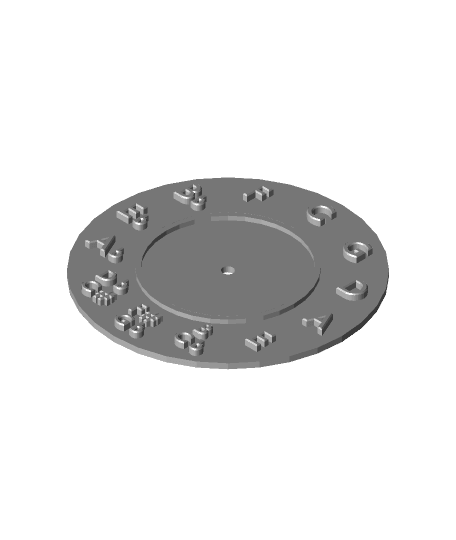
Glue the numeral recesses piece to the numeral ring. There are keys and indents to insure correct orientation.
-
Glue the numeral ring to the clock center. There are three keyed supports that fit into notches on the back of the numeral ring. This assures the numerals are orientated correctly.
-
Glue the clock center with the attached numeral ring to the outer ring. The supports on the outer ring will fit in the spaces between the numeral recesses.
-
Place the hour hand (the shorter hand with the hexagon cutout) over the drive shaft and rotate it while gently pressing down, until is slides into place.
-
Do the same with the minute hand (the longer hand with the slot cutout) and secure it with the nut provided in the kit.
-
Fit the center decoration on the nut used to hold the minute hand in place.
The steps for assembly without the clock kit will be the same, except you need to glue the clock support with hanger to the back of the clock center and insert the center decoration spacer into the center decoration before gluing on. When attaching the hands, it's probably best to glue them from the top.
Mandala clock face

Human Walking Scanimation Clock Face

Clock Body for Round Clock Face Designs - 3 parts, 230mm and Smaller Clockfaces

Generic clock face
Circle of Fifths clock face
Clock face Retro

Celtic Knot Design Clock Face showcasing a Carved Great Dragon

Doctor Frankenstein's Monster Clock Face for Halloween

Majestic Wolf Clock Face - Great Christmas Gift - Happy Friday!

WALL CLOCK FACE

WALL CLOCK FACE

WALL CLOCK FACE

WALL CLOCK FACE

WALL CLOCK FACE

WALL CLOCK FACE

WALL CLOCK FACE

WALL CLOCK FACE

WALL CLOCK FACE

WALL CLOCK FACE

WALL CLOCK FACE

Some parts are very difficult to print (inserts, hands). Looking at your photos, you are a better printer than I. hehe
can this be used with the bambu lab clock kit?
I don't know. I googled the kit but it didn't have any size info. If the thread and shaft sizes match what's above it should work fine.