


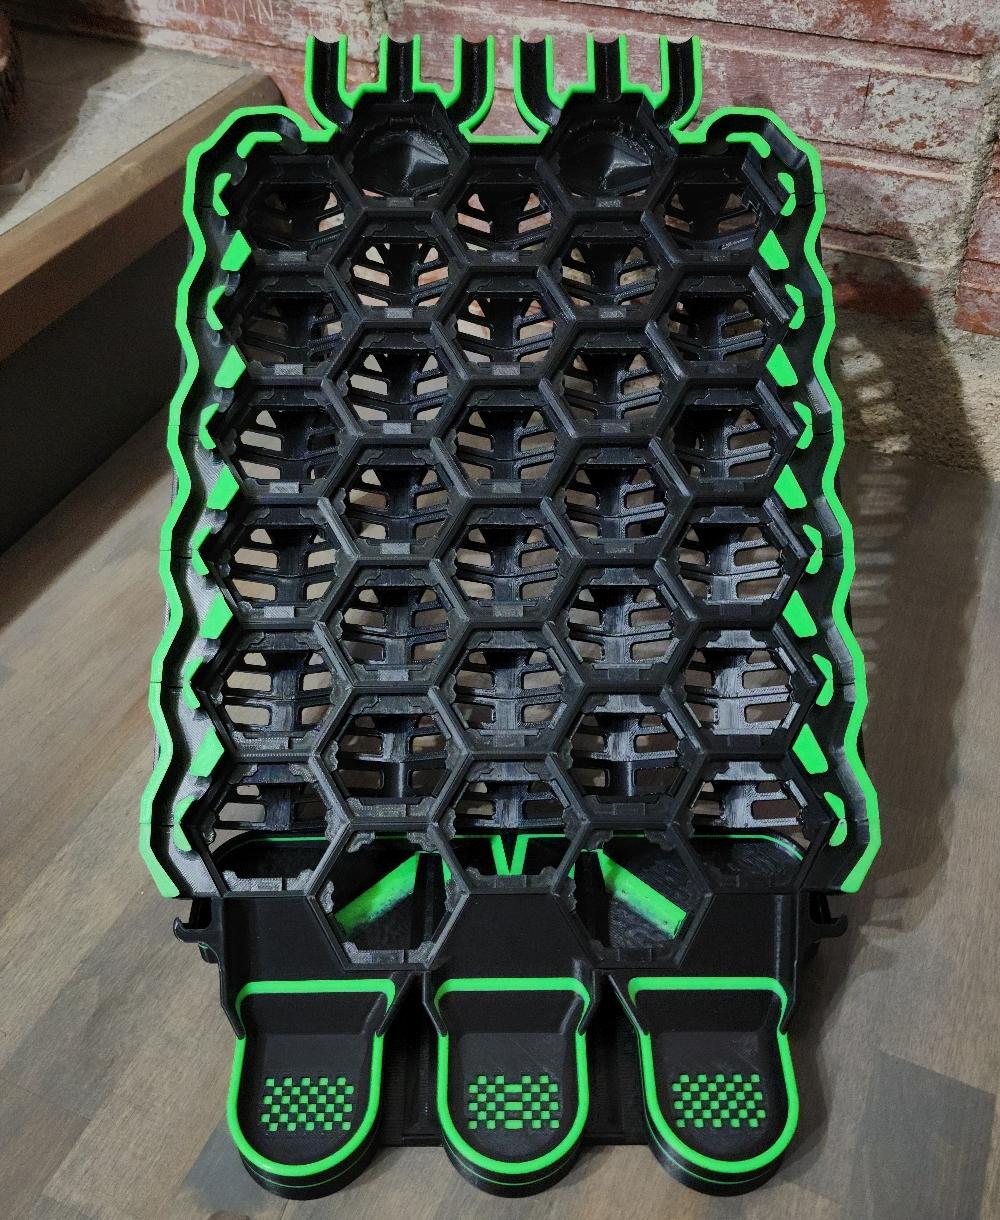
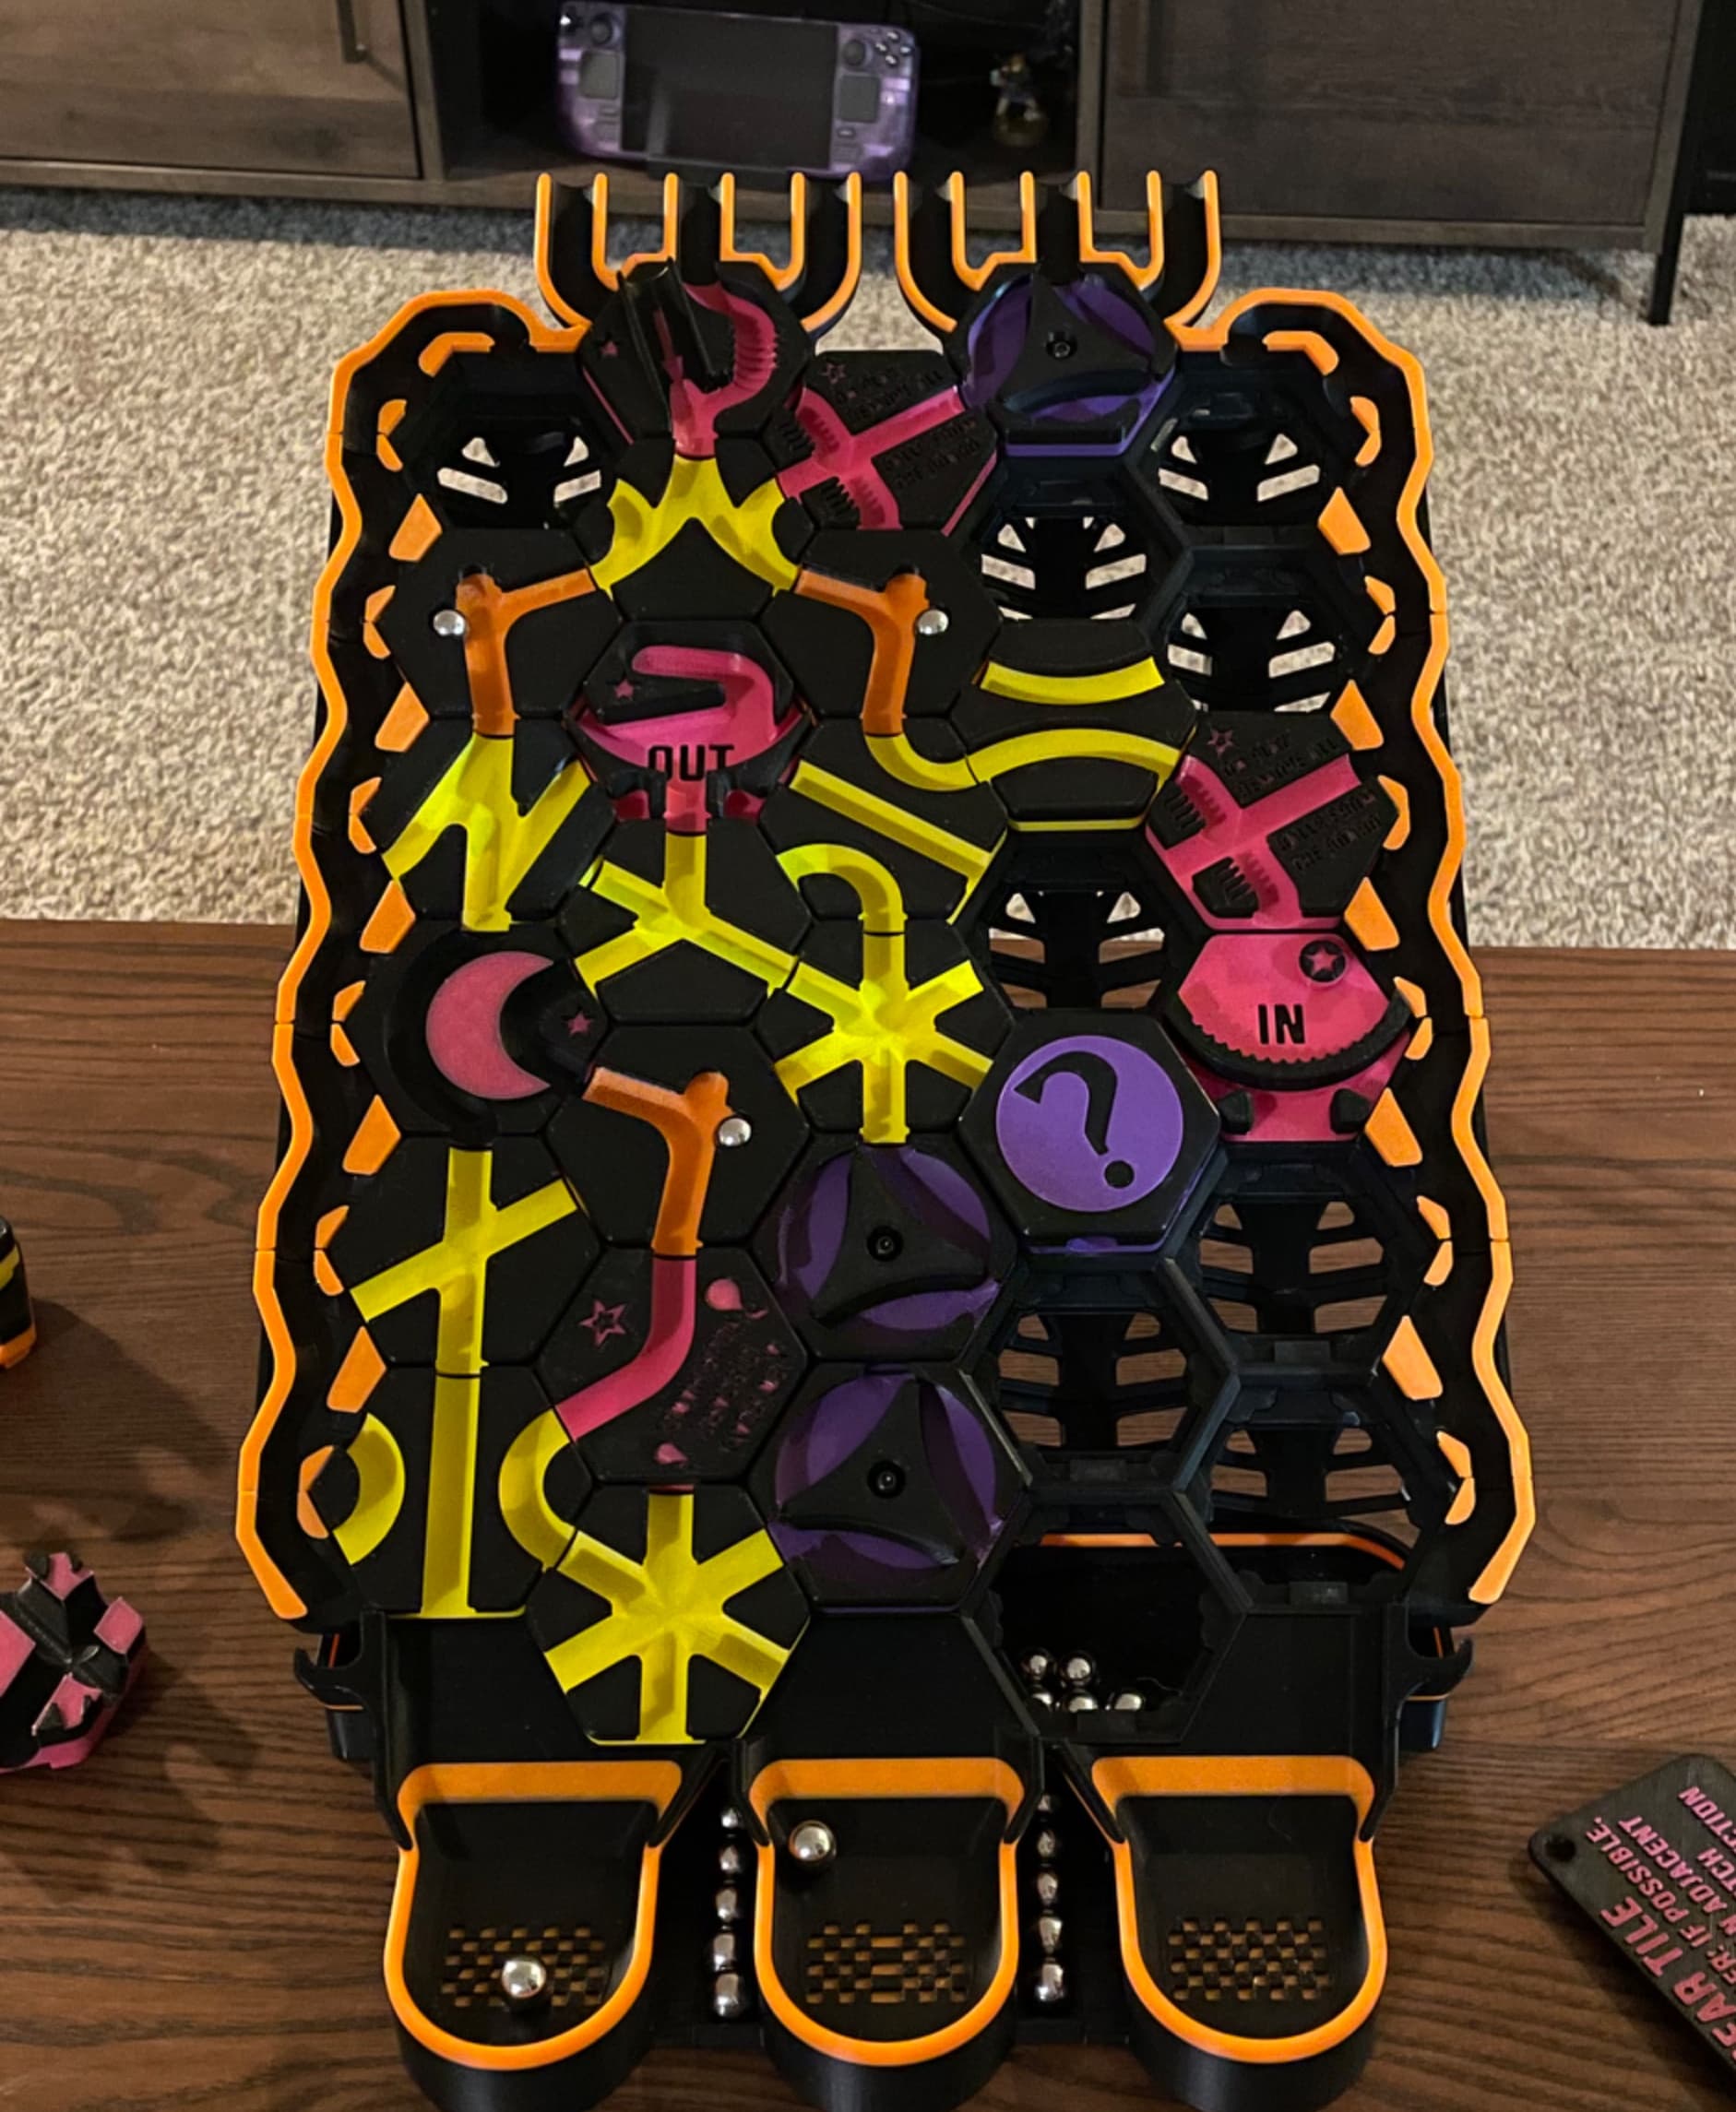
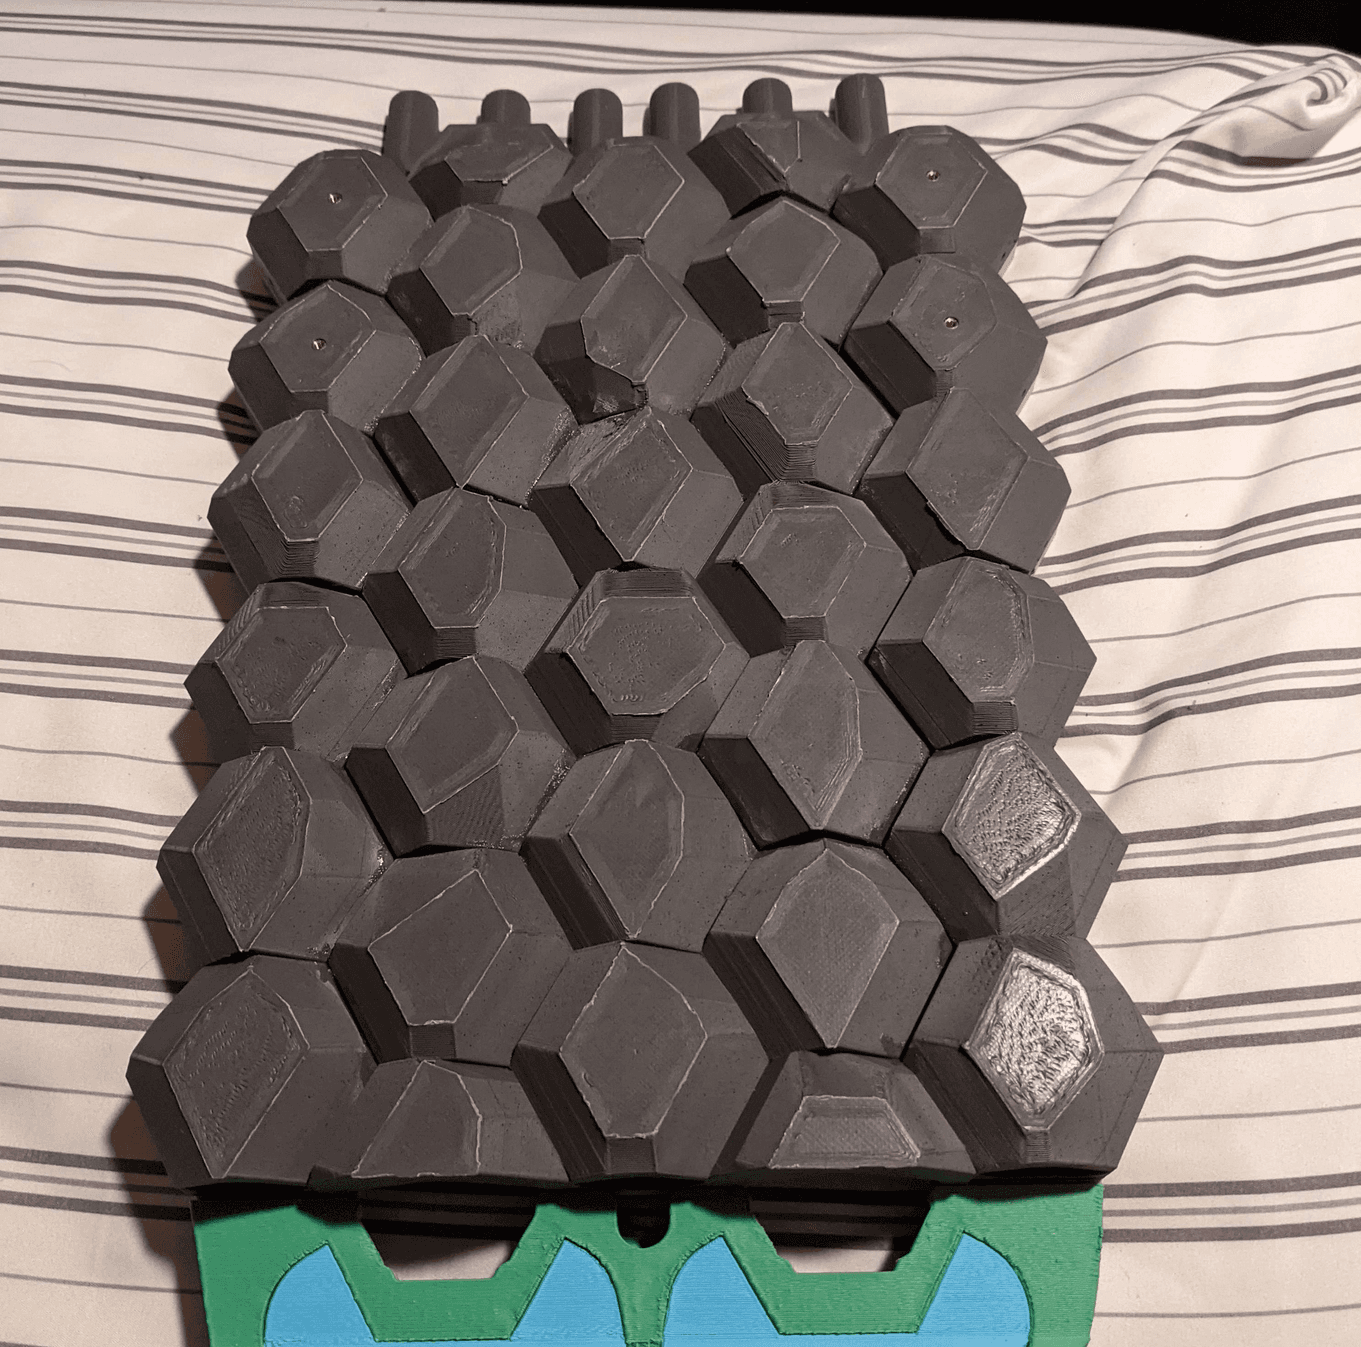
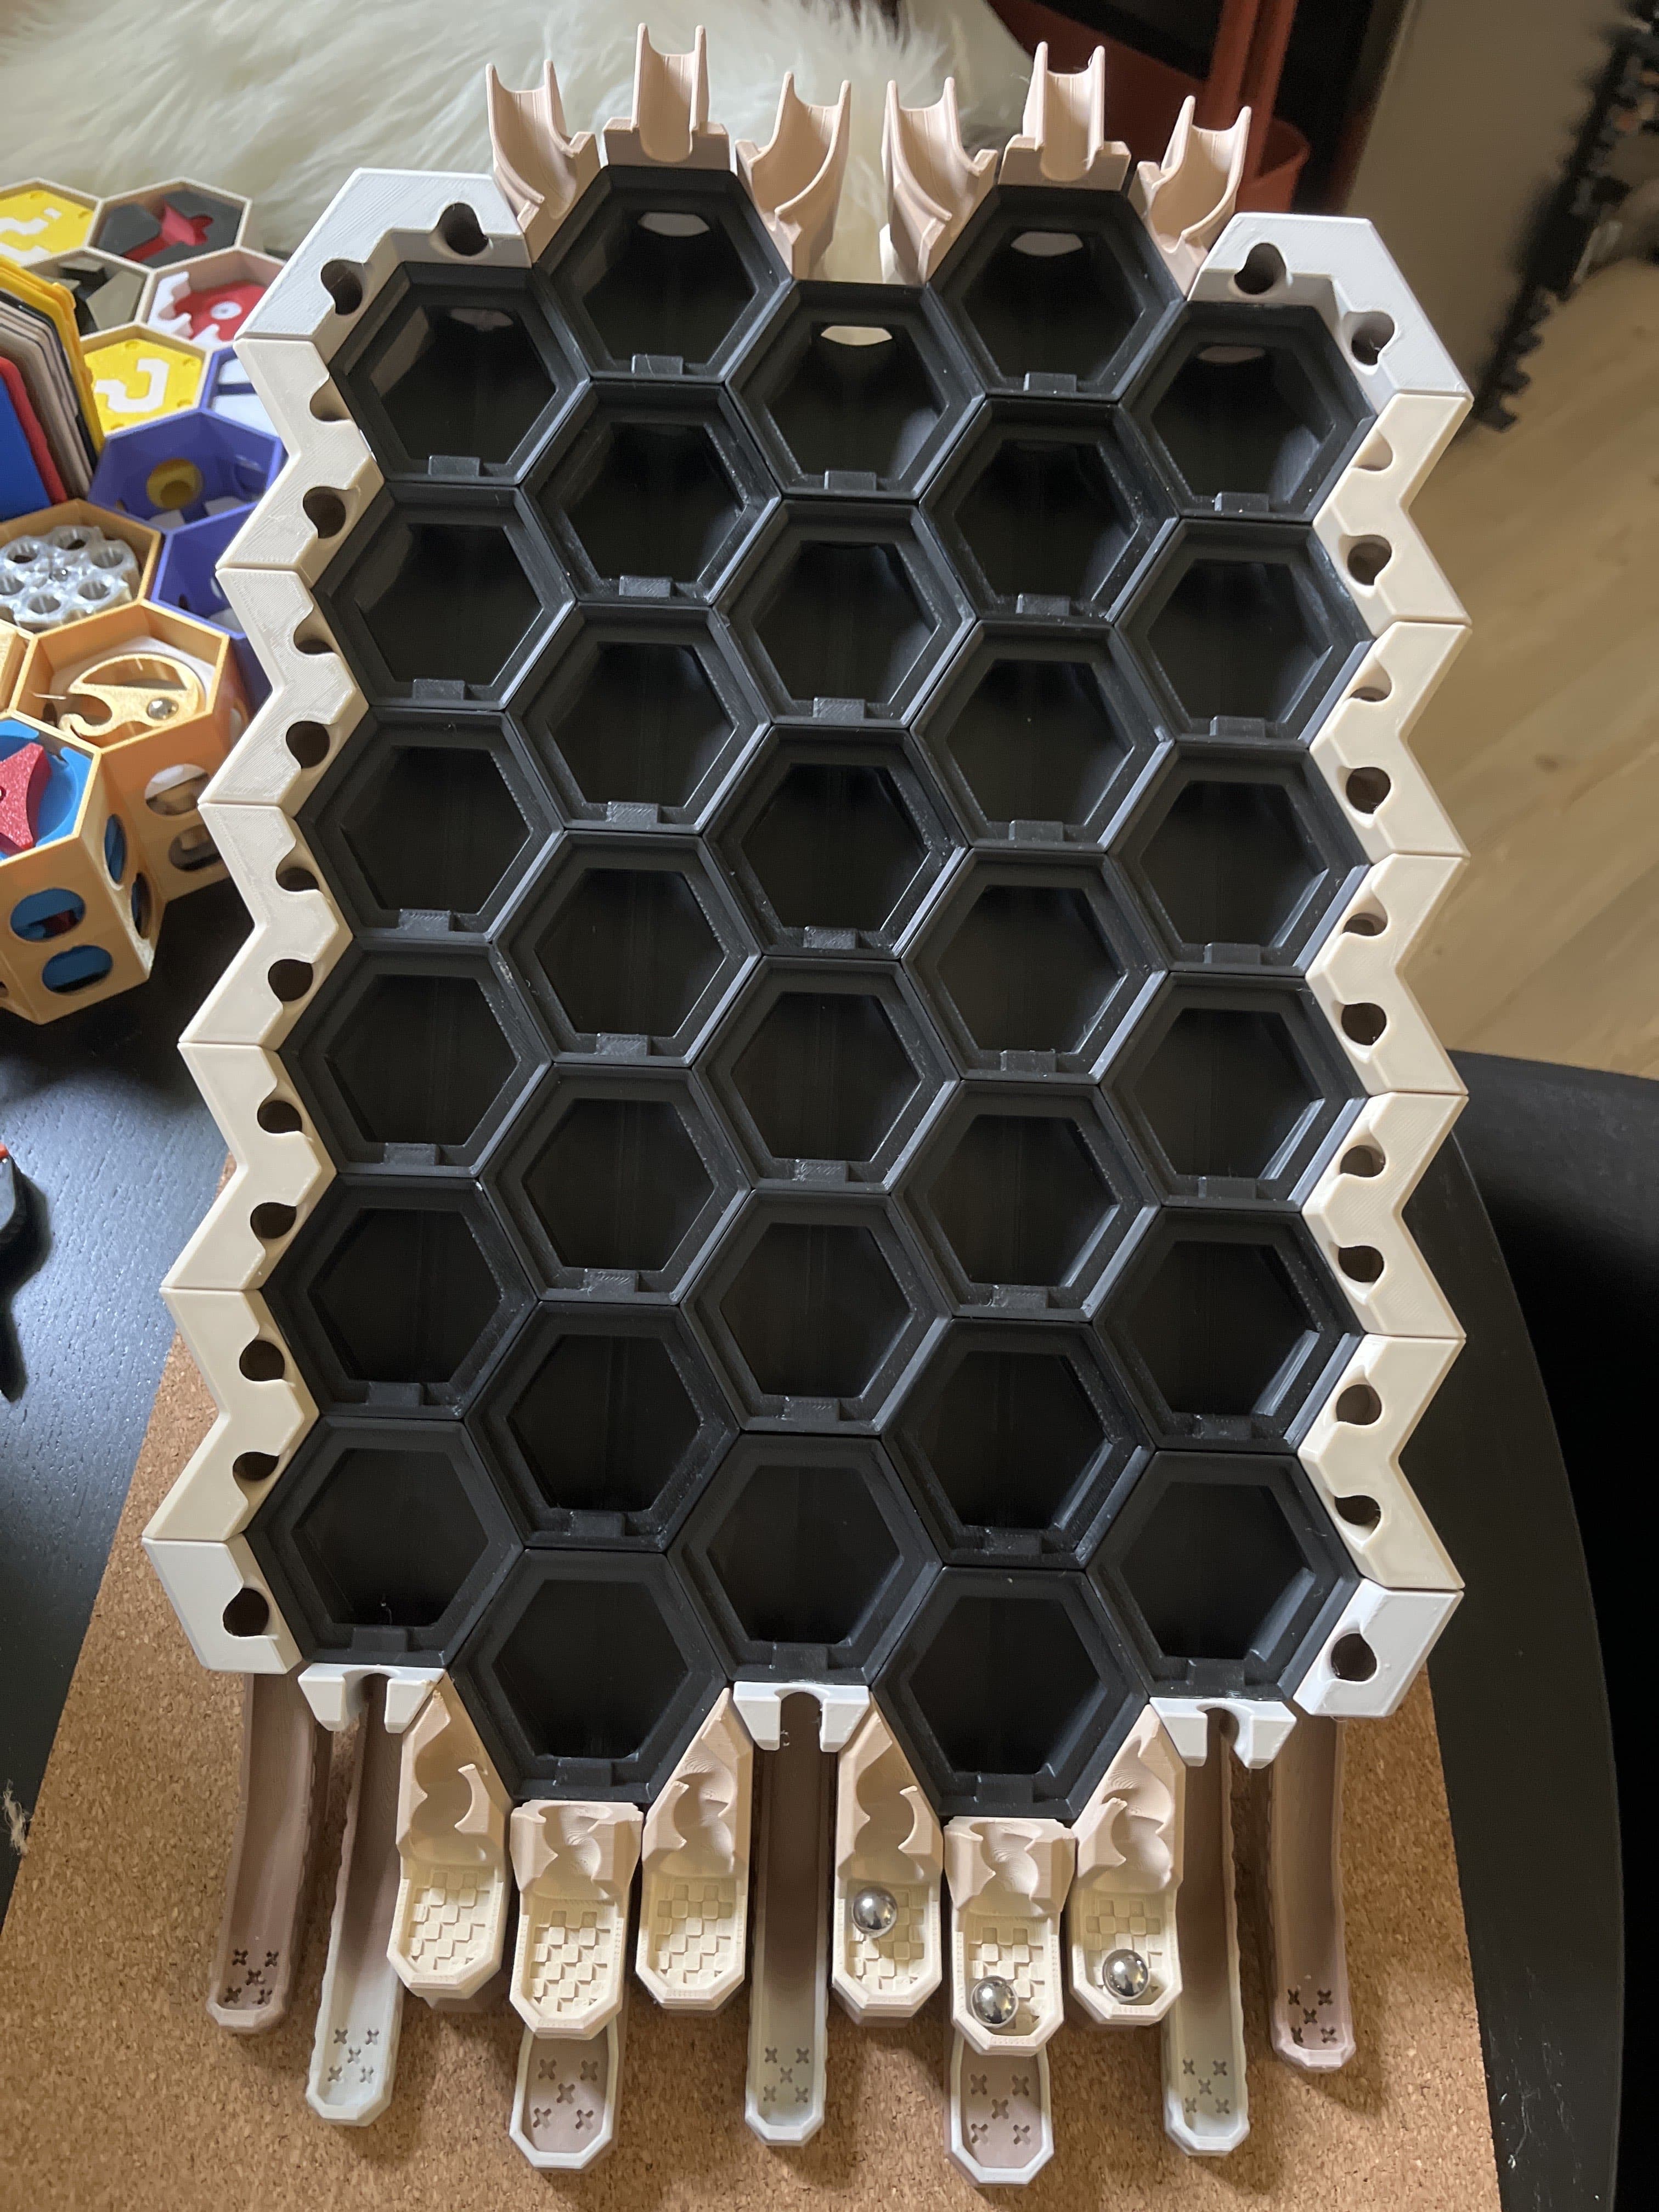
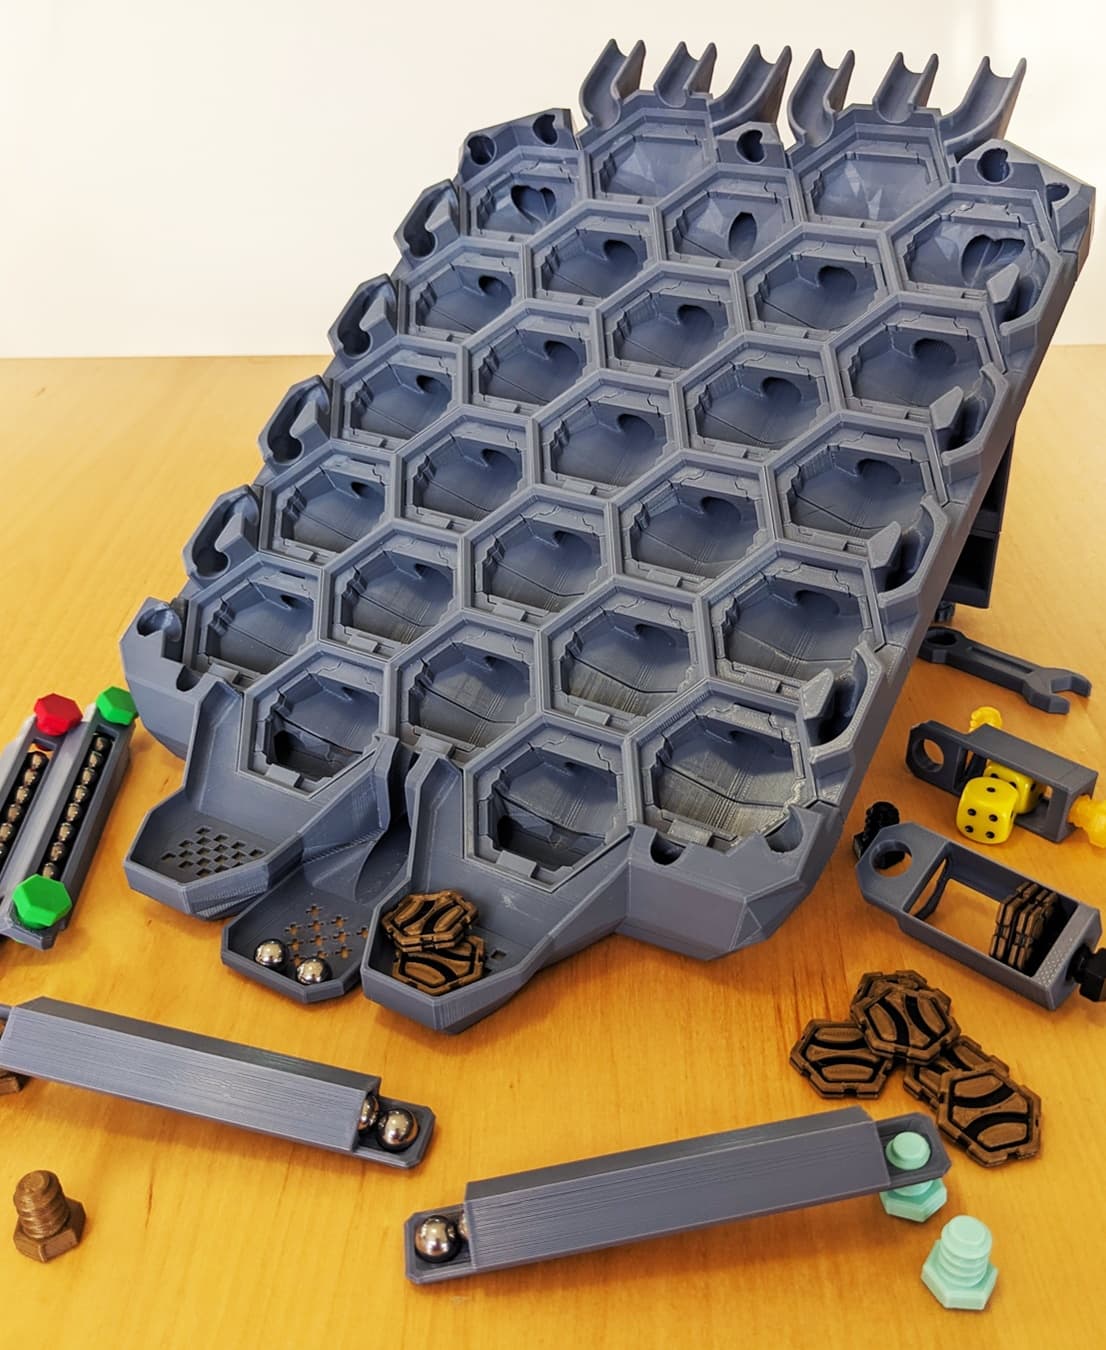
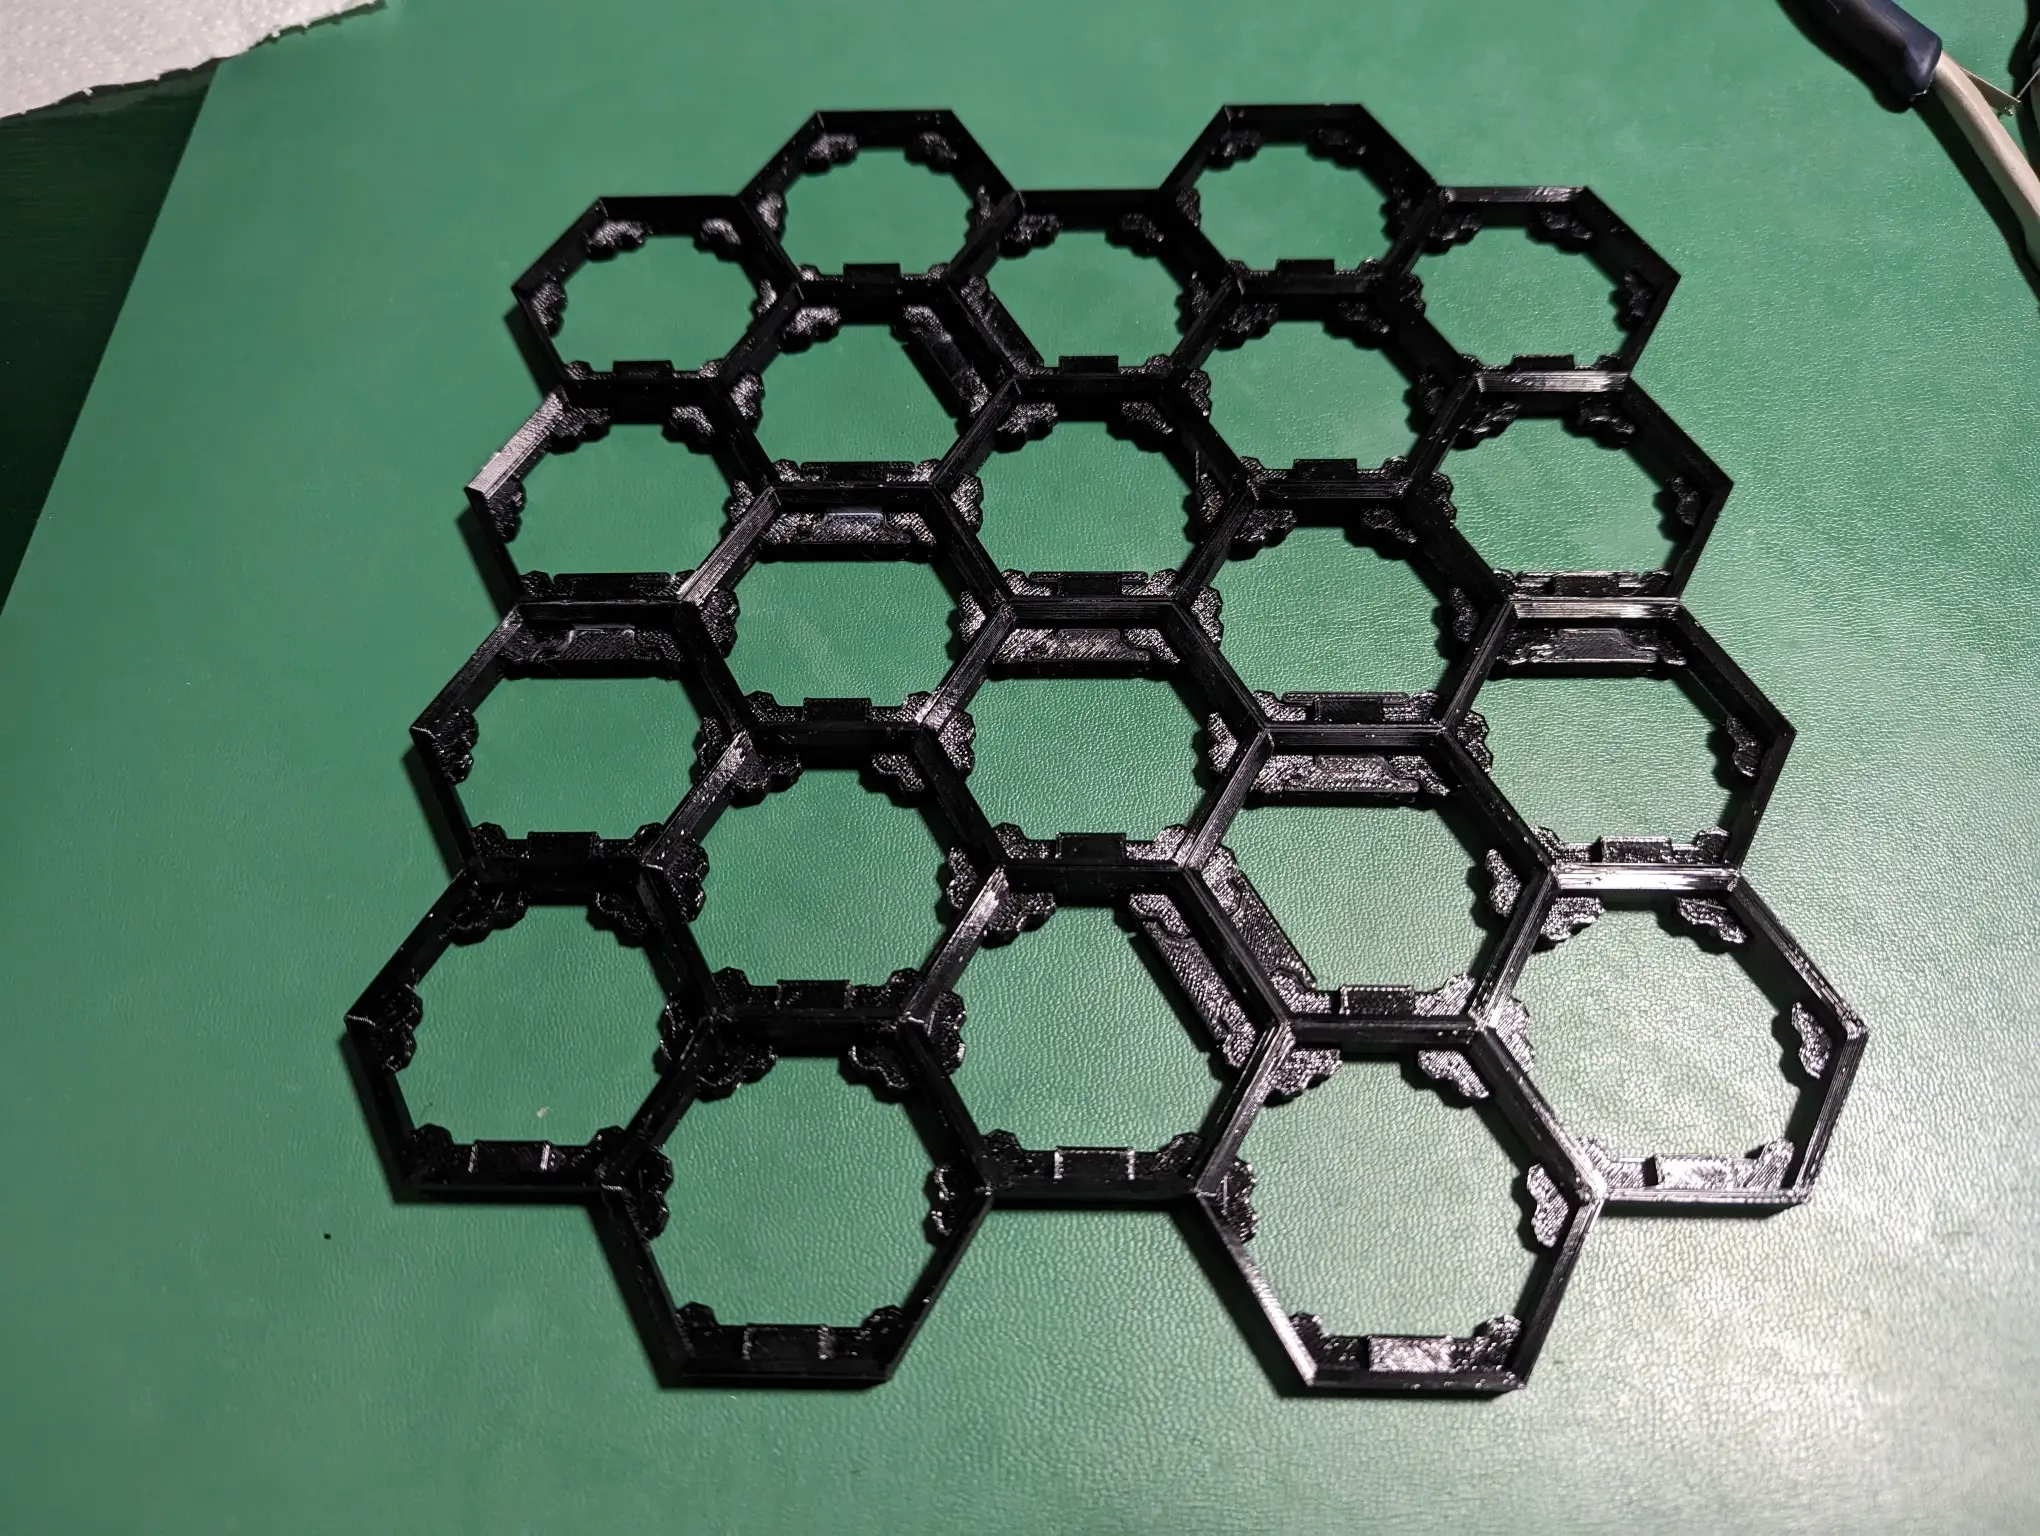
Hextraction Expanded Board Full Gutters
The third and most advanced iteration of the hextraction board gutters, featuring three endzones, full ball coverage funneling them to the front, and with several design improvements over the fancy board gutters. For basic board gutters, go here: https://thangs.com/designer/andrewtho5942/3d-model/Side%20Hextraction%20Gutters%20--%20Basic%20Board-884874?manualModelView=true&source=Recent For fancy board gutters, go here: https://thangs.com/mythangs/file/883800?source=Recent
This description will outline the features of this gutter design, how to print the parts, and assembly instructions & tips.
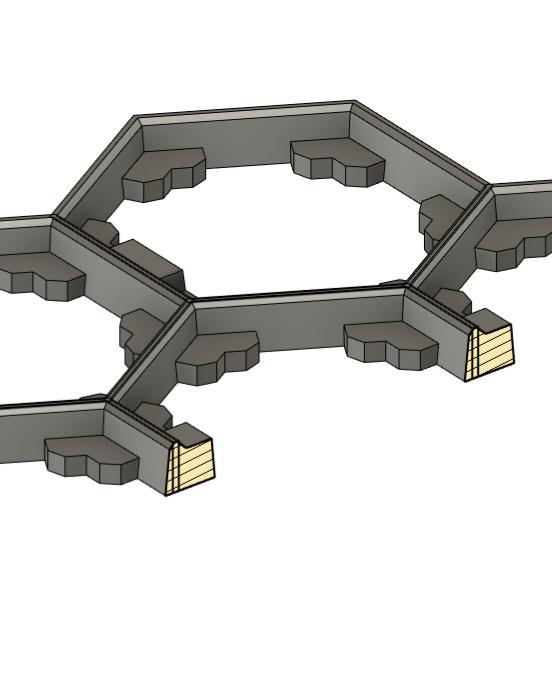
- FEATURES - All of these parts have been fully tested. Some improvements over the fancy board gutters are that the end-zones are combined with the bottom gutters to form one part, the lowest tile frames are no longer partially blocked by the collection trays, and did I mention that the balls actually get funneled to the front now? Because that's the main reason I wanted to make a new board and it is so convenient. The legs in this model are made for M3 screws, but if you use the default legs and M4 screws it will also work (just make sure you still use the 110mm length leg segment).
The board takes about 850g of filament (This was with 15% infill and 3 perimeters).
- PRINTING - All models are scaled up 10x. I recommend printing the sidegutters with supports under the overhang, but everything else doesn't need them. It's also a good idea to print the endzones with a smaller layer height so that the ramps have less thick flat layers. This helps the balls roll down them more reliably.
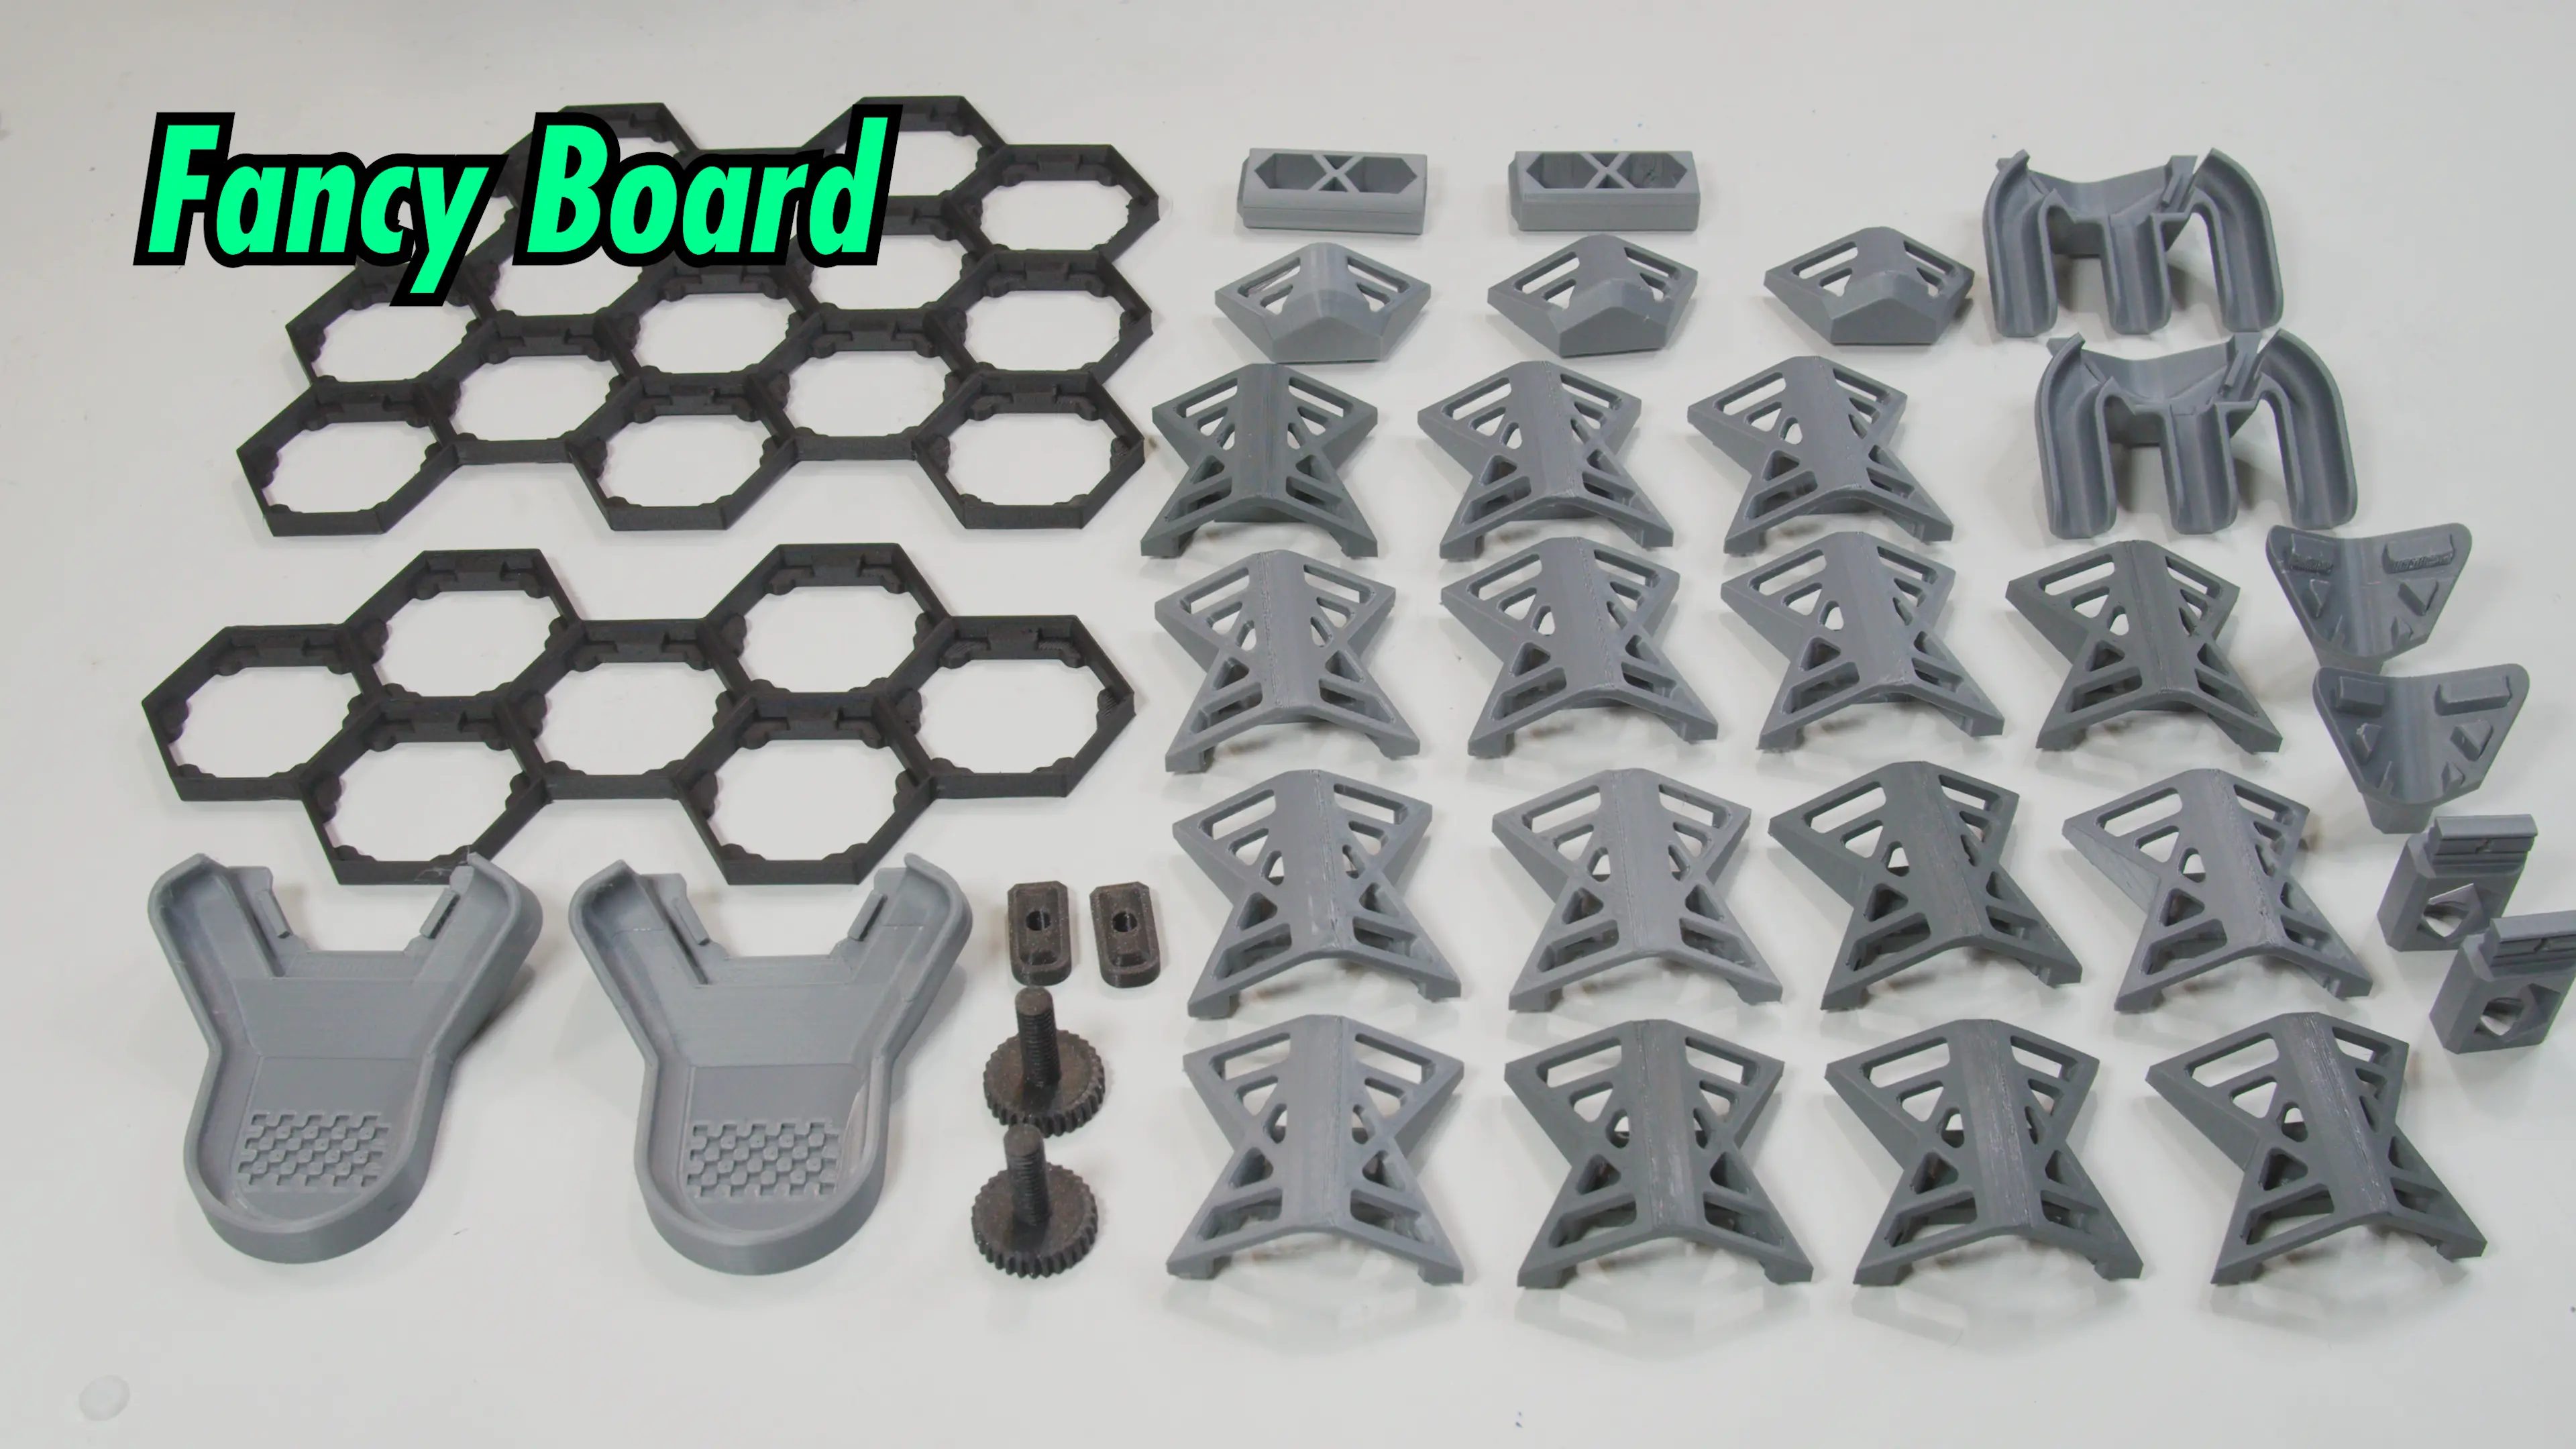
Comprehensive Parts List:
-
2x Gutter On-Ramp
-
1x TopMid Exit Cap
-
2x Board Frame 1
-
4x Board Frame 2
-
4x Board Frame 3
-
1x Board Frame 4
-
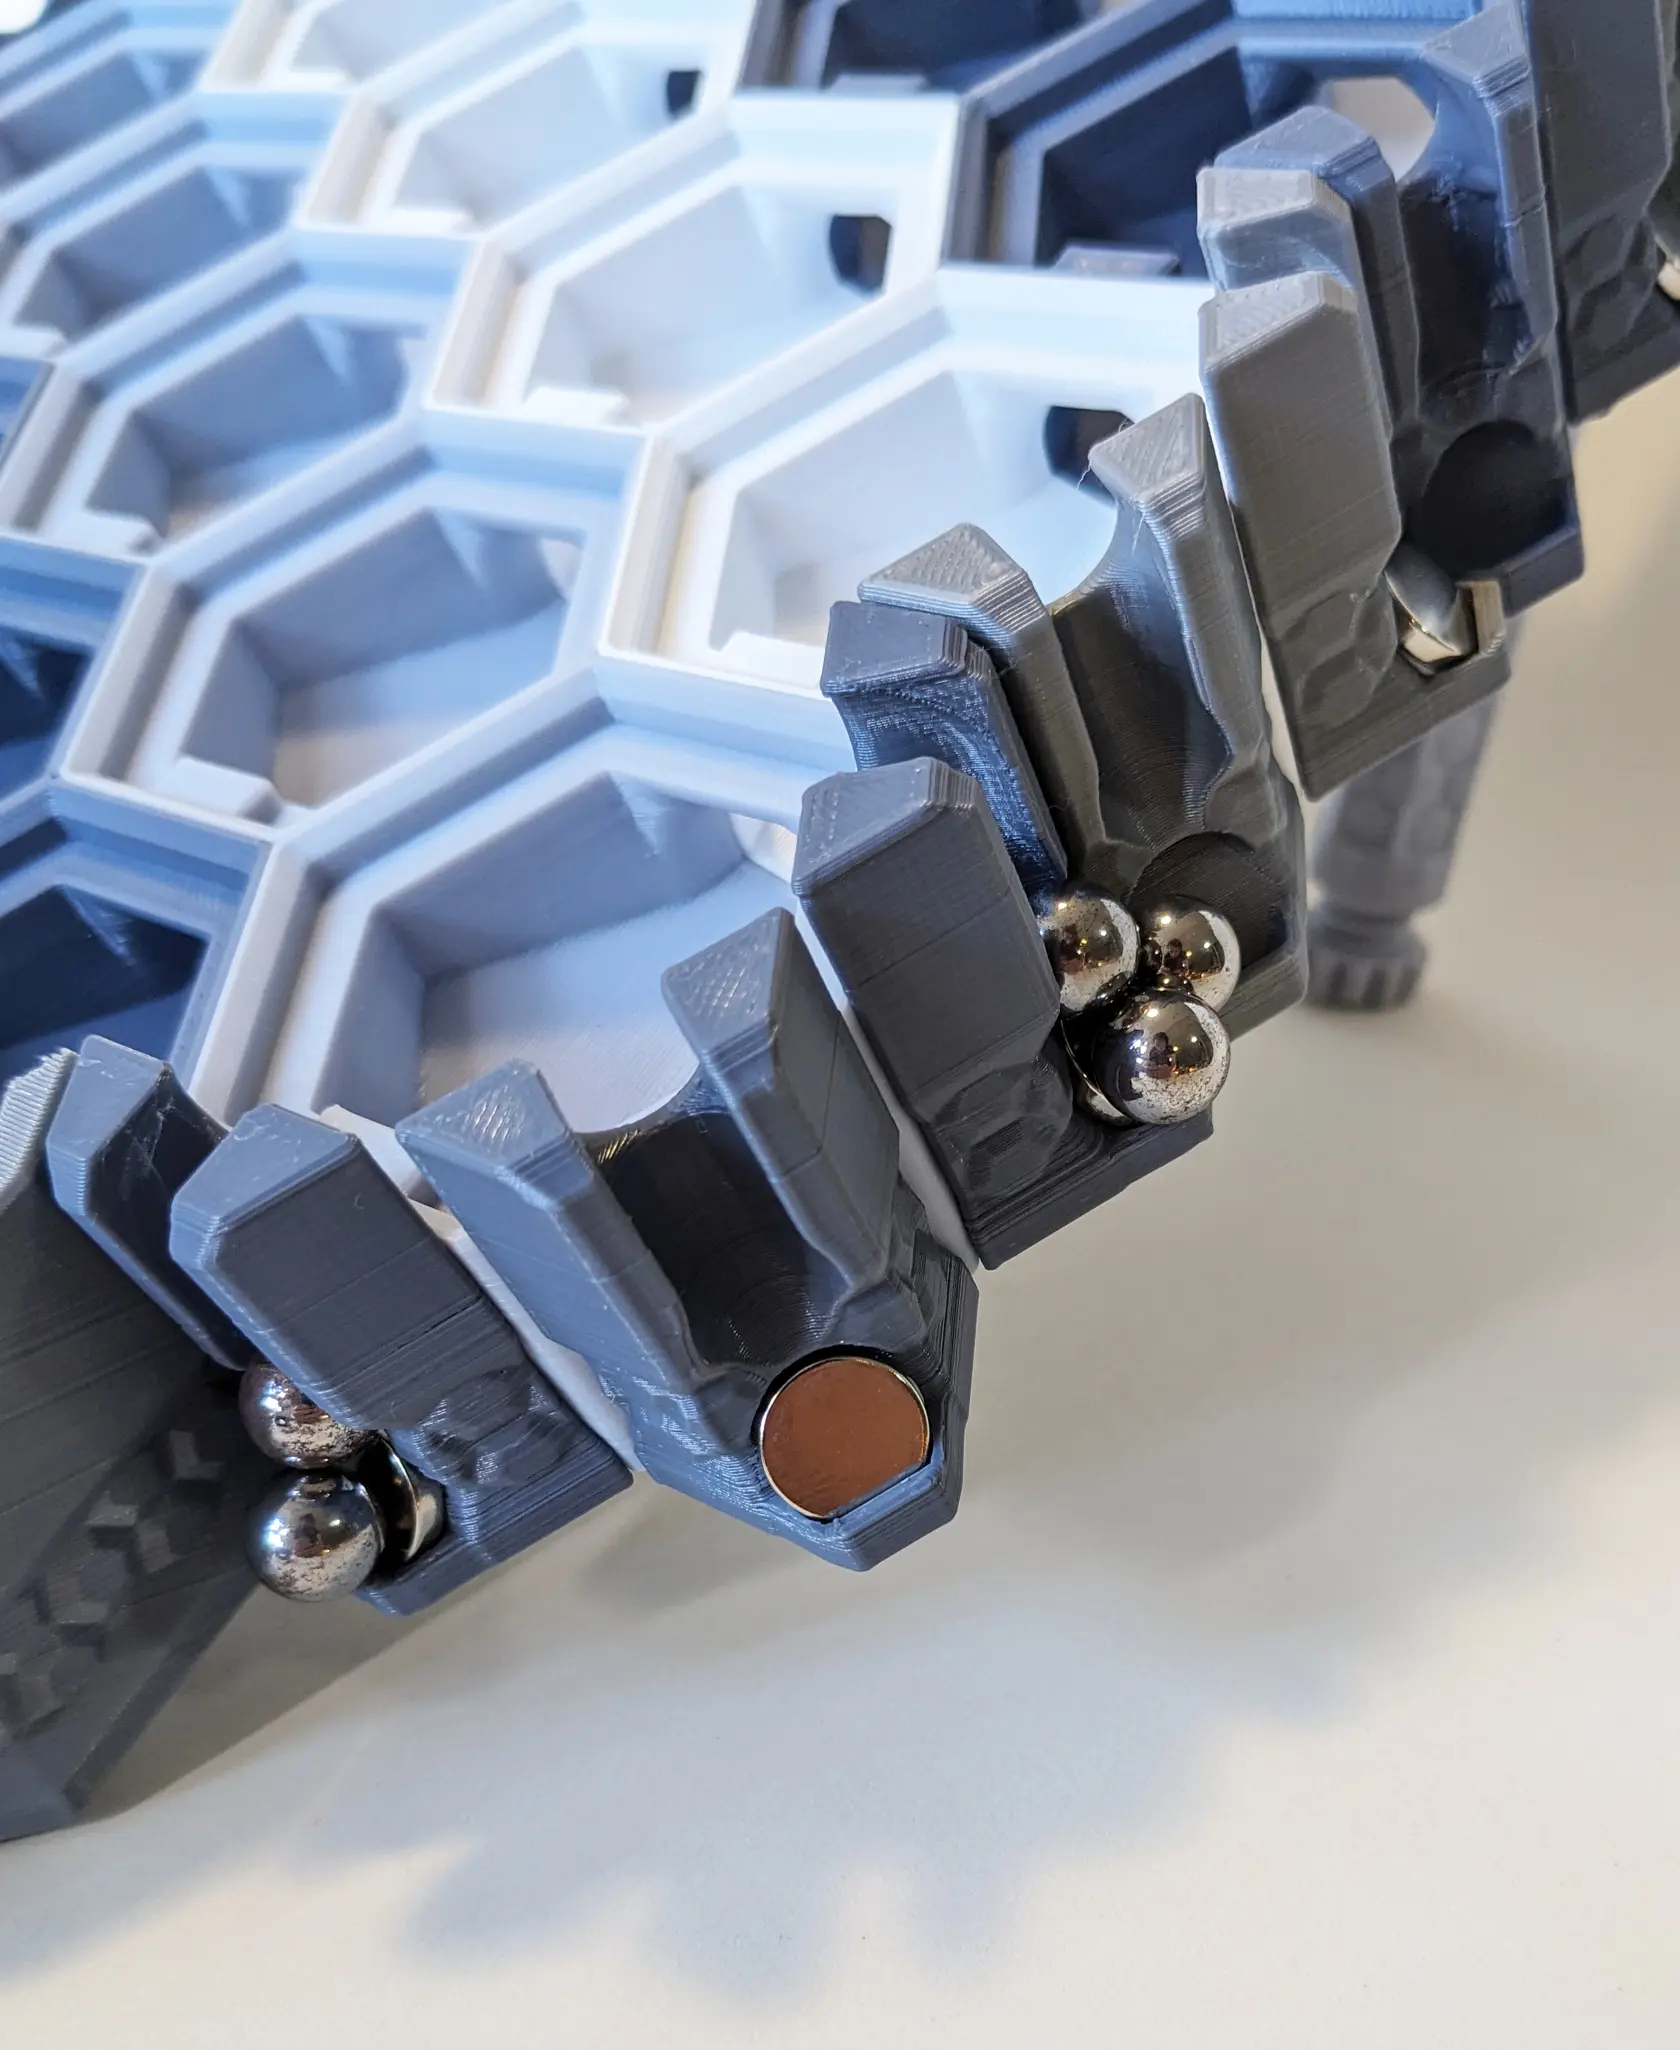
3x Gutter Endcap
-
25x Gutter Segment
-
2x Guide Gutter
-
1x Left Sidegutter Top
-
1x Right Sidegutter Top
-
5x Left Sidegutter Mid
-
5x Right Sidegutter Mid
-
1x Left Sidegutter Bot
-
1x Right Sidegutter Bot
-
1x Endzone Left
-
1x Endzone Mid
-
1x Endzone Right
-
OR 1x Endzones One Piece
-
2x Gutter Leg Mount M3 (OR Default For M4)
-
2x Gutter Leg Start M3 (OR Default For M4)
-
2x Gutter Leg Segment 110mm
-
2x Gutter Foot Mount Integrated (Or Heat Set)
-
2x Universal Foot Integrated (Or Heat Set)
-
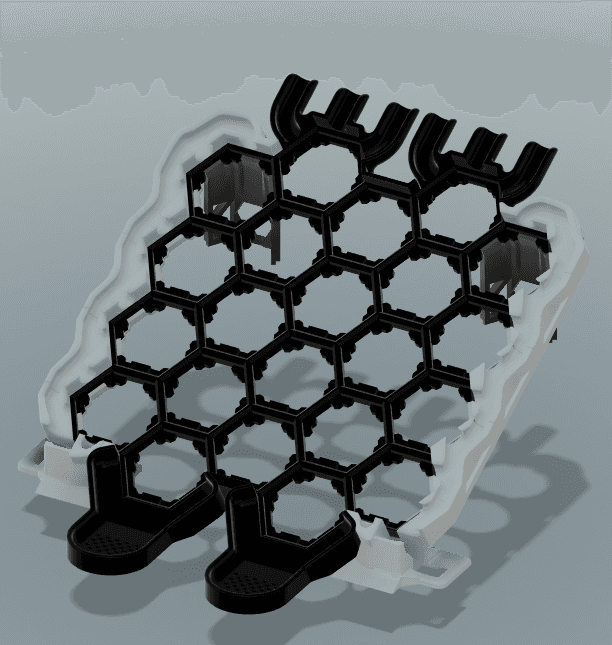
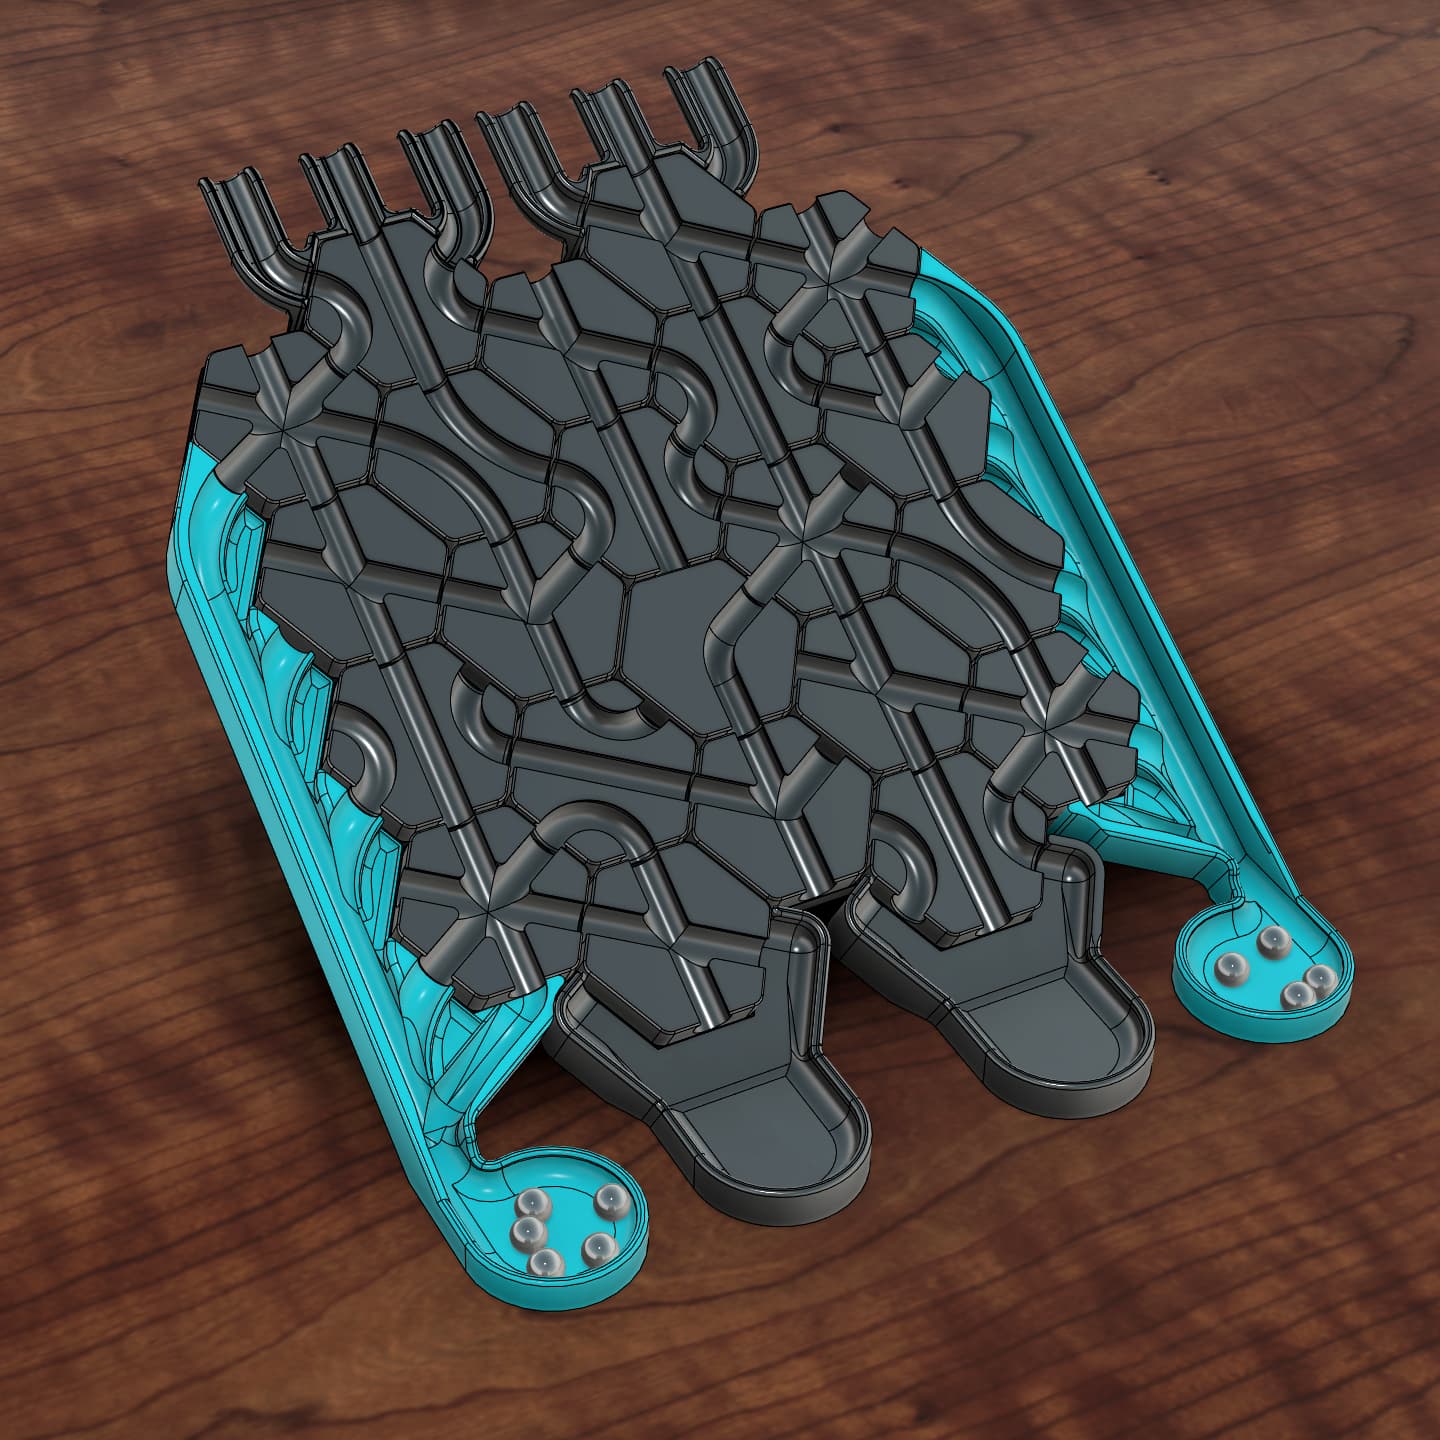
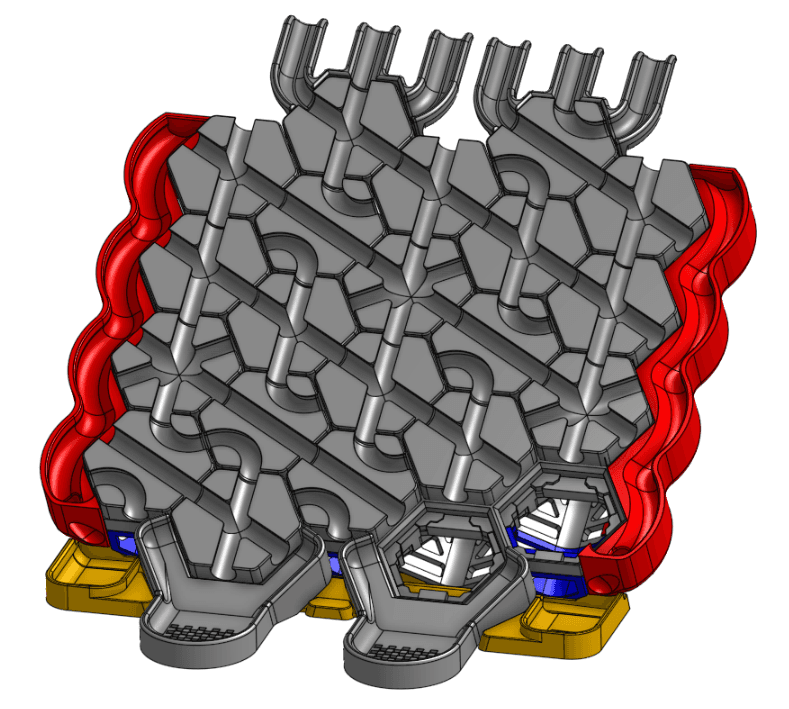
ASSEMBLY - Please reference the board assembly model to see where all the parts are glued.
-
Recommended assembly order and tips:
- Board Frames (Frames 1 and 4 go in the middle, with Frames 2 and 3 alternating on the sides).
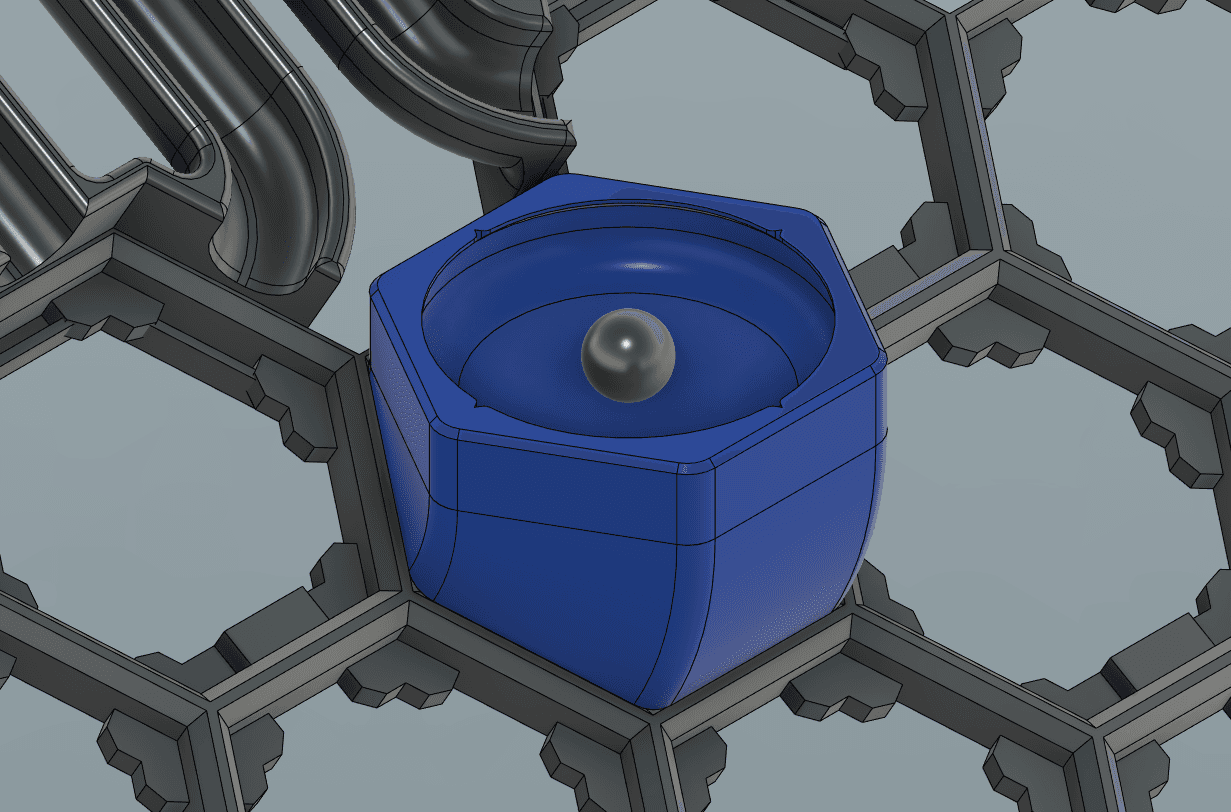
- On-Ramps
- Fancy Gutters (endcaps, gutter segments, and guide gutters)
- TopMid Exit Cap -- Glue between the on-ramps
- Sidegutters -- I recommend you glue these on one at a time from top to bottom, aligning the height with a tile. For each middle piece, ensure the long side of the inner wall is facing up and out to deflect balls correctly.
- Endzones -- Glue these where they attach to the board frames, guide gutters, and each other.
Thanks and have fun!
- Andrew
Hextraction Expanded Board Full Gutters
Hextraction - Rocky Gutters (Expanded Boards)
Side Hextraction Gutters -- Basic Board
Super Fancy Gutters for Modular Hextraction board

Full Hextraction Gutters
Hextraction - Basic Board Gutter Upgrade
Magnetic Gutter system for the Modular Hextraction Board
Modular Hextraction Board!

Hextraction Full 22 Hex Game Board (Remix)
Super Fancy Remix of the Hextraction Game Board
Hextraction Side Gutter
![Hextraction_Board_[for small printers] 3d model](/_next/image?url=https%3A%2F%2Fstorage.googleapis.com%2Fproduction-thangs-public%2Fuploads%2Fattachments%2Fcd0a018e-8340-40be-88bc-2a72ce91cdcb%2FIMG_0366.jpg&w=3840&q=75)
Hextraction_Board_[for small printers]
Hextraction - Gutter Side and End
Hextraction Game Boards
.png&w=3840&q=75)
Hextraction Game Boards

Hextraction Gutter Funnels
Hextraction Board - Drafted Walls

Notchless Hex for the Modular Hextraction Board
Hextraction Board for Small Build Plates (at least 148mmx153mm)
Hextraction Board Leveling Tool

Nice make! And nice steam deck ;)
Hi, I loaded the model into my slicer and it was supersized and don't know what to scale it down too. I was wondering if you had any idea what i should do.
If it's scaled up %10 can I just descale it %10 to put it back to normal or am I right that that would make it smaller than the original?
Yes, descale down to 10% and it'll be normal size.
Thank you so much! This gutter mod is top tier. I've found that it's pretty common in my games for the curve in the bottom of the goal to send marbles flying out of the board. I'm not sure if that's just an unintended side effect of the longer board meaning the marbles can get to a higher speed? Is this something you also experience? And if so, how do you rule it? Is it first marble to reach the goal, or first marble to stay in the goal?
Hi Andrew! Great model, I plan to print it as a gift for a friend, as soon as my printer idles the next time. I was wondering how to assemble the board frames, and if it wouldn't be possible to have one "Board Frame One Piece" File, so that I could print that all at once? I have a 400x400 print bed, so it should fit in one go. Could you build and upload that, or is there any reason not to do it that way that I just don't get yet? I have not played Hextraction yet.
Hi, great extension - How do you place the Gutters for optimal printing?? With or without supports. THX alot
For the side gutters, I placed them face up with supports, but they are a 30 degree angle overhang so some printers should be able to do this without supports.