Bunny Hat - Single and Multi-material - For magicians
This fun model is a remix of my Bunny Pot model that features a bunny inside a flower pot.
The model has two versions available for printing - one is perfect for those with a multi-material printer, while the other is designed for those without.
This serves as a whimsical gift to anyone who strives to be a magician or just loves magic tricks in general.
Print Instructions
0.2mm layer height Organic/Tree supports (for bunny)
There are two versions of bunny you can print. One for if you have a multi-material printer and one for if you don't.
All models should already be oriented in the way they were intended to be printed
“MM” stands for multi-material.
The top hat comes in two configurations. One with a bow and one without. Top Hat Top_bow will have an indent in it to fasten the bow to.
If you want to get that "ribbon" look on the top hat with a bow, I find it helps to slow down the print and increase the heat of the hot end by 5 degrees just for that portion of the model. In Orca Slicer (or prusa slicer) you can right click on the top hat top and select Add Modifier > Cylinder. Scale and position the cylinder to cover where you want it to look like there is a ribbon and adjust the print speed for the outer wall to be much slower than the rest of the print.
Assembly
If you chose to print the non-multi-material model, then you'll want to use glue to fasten the eyes and nose to the bunny.
I like to add a pause when printing the eyes so I can swap the filament to white. This gives it the “reflection” look.
Glue the top of the hat to the brim. After the glue is cured, I like to take a torch or heat gun to the brim and mold it to my liking. But even without the modeled brim, the hat will still look fantastic with your little bunny poking out.
If you printed the top hat with bow, glue the bow to the part of the hat that has the indent.
Feel free to join my discord for additional support, questions, or suggestions!
Bunny Hat - Single and Multi-material - For magicians

Illuminated "Happy Birthday" LED Sign with Vine Frame

Helix Spiral Table Lamp - Mid-Century Modern Desk Light

Lamp 003 Base.stl

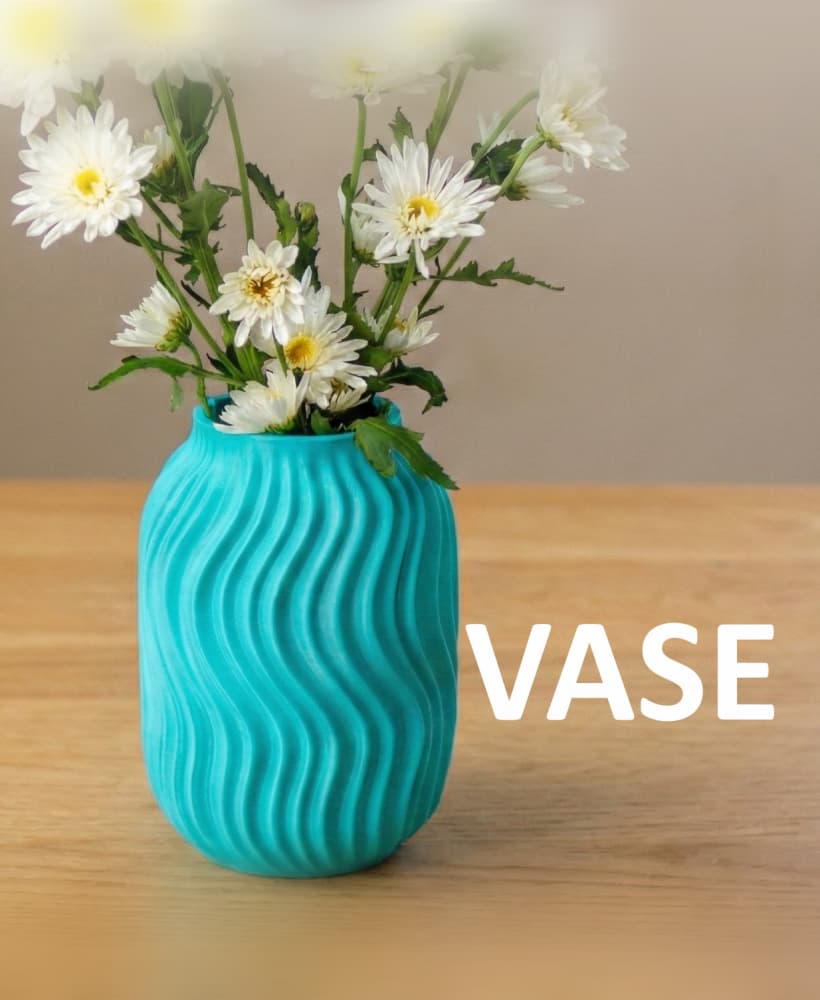
Cup 004 - Spiral Ribbed Desk Organizer / Modern Vase / Pencil Cup

Cup 003 - Chiseled Organic Vase / Pencil Holder

Glowing Castle Lamp & Tabletop Fortress

Birdhouse 002 - Mid-Century Modern Birdhouse & Succulent Planter
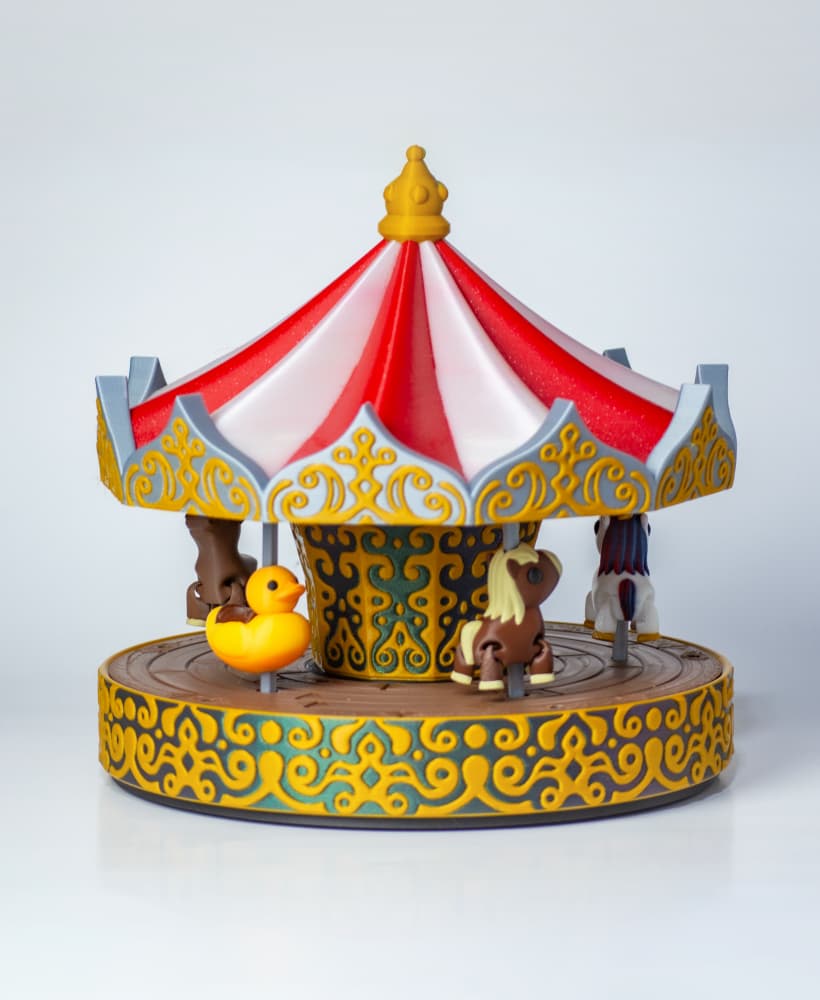
Carousel - Motorized merry go round

Bird House 001 - No AMS or other multi-color printer required

Floppy Stroopwafel

Dragon Egg

Twisty Egg Lamp

Dragon Egg Lamp

Egg Lamp 2.0

Vase 004

Cup 002

Bowl 003

Floppy Guitar Fish

Lamp 002