


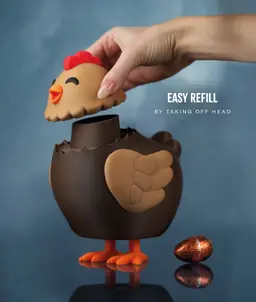

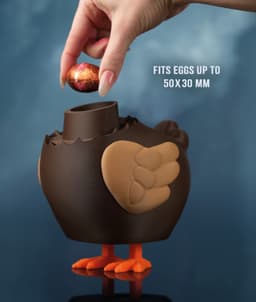
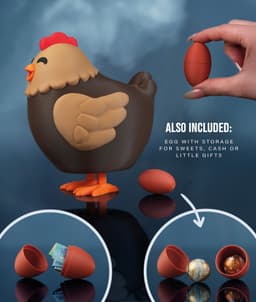


Henriegga – The Chocolate Egg-Laying Chicken
This chunky chicken actually lays chocolate eggs — just fill her up, press down on the body, and watch the magic happen! Powered by a single rubber band, she fits eggs up to 50 mm long × 30 mm diameter, offers two swappable head styles (open or closed eyes), and includes a bonus dummy egg capsule for hiding treats or cash.
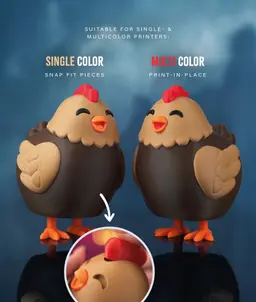
✨ Choose Your Style: • 🖨️ Single Color: All parts print separately and snap-fit together — works on any FDM printer. • 🎨 Multicolor (AMS / MMU): Prints in place with minimal assembly — just install the feet slider and rubber band.
😊 Why You'll Love It: • 🥚 She actually lays eggs — rubber-band-powered mechanism dispenses real chocolate eggs with a satisfying press • 🍫 Fits popular chocolate eggs — works with eggs up to 50 mm long × 30 mm diameter • 🎁 Bonus dummy egg included — a two-piece capsule for hiding treats, cash, or tiny gifts inside • 🧩 No glue needed — snap-fit assembly (single color) or print-in-place (multicolor) • 🐣 Irresistibly cute — chunky design with a wobbly comb, plus two heads to choose from (open eyes or closed eyes)
📐 Quick Specs: Fits chocolate eggs up to 50 mm long | 30 mm diameter | Rubber-band-powered | Includes dummy egg capsule | fits on a A1 Mini Bed (180mm³)
🎨 Filament Used: Dark Chocolate (Get it) • Caramel (Get it) • Orange (Get it) • Red (Get it) • White (Get it) • Black (Get it)
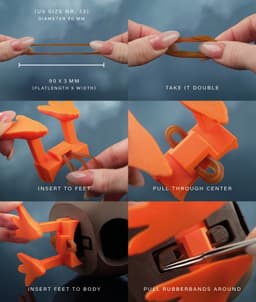
🛠️ Hardware Used: • 1× Rubber Band – 90 mm flat length / 60mm diameter / 3mm wide (US Size #33): EU Amazon
Estimated Print Time & Material Usage (Bambu Lab A1):
- 🐔 Multicolor Version: ~24h17 min / ~485 g
- 🐔 Single Color Version: ~7h59 min / ~312 g
Approximate — varies by printer and slicer settings.
📋 Print Settings: See included README.md for detailed instructions


Henriegga – The Chocolate Egg-Laying Chicken

Pill-O-Matic -- Slot Machine Pill Dispenser

BambooBar - Straw Organizer

PoopPal Corgi - Dog Poopbag Dispenser

Bruce, the Flexi Shark - Magnetic Hand-Holding Companion
Flexi Sloth Branch Dock
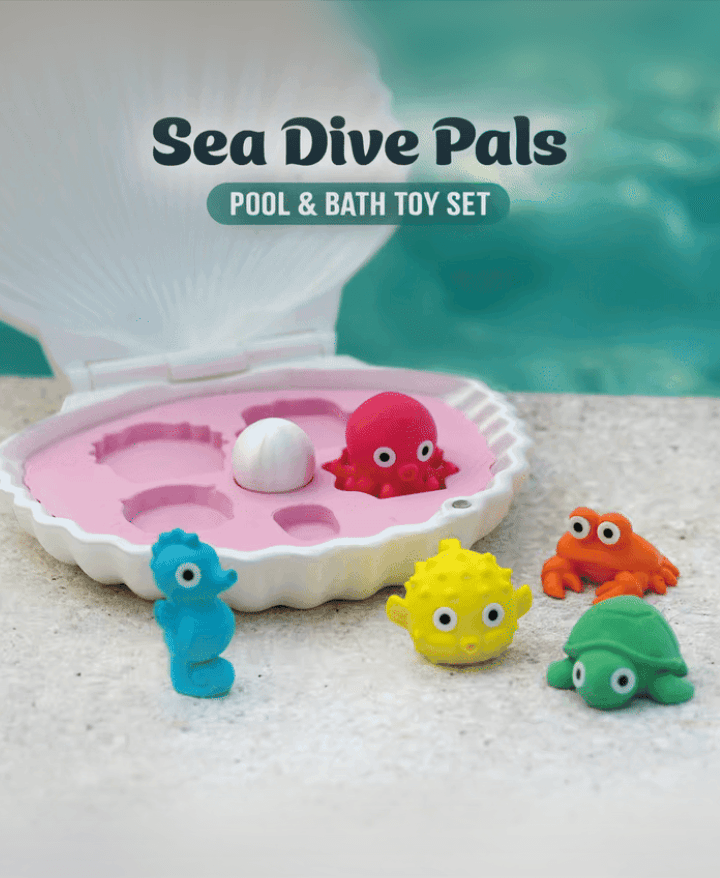
Sea Dive Pals

Domino — Dog Treat Edition

Alfie, the Flexi Alligator - Magnetic Hand-Holding Companion

Diego, the Ice Pint Holding Dragon
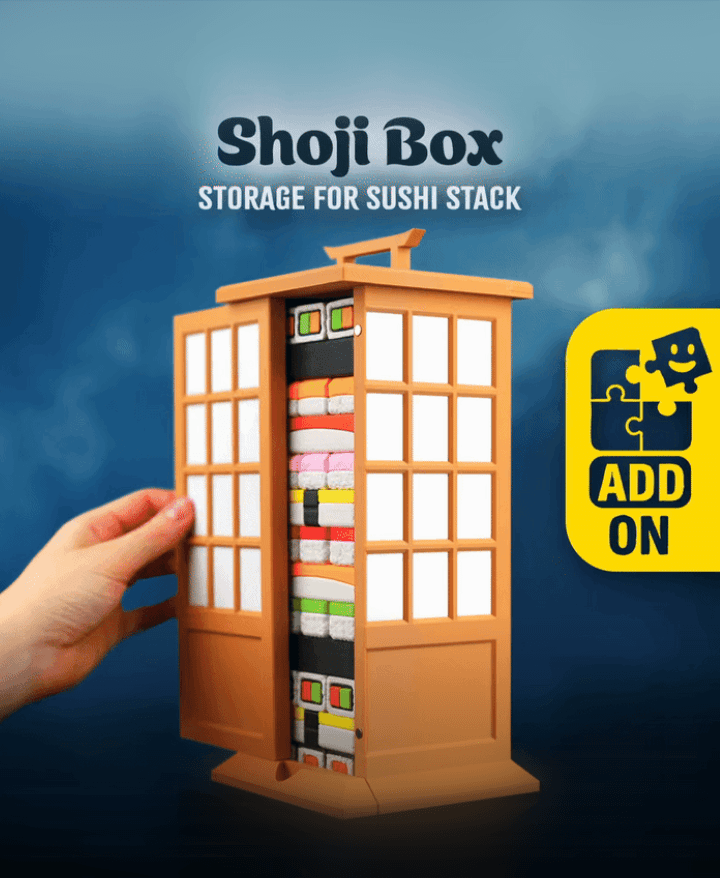
Sushi Stack — Shoji Box
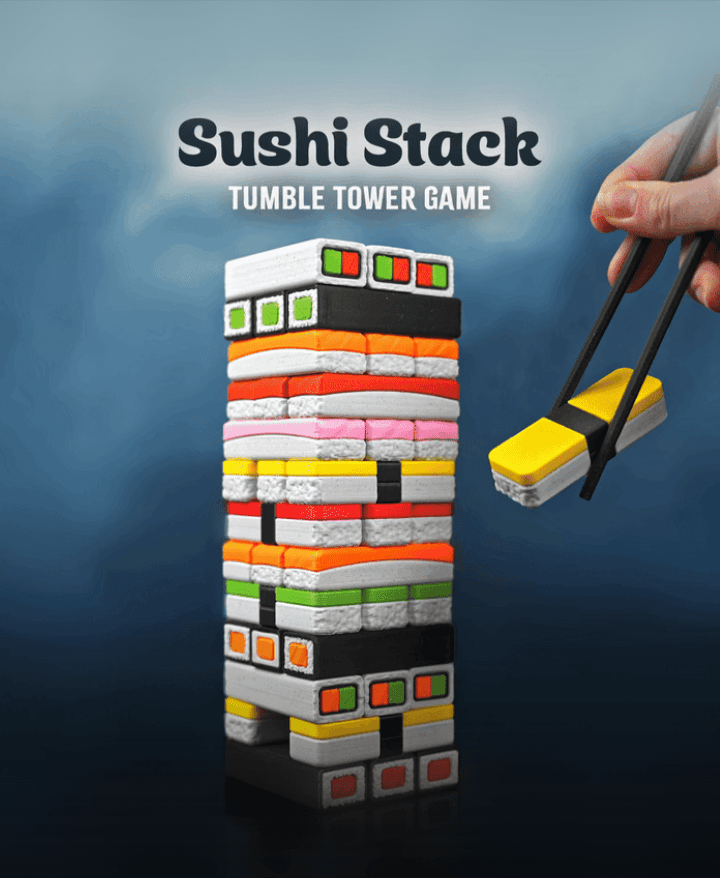
Sushi Stack — Tumble Tower Game

Luisa, the Flexi Lioness - Magnetic Hand-Holding Companion

Highland Cow Desk Organizer
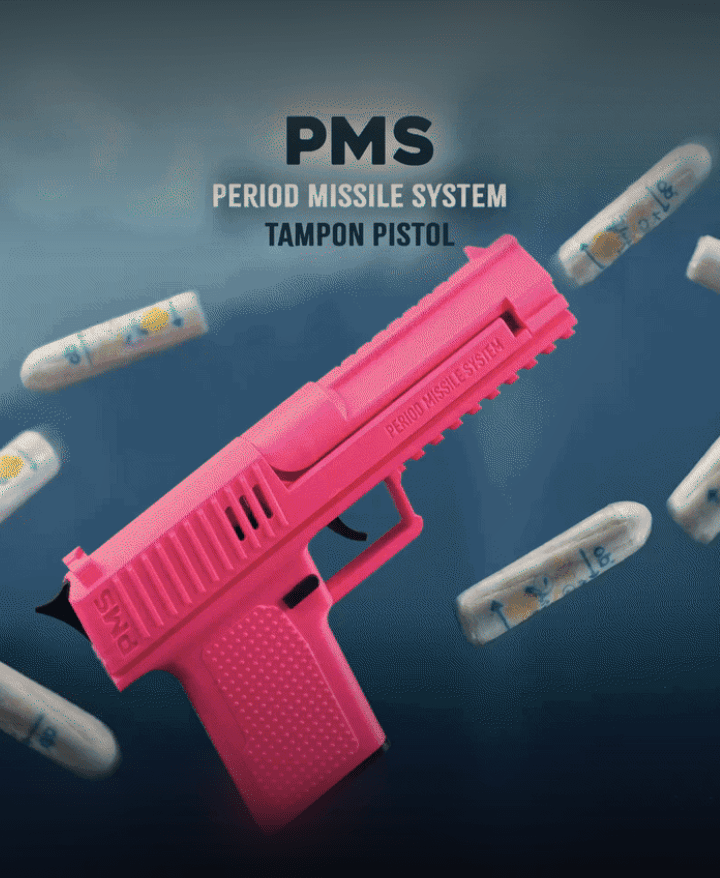
PMS - Period Missile System - Tampon Pistol

RummyCat - Rummy Game

Taro, the Flexi Tiger - Magnetic Hand-Holding Companion

Egglings – Dinosaur Egg Cup

Sammy, the Ice Pint Holding Sloth
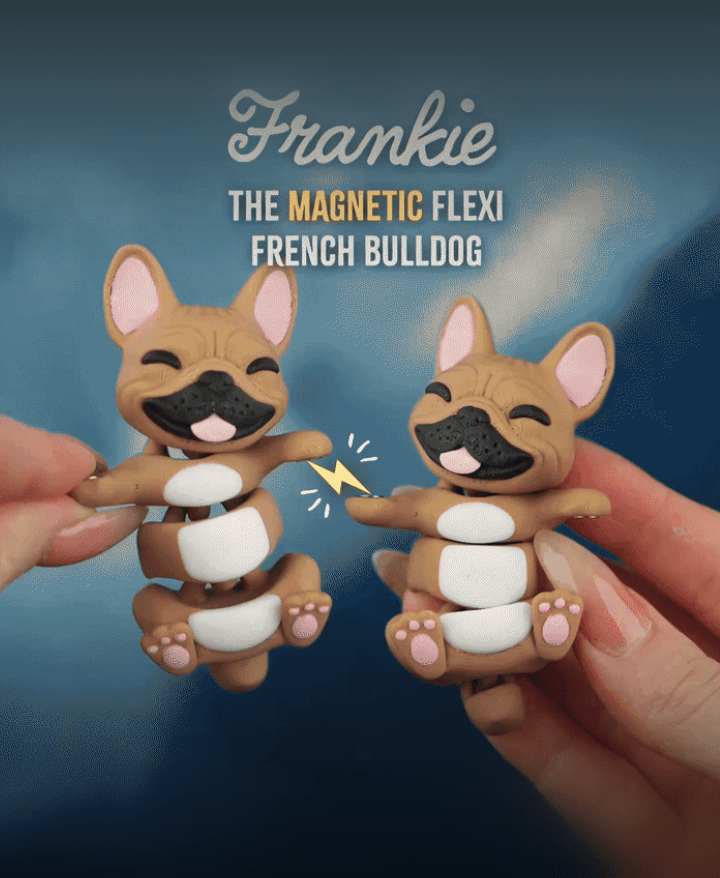
Frankie, the Flexi French Bulldog - Magnetic Hand-Holding Companion

zombie dog √ Nutcracker √ Chunky Chicken√ ... need a dispenser for non seasonal !! please can you do a Tony Tony Chopper ❤️ 🫶🏻
Loved this one. A few points though:
Hi,
i renamed the objects in the 3mf, and added a notch to the feet, so they only go in one way :)
Marvellous. I downloaded it again, and I can see the changes to the legs, but not the renaming of objects.
both are great ideas! thank you, i'll try to adapt it asap :)
This was such a huge hit with all the kids at our family's Easter gathering.
I have a quick question, for some reason i can't copy and paste the stl files from the folder. I can only open up the 3mf files for some reason. I'm working from a windows system, do you know what might be the reason or am i doing something wrong?
mhm, the STL files are in a ZIP container, so you need to unzip it first
I loved this. Made one for my dad.
I was contemplating buying the commercial licence and was looking around on Etsy and found this you might wanna look into.
https://www.etsy.com/au/listing/4489601435/3d-printed-egg-laying-chicken-candy
thank you for pointing this out!
Looks good, not super happy with the function. Did not "lay" eggs properly and they kept just falling out no matter what position the legs were in. In addition, the parts that were supposed to snap into place wouldn't stay. They kept falling out. With super glue, they didn't fit together properly, so the glue didn't make contact with both sides. Needless to say, the kids were disappointed with their easter chick. :/ I REALLY wanted to print Ferdinand next, but I'm not so sure now.
hi i am sorry it didnt work for you right out of the box. which sizes of eggs did you use? we found, that except really small ones, they all work. some better than others.
regarding the snapfit: its really dependet on your printer and filament, but you can always scale the parts up by 1% if your printer prints undersized.
We used the Cadbury minis as suggested well as the egg shell provided in the print. I couldn't get either to work properly. I ended up just gluing the legs and head in place for the toddler to have a toy chicken.
Hello! I tried to email, but it bounced back, so I'll post here. I'm on a Prusa Core One, and I am trying print the egg, but when I do, as per your settings, the first cm or so of layers seems to have my hotend colliding with the outer wall, pressing it and warping. I have played around z-offset, infill before perimeter, etc. I am printing them with "complete individual objects" so that I can utilize a colour changing filament... but other than that I can't figure out what is going wrong here.
hello! when the nozzle collides with the print itself, its imo a z-offset or overextrusion / cooling problem. i would tackle it from this direction:
if nothing of this helps, try printing one object at a time, with Avoid Crossing Wall on
Thank you. Can I ask a follow up question though: when you printed this without issue, were you printing it in the orientation of the opening facing the build plate? Or the bottom of each half being on the build plate?
the opening facing the top, you might also want to add a brim, so you have better first layer adhesion