
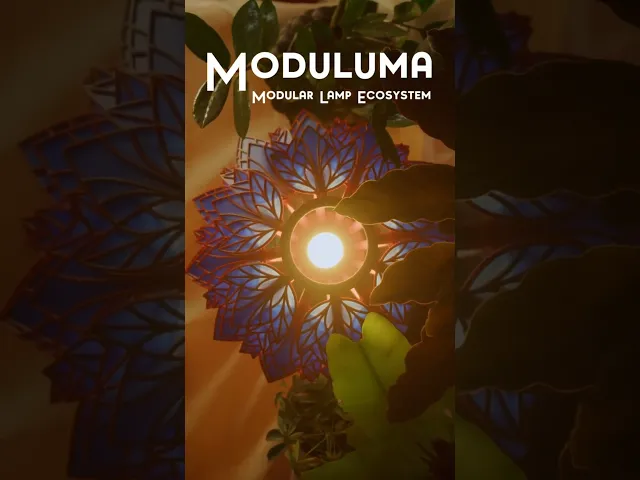


Moduluma - Orbiflora Lampshade Add-On
This is the Orbiflora Shade of the Moduluma Lamp Ecosystem!
The Moduluma Ecosystem is a modular lamp system where every part — vases, shades, inlays, and leaf styles — can be combined to create your own unique lamp design. With interchangeable elements, you can explore endless variations while keeping the build simple and tool-free.
The Orbiflora Shade creates a focused light direction with its distinctive spline construction. It’s perfect for reading corners or accent lighting where you want the glow directed below.
How to Build Your Lamp: Print all the parts you need for your build:
For the Vase: One Vase + Clips 4x Each Insert for the Modular Vases (if its a modular vase) For the Orbiflora Shade: 6 x Spline Even 6 x Spline Odd 12 x Leaf 1, 12 x Leaf 2, 24x Leaf 3, 24x Leaf 4 (the print profile tells you how often to print each plate) The Base, the Top Connector, the Top Cover
Then assemble the lamp as follows:
Prepare the Vase: Press-fit the inserts into the Modular Vase. Since the parts are mirrored, make sure to insert them all the same way (either with the print-plate side facing out or inwards).
Add the Clips: Press-fit the clips into the top side of the vase. Insert the Fixture: Place your lamp fixture (E14, E27, or Bambu Lab LED Kit) into the vase.
Build the Shade: Insert the first Spline Even into the Base, then into the Top Connector. They clip just in place.
Repeat this with the Spline Odd in the next hole. Repeat with all Splines. Clip the leafs into their slots. Start with the bottom row, then continue with the next upper one. From bottom to top in this order for each spline: 3 - 4 - 4 - 3 - 2 - 1 Insert the 10mm clips into the Top Cover. Use tongs to press the side that stands out a bit together, then press into the Top Connector.
Connect Shade and Vase: Align the shade above the vase and press it onto the clips. Be careful not to slip; if it’s tight, press gradually around the sides until it fits securely.
Finish: Position the cable into the slot at the bottom of the vase. Your Shade Downwards Lamp is ready!
If you have any questions or issues, feel free to reach out.
Moduluma - Orbiflora Lampshade Add-On

Snowskate Conversion Kit

Shield Recharger - Arc Raiders

Moduluma - Prisma Petal Add-On

Moduluma - Organic Lampshade 2 Colors

Moduluma - Arboris Shade Addon

Moduluma - Florahedron Lampshade Add-On

Moduluma - Organce Lampshade One Color

Moduluma - Modular Shade Downwards

Moduluma - Modular Upward Shade

Moduluma - Lotus Shade

Moduluma Modular Vase Big

´Moduluma - Modular Vase

Moduluma - Big Spiral Vase

Moduluma - Vase Spiral

Moduluma - Small Vase

Moduluma - Big Modern Vase

Moduluma - Leaf Art Nouveau

Moduluma - Techy Leaf

Moduluma - Autumn Leaf
