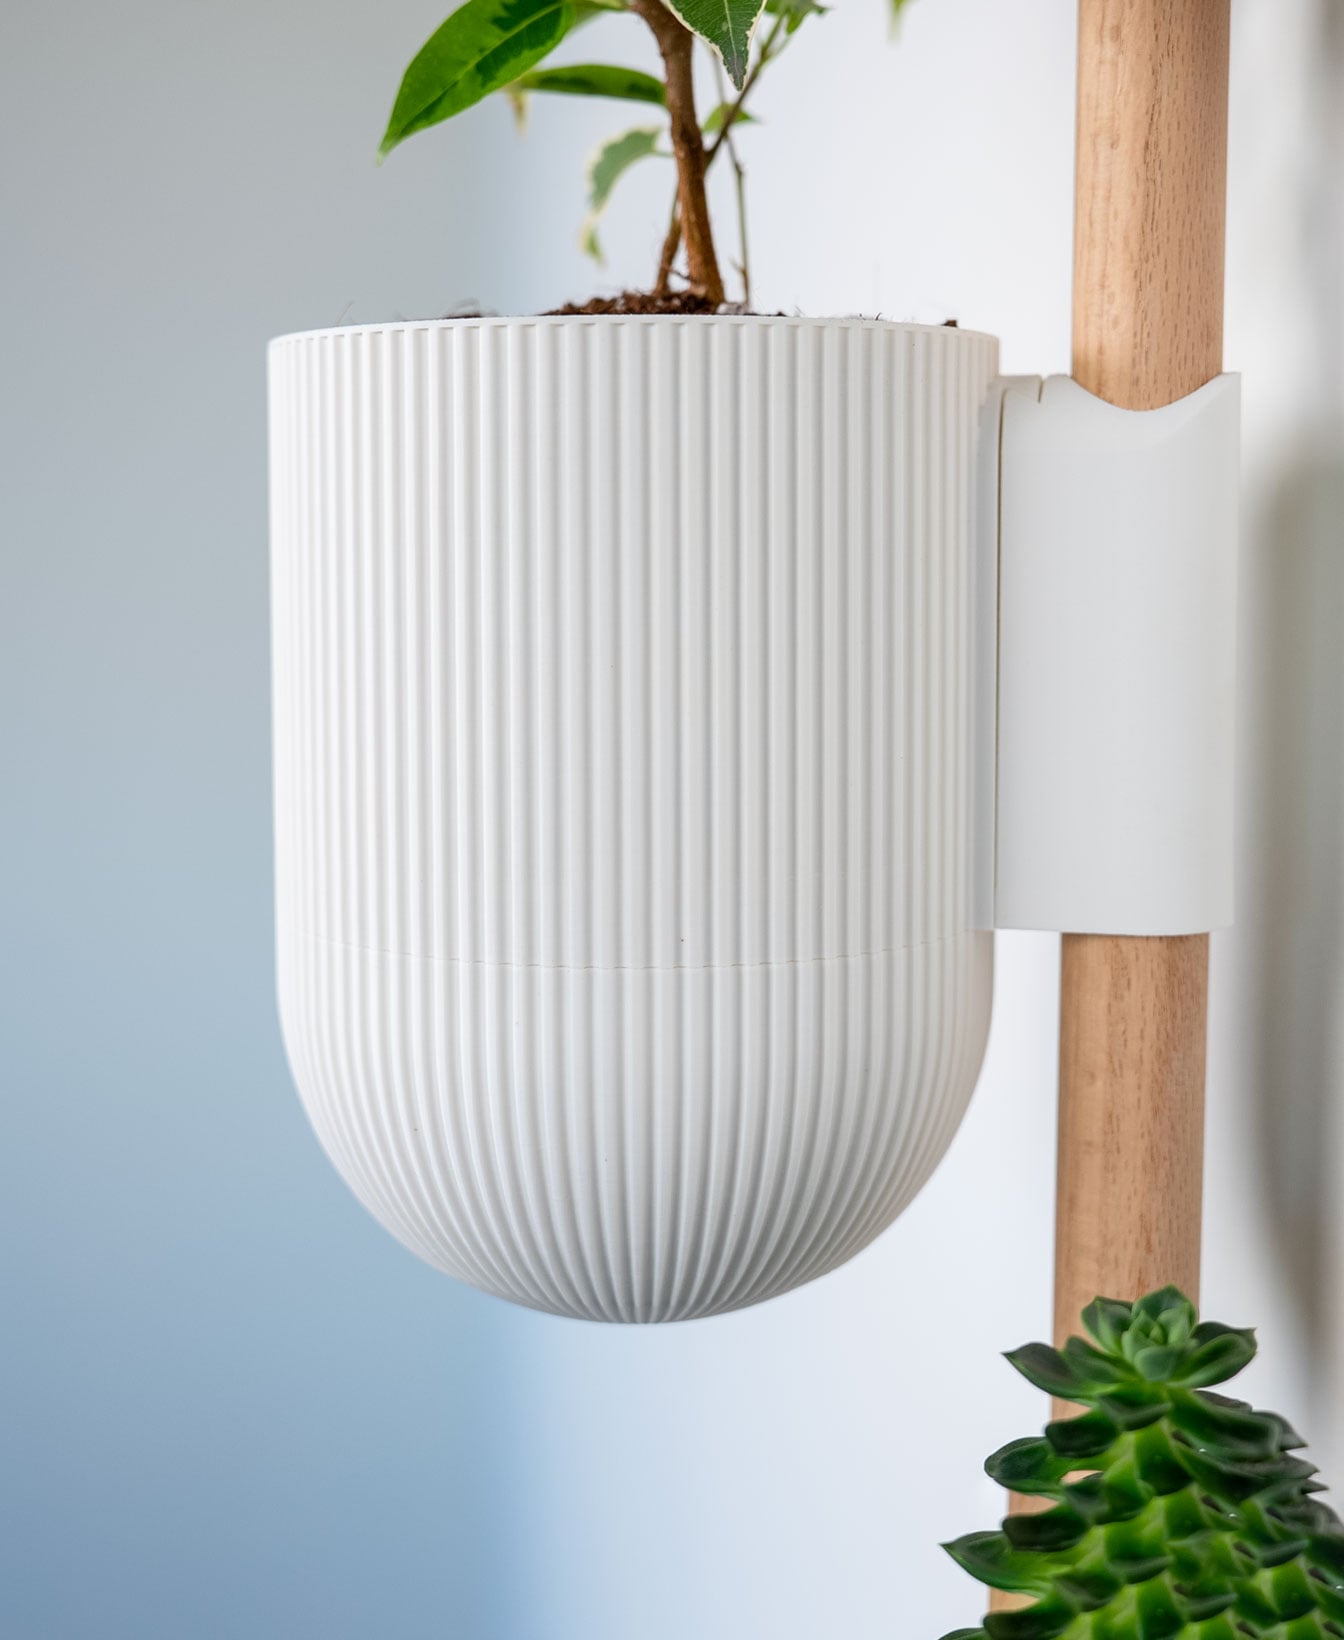


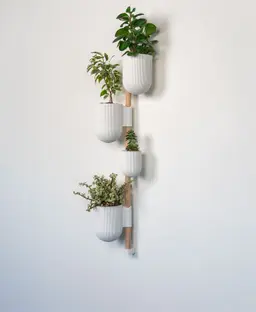

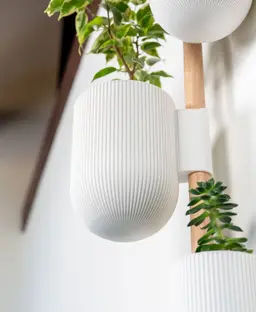
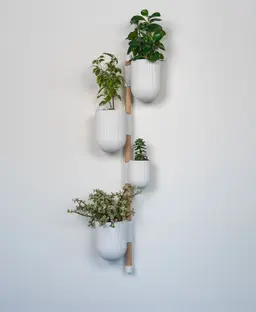

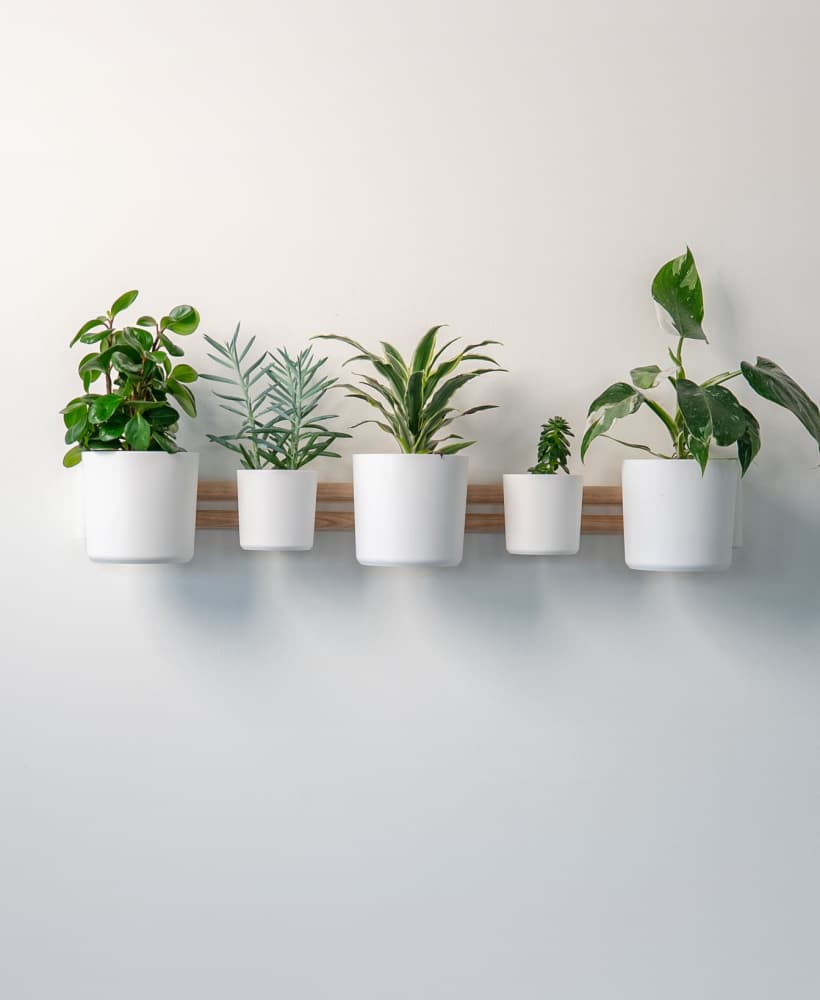
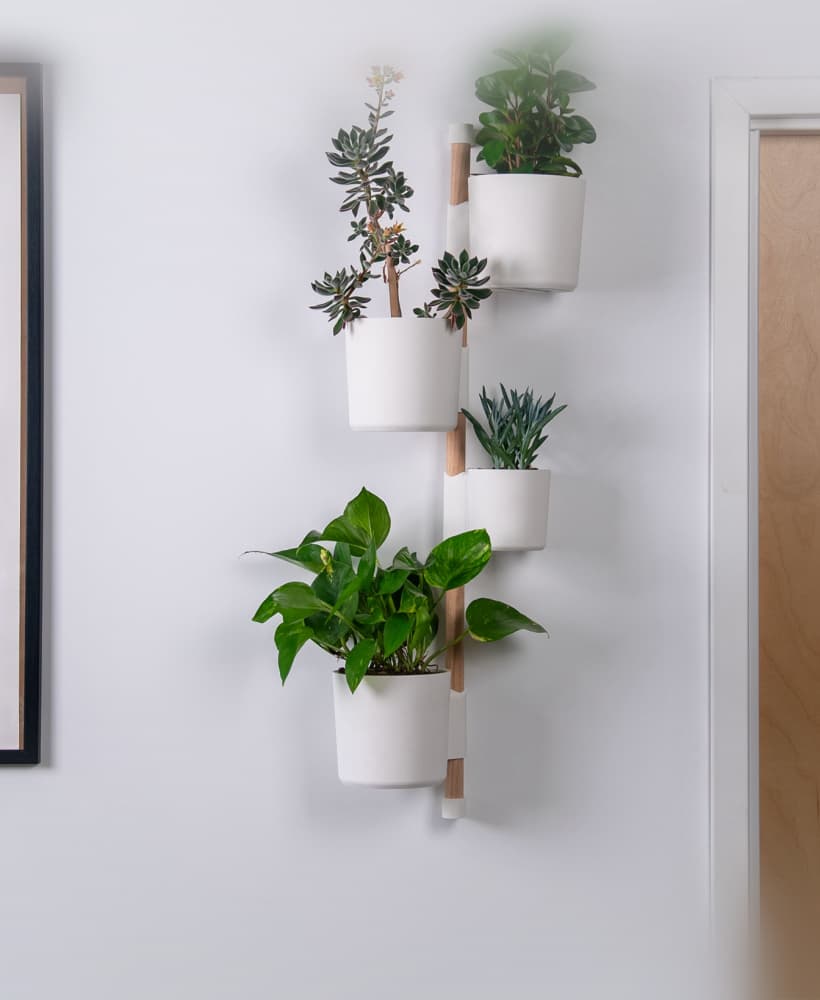
The Rail - Ira Planter
This is an attachment for The Rail. The full required system can be downloaded HERE.
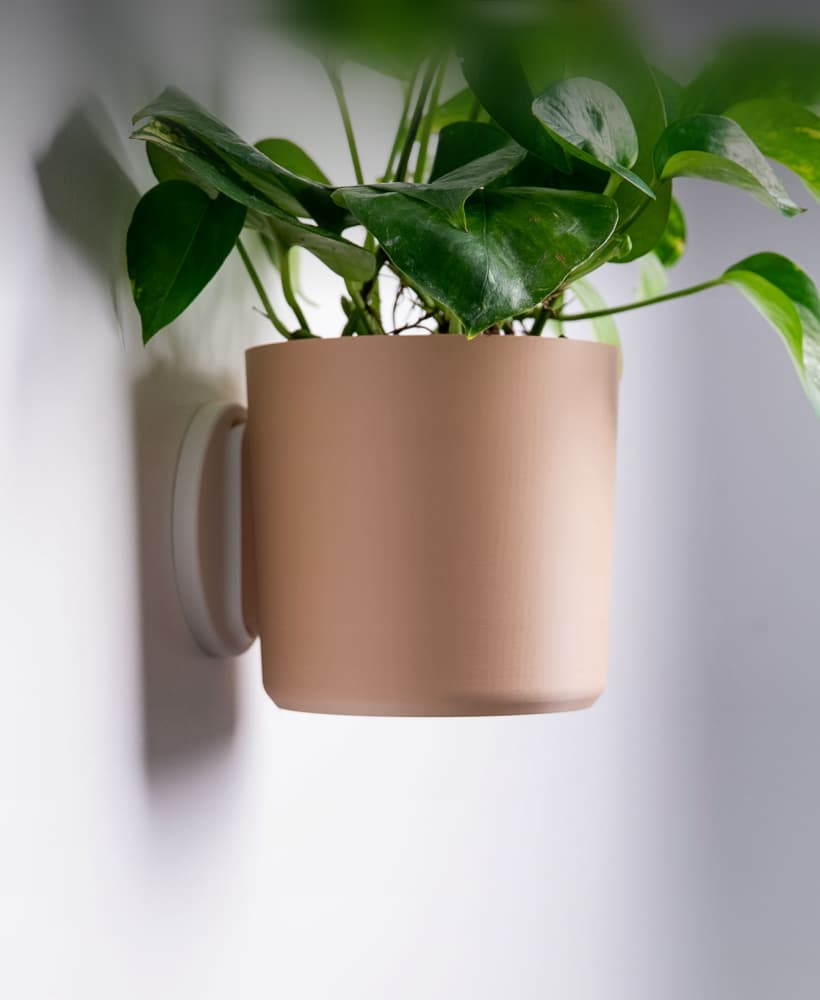
The Ira was one of the first planters I ever designed and it's still one of my favorites, so I've updated it to be compatible with The Rail! I've also updated it to have a twist off drip tray like the rest of my planters.
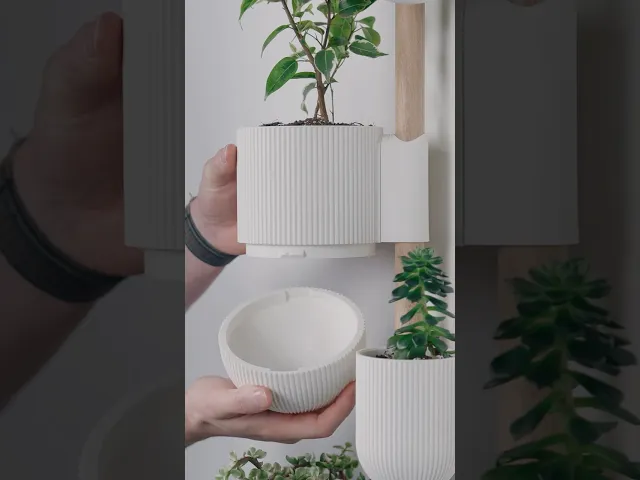
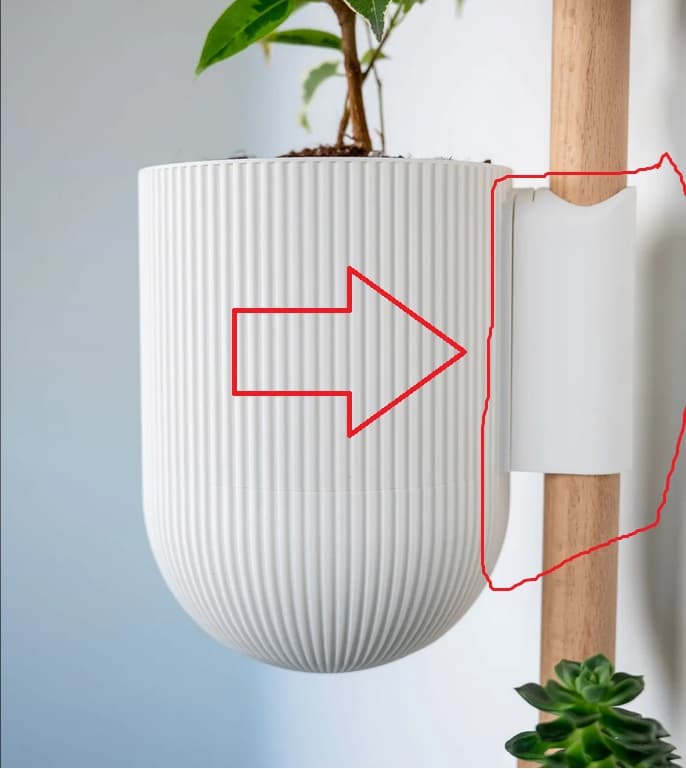
Supports Tree supports are needed for the sliding dovetail part of the outer pots. The supports needed are only about 7mm tall, so very little support material.
Scaling I wouldn't recommend scaling since these are meant to attach to The Rail (or the wall) using the sliding dovetail mount.
Orientation
- The outer pots and drip trays print upside down
- The inner pots print upright with their bottom on the build plate
Print Settings
- .2mm layer height
- 15% grid infill
- 2 walls
Filament
Colors I used:
- Ivory White
Filament and non 3D printed items for this model can be found on my Amazon Storefront, linked here: https://linktr.ee/loftedgoods


The Rail - Ira Planter

Half Dome Wall Planter

Square Bubbles Planter

Plastic Bag Dispenser

Heywood Wall Planter v2
Square Tapered Planter

Catchall for The Horizontal Rail

Sunglasses Holder for The Horizontal Rail

Shelf for the Horizontal Rail
The Rail - Coat Hook
The Horizontal Rail

Scales Planter with Hidden Drip Tray

The Rail Tripod V2

Tripod Lamp

The Rail - Tripod Attachment

The Rail - Storage Bins
Wall Planter with Hidden Drip Tray - LG03

The Rail - Hook Attachment

The Rail - Grow Light Attachment
The Rail v2

Love it!
I'm almost certain it's this one here: https://than.gs/m/1145814
Came here to raise the same concern! @LoftedGoods
In the description above it says that the outer pots and drip trays print upside down - but the file loads them up right - are we meant to flip it over in the slicer before printing?
That's what I did. I think the design, when it's built, is upright, and so it is assigned that orientation in the XYZ environment. So when you import into the slicer software, it inserts in that orientation. In this case, it prints better if you flip them. I suppose someone could design in CAD for optimal print orientation, but personally, that would be too much mental geometry gymnastics. Can you also reassign the orientation afterwards? anyone?
This has been fixed!
Coming back to edit my comment. I was able to download the new files finally (size changed), and see that the geometry changed. Slicing in Cura there's still a large amount of additional seams added in this area. Slicing in Orca seems to minimize those but they do still occur. Working on a print to see how the new model works out
On the lower curved part of the large trays, OrcaSlicer generates a perfectly smooth outer perimeter first, but then it goes back and adds many tiny extrusion “dots” all around the circumference on certain layers. In preview these appear as small isolated segments on top of the perimeter, and on the print they show up as bumps/marks around the surface.
Have you run into this when slicing the large trays yourself?