


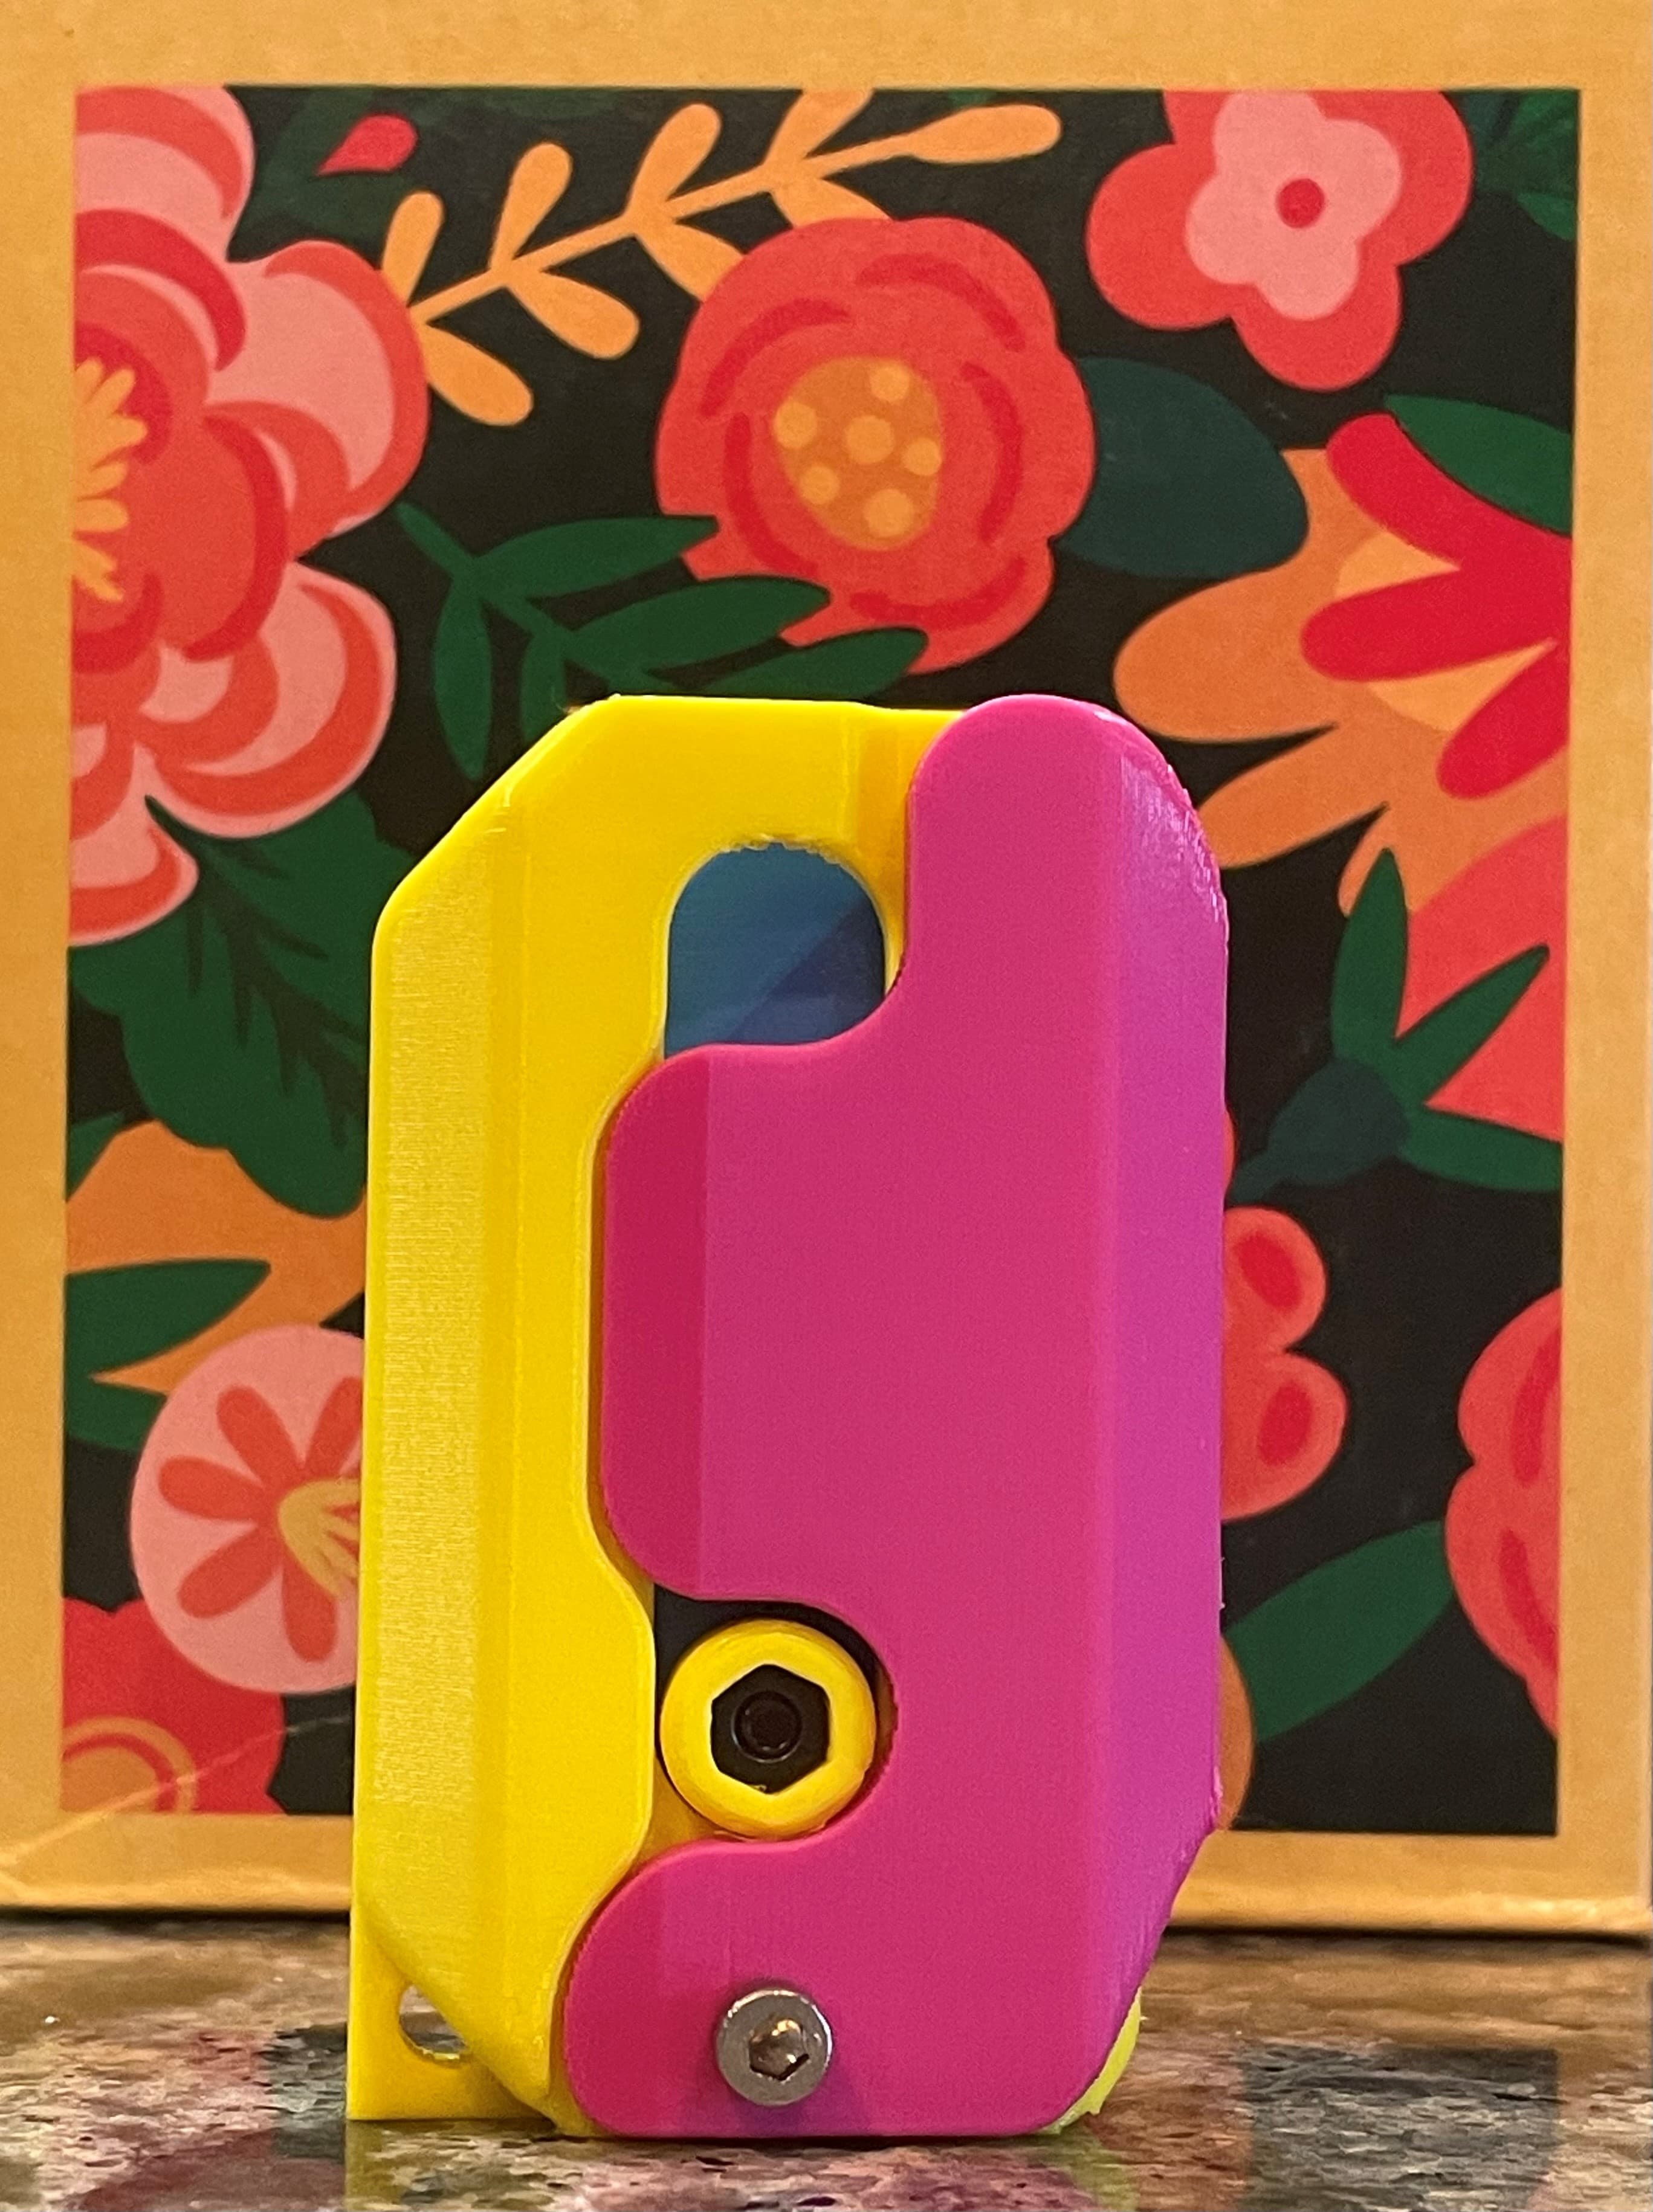
Pocket Knife - Folding Fidget toy
**3D-Printed Functional Folding Pocket Knife – Designed for Display & Fidgeting ** This fully 3D-printed pocket knife has a functioning locking mechanism, perfect for fidgeting and having fun with, without having to worry about slicing your fingers off. Featuring a foldable blade, a secure locking mechanism, and an ergonomic grip, it balances clean design with practical features.
The model prints in separate parts to allow easy dual-color customization. A latch release on the side disengages the spring. This knife is not intended for any kind of cutting task, it is for fidgeting and playing.
Material Notes: PLA is highly recommended. Using silk filament will result in a weak spring and fragile screws, while PLA+ or stiffer materials can make the spring overly strong. PLA will give you the best functionality for this knife.
Print Instructions: This is a fairly easy print, no supports are needed and there are no significant overhangs.
all of the parts are joined together in the files, e.g. The 4 screws are all one, so in your slicer make sure to separate bodies.
the following parts should be printed at 0.2 mm layer height. This includes the Blade, Handles, Rocker arm and Spring
The following parts must be printed at 0.08 mm layer height for proper functionality: Screws, Screw heads and Washers
These smaller parts should also be printed with 100% infill to ensure strength and performance.
Assembly Instructions: This knife can be a bit tricky to assemble, so follow these steps carefully:
1. Assemble the Handle Base
- Place the second handle piece inside the first (main) handle. Insert the four screws: - The Philips screws must go through both handle layers at the back. - The Flathead screw goes only through the base at the front.
2. Prepare the Base for Blade Assembly
- Flip the handle assembly over so the screw heads are face down on a table.
- Slide flat washers onto the two front screw threads.
3. Assemble the Blade
- Join the two blade halves together.
- Insert the headless screw into the smaller top hole of the blade.
- Tighten the screw so the blade halves stay together. Note: The blade might still wiggle a bit—this will be resolved during final assembly.
4. Insert Moving Parts Into the Handle
- Place the rocker arm, spring, and the assembled blade into the handle base.
- Ensure the rocker arm aligns inside the blade’s slot.
5. Insert Ring Spacers
- Push the two small ring spacers into the holes in both the rocker arm and the blade. This might require a bit of pressure
6. Add the Top Washer
- Place the remaining flat washer on top of the blade and rocker arm.
7. Attach the Top Handle
- Position the top handle piece over the assembly.
- Press down gently so all the internal parts settle into place.
8. Final Screw Installation
-
Match and attach the correct screw heads to their posts: - Philips heads to the Philips screws (back) - Flathead to the flathead screw (front)
-
You can start threading them by hand, but it’s best to tighten with a screwdriver: - Tighten the rear screws (over the spring) firmly - Then tighten the front screws
Pocket Knife - Folding Fidget toy

Oreo Gyro Fidget - Pocket Sized Fidget Toy

Folding Pocket Knife

Heart Fidget toy – Gravity-Driven Sliding Fidget Toy (2 versions)

Snapcracker Crackersnap 3-Part Magnetic Pocket Fidget Toy – With Satisfying Click Sound!

Gingerbread Cookie Clickers SET

Set of 4 Halloween Cupcake Clikers

Fidget Cube Fidget Toy Workshop3D

Folding Fidget Knife
TikTok Gravity Knife Fidget Toy

Lego Brick Fidget Sliders - Fun EDC Fidget Toy

Santa Octopus
Fidget Chick (Bouncy Fidget Toy)

Folding Scalpel Pocket Knife v2.1

Ouch! Keychain Fidget EXTREME!

4-in-1 Fidget Master – Multi-Function Desk Fidget Toy

Hexagon Fidget- 2 in 1 Sensory Expanded Fidget Toy

Triceratops Fidget Clicker Keychain, Dinosaur fidget toy
R7 Gyro Flower Fidget | Spring Gyro Fidget Toy | R7Makers
Velociraptor Fidget Clicker Keychain, Dinosaur Fidget Toy
