


12 oz Dragon D20 magnet spinner can cozy
217 downloads · 1 year ago · Dragon 12oz can cozy with built in spinner. No dice required. A fun additon to any game night! Eas
This model is restricted by licensing terms.
View license.
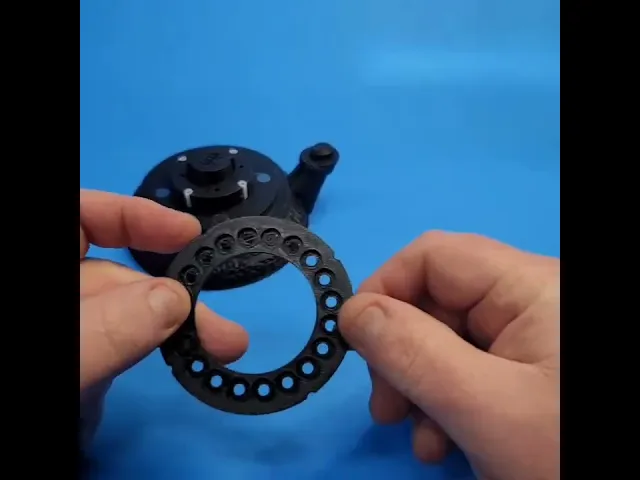
Dragon 12oz can cozy with built in spinner. No dice required. A fun additon to any game night! Easy assembly with just magnets and glue. Screws are optional. Requires supports on the top piece only around the base. Color change files for the numbered spinner also included. You will need 36 Magnet 8x2mm Rare Earth Magnets Neodymium Magnets for Crafts https://www.amazon.com/dp/B0CCXJTTFM?ref=ppx_yo2ov_dt_b_fed_asin_title&th=1 Assembly video included.


12 oz Dragon D20 magnet spinner can cozy
217 downloads · 1 year ago in and
This model is restricted by licensing terms.
View license.

The Prophecy 16oz Can CozyDice Tower

Sight Of The Beyond Potion Bottle Dice Tower With Storage

FREE UPGRADE for wine box case Witch Water-Plates Only

Let's Drink Wine and Judge People with stand - holds 3 Litters box wine bags

Mommy's Little Juice Box with stand - holds 3 Litters box wine bags

Wolfsbane Potion Bottle Dice Tower With Storage

12oz Diamond Wolf Can Cozy Dice Tower

Enchanted Tangled Wood Vase

16oz Dark Insanity Can Cozy Dice Tower
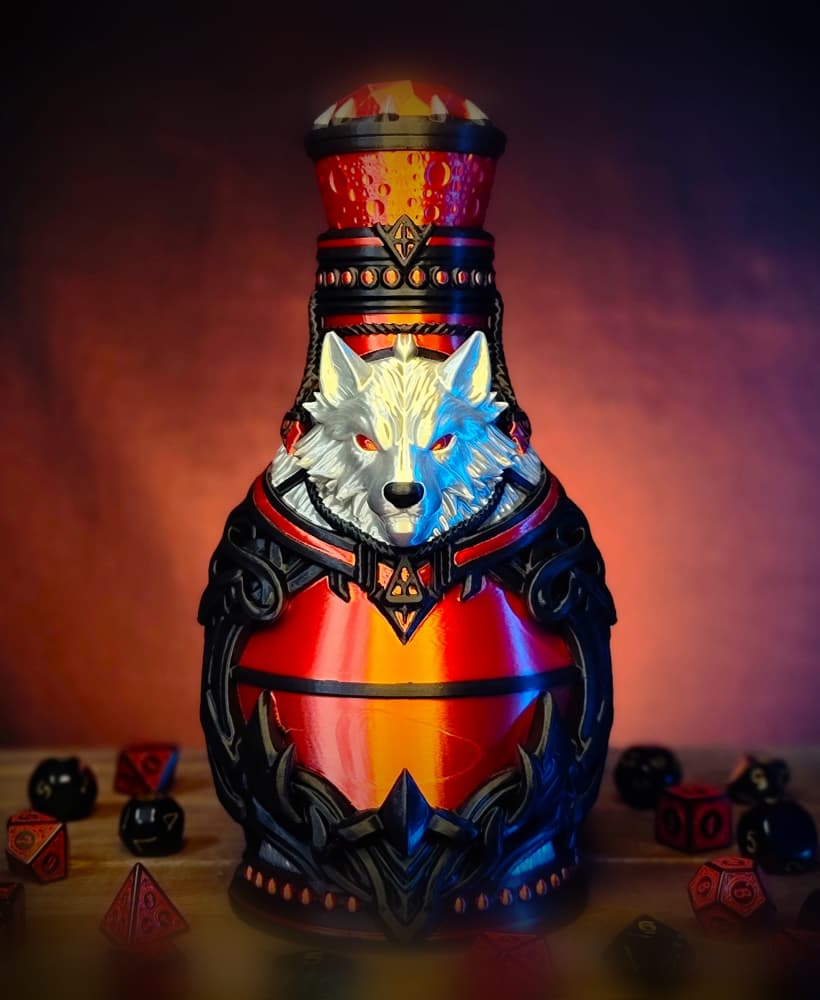
Wolf Blood Potion Bottle Dice Tower With Storage

Carpenter Bee Garden Guardian

D20 Mimic Dice Tower Version 2

Papa and Baby Worm

Wizard Potion Bottle Dice Tower With Storage

Jewel of the Gods Battle Ax

Essence Of The Deep Potion Bottle Dice Tower With Storage

Fidget D20 dice

From The Deep 12oz Can Cozy Dice Tower.stl

King of the beasts 12oz. can cozy dice tower

One aspect of the current d20 ring is that 20 and 1 are not on opposite sides of the spinner. The best setup on a dial or ring that I've seen is for opposite numbers to add up to 21, with the numbers alternating between high and low... so, to go clockwise, you'd have 20-1, 2-19, 18-3, 4-17, 16-5, 6-15, 14-7, 8-13, 12-9, 10-11. That gives a good distribution where a spin can land you on a high or a low, as they are right next to each other going around the ring/circle.
love the design! Any chance at a 3mf file for the main mug as well? that would be great for the multi color printing also. thanks!
May I ask how to locate the assembly video for this build?
It is pinned at the top.
Simply amazing work! Now, just make spinners for d12, d10, d8, d6, and d4...lol
Seriously, though. I love how you "painted" the Tree of Life one. Are you planning on releasing AMS versions of any other mugs (especially the spinner ones)?
I was hoping the same. One aspect of the current d20 ring is that 20 and 1 are not on opposite sides of the spinner. The best setup on a dial or ring that I've seen is for opposite numbers to add up to 21, with the numbers alternating between high and low... so, to go clockwise, you'd have 20-1, 2-19, 18-3, 4-17, 16-5, 6-15, 14-7, 8-13, 12-9, 10-11. That gives a good distribution where a spin can land you on a high or a low, as they are right next to each other going around the ring/circle.
will do.
got it assembled and it works pretty good, I'm running into an issue with it not being able to stop on certain numbers and it seems to want to stay on certain ones. Would the teflon tubes make this work better?
The Teflon tube shouldn't make a difference on the stopping of the numbers. Only how smooth it spins. The magnets are what makes a difference on where it stops. Hopefully a magnet didn't slip out of position. I realize now that I did not explain properly in my video but you can use two 3M screws to dry fit and test it before you glue everything tight.
OMG I just got mine together and it is amazballs. Once again my dude you have killed it with your design. Question though, what type and size of teflon tubing did you use. I used the standard size capricorn and it didn't spin right so I took them out.
Just the standard white 4.0mm Teflon tube.
Cool. Just in case anyone asks don't use Capricorn tubing lol