


.png&w=256&q=75)
Green Eggs (requires mesh fabric), Slinky Ham and Plate
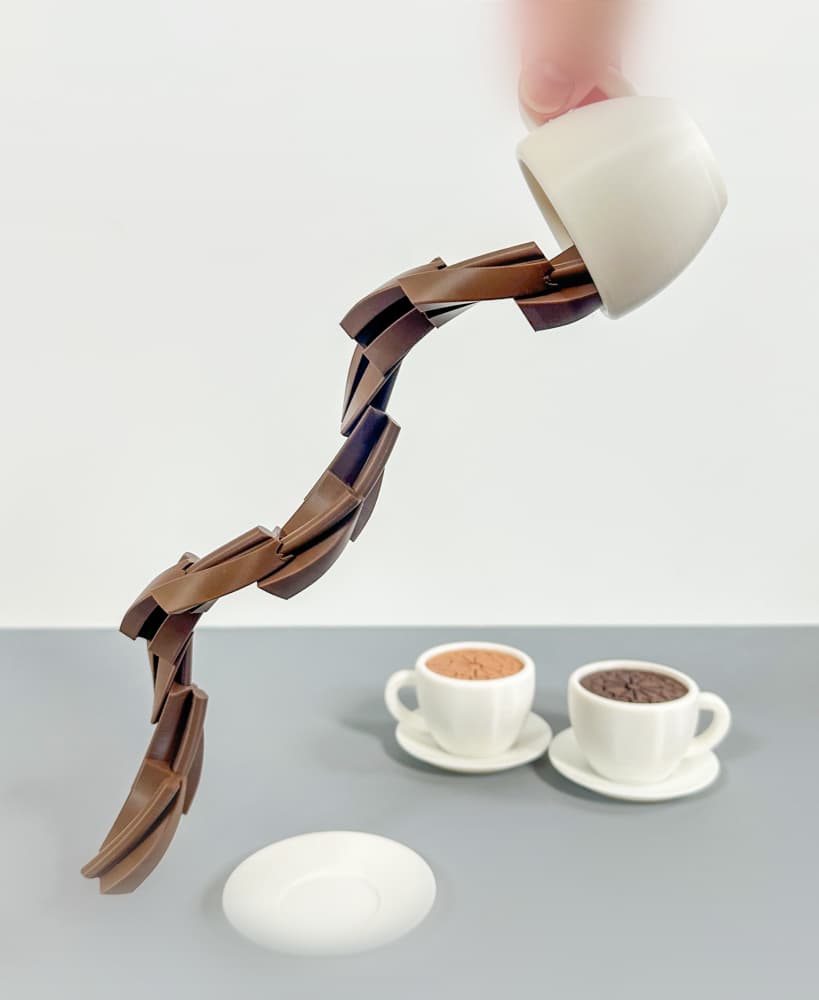
In honor of Dr. Seuss's birthday, I have designed Green Eggs (with egg shells), Slinky Ham and a plate to serve them on. (I also designed a fry pan, spatula and fork for ‘cooking’ the eggs and ham and posted them separately on my page.)
PLEASE NOTE: you will need the following items for these prints: Polyester Mesh Fabric (Mosquito Netting) 6x3 Neodymium Magnets (4 magnets per egg shell)
Here is an Amazon link for both the fabric and magnets needed: https://amzn.to/3DgoWQq
3D Printing Instructions: PLA works great Layer Height 0.16mm Infill 10-15% Supports needed for inner ‘dome’ of each egg shell
I have included a 3mf file with the following print profiles: Print Plate #1 (ham slinky): 3 colors, layer height 0.16mm preferred Print Plate #2 (fried Egg): 2 colors, pause print inserted at layer 5 (layer height 0.68mm) to insert mesh fabric Print Plate #3 (egg Shell): one color, pause print inserted at layer 32 (layer height 3.82mm) to insert magnets; supports added for dome of each shell Print Plate #4 (plate): 2 colors
A note about the fabric: I have tried several different types of fabric. Polyester Mesh fabric (also called Mosquito Netting) is my favorite. I have found that mesh made from PE (Polyethylene) tears very easily. Tulle also is not very durable and tears very easily. Nylon mesh will also work but it is thicker for the print head to print over and I think if you have never printed with fabric before you will feel more comfortable using Polyester Mesh instead.
How to print the Fried Egg: I have inserted a pause print at layer height 0.68mm. When the printer pauses, lay a piece of mesh (that has been cut about an inch wider in diameter than the print) over the print. I like to secure the fabric down with blue painters tape. You can also use magnets. After the fabric is secured, resume the print.
How to print the Egg Shell: You will need (4) 6x3 neodymium magnets for each complete egg. To insert the magnets, I added a pause print at layer height 3.82mm - when it pauses you can add the magnets. Make sure the orientation is correct so that the two halves of the print will attract to each other when done:)
How to print and separate the layers of the Ham Slinky:
Note: When you go to preview your print in Bambu Studio you will get a warning that states: “Warning: It seems object Ham Slinky.stl has floating cantilever. Please re-orient the object or enable support generation.” You can ignore this warning. The program is recognizing the space between each layer of the slinky. That ‘space’ is intentional and necessary to be able to separate the slinky when it is done printing:)
After printing, the layers of the slinky will be lightly connected together. Gently separate the layers with your fingers or a non-sharp object like a butter knife. Take your time and do this carefully.
Have fun printing!!


Green Eggs (requires mesh fabric), Slinky Ham and Plate

Alphabet Layered Fidgets

Big Beads: Sports Themed

Cupcake & LED Candle Set (with Cupcake Stand and Magnetic Match)
Spill the Tea Fidget

Football Layered Fidget

Potted Flowers and Watering Can

Flower Stand for Potted Flowers with Watering Can

Pixel Flower Fidget (2 sizes) with Stems, & Vases (3 styles)
.JPG&w=3840&q=75)
Fidget Fabric Fried Egg Set (play or coaster set)

Twisty Pint Fidget (2 Styles)

Clicky Phone Fidget (2-in-1 Fidget)

Fry Pan, Spatula and Fork

Number & Symbol Big Beads (for Horizontal and Vertical Stringing)

Big Letter Beads
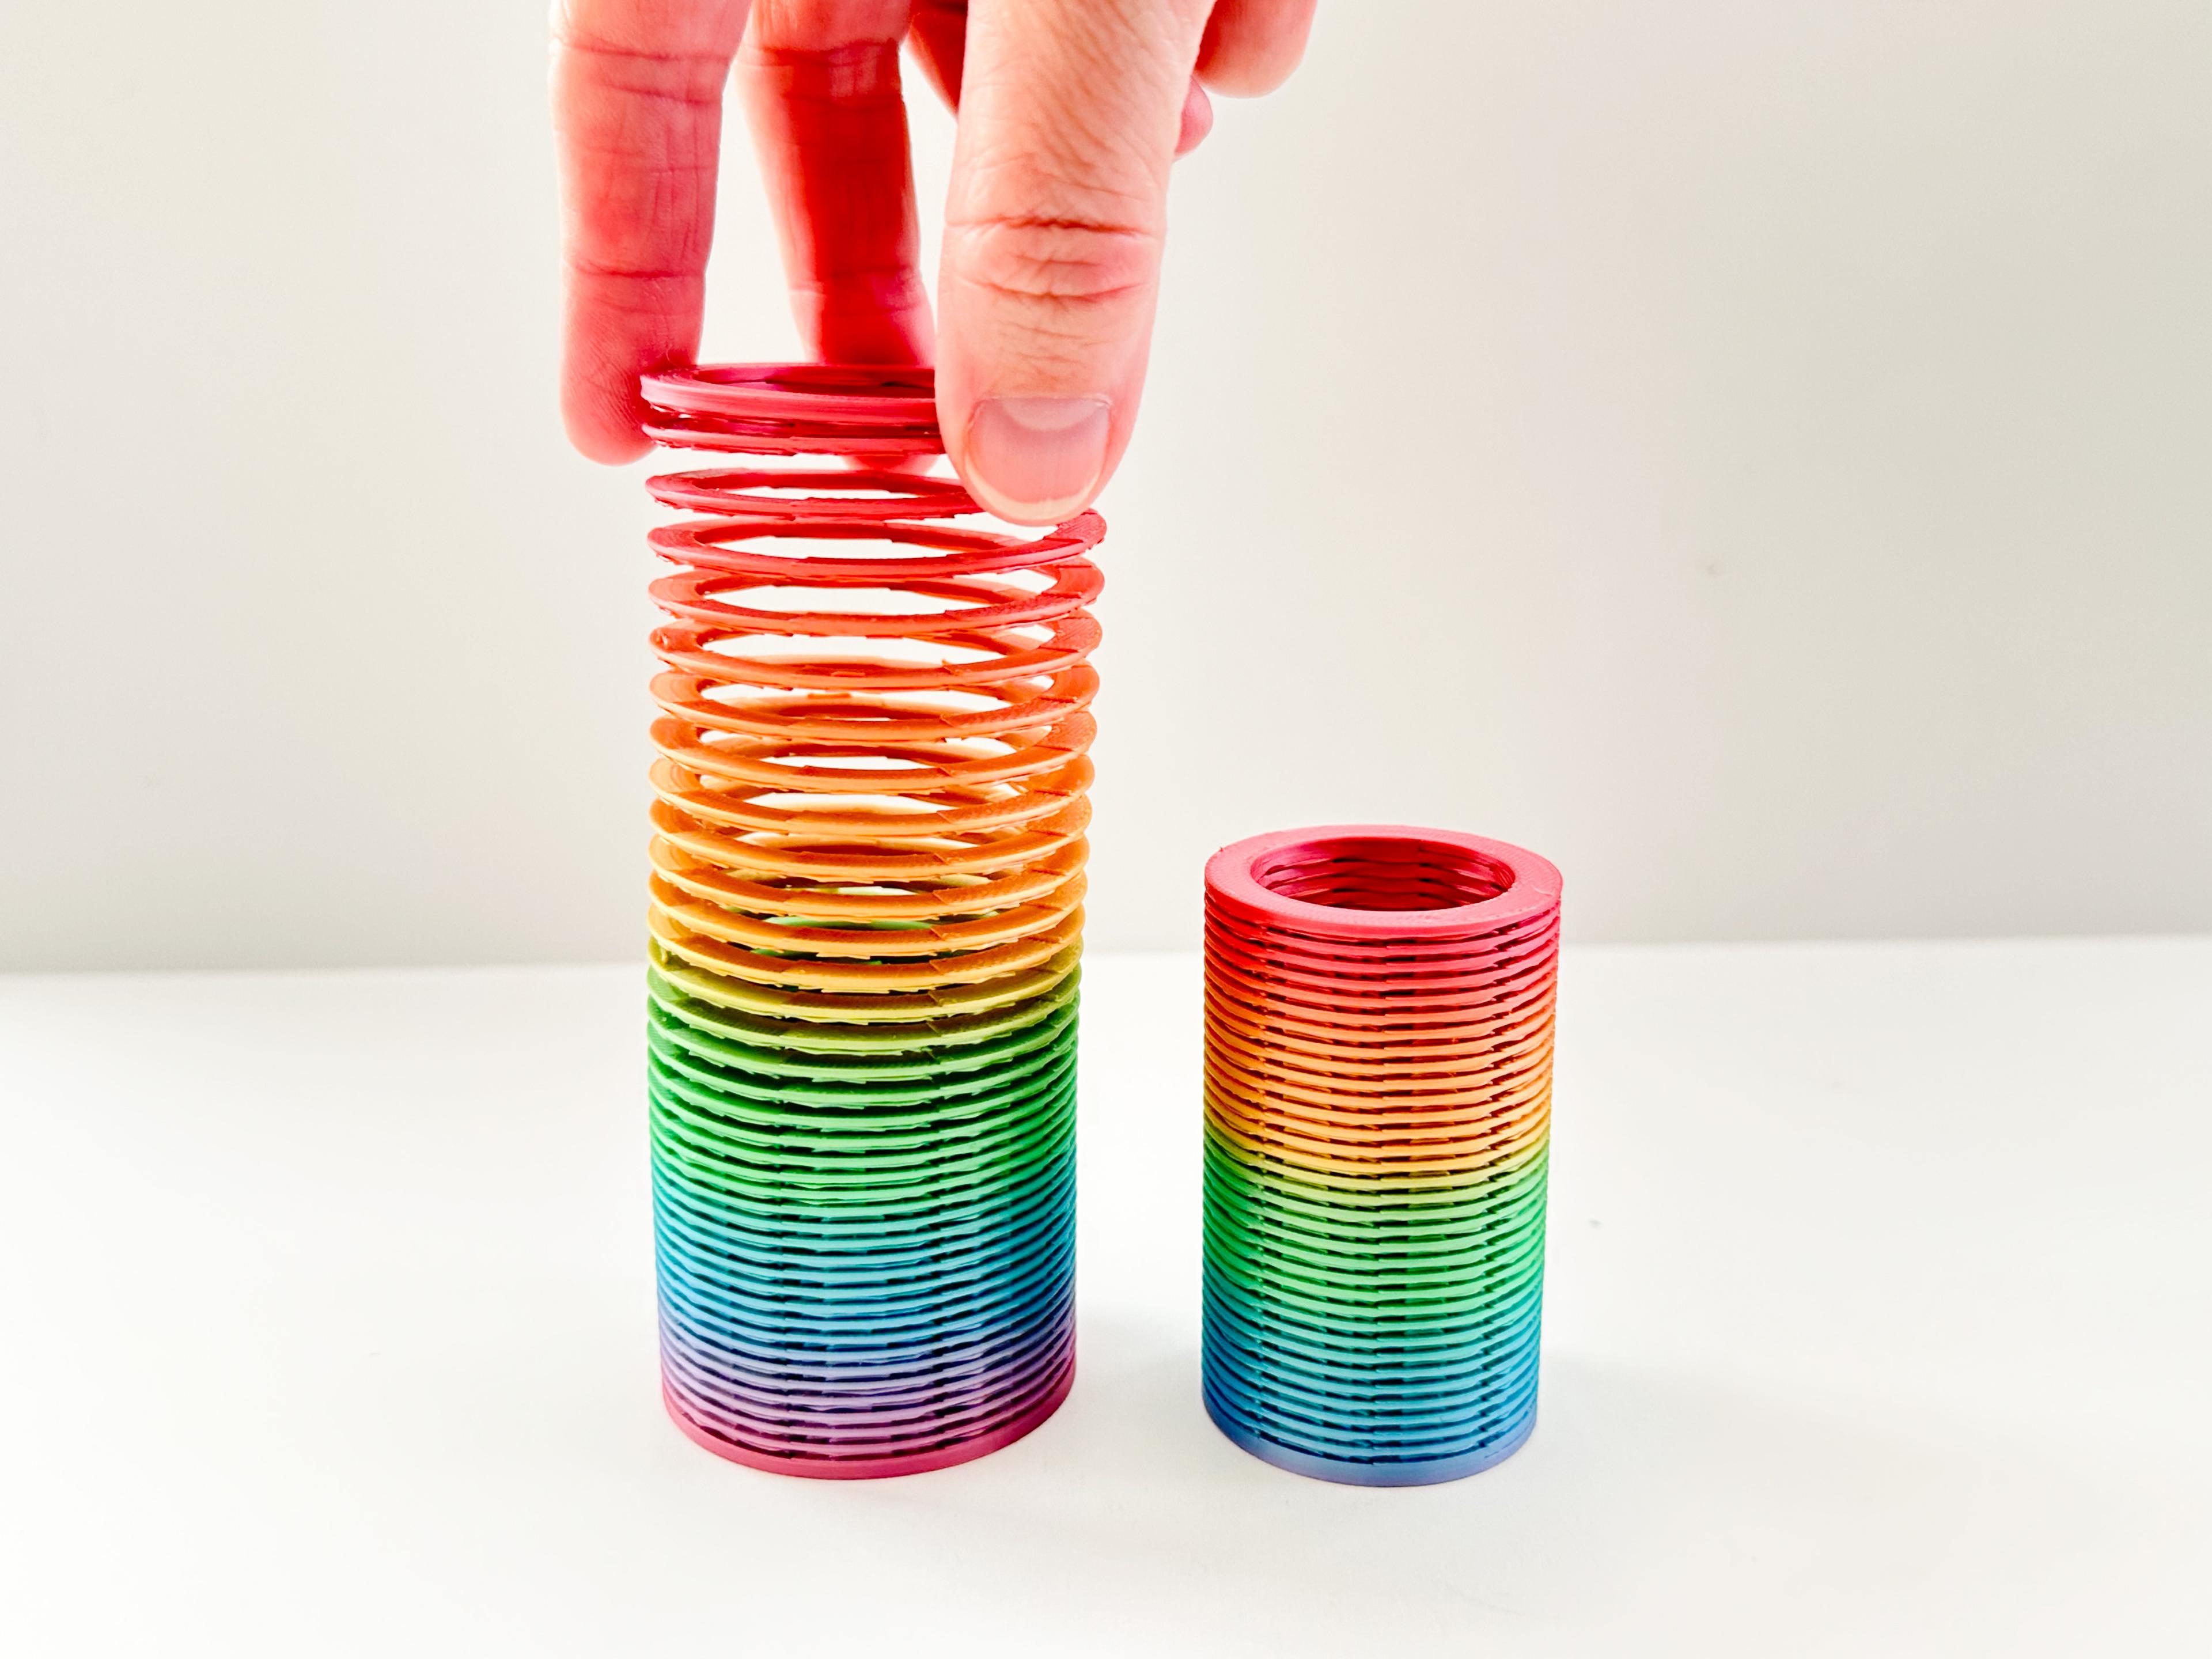
Slinky (2 sizes)

Pear Spinner Fidget
.JPG&w=3840&q=75)
Carrot Garden (2 sizes)
.JPG&w=3840&q=75)
Planter Box and Dirt Bed for All Veggie Fidget Garden (2 Styles)
.JPG&w=3840&q=75)
Bouncy Broccoli Fidget + Garden
.JPG&w=3840&q=75)