


bambulabs p1s 3d printer wall art 3d printing decor
7 downloads · 1 year ago · [**CLICK HERE FOR FILE ANY REQUEST**](https://discord.gg/5TVsrJcCkn) List your themes and requests f
CLICK HERE FOR FILE ANY REQUEST List your themes and requests for free and your files will appear in my library ready for download! *Excludes personalizations.
Unlock So Much More with Kaoz Studios Memberships!
Join Me on Discord!
Get connected: Discord Link
Print Settings
My files are designed to fit most 220x220 print beds and can be resized to suit your needs. Here’s what I recommend:
- Infill: 15-20%, draft settings
- Nozzle: 0.6mm or 0.4mm for finer details
- Material: PLA at 210-215C (PETG slightly hotter)
- Layer Thickness: Z-axis = 3.5mm
- For thicker/thinner lines, adjust XY by ±0.2-0.5 in your slicer, ensuring at least two solid lines around any open spaces to avoid fragility.
FUN TIP: To create a dual color/sided piece, simply do a filament color swap at 50% completion.
wallart, homedecor, walldecor, 2d, 3d, room, game, kitchen, living, scene,low poly, easy, fast, free, meme, walls, party, sign, kaoz, studios, life, ornamant, kittenskritters,art, tactical,tacticalkaoz,kitten, kaozkitten, kaozstudios,print, decoration,animal,nature
bambulabs p1s 3d printer wall art 3d printing decor
7 downloads · 1 year ago in and

wavy usa flag 4th of July wall art home decor

usa flag country 4th of July wall art home decor

USA Flag United States of America wall art home decor

america patriotic usa country flag wall art home decor

70s lava lamp with mushrooms wall art home decor

70s phantom lava lamp wall art home decor

70s Retro Lava Lamp wall art home decor
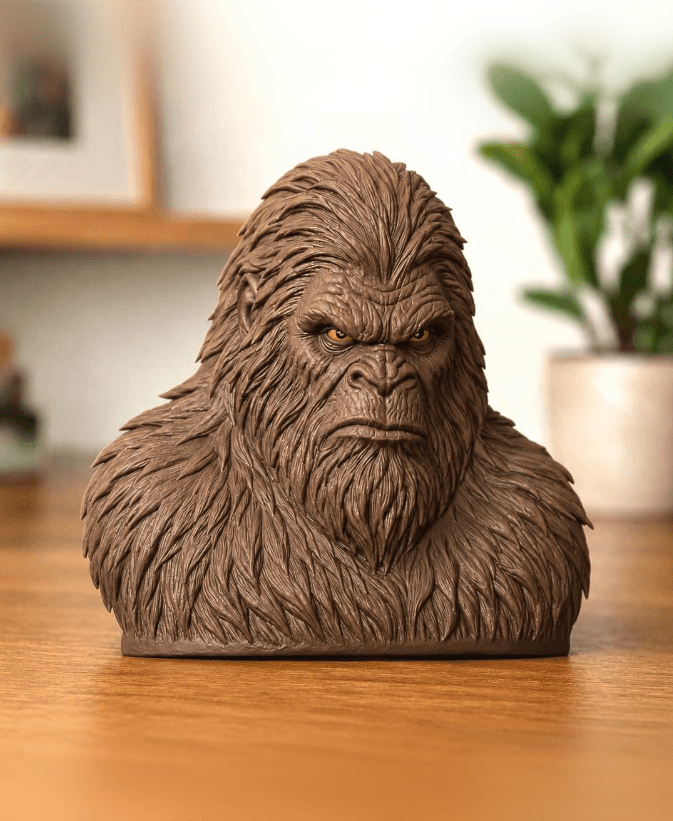
Realistic Big Foot Bust

rose bud flower vase

Baby Elephant Desk Pet Figurine

The Nightmare Before Christmas ZERO the Ghost Dog
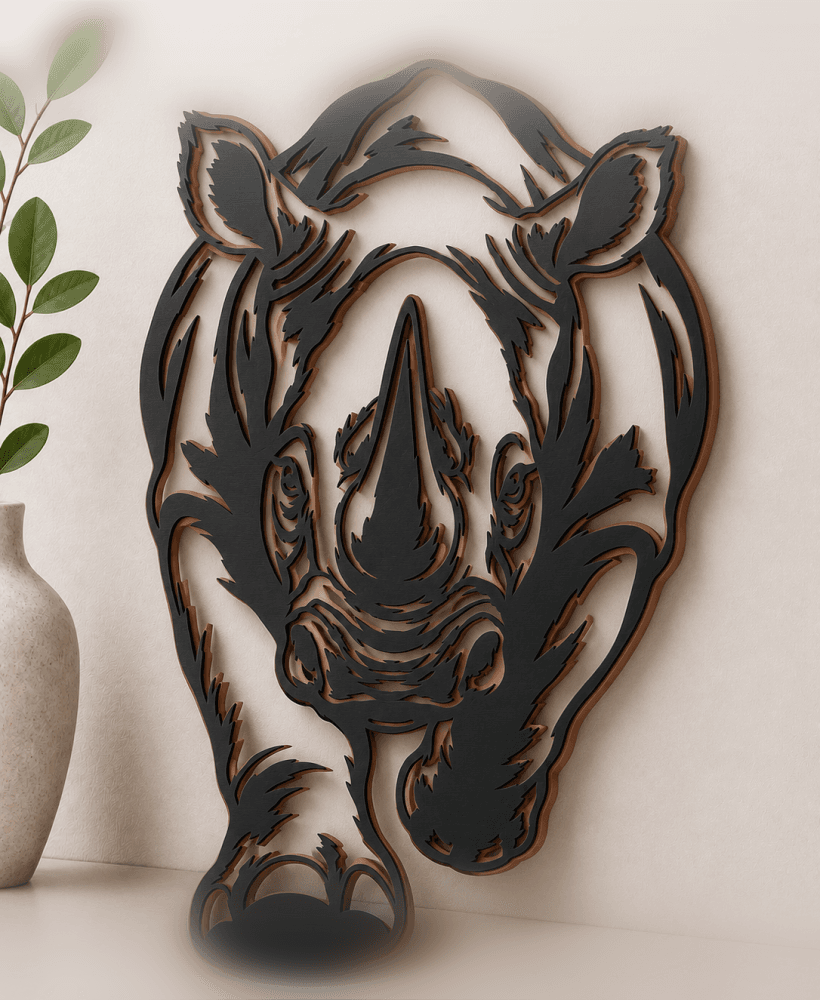
rhino-safari-rhinoceros wall art home decor
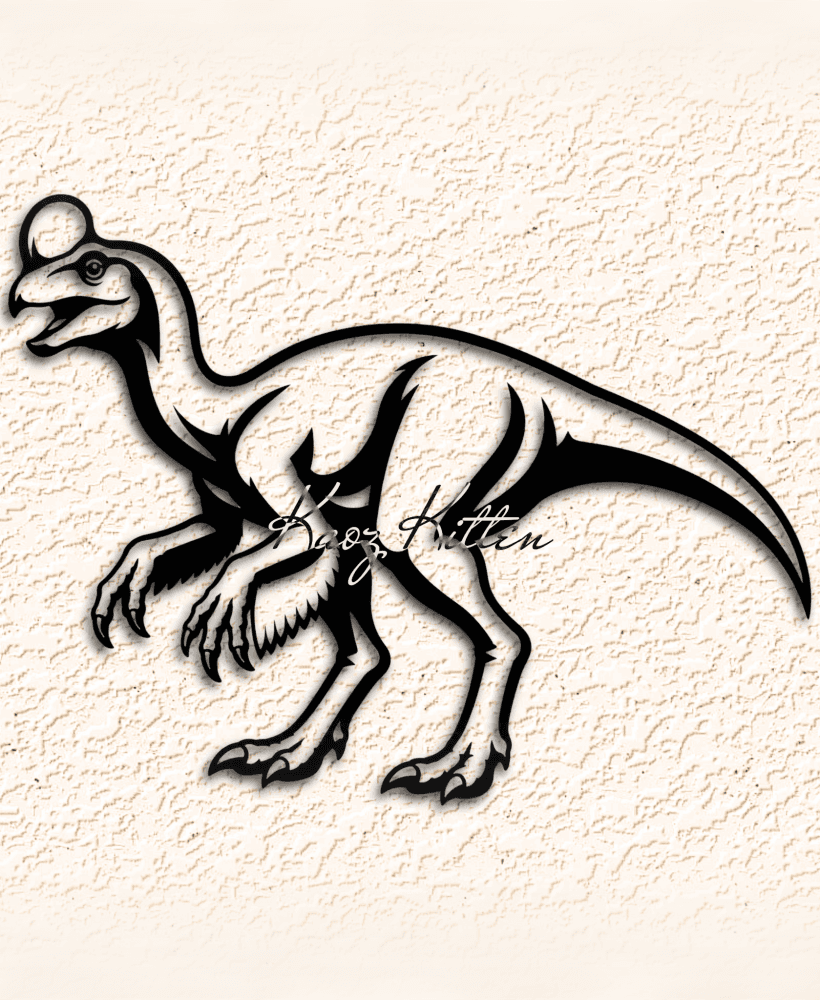
oviraptor-dinosaur WALL ART HOME DECOR

wheres the fish wall art home decor

trap-jaw-masters-universe WALL ART HOME DECOR
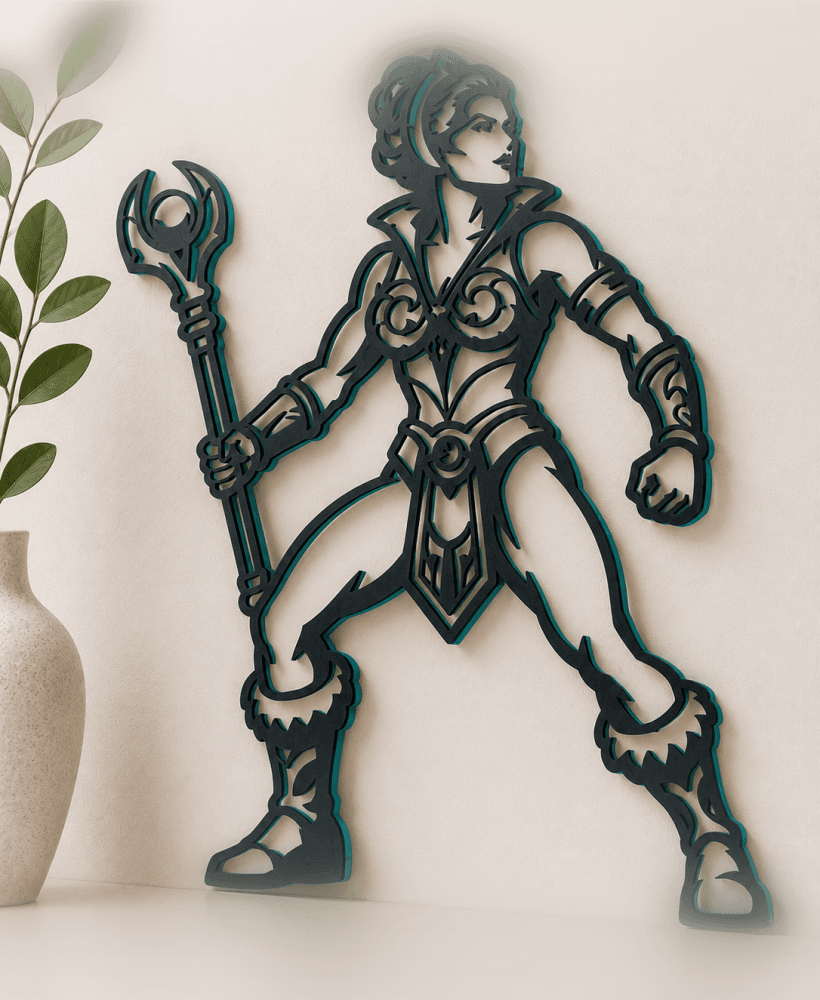
teela-masters-universe wall art home decor
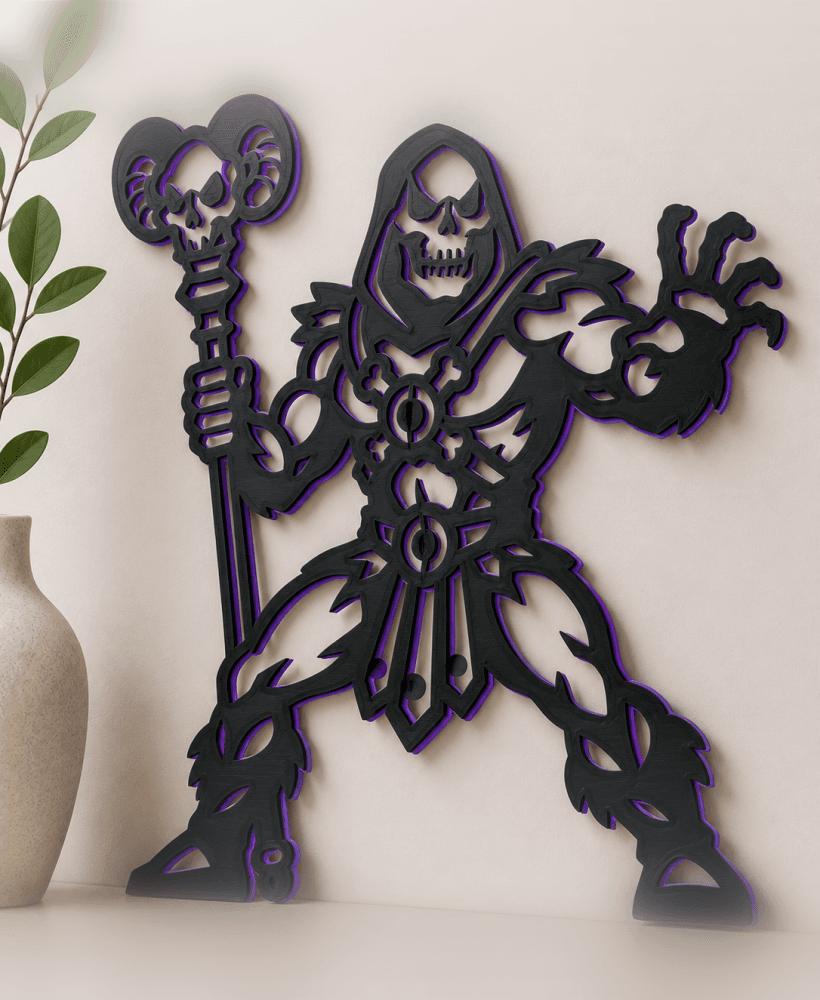
skeletor-universe-masters WALL ART HOME DECOR
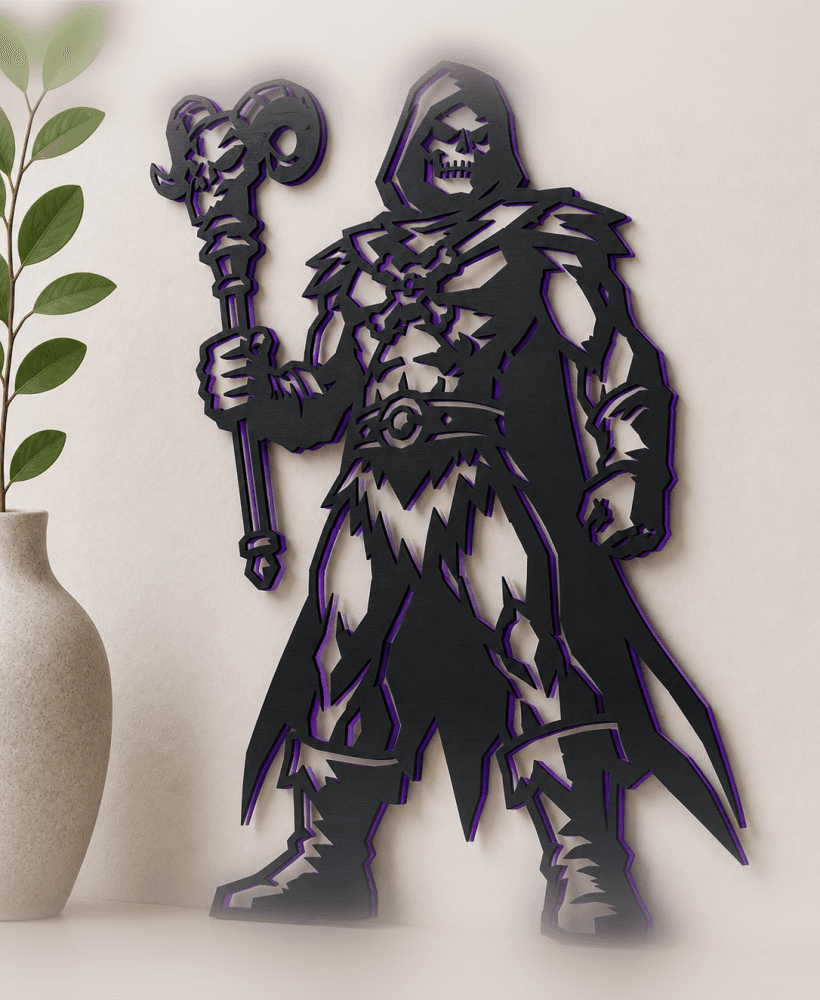
skeletor-masters-universe-2 wall art home decor
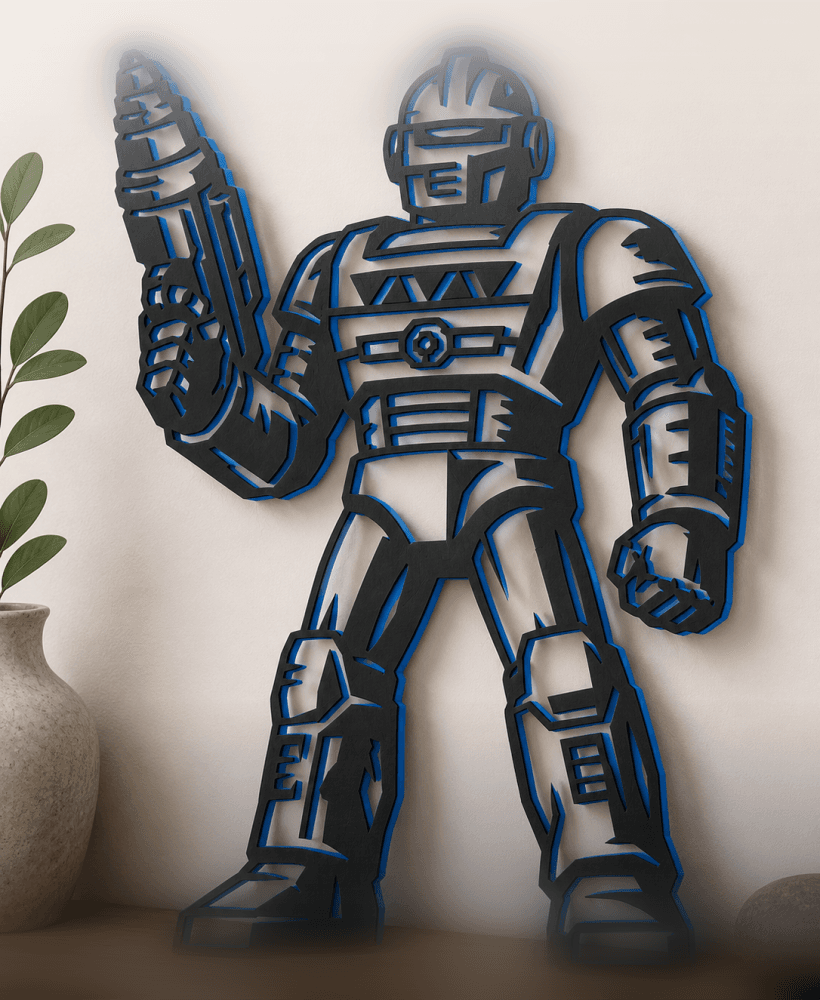
roboto-masters-universe WALL ART HOME DECOR

Also, it's worth noting... for delicate prints, especially Wall Art you will NOT want to use a glass bed 😬 (just in case you have a glass bed in any printer) unless you want a permanent wall art squatting inside your printer as its newfound home lol
Have all these works been successfully test printed?
Yes Sir 😉 Mostly on our P1S's but some on our MK3S's as well :) both with .4 and .6 nozzles. If lines are too thin (as with some machines) you can adjust the xy by +0.2 to +0.5 for thicker results. And of course, if there's ever an issue with an stl (sometimes corrupting with upload) just lmk and Ill re-upload it 😊
Are you saying increase "default line width" or "X-Y Contour Comp" in Bambu Studio?
Wow. Impressed by the quick reply. Looking at some of them, for example, this Bambu one (SO COOL), the lines are like, 1 layer, in some areas. Feels like a nightmare to print, remove, handle, etc. I'll give it a go, and see what happens. I will toss it on an X1C with a 0.4. I have POTUS printing on a K2 PLUS, and it looks great so far...
So Bambu's Slicer is kinda the opposite of Prusa Slicer 😉 With Prusa Slicer you're working with positive space, and with Bambu Studio, you'll work with negative space. In Bambu Studio, you'll go to "Precision:xy hole compensation" - for a negative value for example, put something like -0.25 which will give you thicker lines, and a positive value (+0.25) for thinner lines.
Ah Prusa! I didn't have that on my Bingo Card. The Irony, that I'm preparing to work on a Tutorial for them. Awesome. Thanks for the superb tips. This applies to Creality Print 6 also.
Ahh nice! And of course 😁 Glad I could help! Always here any time you need 😊
Here are some direct links too if ya have any other questions :) Always glad to help ! (My discord) https://discord.gg/5TVsrJcCkn (Facebook messenger) https://m.me/luisandtracybenitez
FYI: The M.ME link, takes me to a FB inbox, of a deleted user....
P.S. , did the discord link work?
So weird? I just tried it and it worked np - might be a FB issue? Look up TracyandLuis (first name) Benitez (Last name) on fb / messenger - should bring it up that way :)
Super. In return for your awesome tip, I joined your Membership. :) This is me:
Youtube.com/@3DRUNDOWN Youtube.com/@GreggAdventure Instagram.com@3DRUNDOWN Instagram.com/@GreggAdventure
NEW, and MAYBE neglected, maybe not: @3DFUNDOWN
Thank you so much for support of my work Gregg! And superb to have you on board :D As always, if there is anything at all you ever need, or any specific things you'd like to see made, I'm just a text away :)!