.png&w=3840&q=85)
.png&w=256&q=75)


.png&w=256&q=75)

Desktop Cornhole - Catapult and articulating bean bags
Instructions Hardware Filaments
Desktop Cornhole! - Intermediate
Another addition to the desktop games collection. Just like Desktop Hockey, this game is actually super addicting to play.
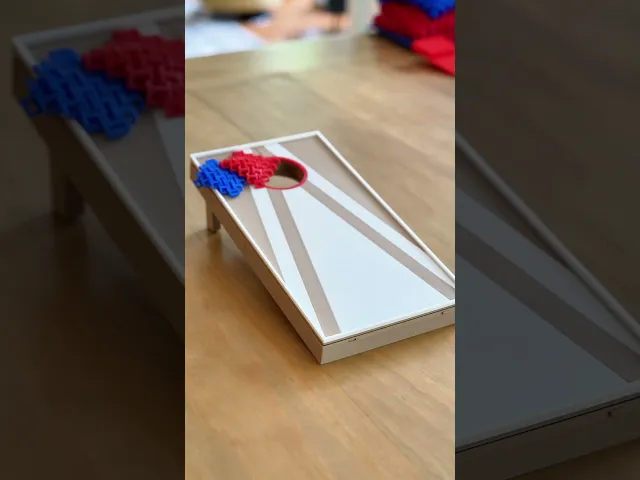
Print two sets of boards and play across the length of a table.
Rules The rules are the same as normal cornhole but with a twist. You take turns throwing your 4 bags at the opposite board. But you can use the built in catapult to launch your bags instead of throwing them!
Bag on board = 1 point Bag in hole = 3 points Opposing team's points cancel each other out each round First to 21 wins, must win by 2
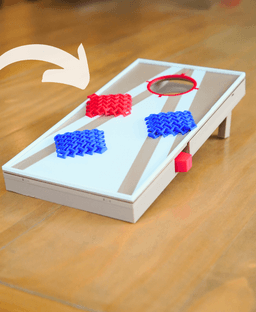
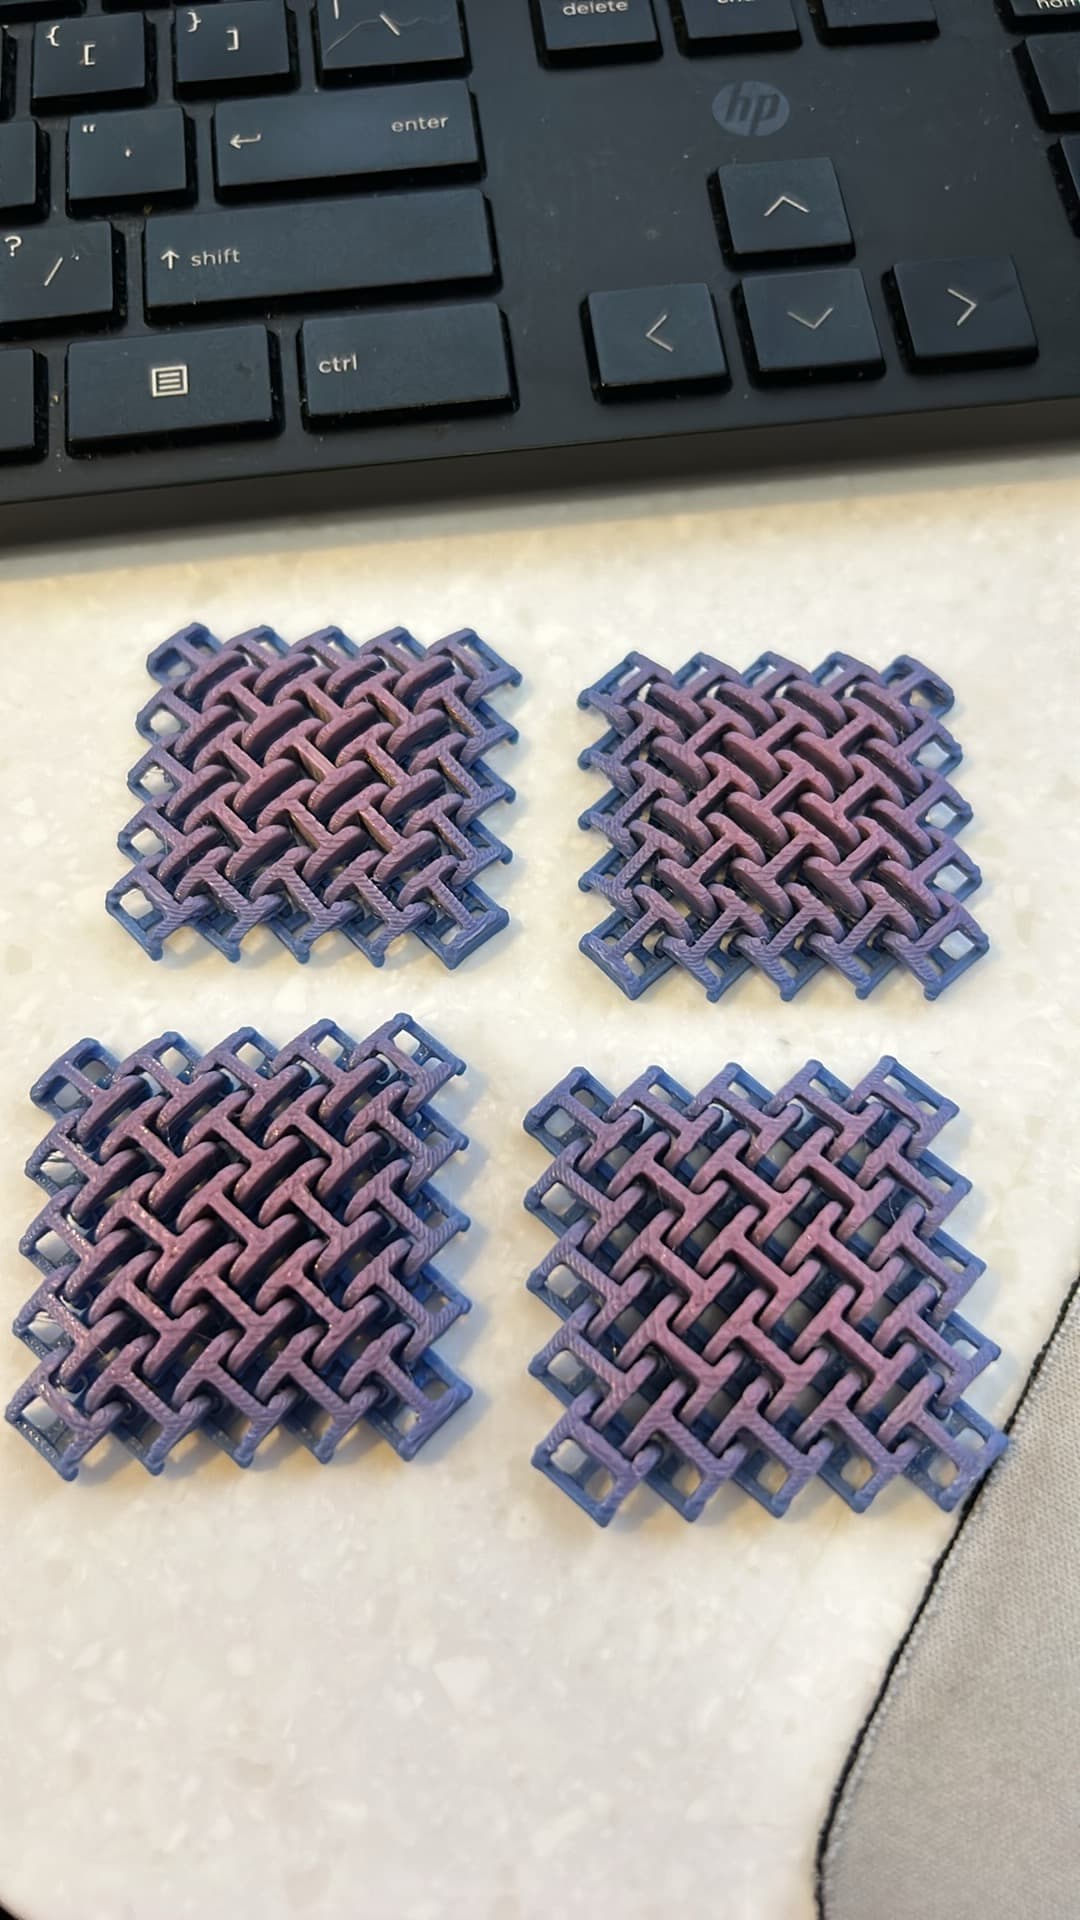
The Design This design features articulating beanbags inspired by 3d printed chainmail. I designed the bags to bend, and flop just like real cornhole. The physics worked out pretty great on this! The bags slide, flop, spin, and stick just like real cornhole thanks to the articulating design that absorbs energy just like the beans in a real beanbag.
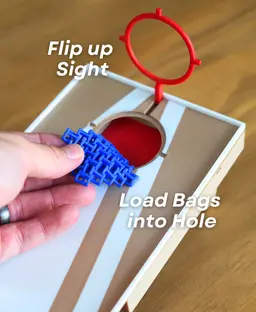
The board has a built-in catapult so you can launch your bags in addition to throwing them. Flip up the Sight, pull back the launcher, and send your bags flying!


Desktop Cornhole - Catapult and articulating bean bags

PlayBook'd Zoo are you?
Battery Bank

PlayBook'd LUDO

Cactus Cluster

PlayBook'd Tic Tac Toe

Lucky Bamboo Mahjong

PlayBook'd - Go

Telephones Booth

Spinny Succulents - Pack III

Desktop Golf Gen 2
PlayBook'd - Playing Cards

Desktop Dumpster

PlayBook'd Cribbage

PlayBook'd Crosswords

Snack Attack - Gen 2

PlayBook'd Snakes and Ladders
.png&w=3840&q=75)
Date Night Daisy

PlayBook'd Settlers' Storage
Scoopy Stacks

I printed this Cornhole boards the ONLY thing I would ask for is that the edges be removed so it would be just like the full size. So you are not sure that your bag will stay on the board. I know when we play one of us always try to knock off the other players bags to lessen their score Thanks0
The edges were added since the bags slip off the sides too easily without it. I adjusted the height of that edge so that it plays very similar to normal cornhole, where a bag can partially hang off without falling, but you can still knock it off. Tested a few different heights until i found one that i thought was best, but its certainly a judgement call
If you feel like its a little to hard to knock other players bags off, you can cut off some of the edge in your slicer using the Cut option!
Great model! I would recommend supports on the bottom board for the leg pivot points! Still worked just not as smooth as it could have been!
checked this too late, make it 3rd vote for supports on the legs. My fault for trusting someone else's 3mf I guess but I would expect more from such a high cost designer.
These type of designs require good printer tolerances, so its hard to make a 3mf that works for everyone! Apologies for that. Will take another look at the clearances asap
definitely has a floating section on the legs, not a tolerance issue. works fine once supported. funny thing is that if you look at the opposite side of the leg, top part when printing, it is perfectly flat and would be perfect for print in place but the bottom has a indent causing a floating section.
The legs needs that indent for it to fold out correctly and not "collide" with the back of the board. So yes using supports is definitely the way to go
Do you use the catapult for all the bags. I'm asking because wouldn't you need to move the board to shoot it
You would definitely need to move the board to use the catapult, but that's some of the fun of it!
Is there a way to print the legs separately and then snap them into place? It takes over six hours to print the base, and I broke one of the legs trying to get it to rotate 😭
Yes, the supports mentioned in the instructions do need to be removed.
I don’t have the legs available as separate parts, since the model is designed to be printed in place so they can rotate properly. You _could _try splitting the file in your slicer, but there isn’t a snap-on option. When freeing the legs, remove the supports carefully and gently work the legs loose a little at a time—slow wiggling usually helps avoid breakage.
Also, are you supposed to remove the small amount of supports mentioned in the instruction document?