


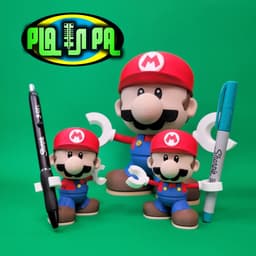


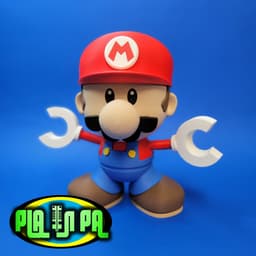


Articulating Toy Mini Mario multi part
A toy Mario that moves and spins!
His large hands are perfect to hold various pens and sharpies. I am including a blank hand uncut if you wanted to make the holes in the hands fit different size things as well.
Print settings…
Just about all the parts can be printed without support. I would recommend adding tree support to the Tan Face part, but I accidently forgot to add them and surprisingly the print turned out just fine!
Assembly…
The Arms are on a ball joint and move freely in all directions. Make sure to insert the arms through the red shoulder pieces before glueing the shoulder pieces in place.
I used a piece of scrap filament for the white eye centers in the small original size Mini Mario. Taking a long piece and pressing it into the small hole in the black eye piece creates a perfect tool to glue the eyes in place. Just trim off the excess white filament once the glue has set. Check out my TikTok video for a better explanation.
When assembling the head, slide the back of the head into the brown hair first, then side the face into position. It pops into place when aligned correctly. Then add the side burns to the sides of the face. The brown hair holds the two head pieces firmly in place. Do Not glue the Main body Pin the lower half of the body without adding the Head and upper body first. Press the main body split key into the head and drop the completed upper body on top of the pin. Put a few drops of glue in the hole for the pin in the lower body, then with the head and upper body loosely in place, press the pin into the lower body, and let the glue set.
When assembled correctly the Head and Upper body should swivel independently from one another. With the body and arms free to move he’s pretty fun to play with, posing in different directions.
I also created a Toy Luigi check my profile for the design If you’re interested in selling prints of my designs, become a Patreon supporter here… https://patreon.com/planpa3d I have a version of the design scaled up 225% and adjusted the clearances between the parts for better fitment posted on Patreon now.
You can follow me on Instagram, https://www.instagram.com/pla.n.pa/ to find out what I designs I am currently creating or check out my TikTok, https://www.tiktok.com/@pla.n.pa for assembly videos


Articulating Toy Mini Mario multi part

Articulating Toy Mini Luigi multi part

Cute Flexi Eagle (Toy, Keychain) + print-in-parts, Articulated Toy Mini

Fidget Fries Buddy (Mini Articulated Fidget Toy)

Monster Caterpillar Flexi 3MF | Fantasy Toy Multi-Color | Articulated

Cute Flexi Sheep & Ram, (Toy & Keychain), Mini Articulated Animals

Cute Flexi Butterfly (Toy, Keychain), Mini Articulated Animal
.png&w=3840&q=75)
Articulated Fire Dragon | Brain Texture Flexi Toy | Fantasy Monster Statue | Multi-Color Articulated

Cute Flexi Caterpillar (Toy, Keychain), Mini Articulated Animal

Blob Owl - Mini Modular Articulated Art Toy

Blob Skeletons - Mini Modular Articulated Art Toy

Blob Pumpkins - Mini Modular Articulated Art Toy

Mini Snow Dragon 2025

Gingerbread Blobs - Mini Modular Articulated Art Toy
.png&w=3840&q=75)
Crystal Spiked Lizard | Articulated Reptile Toy | Multi-Color Flexi Monster | Gemstone Dragon Sculpt

Funny Capybara Fidget Toy – Articulated Animal Toy

Snowblobs - Mini Modular Articulated Snowman Art Toy

Cute Flexi Spider (Toy & Keychain & Magnets) + Halloween Version, Mini Articulated Animals
.png&w=3840&q=75)
Flexi Axolotl Cat | Cute Articulated Creature | Hybrid Fantasy Toy | Multi-Color Flexi Monster
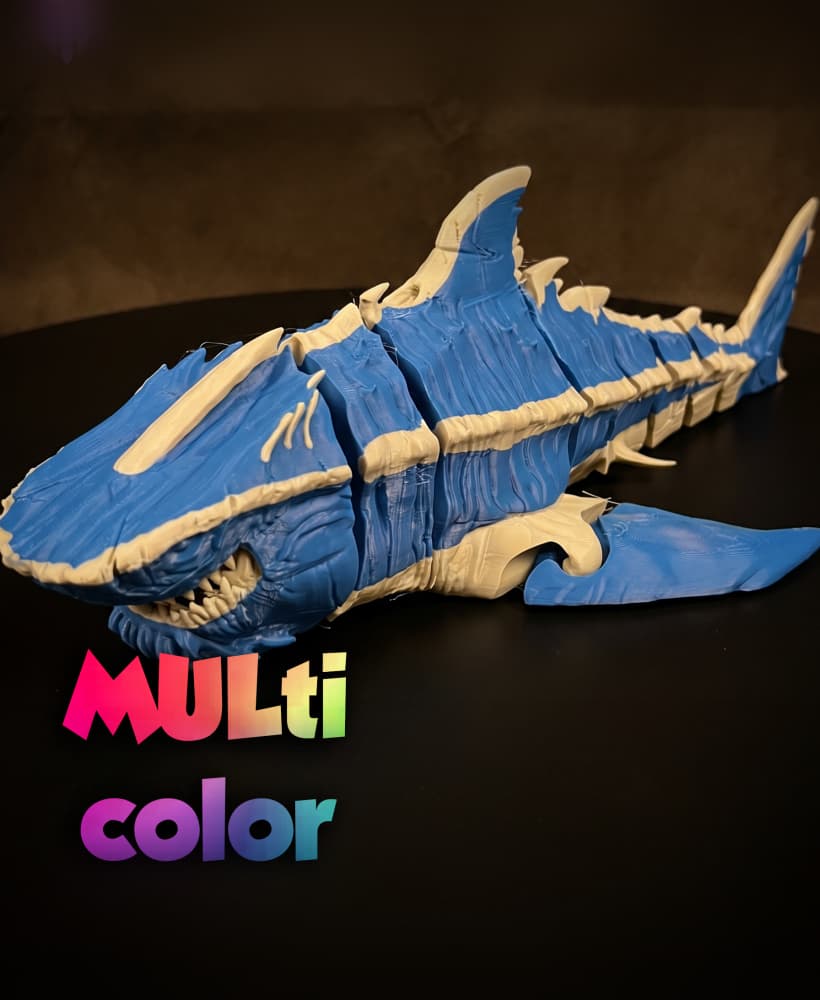
Articulated Shark Flexi 3MF | Ocean Toy Multi-Color | Flexi
