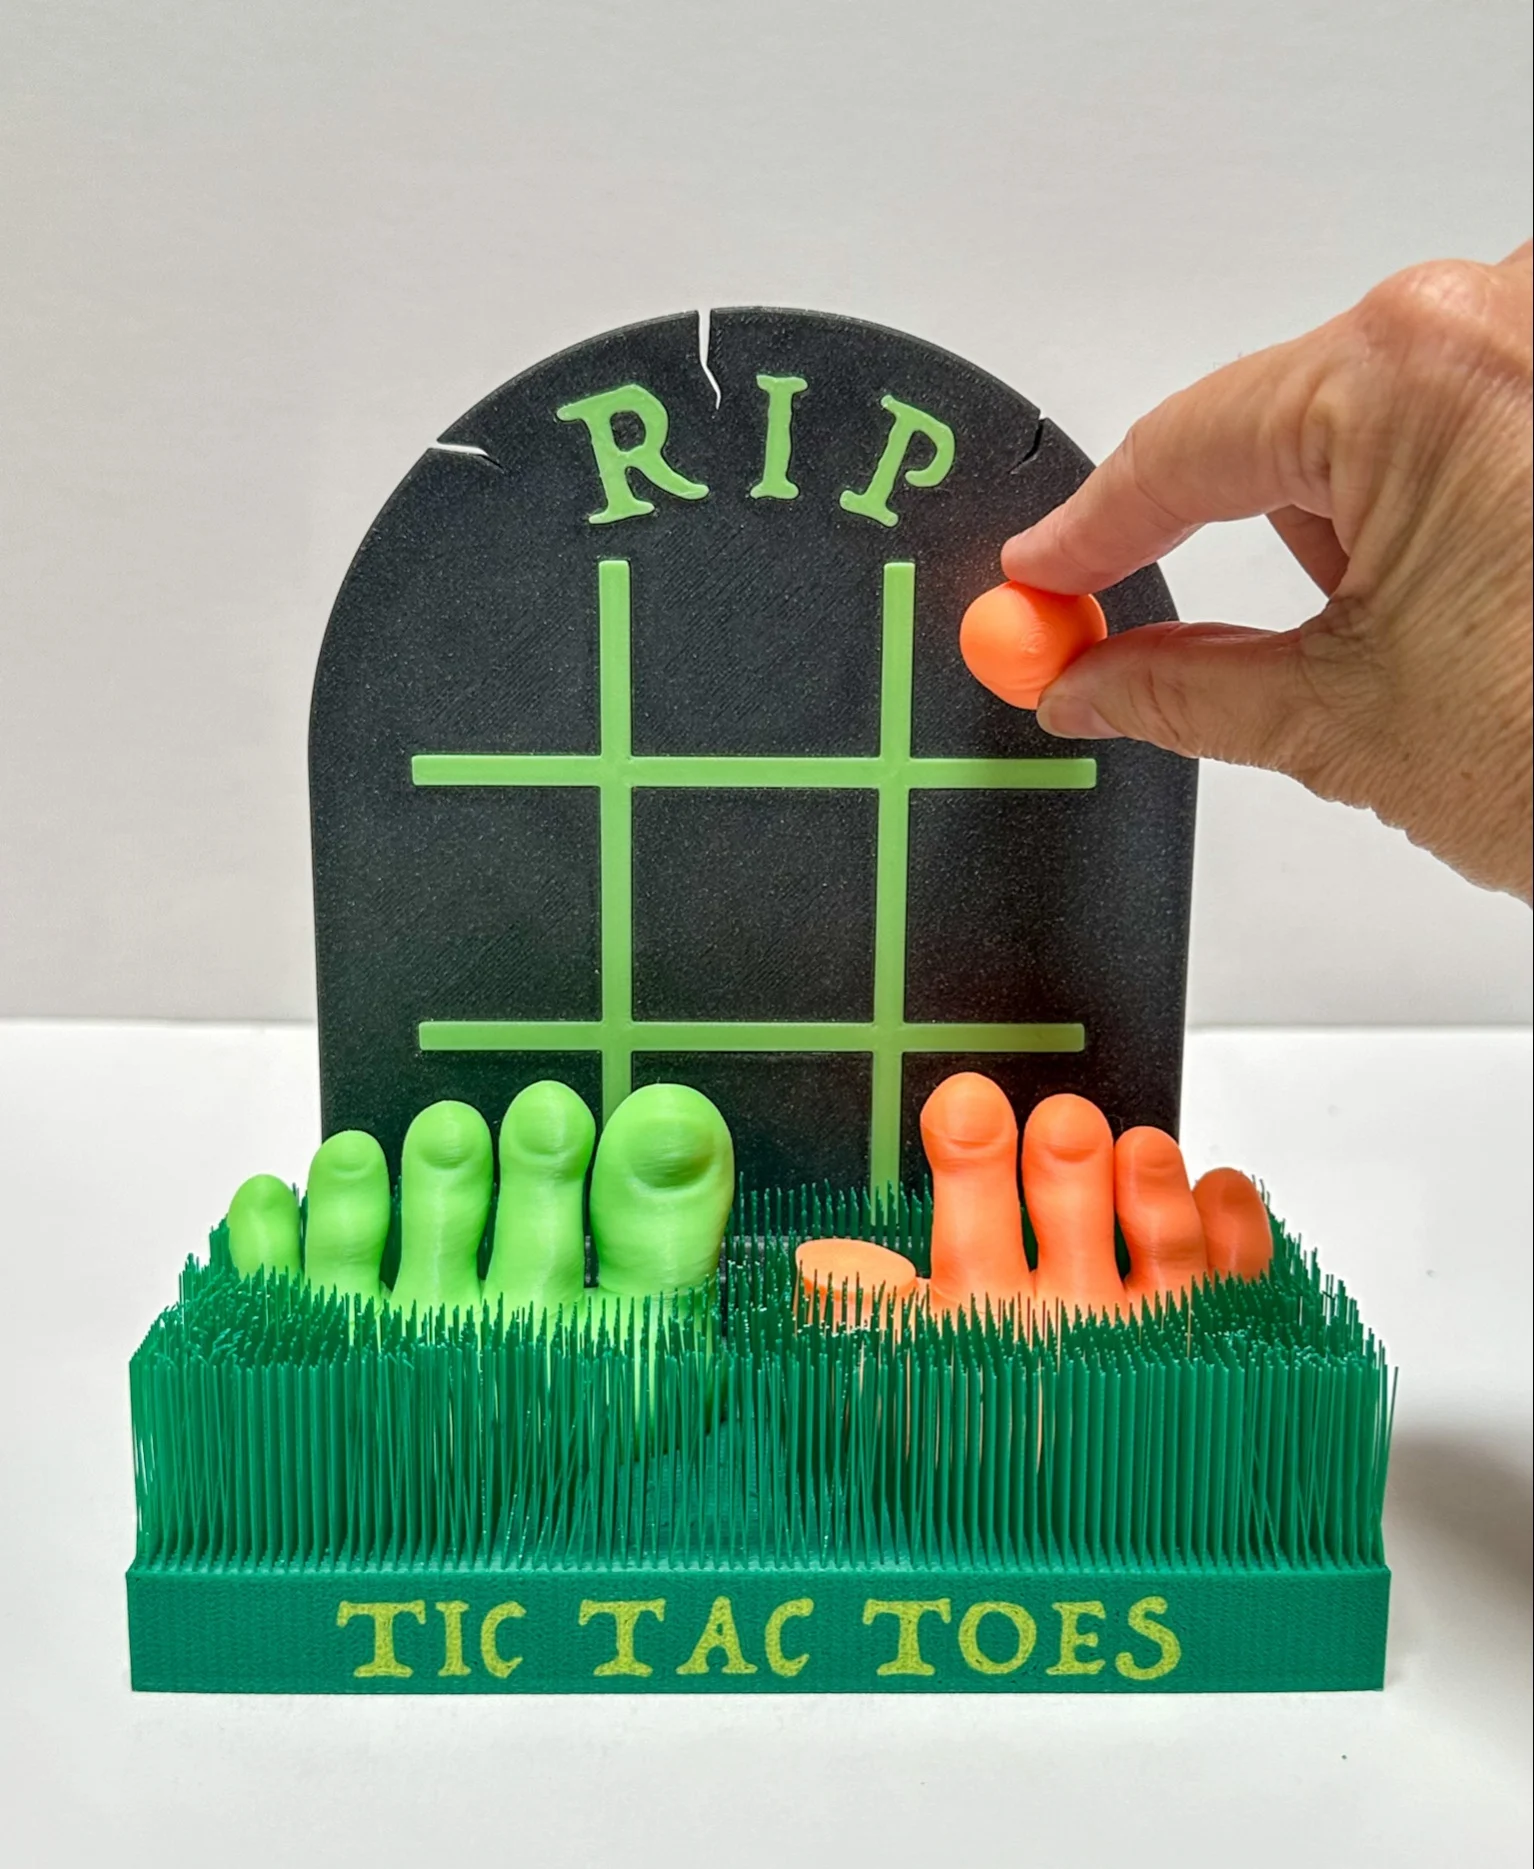
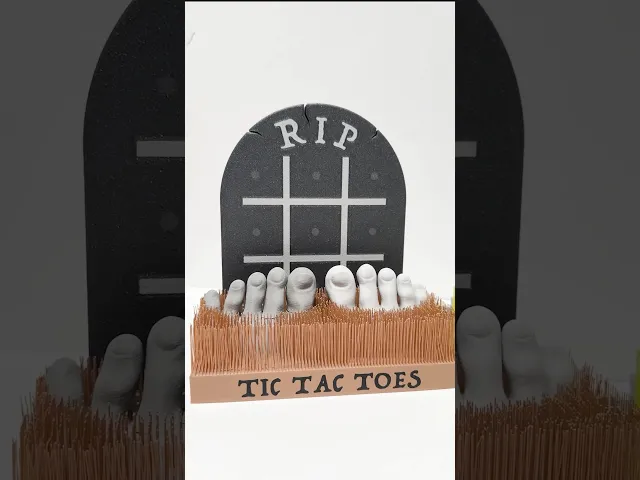


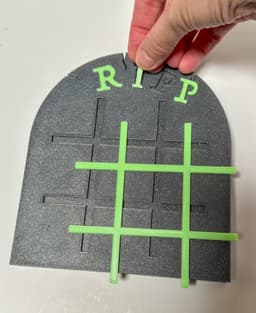


Halloween Tic Tac Toes
Here is my Halloween version of Tic Tac Toe(s) 👣 One player gets the left foot and one gets the right. To make it extra spooky print the feet in glow-in-the-dark filament 👻 Also, I do recommend printing the feet in two different colors so they are easy to tell apart:)
PLEASE NOTE: You will need (29) 6x3 mm neodymium magnets for this print (10 for each foot and 9 for the tombstone tic tac toe board)
Here is an Amazon link to the magnets needed: https://amzn.to/42jixNZ
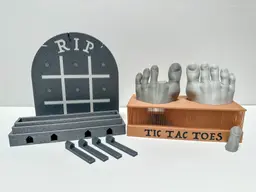
3D Printing Instructions: I have included two 3mf files (they need to be separate because the layer height is different on each): Tic Tac Toes 3mf (includes the feet, tombstones, tombstone base, connectors, and the extra parts for the tombstone that prints in one color) 0.2mm Layer Height PLA works great (I used PLA Basic, Glow and Sparkle) No supports 15% Infill Print ‘pause’ added on print plates with feet and tombstones to insert magnets (see more detail below and photos)
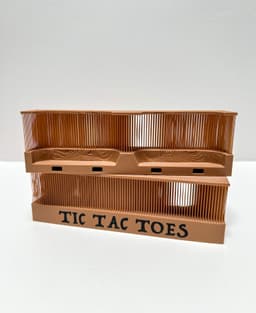
Grass pieces for Tic Tac Toes 3mf (includes front and back grass pieces) 0.24mm Layer Height PLA works great Arachne wall generator turned on/selected (very important) Bridge speed 25mm/s Thick Bridges turned on/selected Wall loops 3 Brim ears applied to corners of each piece No supports needed (NOTE: for the Back Grass piece it will give you a warning about a floating area of the print. It is referring to one blade of grass. I have looked back over my model and do not see any issues with any blades. I have printed it several times without supports. PLEASE DO NOT ADD SUPPORTS)
How to Print and Insert the Magnets into the Feet/Toes:
-
Pause at layer 19 (layer height 3.80mm) for both the feet and toes to insert the magnets
-
Make sure the magnets are orientated correctly (make sure the toes will be attracted to the feet AND that the toes will be attracted to the tombstone) I like to print the feet/toes first and then the tombstone. I use the toes to check my magnet orientation before I insert the magnets into the tombstones.
How to Print and Insert the Magnets in the Tombstones: The Tombstone (two colors) will print facing down. I have inserted a pause print at layer 19 (layer height 3.80mm). When the print pauses, insert the magnets in the correct orientation (compared to the toes) and then resume the print.
The Tombstone (single color) prints facing upright due to the recessed areas of the letters and grid lines. I have inserted a pause print at layer 84 (layer height 16.8).
NOTE: Because these magnets are inserted higher in the print, you will need to add a little glue into the hole for each magnet (you can use a very small drop of super glue or even a little smear of a glue stick on the back of the magnet). This will help them stay in place when the print resumes and prints over them. If you don’t secure the magnet with a little glue, when the print resumes the magnets may ‘jump’ out of the holes and cling to the print head.
How to Print and Trim the Grass pieces: Both Grass pieces print on their side. After they are done printing you will need to trim off the top cover of the grass. You can use scissors, wire cutters or even carefully slice it off with a knife. Use caution and take your time. After that top cover is removed you can trim and shape the grass however you would like.
How to Assemble:
-
Slide the connectors into the tombstone base (add a little glue if necessary)
-
Slide the back grass piece onto the connectors
-
Slide the connectors into the front grass piece
-
Before pushing these three parts together too tightly, insert the feet. Glue can be added to the bottom of the feet to secure them permanently in place.
-
If you printed the Tombstone (one color) glue the RIP letters and grid lines into place Insert the tombstone into the tombstone base, add the toes to the feet and you are ready to play (you can also lay the tombstone flat and play on it that way too)
Have fun printing and playing!! 👻


Halloween Tic Tac Toes

Alphabet Layered Fidgets

Big Beads: Sports Themed

Cupcake & LED Candle Set (with Cupcake Stand and Magnetic Match)
Spill the Tea Fidget

Football Layered Fidget

Potted Flowers and Watering Can

Flower Stand for Potted Flowers with Watering Can

Pixel Flower Fidget (2 sizes) with Stems, & Vases (3 styles)
.JPG&w=3840&q=75)
Fidget Fabric Fried Egg Set (play or coaster set)

Twisty Pint Fidget (2 Styles)

Clicky Phone Fidget (2-in-1 Fidget)

Fry Pan, Spatula and Fork

Green Eggs (requires mesh fabric), Slinky Ham and Plate

Number & Symbol Big Beads (for Horizontal and Vertical Stringing)

Big Letter Beads
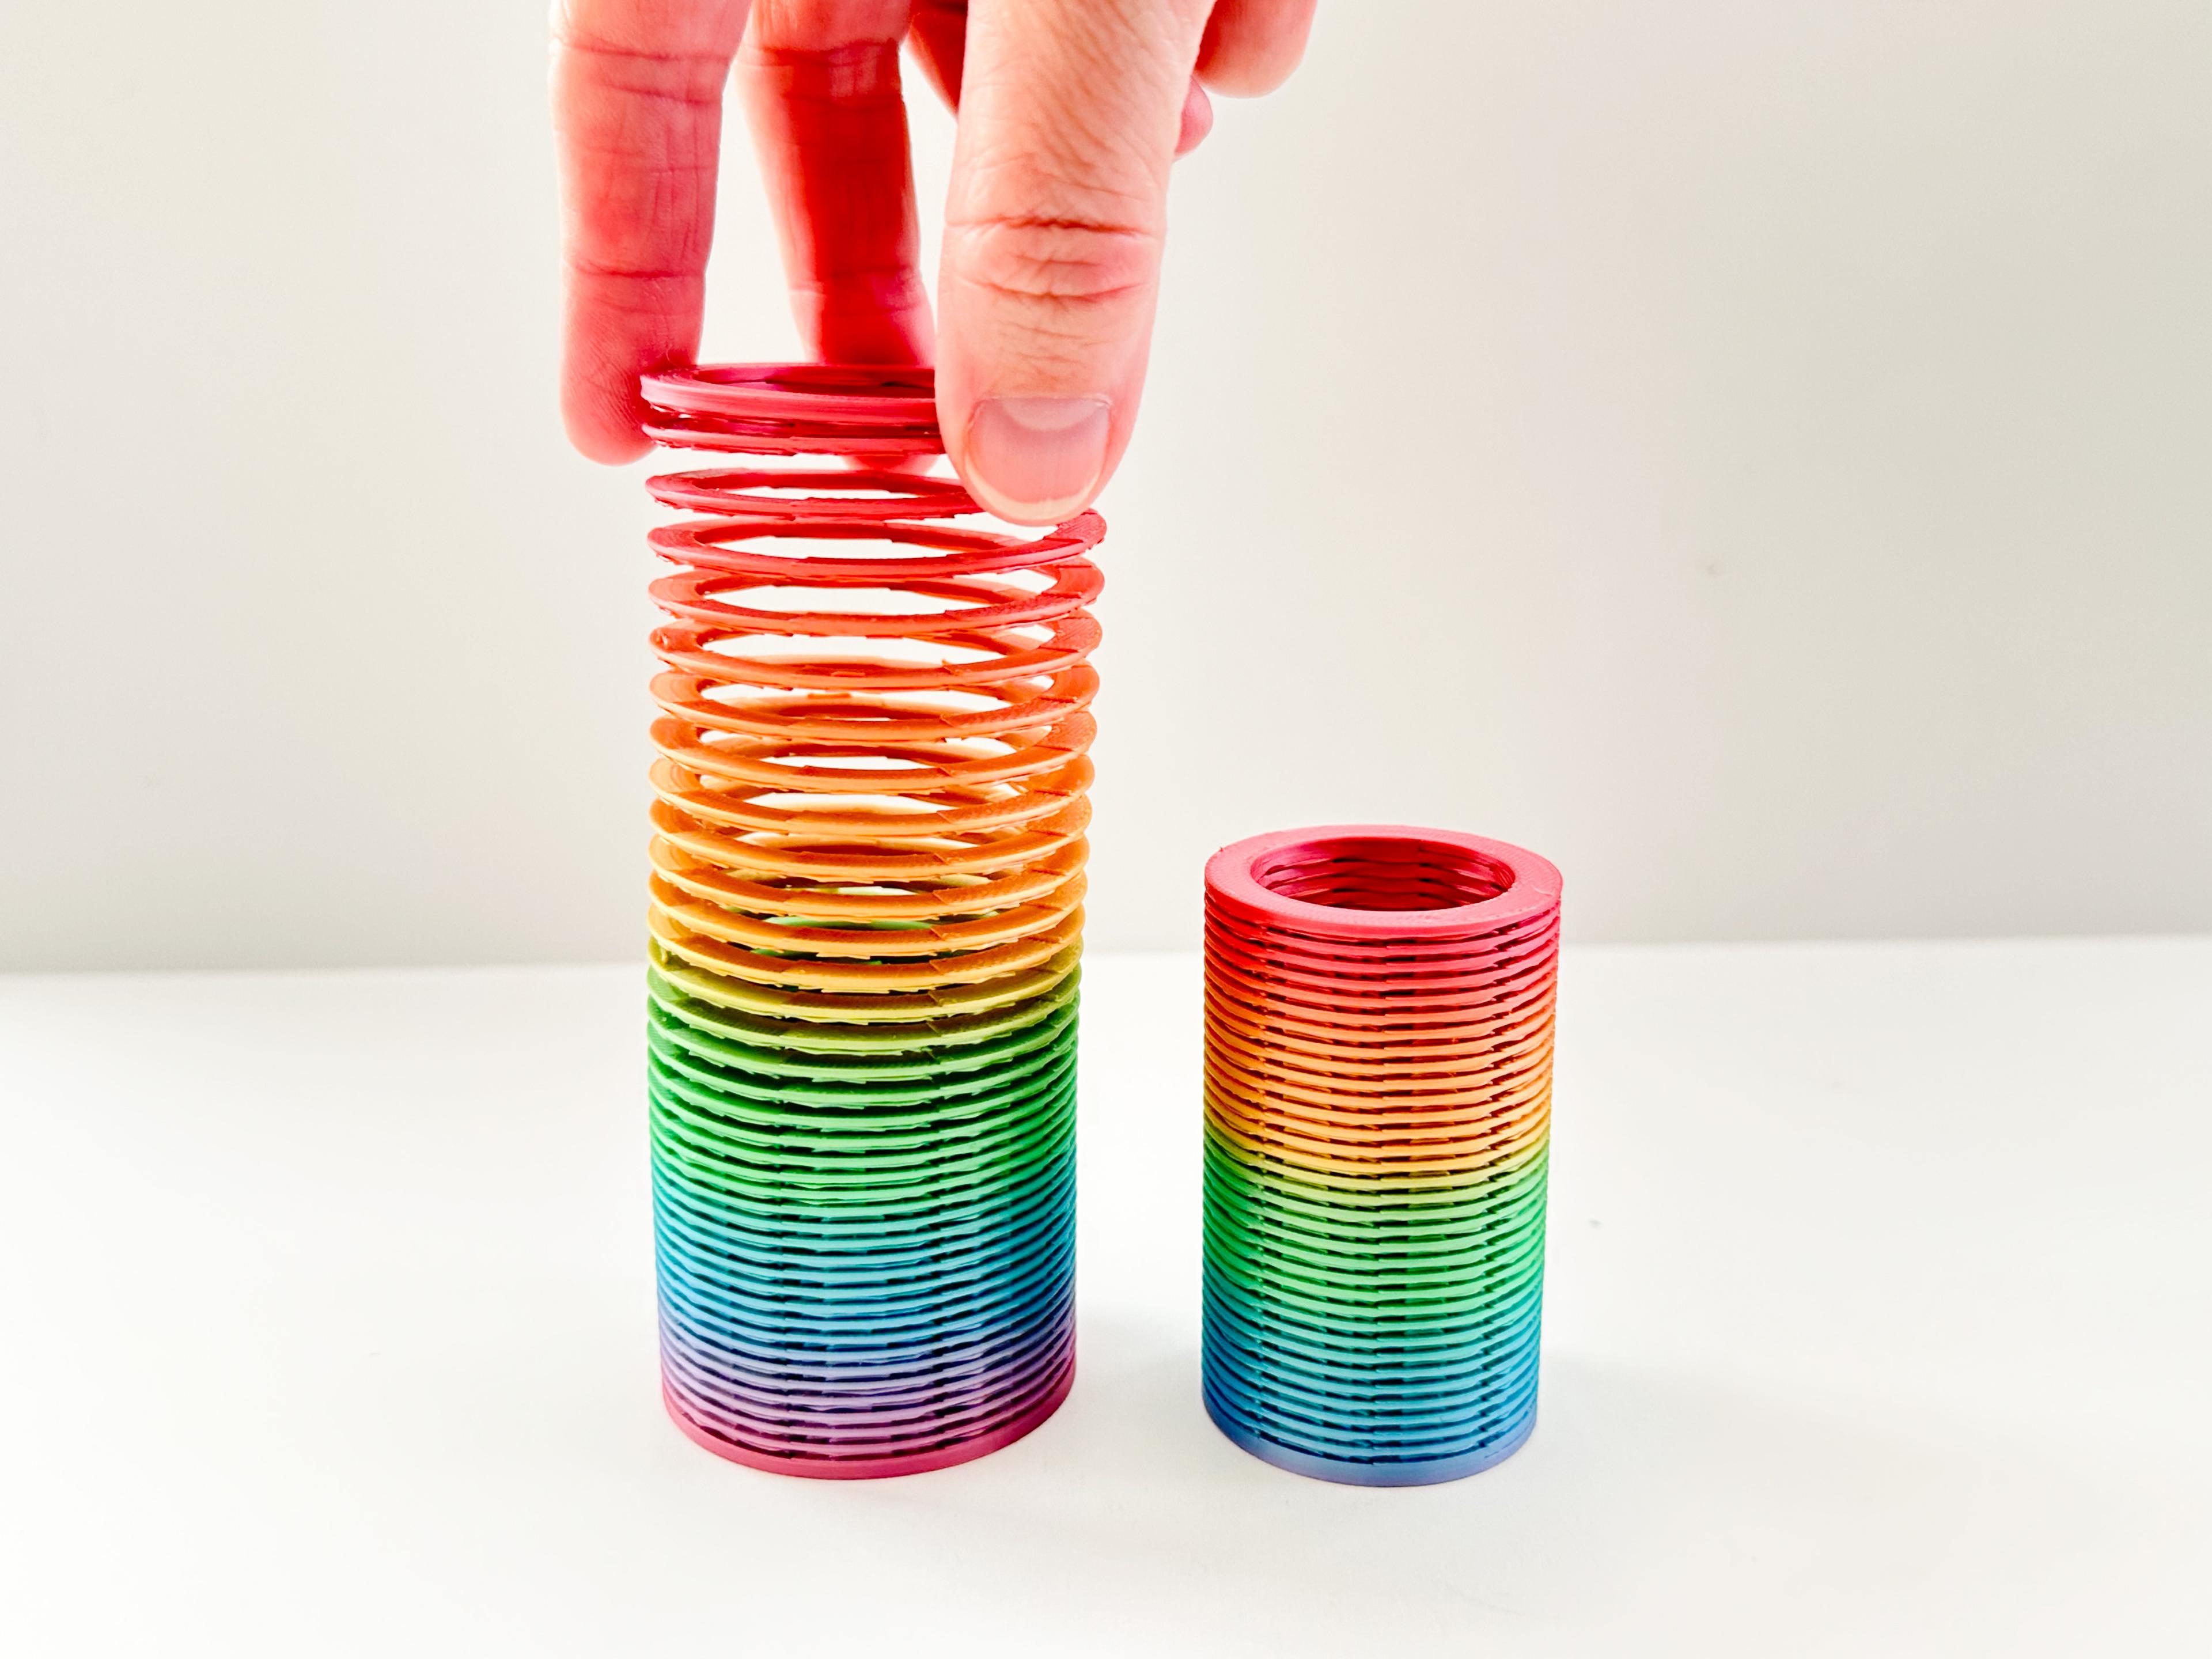
Slinky (2 sizes)

Pear Spinner Fidget
.JPG&w=3840&q=75)
Carrot Garden (2 sizes)
.JPG&w=3840&q=75)
Planter Box and Dirt Bed for All Veggie Fidget Garden (2 Styles)
.JPG&w=3840&q=75)
Something is off with the grass STLs. When I slice them, it makes them almost solid. It looks like something to do with how the bridged grass is designed. I don't know enough about to design to know how to fix it. They should only take a couple of hours to print, but my slicer is showing nearly 8 hours.
Do they actually look solid on the slicer or are you just assuming it's solid because of the high print time? Just asking because it takes 8 hours for the front piece and 6 for the back with my settings but it's not solid. I think it's because it moves a lot slower while printing bridges. Anyway, maybe you could set it to print just 10 layers and stop to see if it's looking like you have two rows of grass or a solid green block.
This is so cool and creepy. Is there any way you could make a riser piece to go between the tombstone and the base so it's a little easier to put toes on the bottom row?