


.png&w=256&q=75)
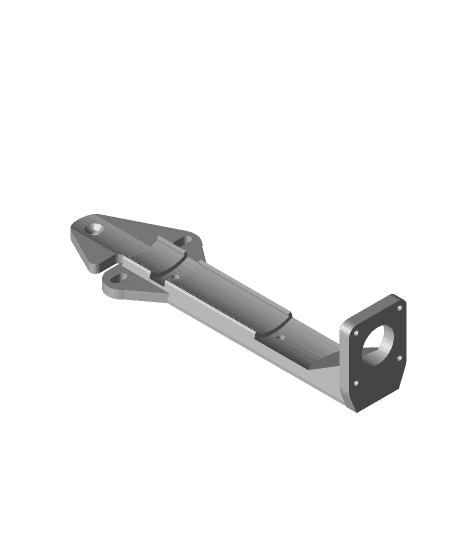
Bolt-Locked Insert - Lite Fix Point (Folded)
Fix Points allow for fast and easy installation and removal of any accessory part while still being sturdy. This is a "Lite" Fix Point that is thinner than a regular Fix Point and makes Multibins fit flush against the Tile.
This is a “Bolt-Lock” Fix Point that can be inserted into the Multiboard Snaps (Weight Bearing Snaps are recommended).
"Bolt-Lock" the Fix Point into place by screwing in a Small Thread T Bolt from the back of the Snap, this way the Fix Point won't slip out.
Attach parts that have a negative Fix Point or Rail, like "Rail - Multibin Shells" or other accessories.
Learn more about this part at https://multiboard.io/knowledge-hub
Printing Guidelines:
Use 3 perimeter wall thickness, 0.2 mm layer height, 15% infill, and no supports. Apart from that, use your printer's default settings.
The printing orientation is as provided in the file. Make sure the downloaded files are .STL. This part has been designed with a tolerance of 0.25 mm. Your printer will need to be able to bridge gaps of up to 30 mm for some designs.
For more information about printer settings, click here.
This object is part of Multiboard, a FREE and ridiculously modular organization system with thousands of parts, for creating the most adaptable workspace possible. Learn more and find ALL the parts at https://multiboard.io
Bolt-Locked Insert - Lite Fix Point (Folded)

Modular Infinity Cube
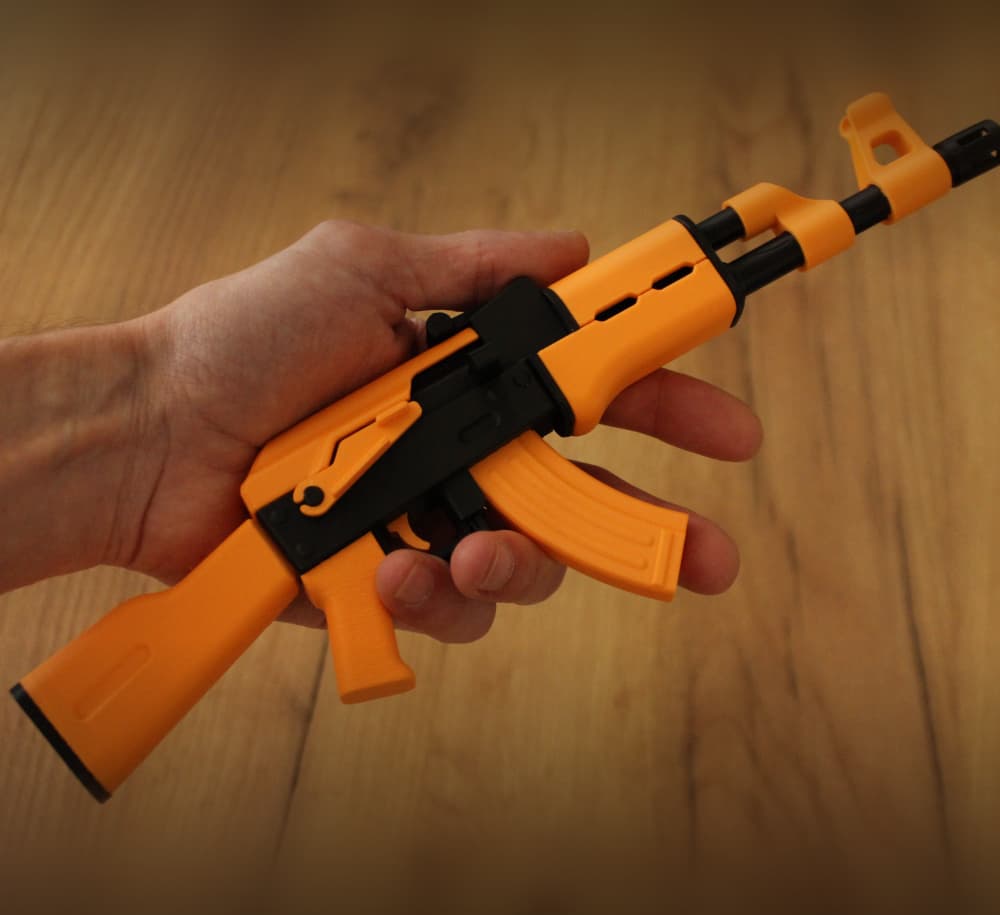
AK-47 Pocket Rifle – Bolt-Action Toy

Beading Loom 200x50mm
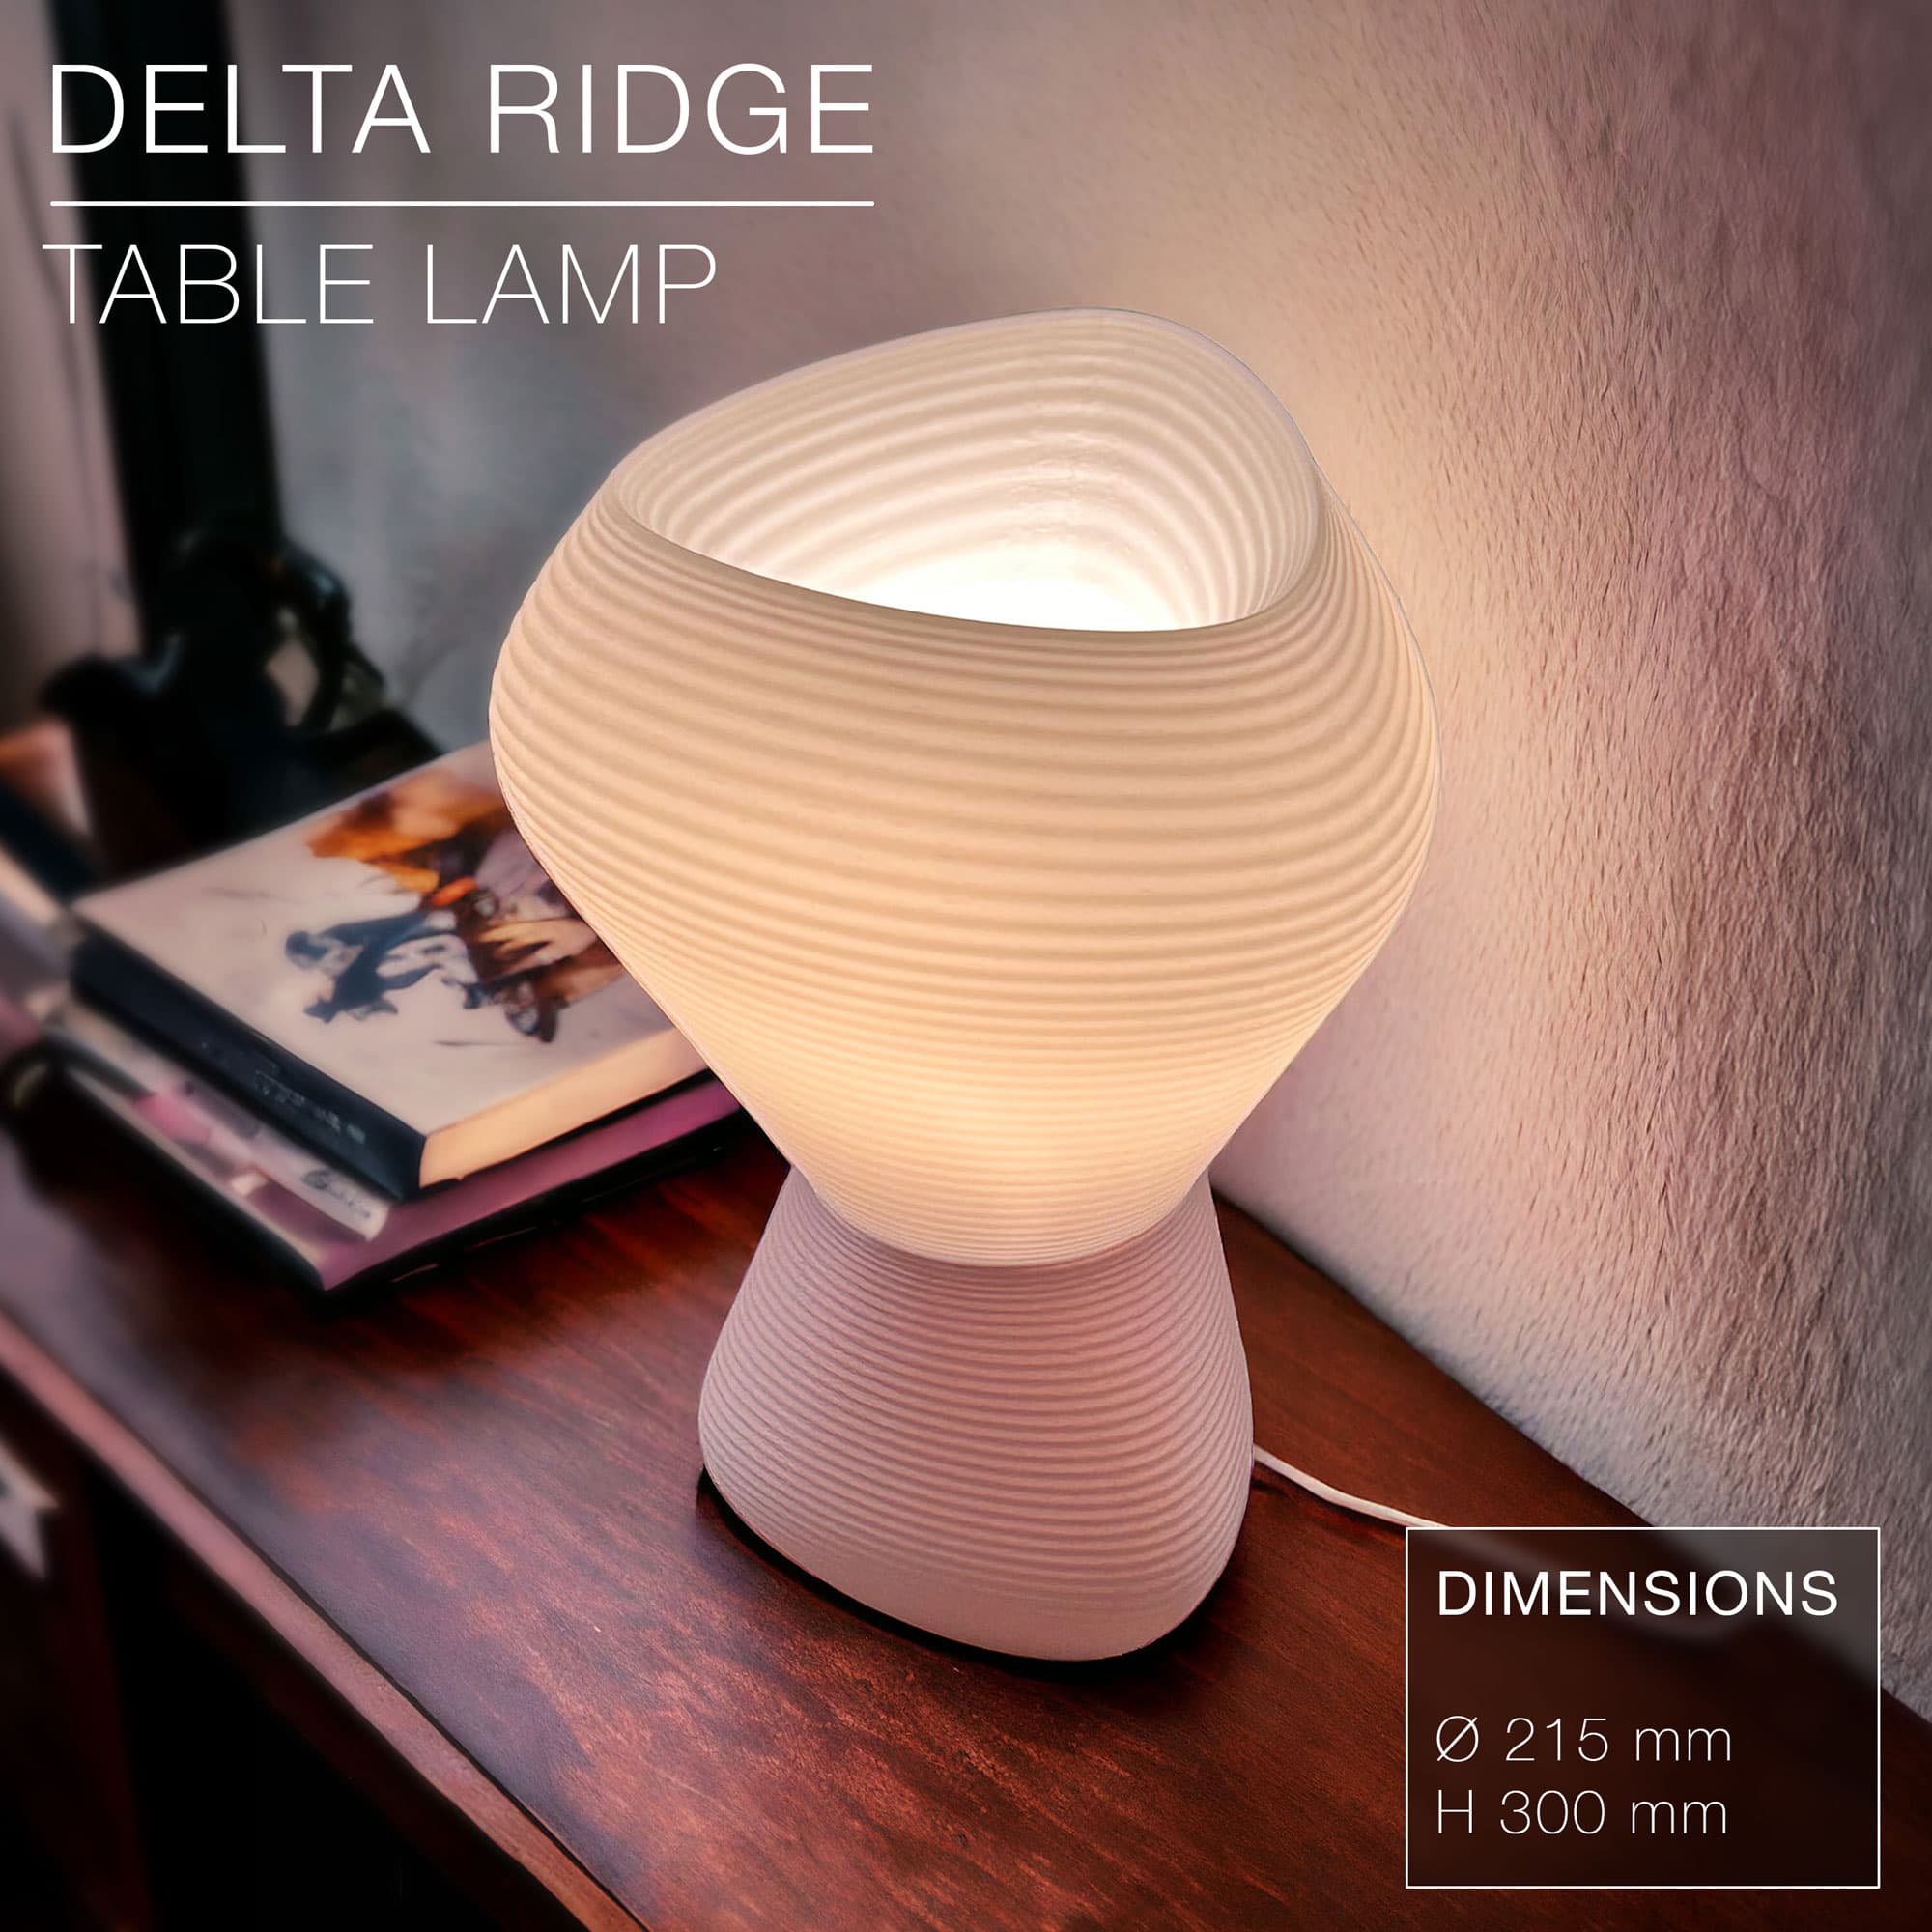
DELTA RIDGE | Table lamp E14 & E27 fast-print

abanico2.stl

Gothic Reaper Shrine - Dark Fantasy Statue

Pop King Dancer 3MF | Music Icon Multi-Color | FDM

Tennis Ball Container

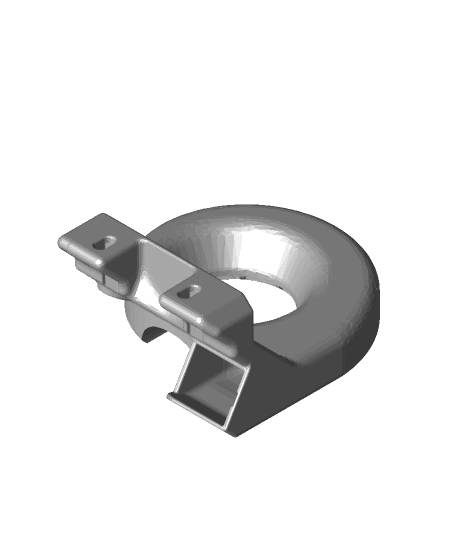
MDO - Wall Support
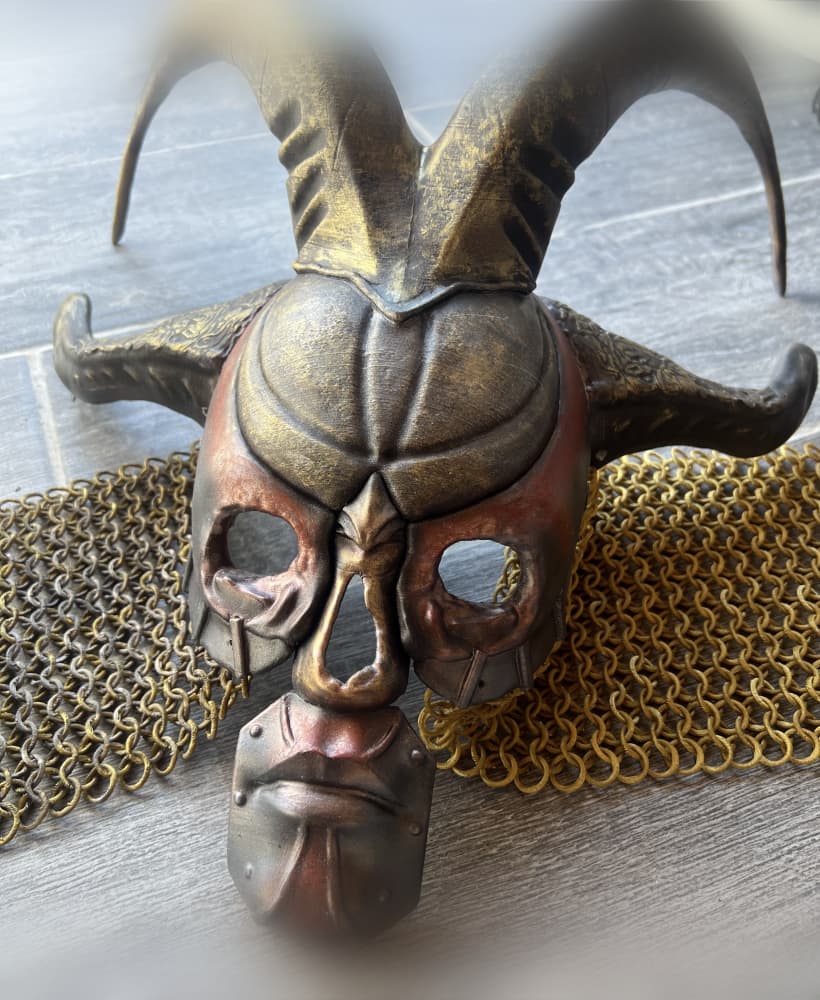
Valkyrie Horned Mask

Articulated Hermit Crab - no supports
DiiiCooler mod for Wanhao i3 Plus

Ballerina Dancer Figure 3MF | Art Multi-Color | Flowing Dress

Fixum Dude Motors PiP Armored Truck

Crosshair Stamp Tile Set, 5 Motif Sizes, Perfect for Clay, Cookies & Fondant PRODUCT_1469
FN Five-seveN Fidget Keychain – Slide-Action Toy

Heart Envelope Box – Romantic Multi-Purpose Holder

Ready to Assemble Toy Robot
Cakewalk 3D mount (strengthened)
I don't get these "bolt locked" items. How are you supposed to screw something in from the back of your Multiboard? Unless you either A) Have a free standing board or B) a very small board (less than arm length) and very small hands, I just don't do see how this works.
I think you use the T bolt to screw the insert (i.e. lock) into the snap and then put the snap in the board. So, it is locked into the snap, not the board.
Excactly so. The picture is misleading by showing the bolt behind the plate. Screw the fix point to the snap then snap th combined items into the panel.
I was wondering about the same thing. Yes, using screws from the back will make things secure, but it's no longer very flexible :thinking face:
This doesnt appear to be linking to the right part.
same here