Model originally uploaded to Thingiverse at https://www.thingiverse.com/thing:4947397.
This is my Small & Simple Filament Runout Sensor (microSD card pictured for scale)
My goal was to create a general purpose filament runout sensor that was small, effective, good quality, and built around the cheap and common limit switches that I already had onhand (ordered from Aliexpress: https://www.aliexpress.com/item/4001033375208.html).
This filament sensor has the following "features"
- Uses common parts (common limit switch, two M3 cap screws)
- Screw holes pass all the way through, so you can use longer screws to affix it to something, or shorter screws (9mm overall length) for a "floating" sensor.
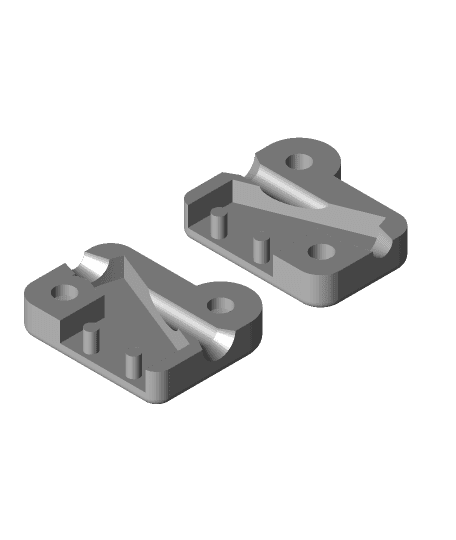
- Small, fast print. Anyone should be able to print this in a half an hour or less. I made it almost as small as I was able to - I did have a smaller version, but it was only held closed on one side which seemed kind of lame.
- Internals are shaped so that the filament has a lower chance of getting "caught" when pushing it through (tapered cone to guide the filament to the exit hole).
- Handy arrow on both sides to show the direction the filament should be passing through the sensor.
I printed this on my Anycubic i3 Mega, but I plan to use it with a printer I'm building out of an old Monoprice Maker Select. It should work with most printers though, especially if you know how to configure and flash firmware:
To make this work, you may need to make changes to your firmware, depending on your printer. The switch logic will depend on which pins you wire to. If your printer is already designed to use a mechanical limit switch, be sure to wire it correctly to avoid having to invert the logic in your firmware.
Another option is to use this with Octoprint. In this case it can (optionally) be wired to the GPIO pins on your raspberry pi.
Assembly is pretty straight forward. Put the limit switch in place on top of the two posts (careful not to break them), put the other half on the other side, and screw it together. I just forced the M3 screws in to the screw holes and used them to self-tap the holes, and they hold very firmly. You can do the same, or tap it if you'd prefer. Use M3 screws with an overall length no more than 9mm for a floating limit switch, or longer ones if you want to screw it to a bracket or something - you'll have to make this part yourself.