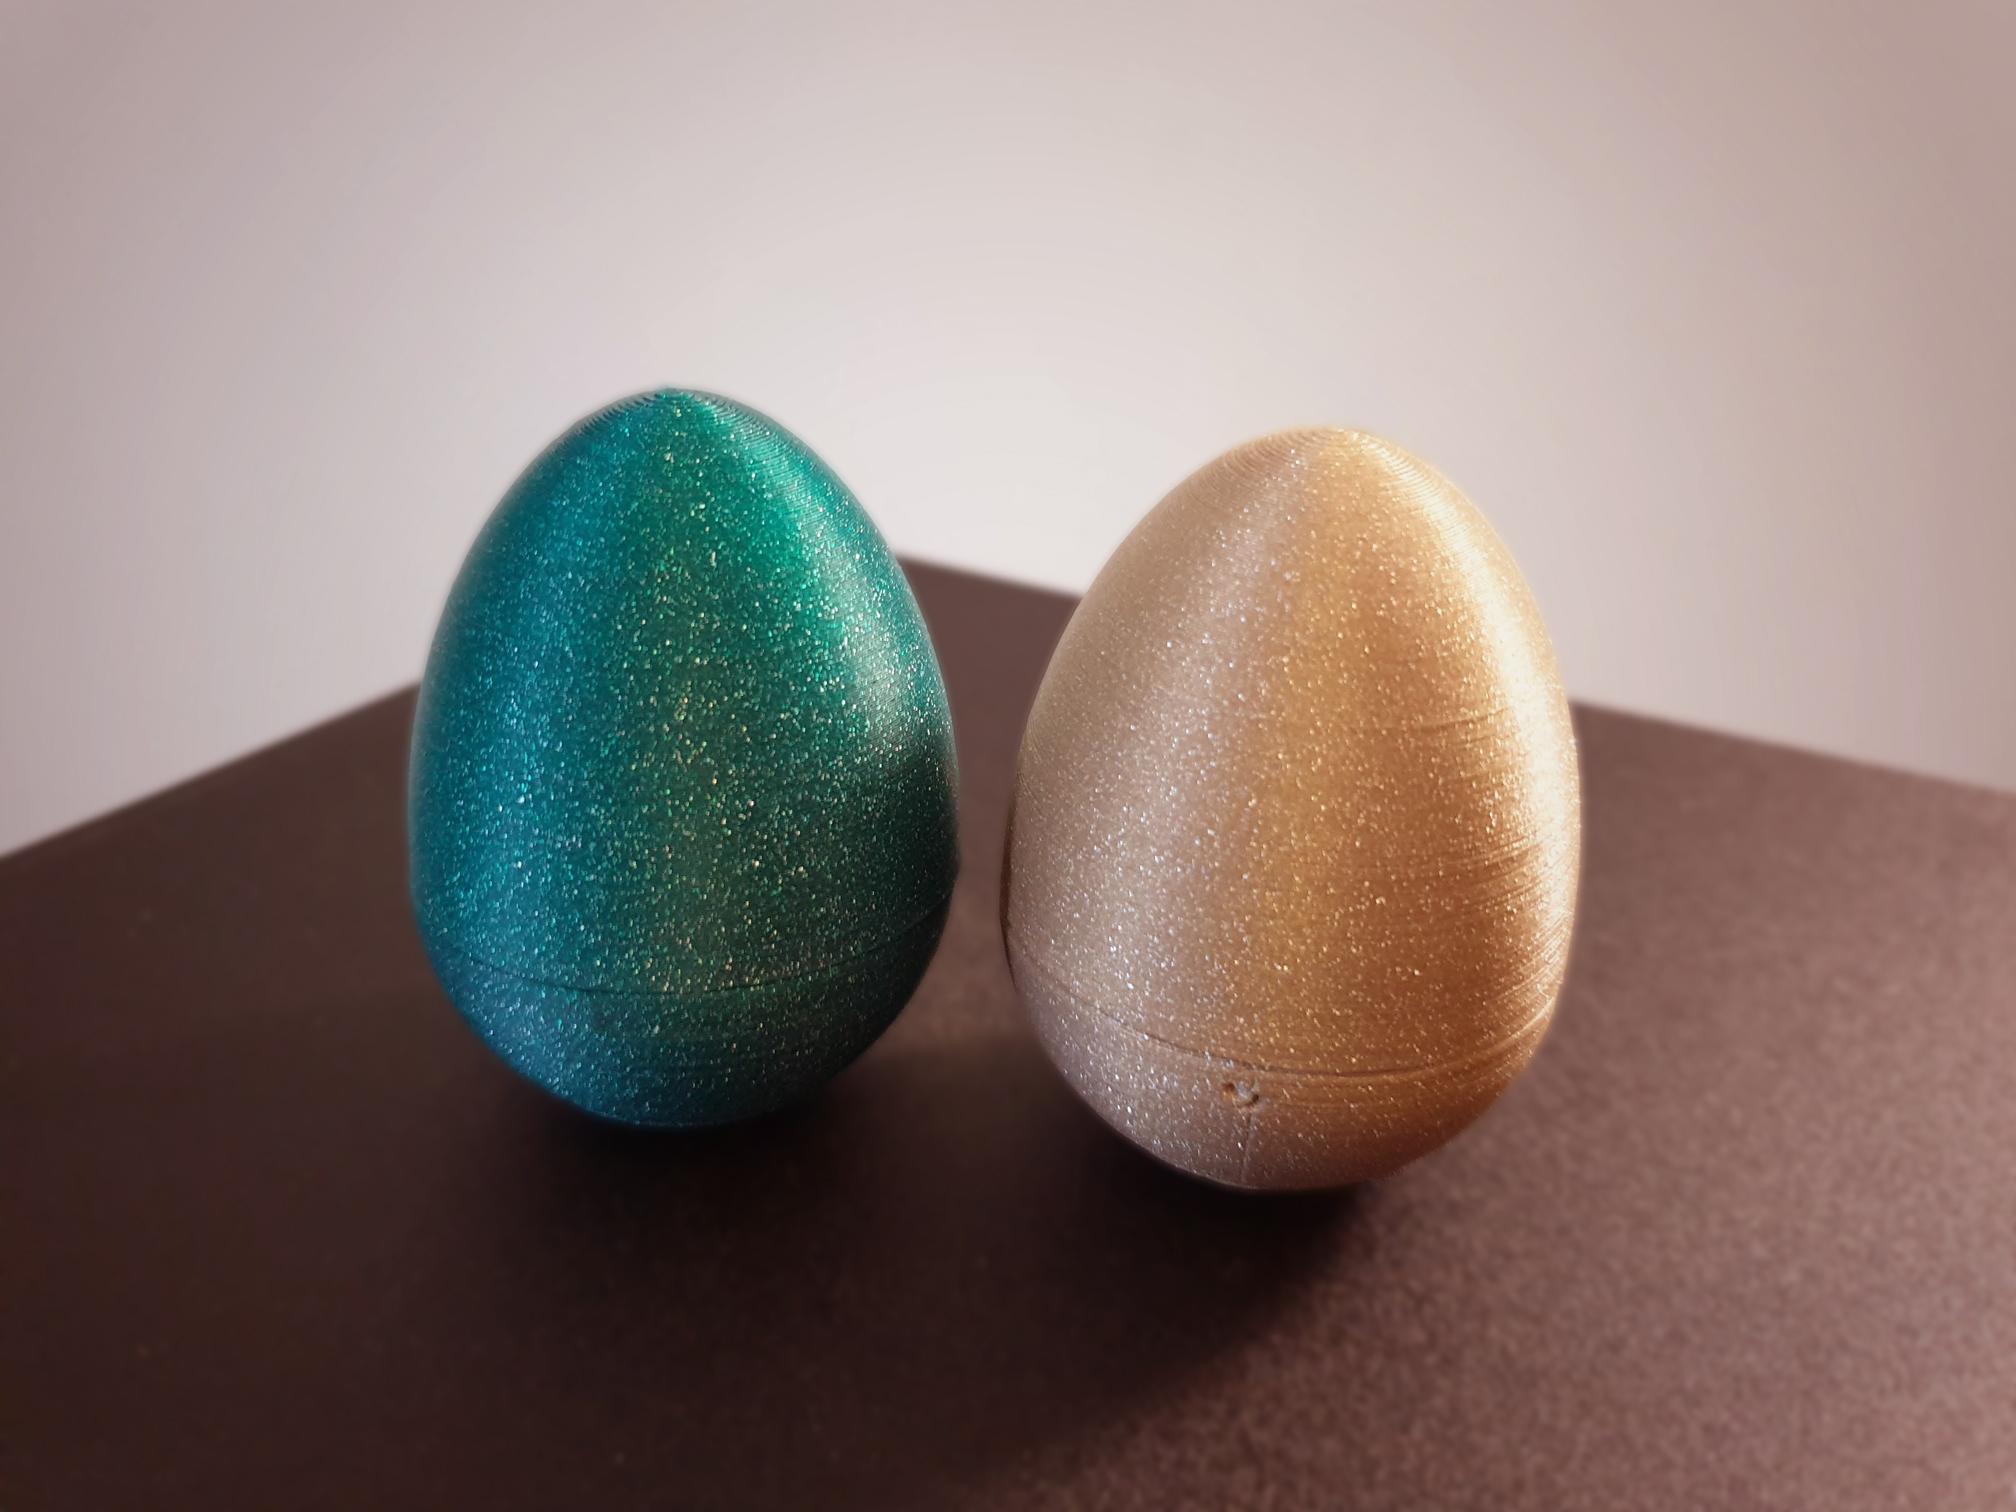
My first foray into puzzle design; simple little Easter Egg puzzle that works with magnets. It's nothing very complicated, but it's compact and pretty (if you like Easter Eggs and have nice filaments to print this with). :)
Apart from the printed parts, you'll also need:
- Two 6x3 magnets (preferably N52, I haven't tried if weaker ones work)
- Super glue
Assembly:
Before starting the assembly, make sure the Rotator can rotate easily when placed in the Shell Bottom. If not, sand the edges in the Shell Bottom hole and make sure the Rotator bottom is smooth as well.
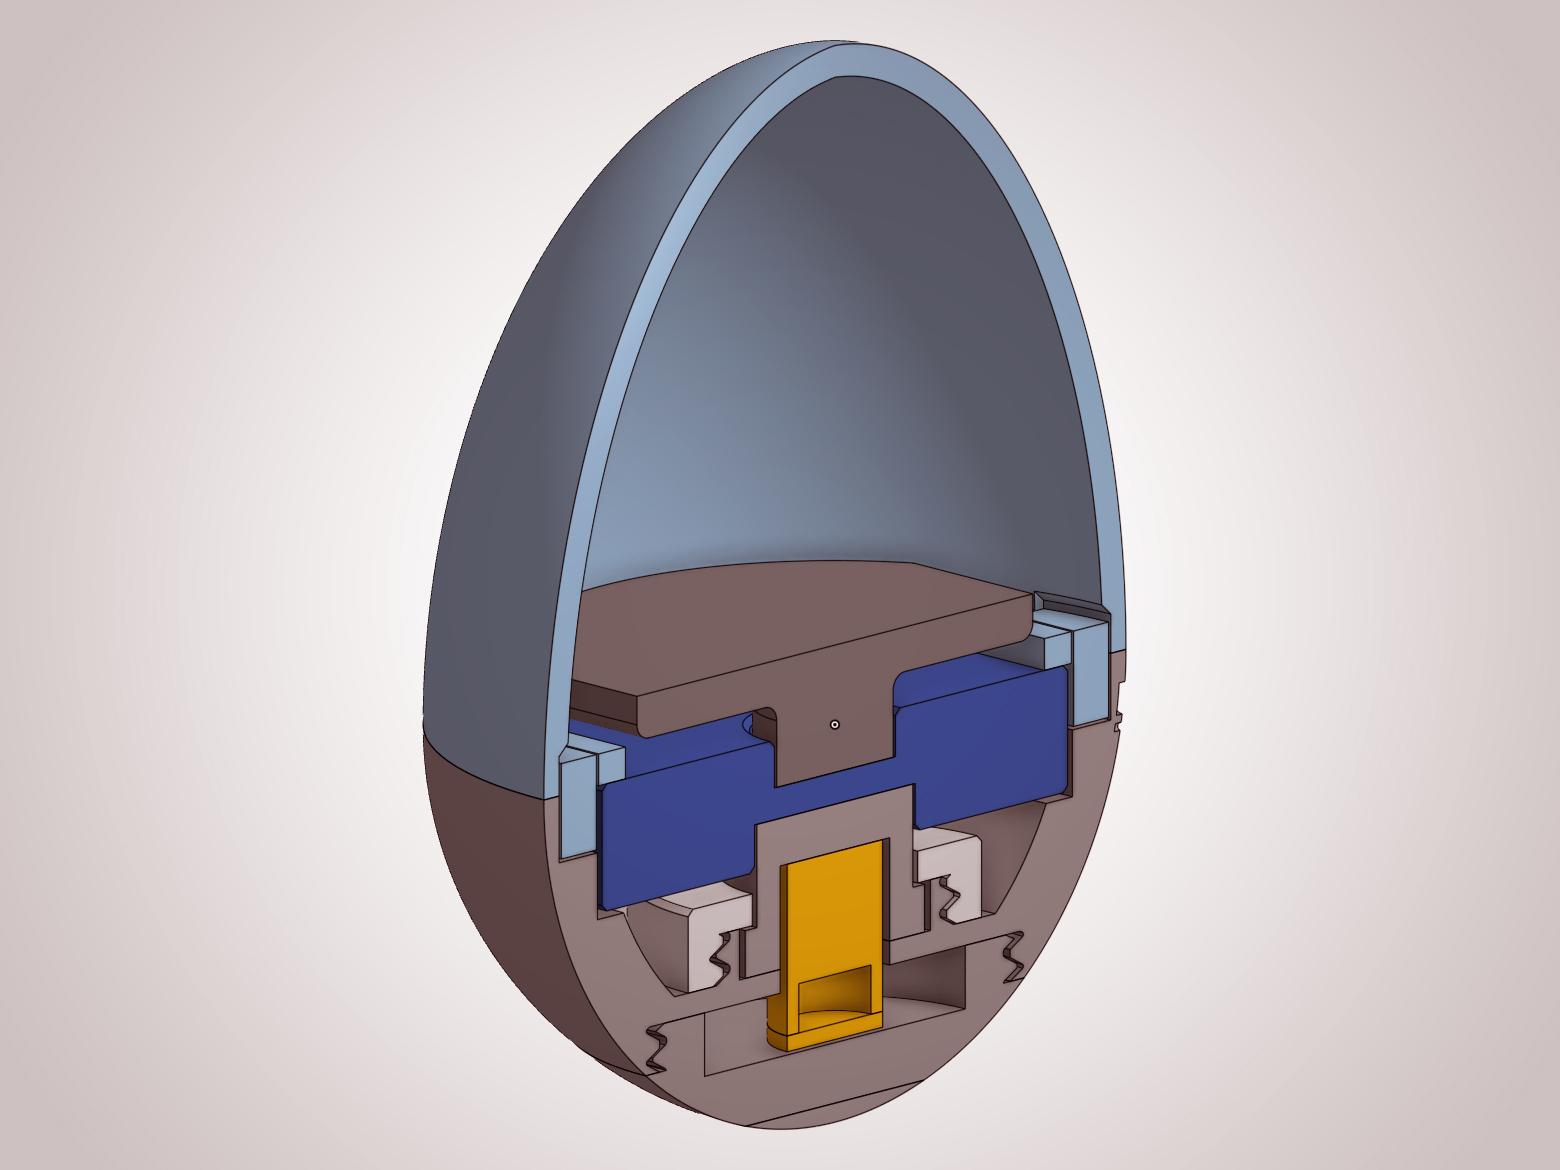
Shell Top and Shell Pegs — Push the pegs in the Shell Top holes. Make sure they go all the way in. You can also add a drop of super glue, especially if the tolerance is loose.
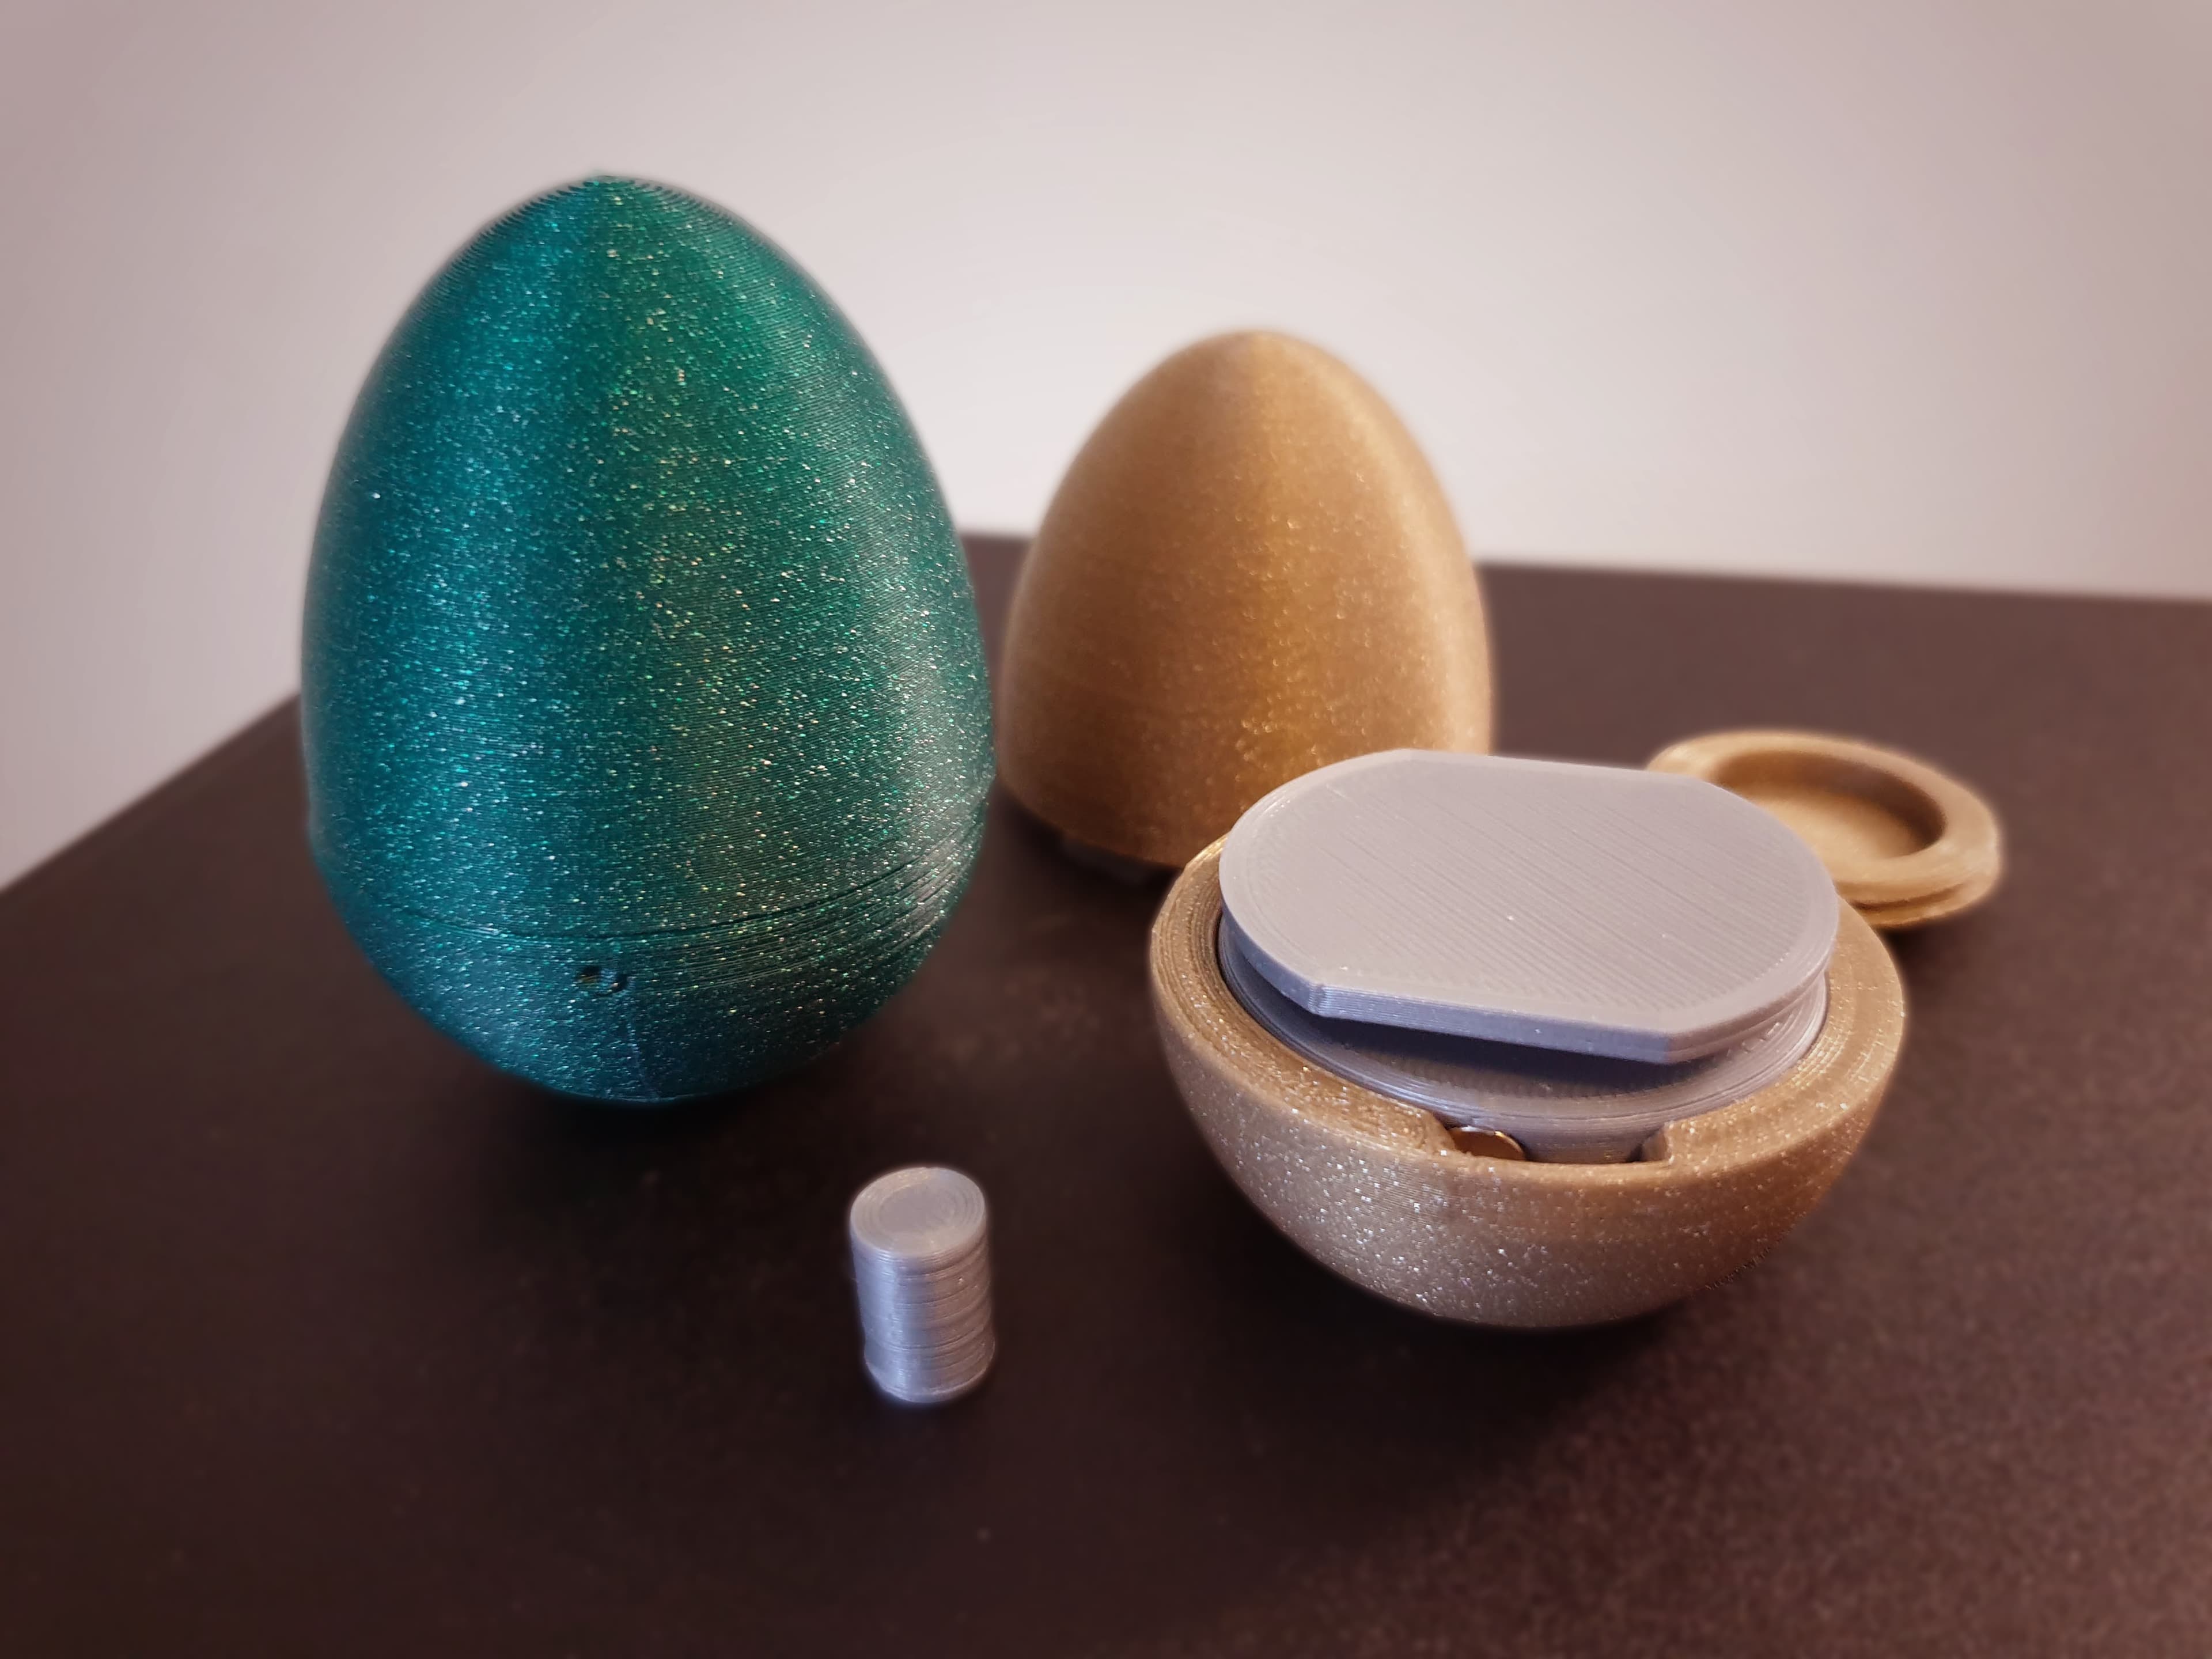
Rotator and Key — Glue the magnets in the holes in the Rotator and Key. Make sure they are correctly orientated so they attract each other!
Rotator Latch — Glue the Latch in the smaller hole in the Rotator.
Rotator Axle and Rotator Lock — Put the Rotator Axle in the hole in the Shell Bottom and twist the Rotator Lock closed around it. Make sure the Axle can rotate freely and easily.
Rotator and Rotator Axle — Glue the Rotator Axle into the Rotator's larger hole.
DONE!
Locking the Egg — Align the Rotator Latch with the pegs of the Shell Top and use the Key to rotate the Latch 90 degrees to the other indicator marker on the Shell Bottom surface (Note: the new model has marker for both locked and unlocked positions; the version in the pictures is slightly older version and is missing it).
Now just put the key in the secret bottom hole and twist the Twist Cap closed. You may need to twist it around and/or sand the threads a bit to make it smooth. Make sure it's not too tight, otherwise whoever is trying to solve it might have a bad time…