tracking pixel
David F

Low Profile Toe Clamp for CNC Router (Heat-Set Insert Version)

by
DrDflo
Follow
Follow
Remix Model
Like
DrDflo
DrDflo
Image 1 of 4
This cutting board if firmly held by two toe clamps pressing the board into the right-angle jig. The entire top of the cutting board can be faced/carved without running over a clamp.
Low Profile Toe Clamp for CNC Router (Heat-Set Insert Version) - This cutting board if firmly held by two toe clamps pressing the board into the right-angle jig. The entire top of the cutting board can be faced/carved without running over a clamp. - 3d model
2D
3D
Makes
Low Profile Toe Clamp for CNC Router (Heat-Set Insert Version) - This cutting board if firmly held by two toe clamps pressing the board into the right-angle jig. The entire top of the cutting board can be faced/carved without running over a clamp. - 3d model
Low Profile Toe Clamp for CNC Router (Heat-Set Insert Version) - Supplies needed to assemble head-set toe clamp - 3d model
Low Profile Toe Clamp for CNC Router (Heat-Set Insert Version) - Location of heat-set insert in the bottom of the clamp. There is a cutout in the bottom of the model to allow for the flange of the insert to sit flat.  - 3d model
Low Profile Toe Clamp for CNC Router (Heat-Set Insert Version) 3d model
This model is restricted by licensing terms. 
27 Likes201 DownloadsMay 30, 2021
This model is restricted by licensing terms. 


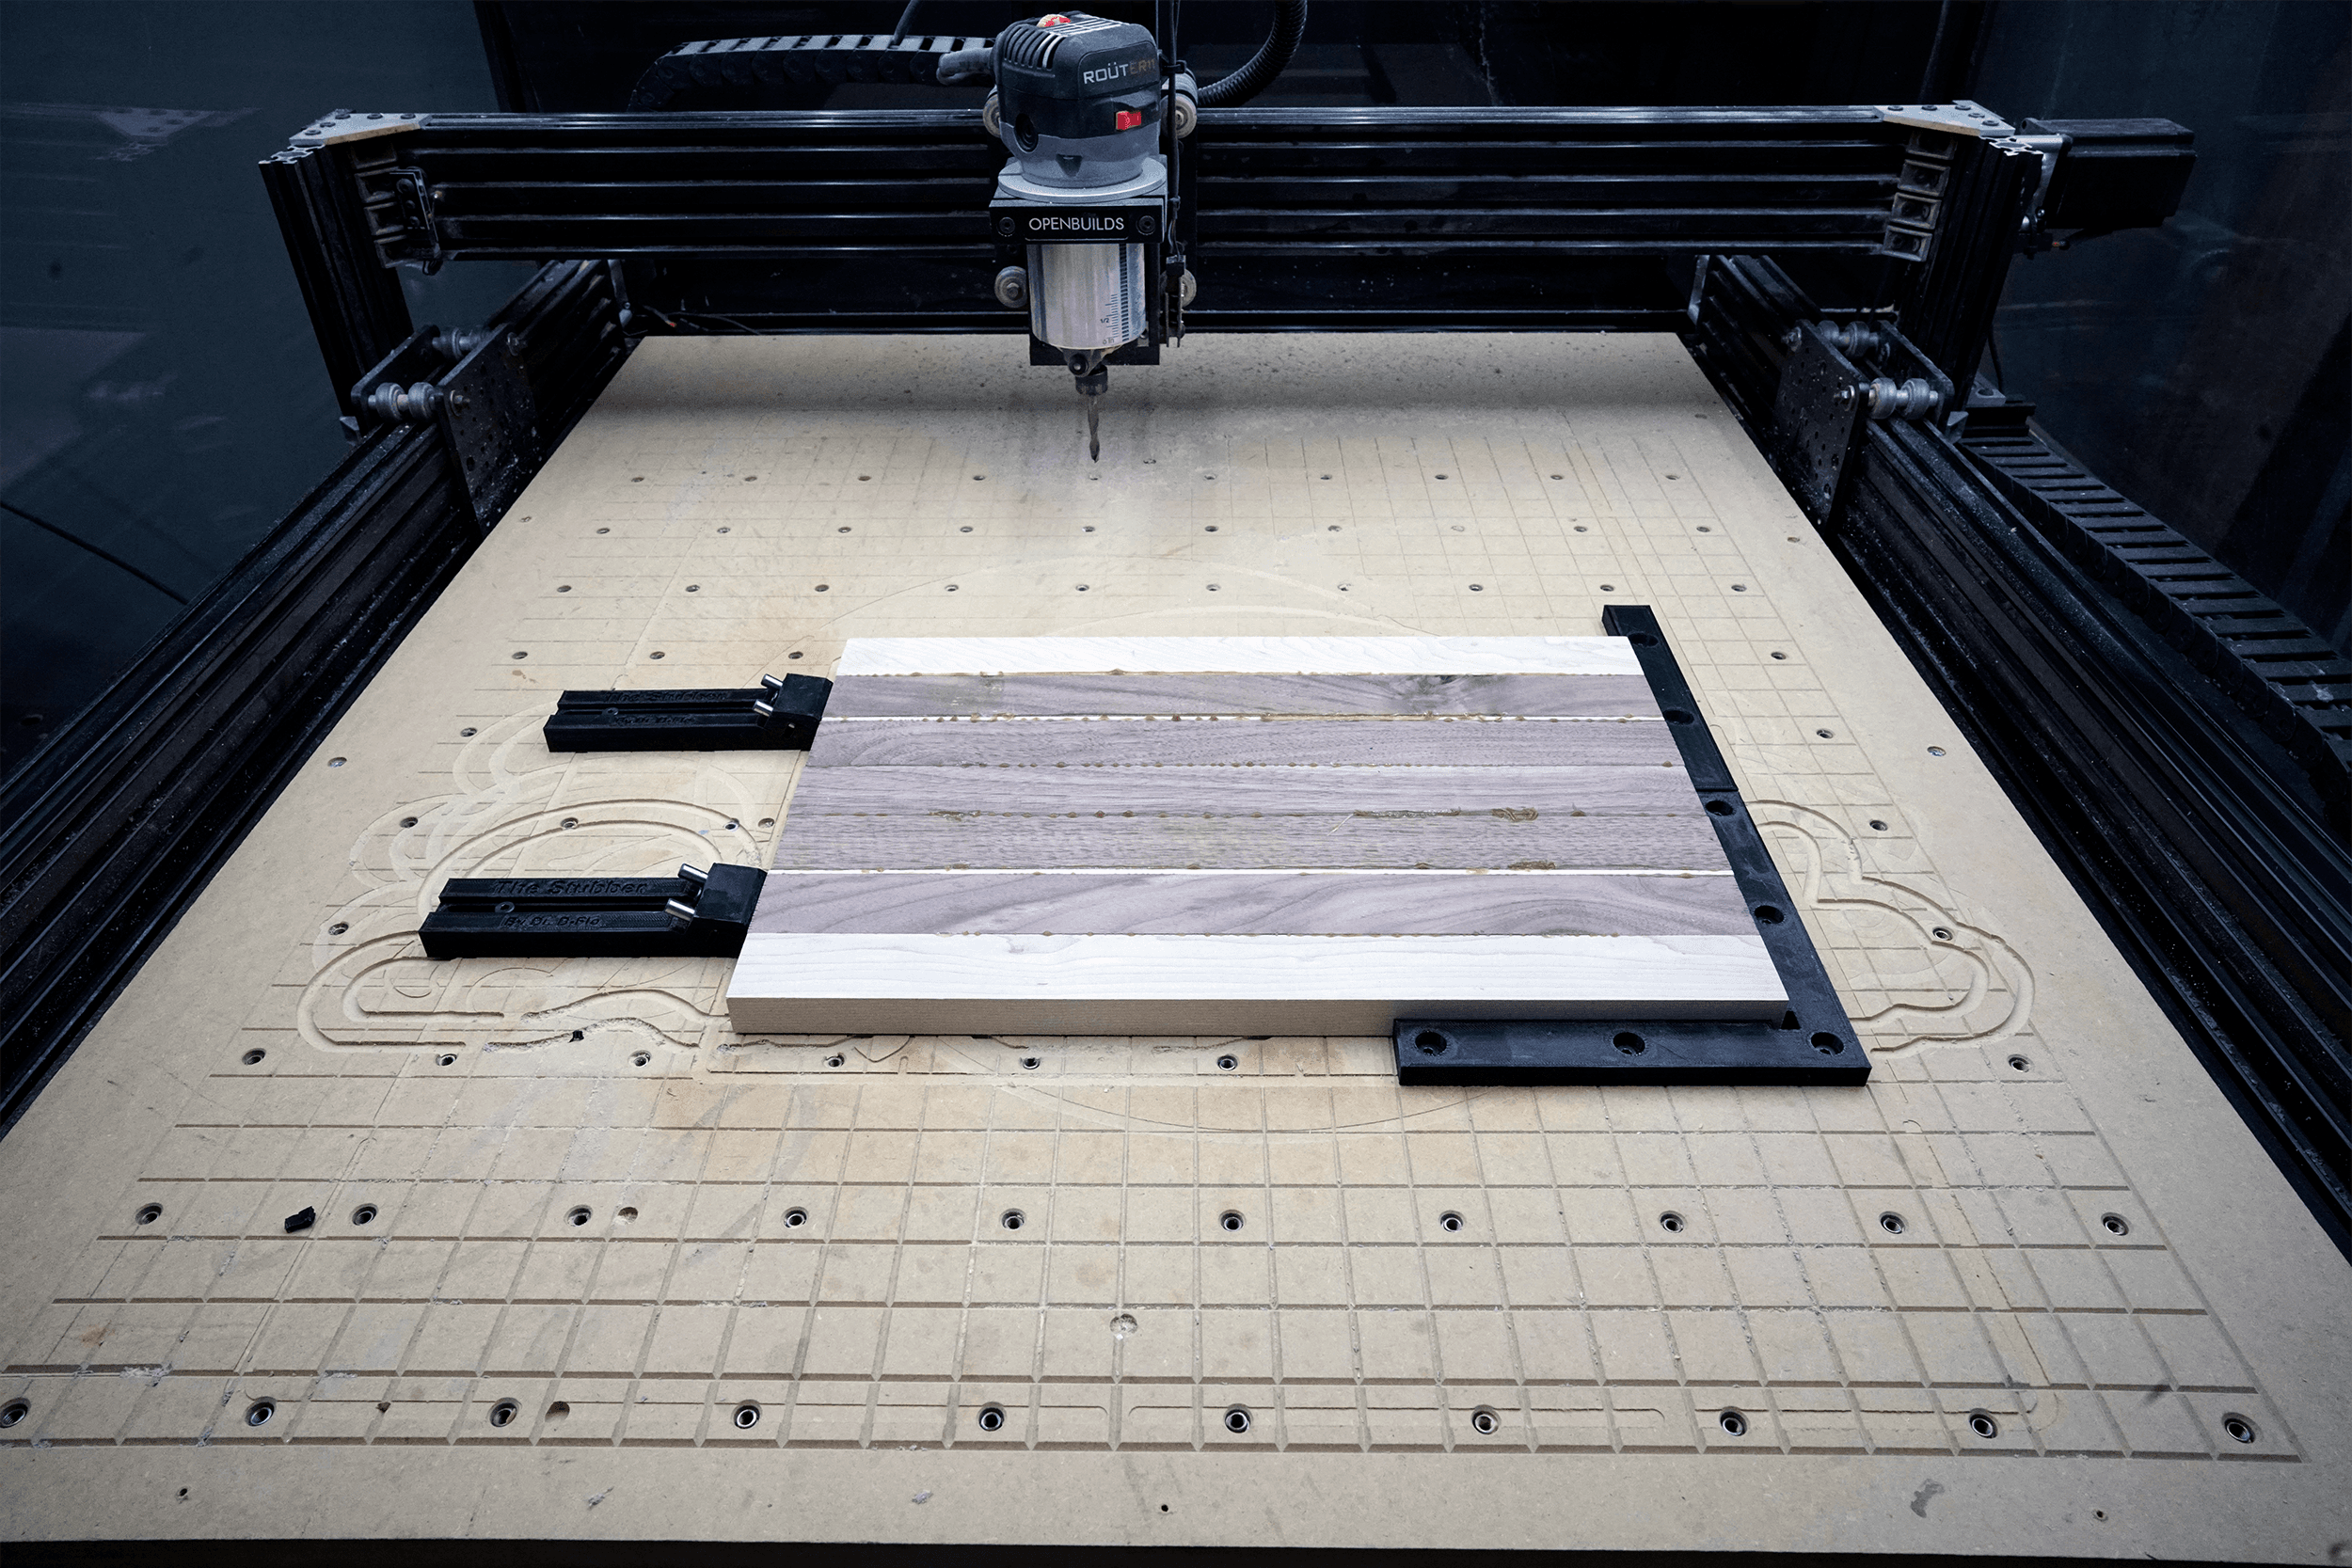
A low profile clamp for securing wood and plastic to a CNC router's wasteboard while still having full access to the top of the stock.

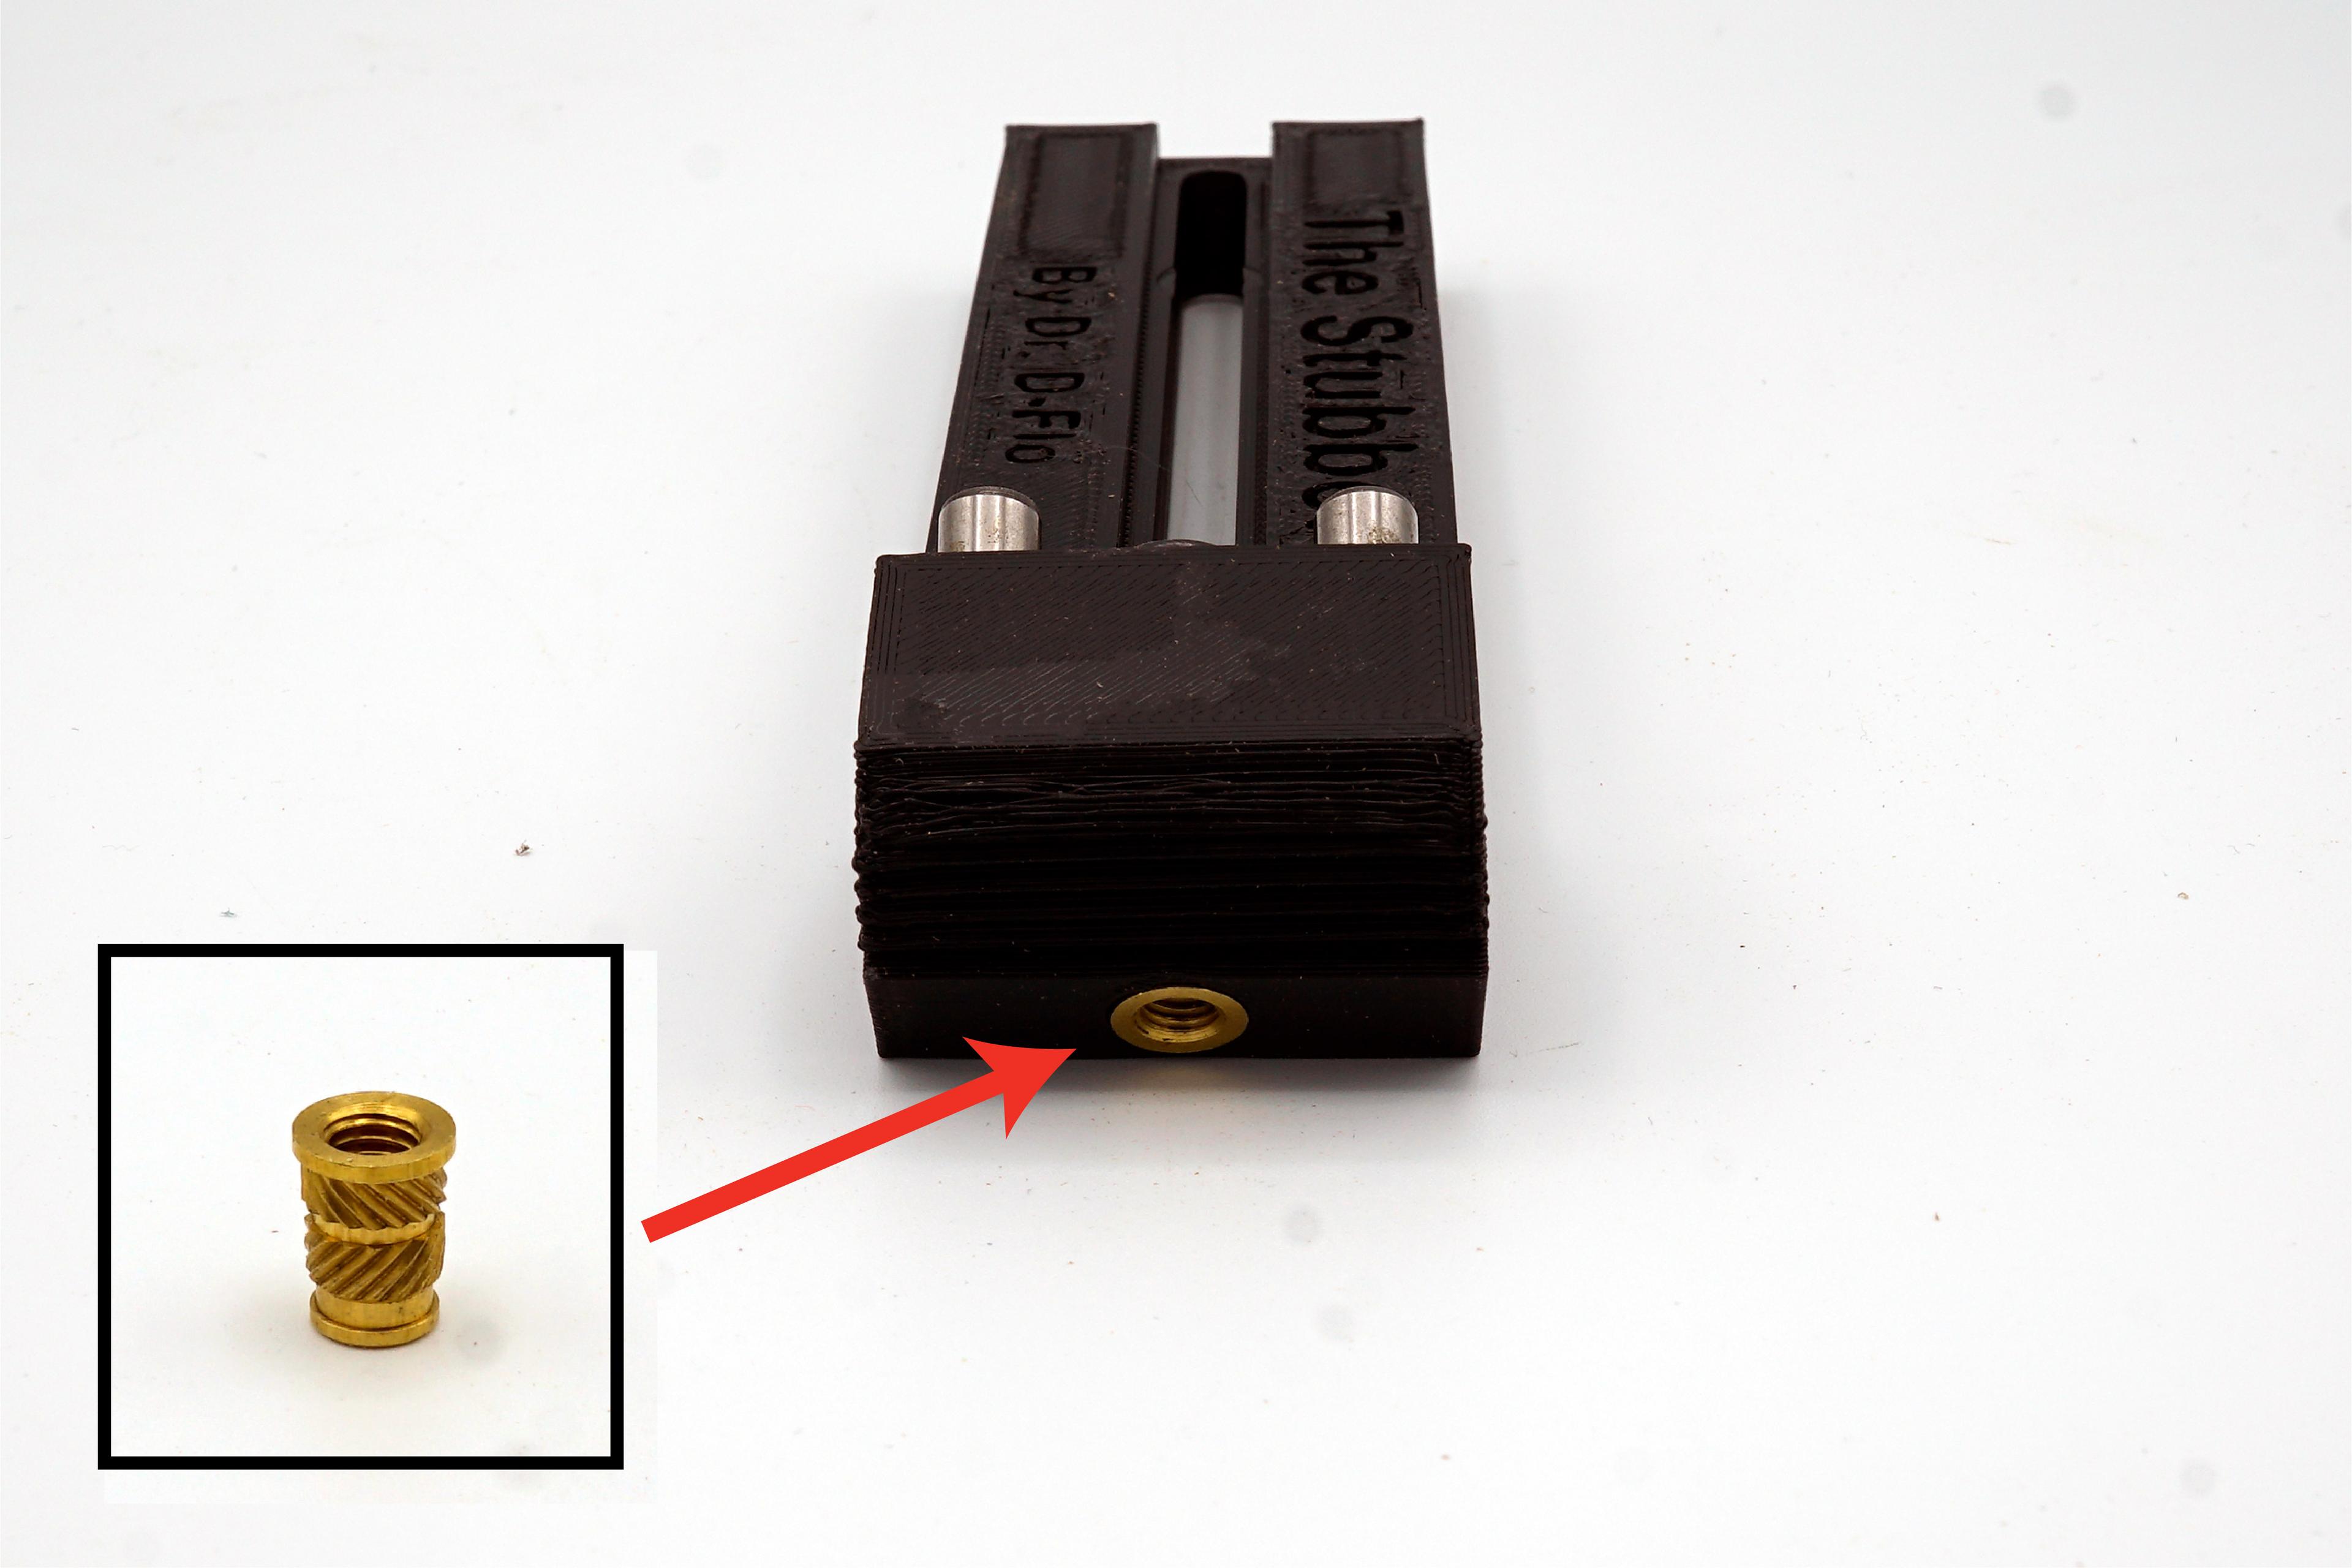
There are two version of this clamp, which differ based on how the the threading is added. This version uses a threaded insert that is pressed in by a soldering iron. The insert has a flange on to prevent it from getting pulled out of place. Compared to the second version, which uses a hex nut, the heat-set insert model can be tightened harder for further clamping force.

The clamp is secured through M5 bolts, and therefore, your wasteboard must have threaded insets (like these: https://amzn.to/2TunKBK)

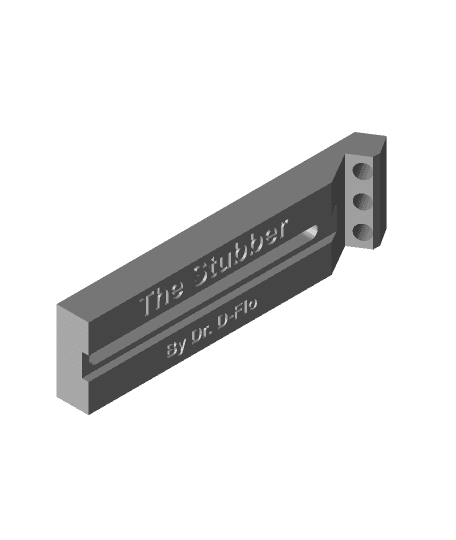
Model fits within a 135 x 35 x 25mm volume.

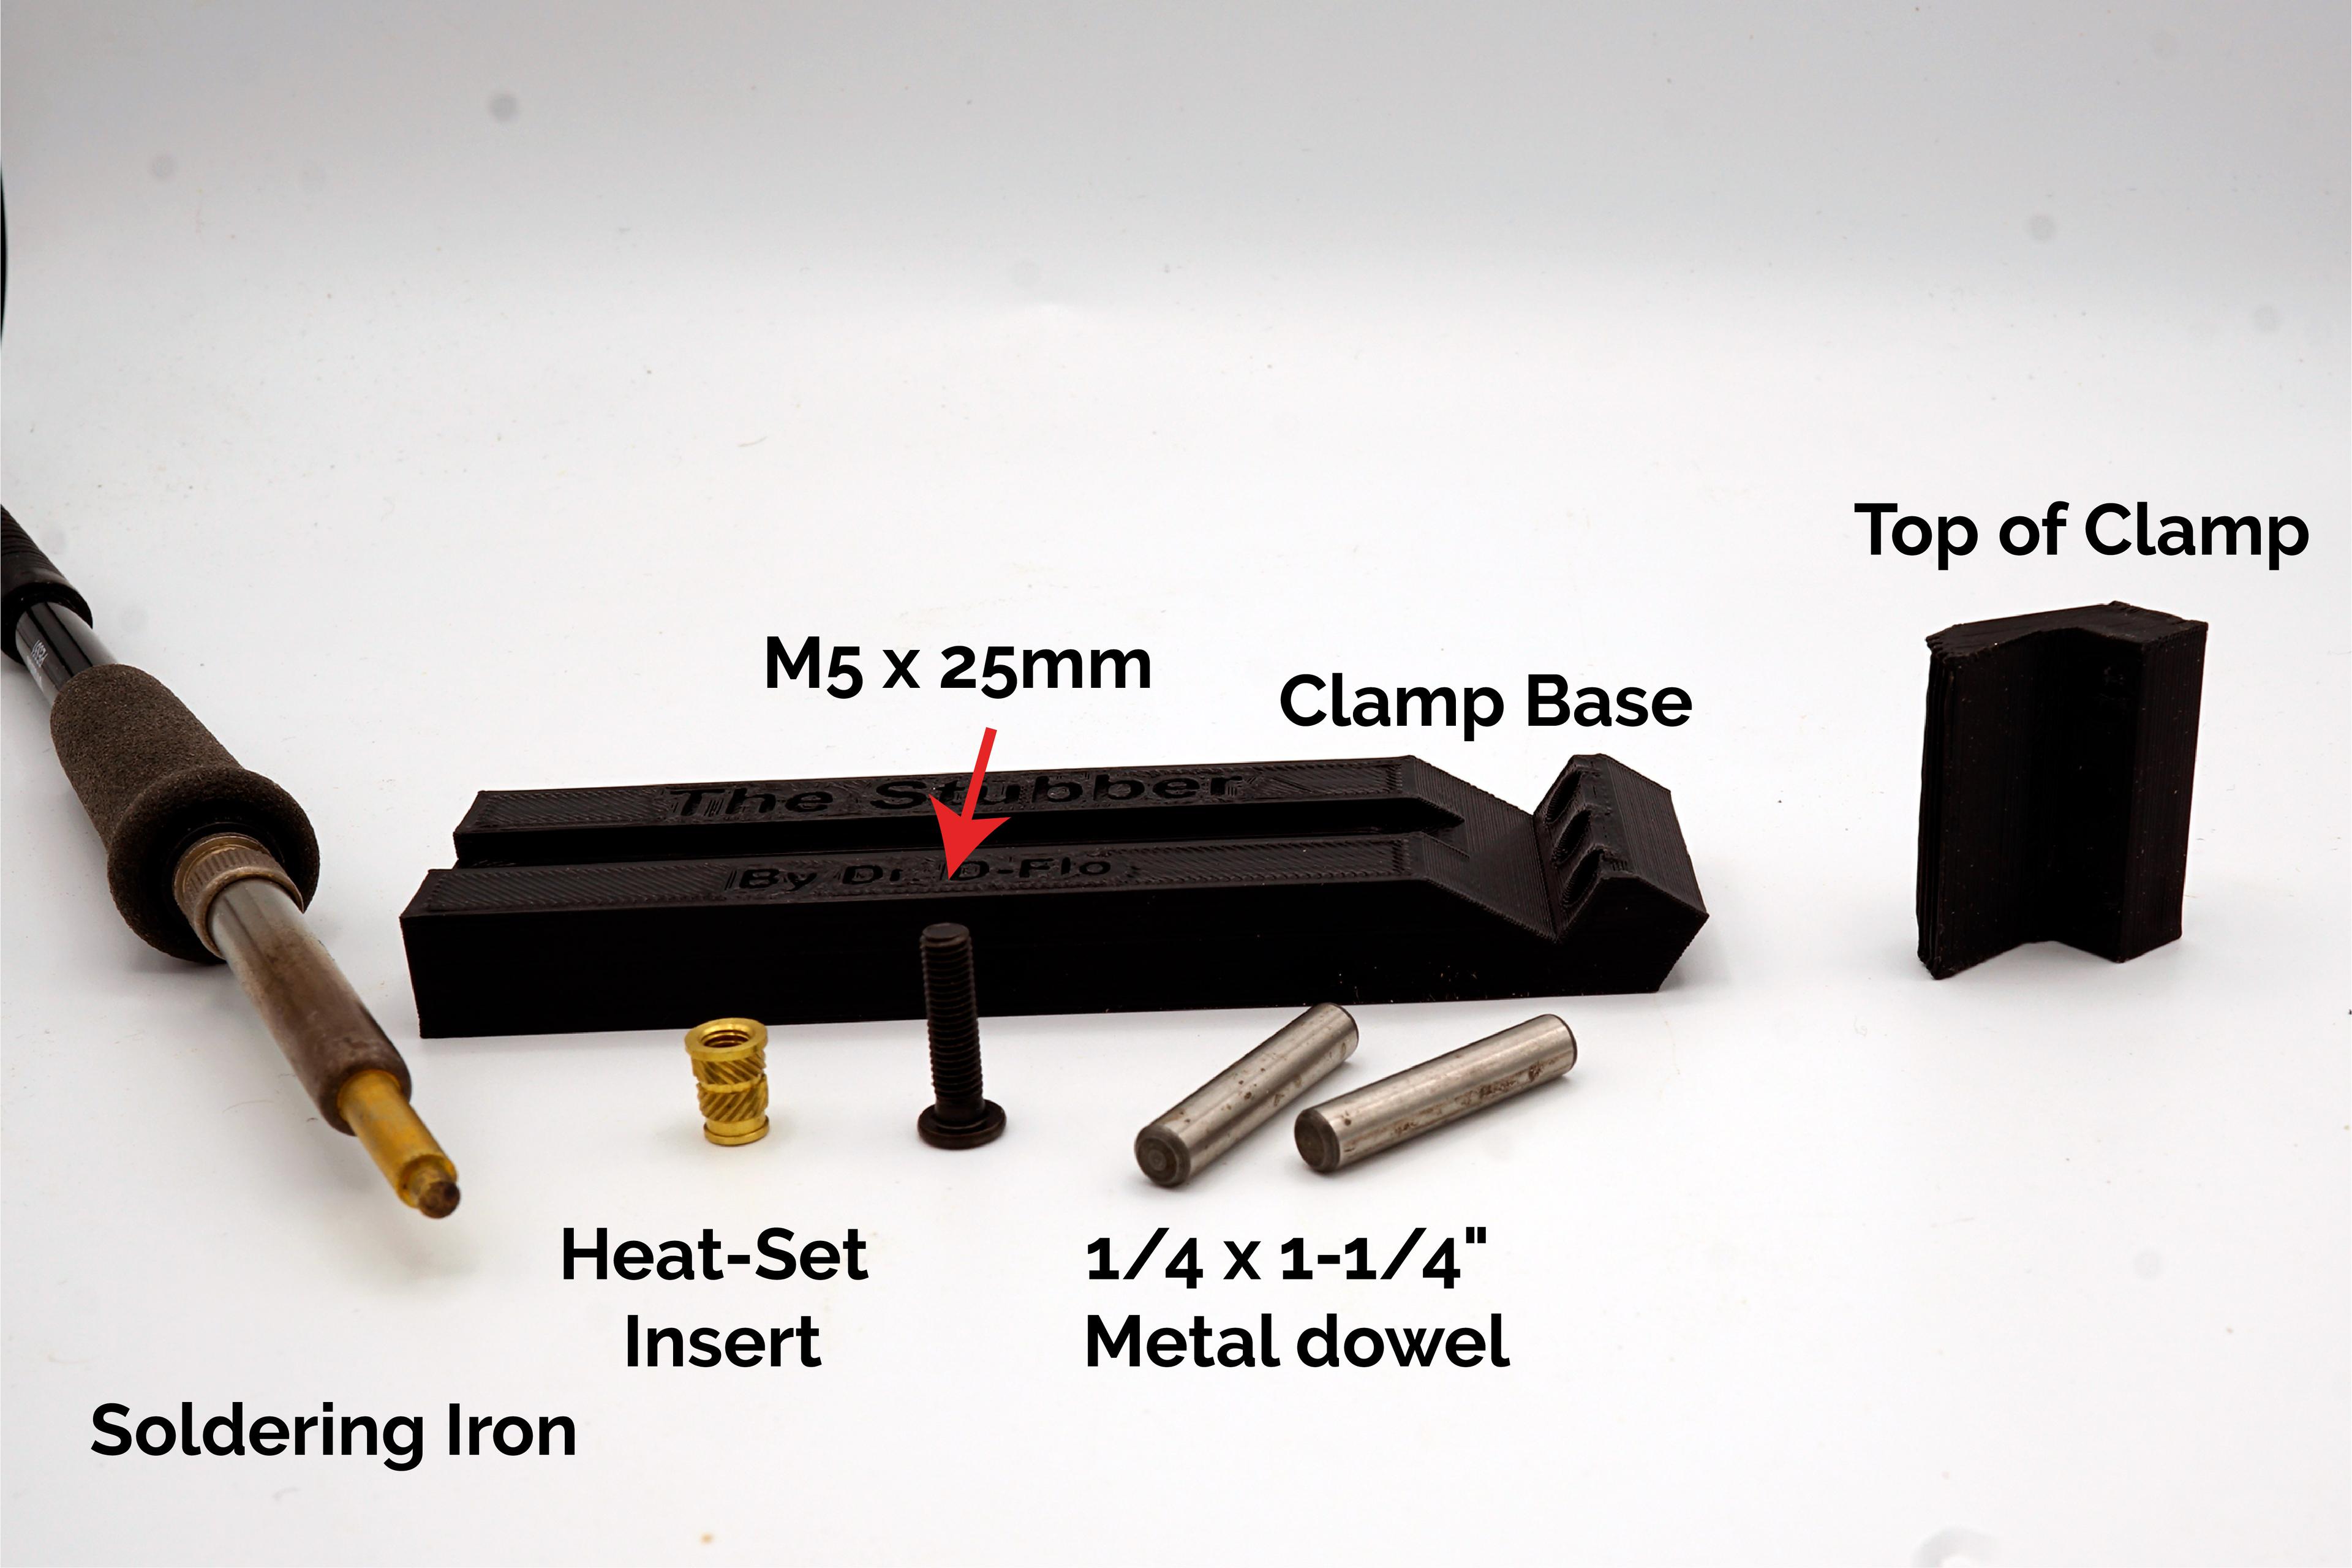
Materials required for assembly: -1/4 x 1-1/4" Metal dowel x2 (https://amzn.to/3g4d2th) -M5 Het-Set Threaded Insert (McMaster-Carr: 97171A350) -25mm M5 Bolt (McMaster-Carr: 93070A129)

Equipment Required: Soldering iron for putting the heat set insert into place

3D Printing Settings: -Can be printed without support. Highest infill possible is recommended for rigidity.

The Toe clamp pairs wells with the Universal Right Angle Jig

Check out this video see my 3D printed work holding in action: https://youtu.be/cU-LR5Mn9fY


27 Likes201 DownloadsMay 30, 2021


This model is restricted by licensing terms. 
27 Likes201 DownloadsMay 30, 2021
This model is restricted by licensing terms.