(1).PNG&w=3840&q=85)
(1).PNG&w=256&q=75)
.PNG&w=256&q=75)
(1).PNG&w=256&q=75)
.PNG&w=256&q=75)
.png&w=256&q=75)
Simple Spline Jig
3 downloads · 6 months ago · **Disclaimer:** This jig is **NOT** a safety device. It is not meant for protection against injury.
This model is restricted by licensing terms.
View license.
Disclaimer: This jig is NOT a safety device. It is not meant for protection against injury. Saw's and other cutting devices are inherently dangerous. Make sure you are using proper precautions during the use of this jig.
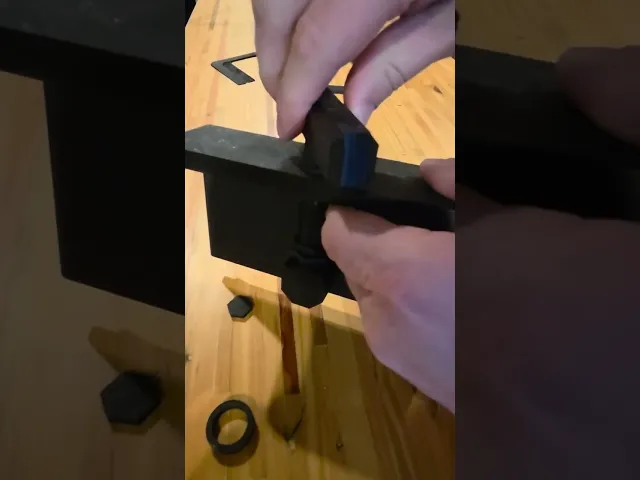
Model Information: A Simple Spline Jig that can be used to hold pieces in a 45 degree orientation to a flat surface. The clamping jaw can open up to 35mm and be tightened down to as thin as 5mm. The clamping jaw thickness is 6.5mm, always use the full depth of the clamping surface for best clamping results.
Printing instructions:
- Two parts have "no raft" and "w/ raft" versions to support overhangs. No raft versions you'll have to do your own supports. w/ raft versions should support themselves if you make sure you have a layer height of 0.2mm.
- The model is strong enough to operate even at low infills but I would recommend higher infill the better as the jig is nicer to use if its a bit heavier.
Build instructions: There is an included build video to show how the parts go together. In addition to that I've listed steps below:
- Remove the "Main body" and "screw" rafts by prying with a flat bladed tool.
- Orientate the clamp correctly and insert the threaded side through the matching opening in the main body. Then slide the clamp to the top of the main body.
- Insert the screw through the bottom of the main body (turning the screw at the same time helps to get the screw through the hole).
- Once the screw has made it through to the other side begin threading the 2 stop nuts on. make sure these nuts stay loose for now.
- Continue threading the screw all the way up and through the clamp.
- Thread the screw until it is flush with the bottom of the main body. Somtimes a combination of turning the screw and stop nuts at the same time is required to accomplish this. At this point you will have to start using the included adjustment tool.
- Thread the bottom stop nut up to the base of the main body but do not tighten it to the main body. If you tigheten it this will make your jig very hard to adjust.
- While holding the bottom nut in place thread and tighten the top nut onto the bottom nut. Try to get it quite tight so it does not loosen during use. You could put dabs of glue between the nuts if you can't get them tight without. (In the video I did a poor job of tightening and thus why you can see the nuts adjust later while turning the screw)
- That's it! you should be able to adjust the clamp up and down with your adjustment tool.
Simple Spline Jig
3 downloads · 6 months ago in and
This model is restricted by licensing terms.
View license.
.PNG&w=3840&q=75)
Utility Knife - Wall Holders
.PNG&w=3840&q=75)
Hand Saw - Wall Holders
.PNG&w=3840&q=75)
Hose Clamps 172-200mm
.PNG&w=3840&q=75)
Hose Clamps 128-170mm
.PNG&w=3840&q=75)
Hose Clamps 72-126mm
.PNG&w=3840&q=75)
Hose Clamps 28-70mm

Hose Clamps 10-26mm

Hand Crank Card Shuffler (Fully printable)

Paw Cups - Measuring Cups

Modular Infinity Cube

Reciprocating Saw Blade - Wall Holder

Jigsaw Blade - Wall Holders

Hex Bits - Wall Holders

Pegboard - Grinder Holder.stl
.png&w=3840&q=75)
Pegboard - Oscilating Multi Tool.stl

Ego Mower Trash Can

Anchor Glass Food Storage Organizer

Mount for Sonos Roam 2

Reciprocating Saw Holder (Sawzall)
