

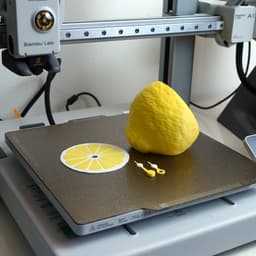


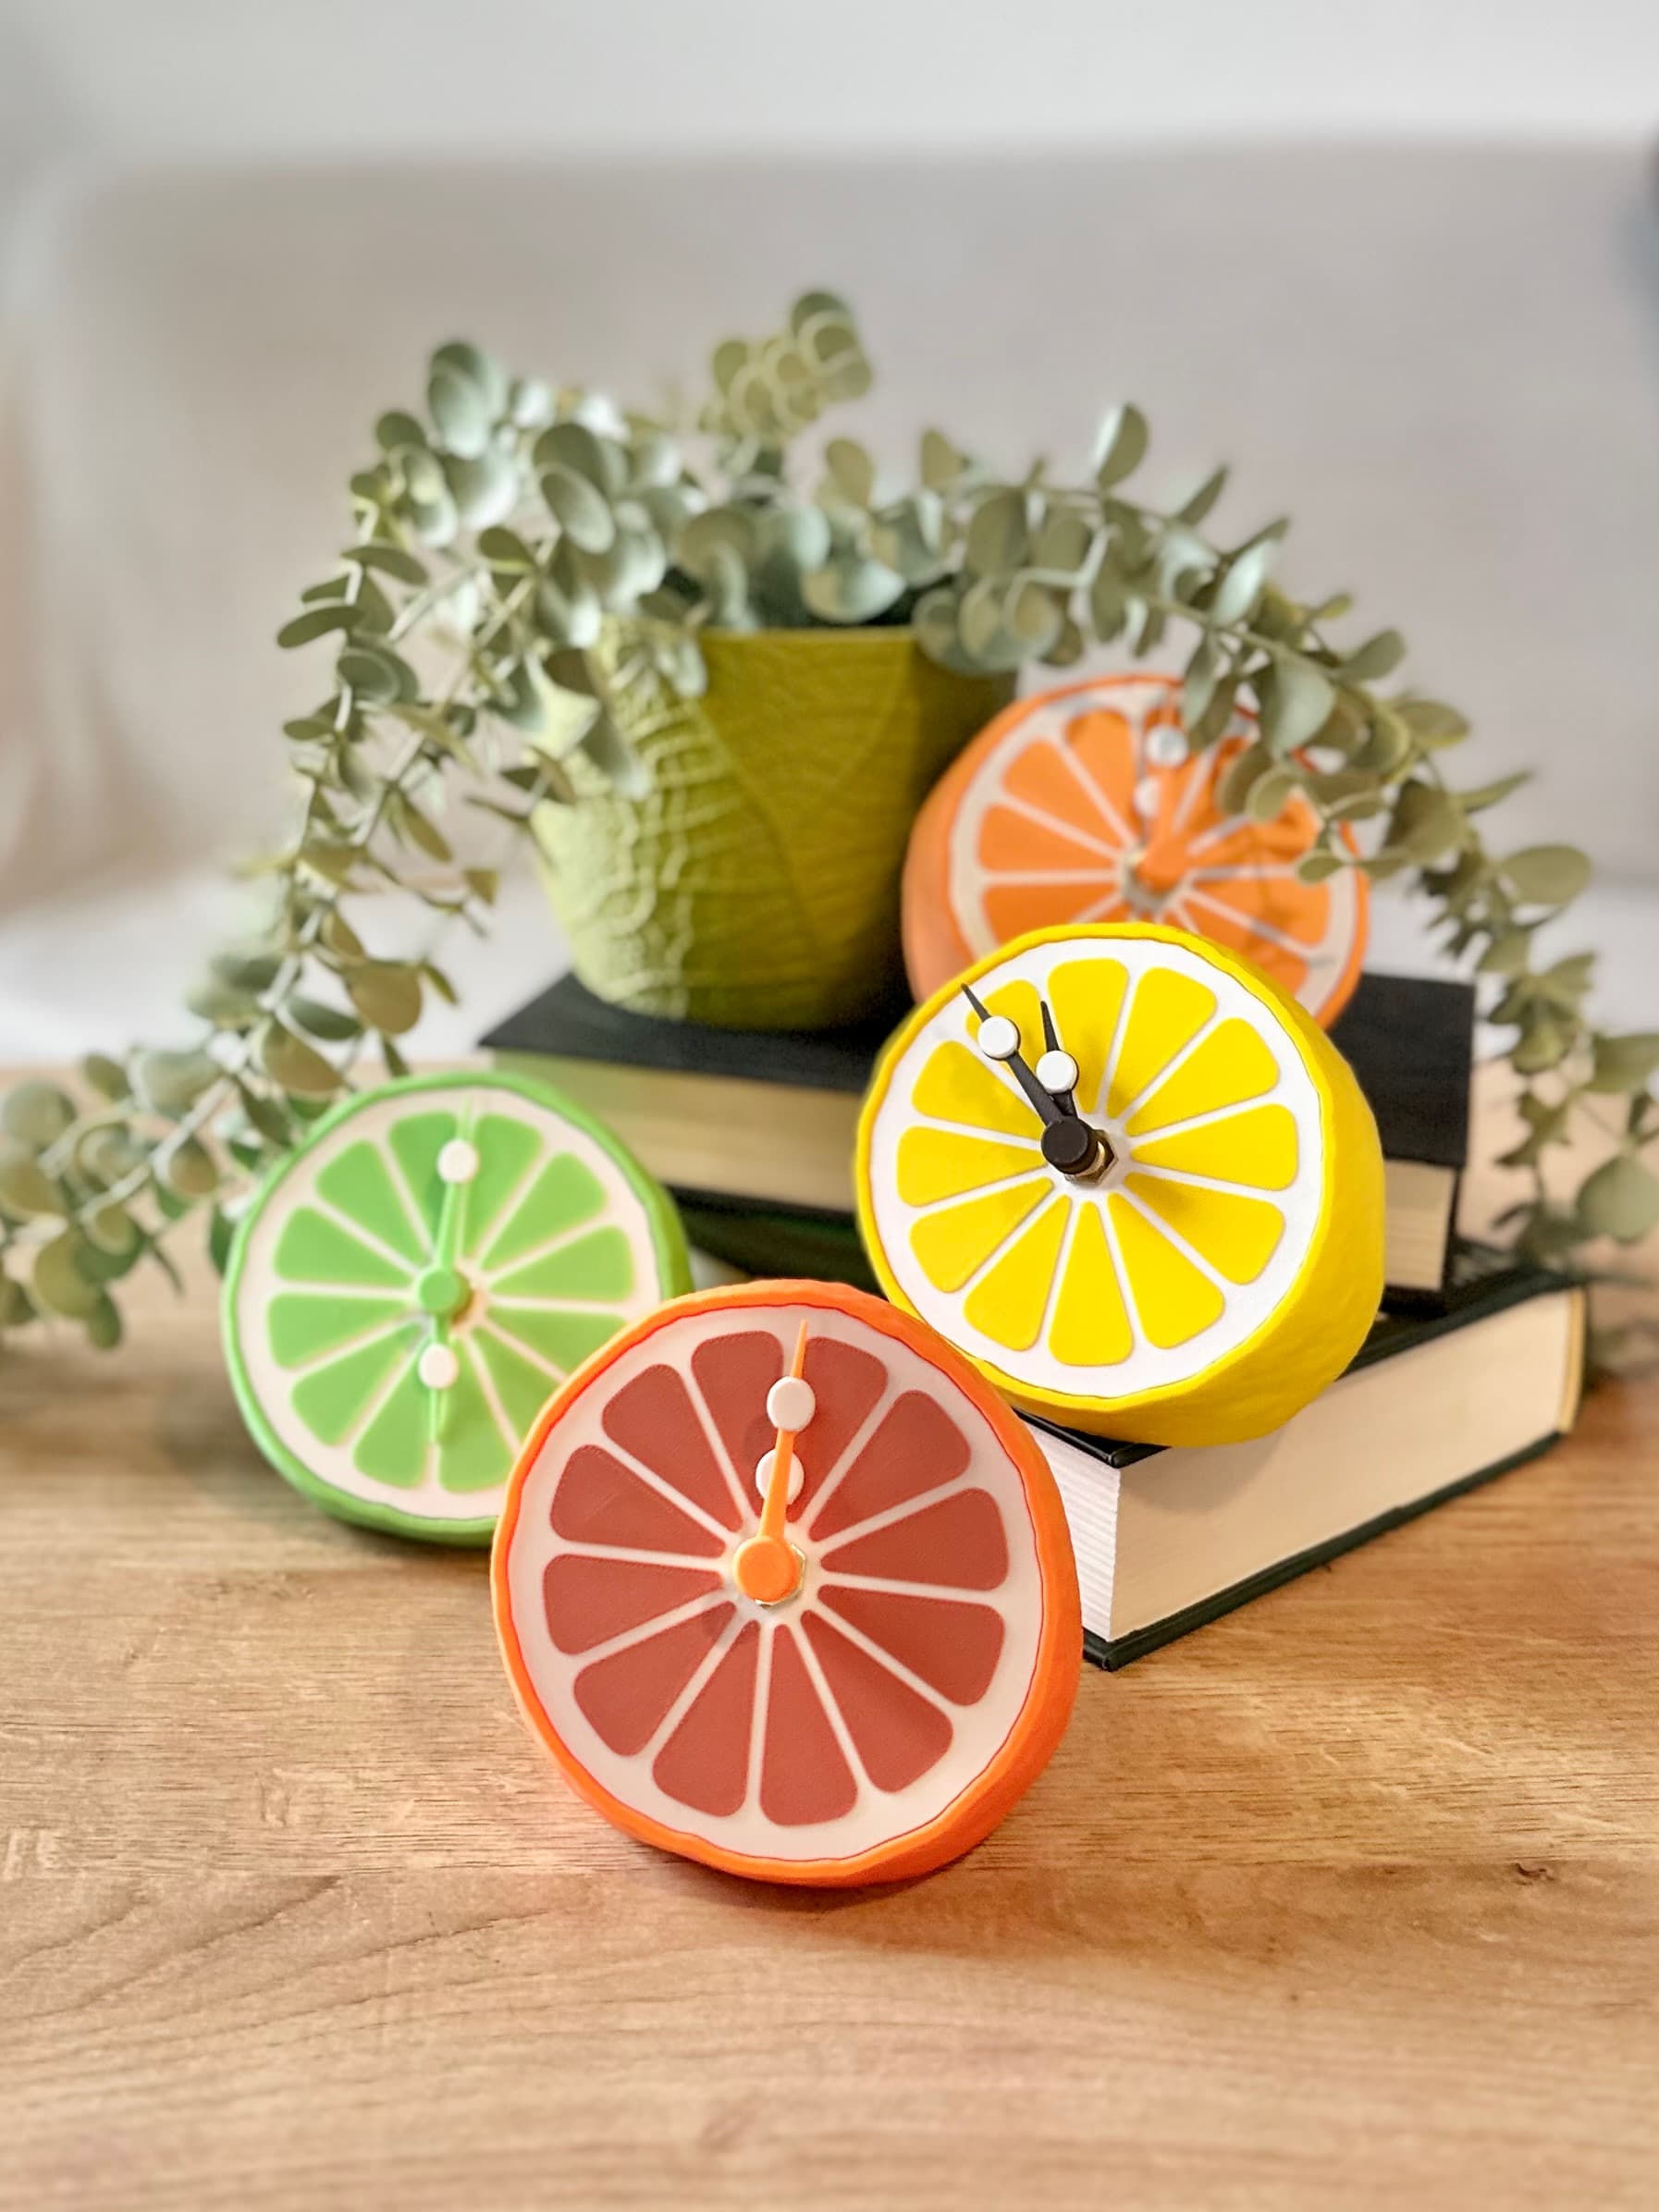
Citrus clock
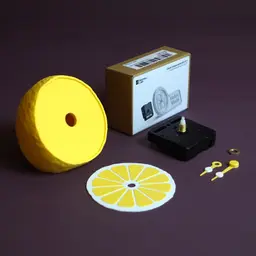
629 downloads · 2 years ago · **A creative desk clock based on a 3d scan of a lemon.**
Single and multi-color printing models are
This model is restricted by licensing terms.
View license.
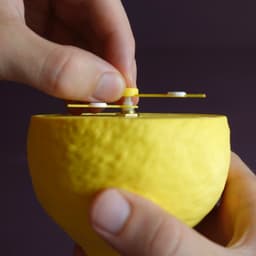
A creative desk clock based on a 3d scan of a lemon.
Single and multi-color printing models are included as STL and 3MF! They work with all current and usual multi color setups.
Clock mechanism
- This design requires a clock mechanism. They are widely available, cheap and almost identical in size. I used the bambulab clock components kit.
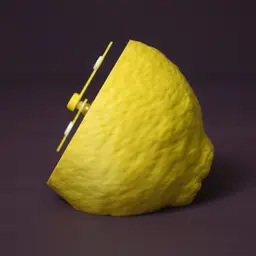
- The case can be up to 56x56x20mm big.
- The shaft of your kit can be up to 8mm thick.
- The clock dial thickness is 5mm when assembled. The kits shaft thread needs to be at least 6mm long.
- The hour handle needs to have a 5mm hole for my hand design to work
- The minute handle needs to have a 3mm hole for my hand design to work
- You can use the hands of your kit up to a length of 40mm to stay within the clock dial. Up to a length of 50 mm works but reaches beyond the dial. My design does not include a hand for seconds. If you want that please use your kit’s clock hands.
Instructions version M (multi-color)
- Get a clock mechanism according to the info above
- Print the Body, front, hour and minute hand in colors of your choice, preferably citrus themed
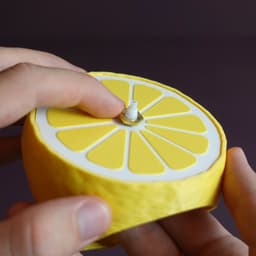
- Put the front in by rotating it until it fits. It only works in one direction.
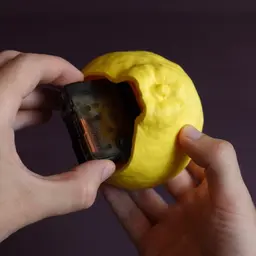
- Insert the case from the bottom
- Attach the hex nut onto the shaft
- Push the hour hand onto the shaft – on 12 o’clock
- Push the hour hand onto the shaft – on 12 o’clock - make sure that the two small “seeds” don’t block the movement of the other hand.
- Rotate the small wheel on the back of the mechanism to the current time
- Insert a suitable battery
- To replace the battery a small stick like a skewer helps to get it loose more easily.
Instructions version S (single-color)
- Get a clock mechanism according to the info above
- Print the Body, 12 front segments, hour and minute hand in one color
- Print the front and two seeds in another color
- Glue the 12 segments into the front
- Glue the seeds onto their respective hand – make sure to position them as in the pictures, so they do not overlap for better readability.
- Put the front in by rotating it until it fits. It only works in one direction.
- Insert the case from the bottom
- Attach the hex nut onto the shaft
- Push the hour hand onto the shaft – on 12 o’clock
- Push the hour hand onto the shaft – on 12 o’clock - make sure that the two small “seeds” don’t block the movement of the other hand.
- Rotate the small wheel on the back of the mechanism to the current time Insert a suitable battery
- To replace the battery a small stick like a skewer helps to get it loose more easily.
Size assembled 100 x 91 x 95 mm
Print settings Required build volume: 100 x 1000 x 100 mm Material usage: 80 g
Material: PLA Print direction: stls are rotated correctly, check images Support: none Nozzle size: 0,4 mm Line width: 0,4 mm Layer height 0,2 mm Infill: 15% Build plate adhesion type: none


Citrus clock
629 downloads · 2 years ago in and
This model is restricted by licensing terms.
View license.

Frame Lamp - in Multiple Options

80s retro desklamp with mac charger
Art Deco Wall Clock

Skeleton Reaper

Black Surrealist Hand Clock Sculpture – Modern Abstract Time Art
APPLE WATCH CHARGER MINI STAND

Melting Clock Vase - Surrealist Decor Piece
STRUCTURE CLOCK V01

Ornate Bow Fruit Bowl – Decorative Ribbon Rim Centerpiece – 3D Printed STL

iPod Mini Charging Dock for Alarm and time.3mf

Fun Drinking Wall Clock

Lyrina, Sinful Sorceress (32mm)
.png&w=3840&q=75)
Lemon Slice Soap Dish – Cute Citrus 3D Printable Bathroom Holder
Shipto you

Wall clock I

Timekeeper Skeleton Sentinel - Dark Fantasy Skelet

Voronoi design wall clock 200mm

Dune Clock

Tidal - The Wave Desk Clock
Clock face Retro

Did you also use Polymaker Savannah Yellow on this model?
i did! good catch!
but i recommend printing the dial or just the seeds in a different color! I just now realized that reading the clock in this color composition is a little hard on the eyes.
I was planning on printing those in a darker, more contrasting color. I noticed that you use quite a few 3D scans for your latest models. Do you have any recommendations for an affordable scanner?
Not really for a affordable one ... i use the revopoint miraco pro and it's pricy and still not to easy to work with. This is not as advaced as 3d printing is unfortunately...
why don't the hands fit into the clock mechanism?
Sometimes printers can be a little off on the tolerances, and so can the clock parts. The best thing you can do is make sure that your filaments are dialed in and that you've gotten the right parts.