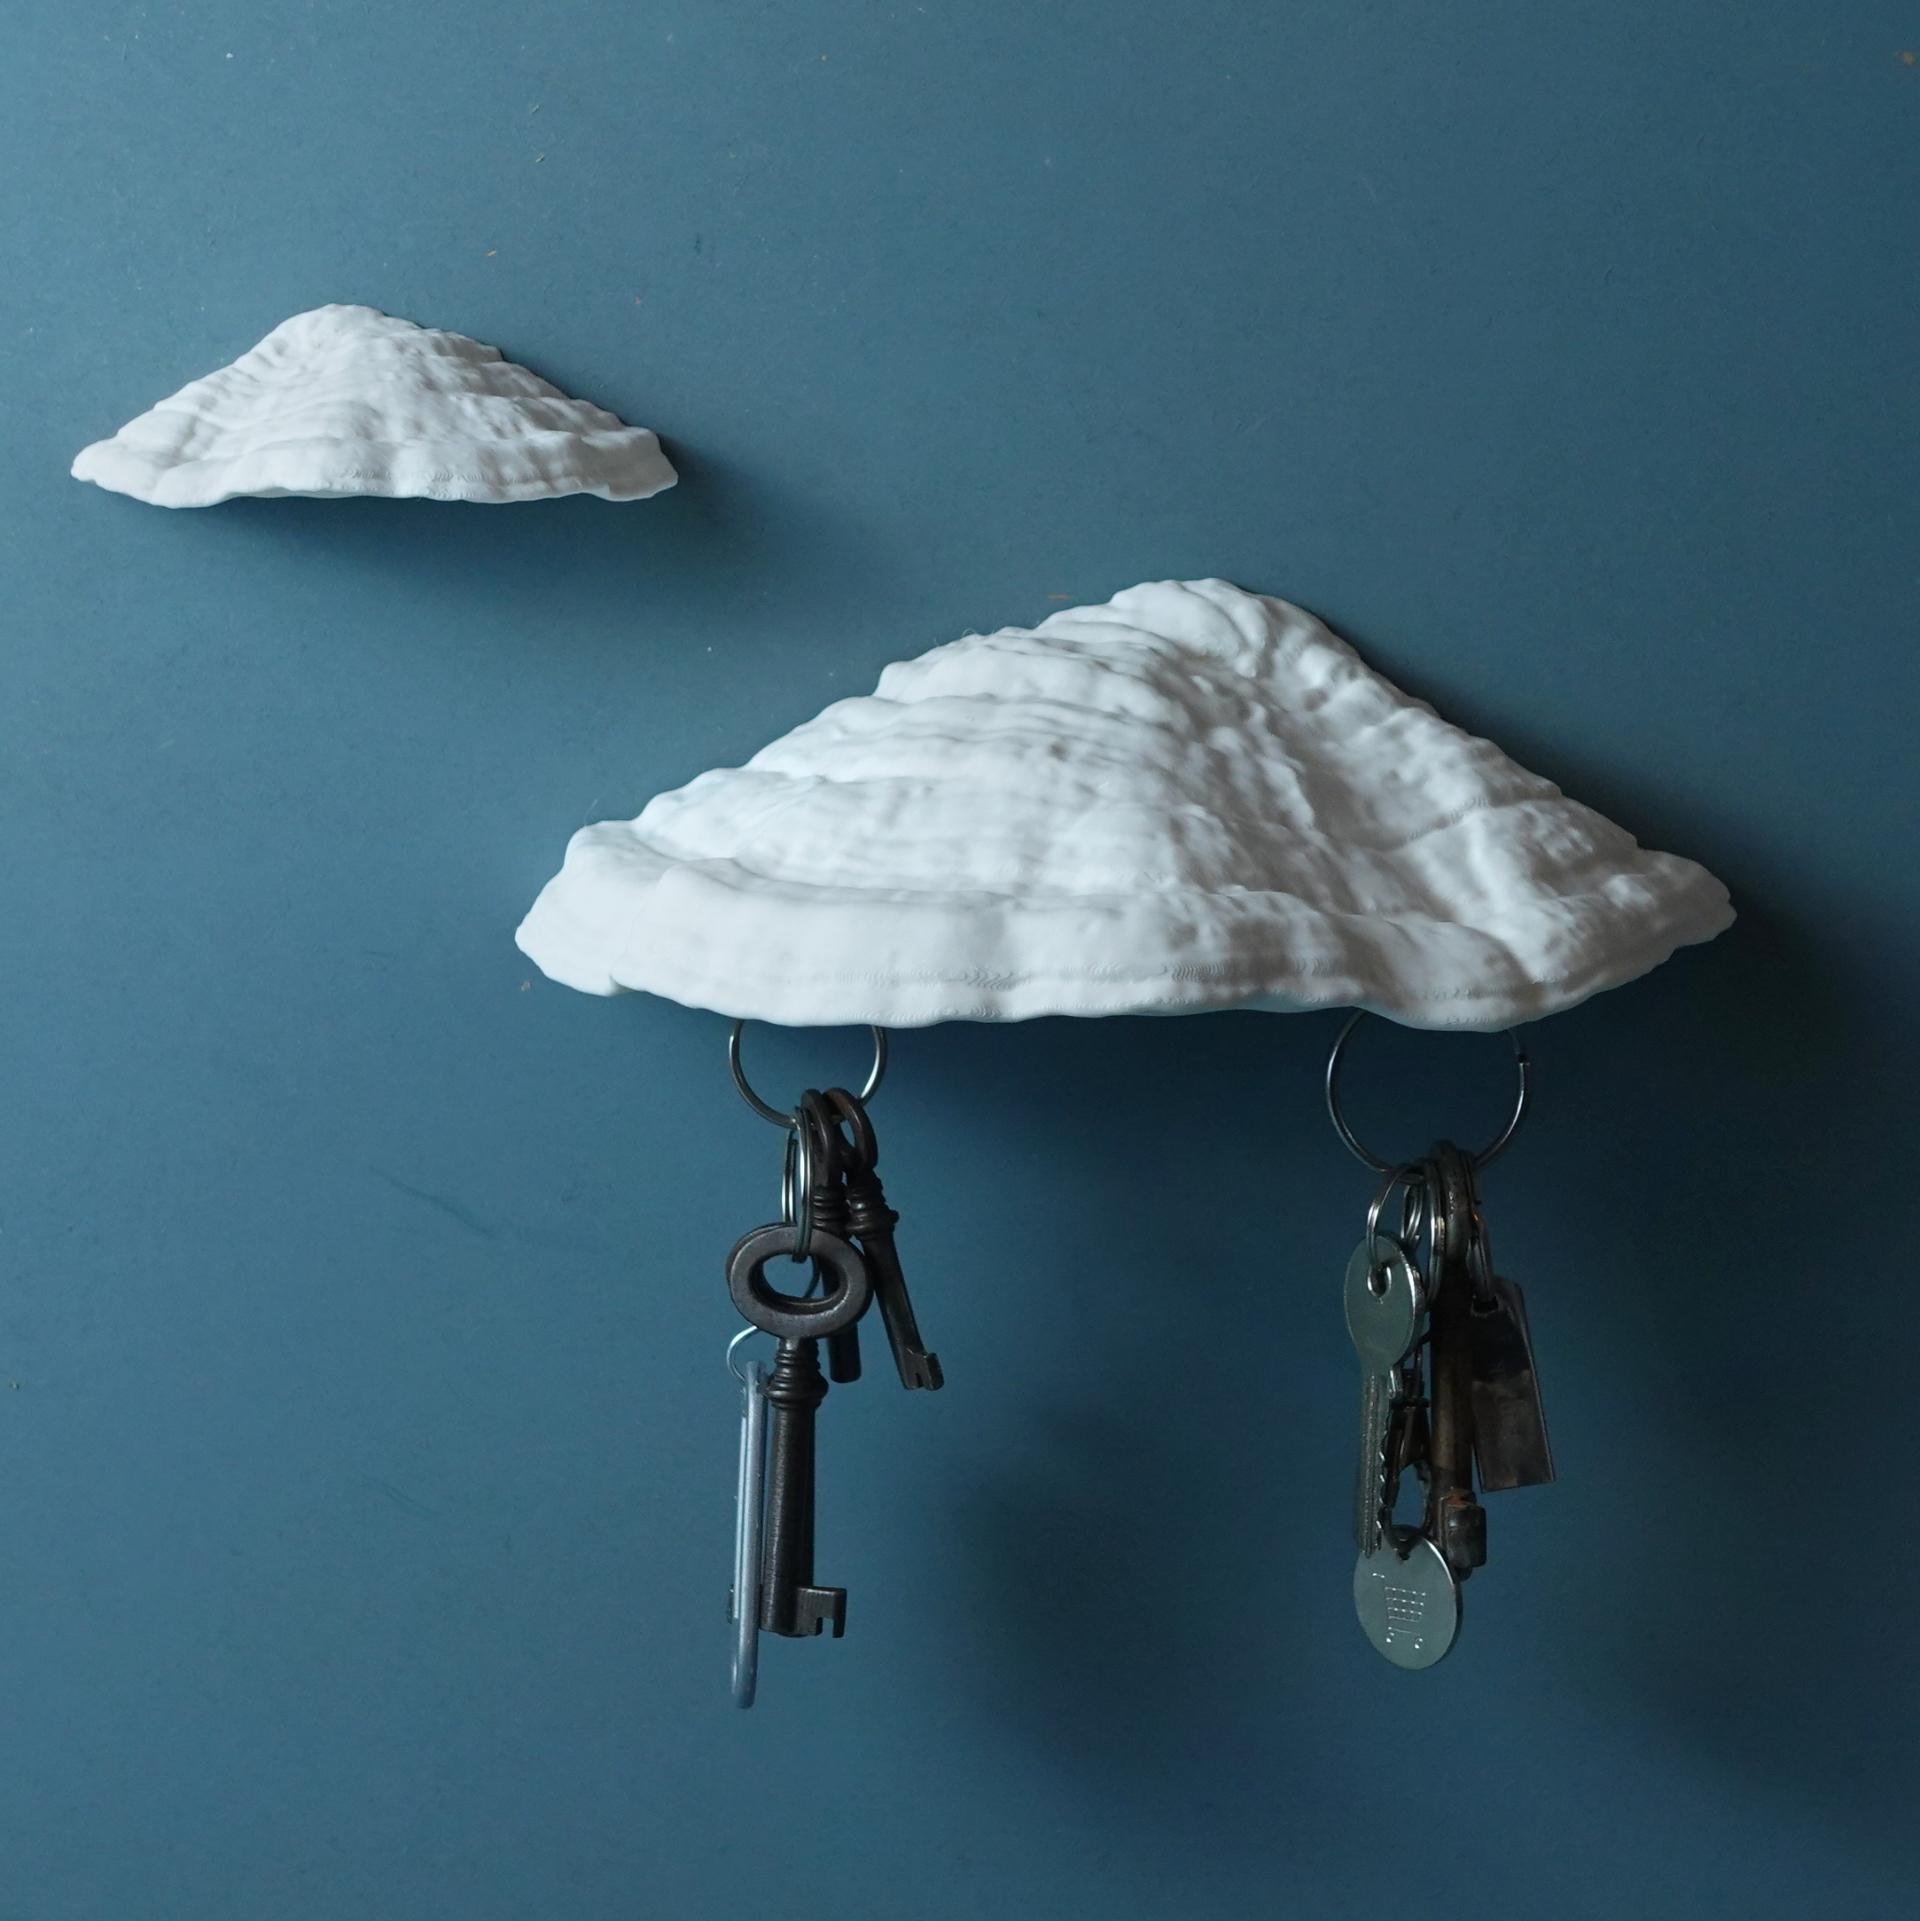


A magnetic Key holder for a delightful entrance. This design is based on a 3d scan of the mushroom species “Ganoderma Carnosum”.
Files included
- Body: The mushroom
- Body_no_compartments: The mushroom but with no magnet compartment intended for purely decoration application.
- Body_no_holder_no_compartment: The mushroom with no magnet compartment and no holder cut-out. Intended to be scaled down and a serve as extra decoration.
- Holder: The default wall holder with a screw-hole diameter of 5.5 mm and a hole distance of 24 mm
- Holder_line: The wall holder with a 0.4 mm extra line on top, a screw-hole diameter of 5.5 mm and a hole distance of 24 mm – Use this one if your printer has a great dimensional accuracy. Magnet_compartment: The magnet compartment.
What you need
- The printed parts
- Neodymium Magnets: The maximum size to fit the compartment segment is 20 x 20 x 4 mm. The size you need depends on the weight of your keys and the strength of the magnets. I used 8 x 8 x 4 mm neodymium magnets in the strength N45. The support well over 150g of weight which is already more than enough. I can not recommend a certain product since they quality and sizes available vary a lot. Additionally, a lot of vendors do not provide strength information.
- Glue or strong double-sided tape
- Wall fixation: Screws and dowels or Wall mount tape.
Instructions (also see images)
- Print the Body and Magnet compartment.
- Choose and print your holder according to the info provided in “files included”. The design works with a frictional connection. Check if the holder moves into the body with resistance but you also do not have to apply to much force. If it is too loose you may knock the body off the wall when adding your keys. If it is too tight you might not be able to remove it without damaging the product. If your printed holder does not meet these criteria, print the other one or scale it just slightly to fit.
- Insert the magnet into the compartment and check if they can hold your keys through the 0.6mm thick bottom.
- fix the magnets in place with either glue or double-sided tape.
- Fix the magnet compartment in place (into the body) with either glue or double-sided tape.
- You can either screw or glue the holder onto your wall. There are various glue or tape products for wall fixation out there. I used 3M Tape. Old fashioned screws and dowels are the most reliable fixation.
- Insert the shelf from above until the holder is completely inside the body.
- Optional: print a scaled down version of the Body_no_holder_no_compartment as small extra decor to put next to the hanger.
- Have fun with your new key hanger!
Size assembled ca: 200 x 100 x 66 mm
Print settings Required build volume: 200 x 200 x 100 mm (works on a slightly smaller bed if you rotate the file by 45 degrees) Material usage: 150g
Material: PLA Print direction: stls are rotated correctly, check images Support: none Nozzle size: 0,4 mm Line width: 0,4 mm Layer height 0,2 mm Outer walls: 3 Infill: 15% Build plate adhesion type: none
Categories:
78 Likes57 DownloadsDecember 5, 2023